
This week in my series about my new command central. I’m going to show you the final finished kid’s portion. I’m calling it my Kid’s Command Central.
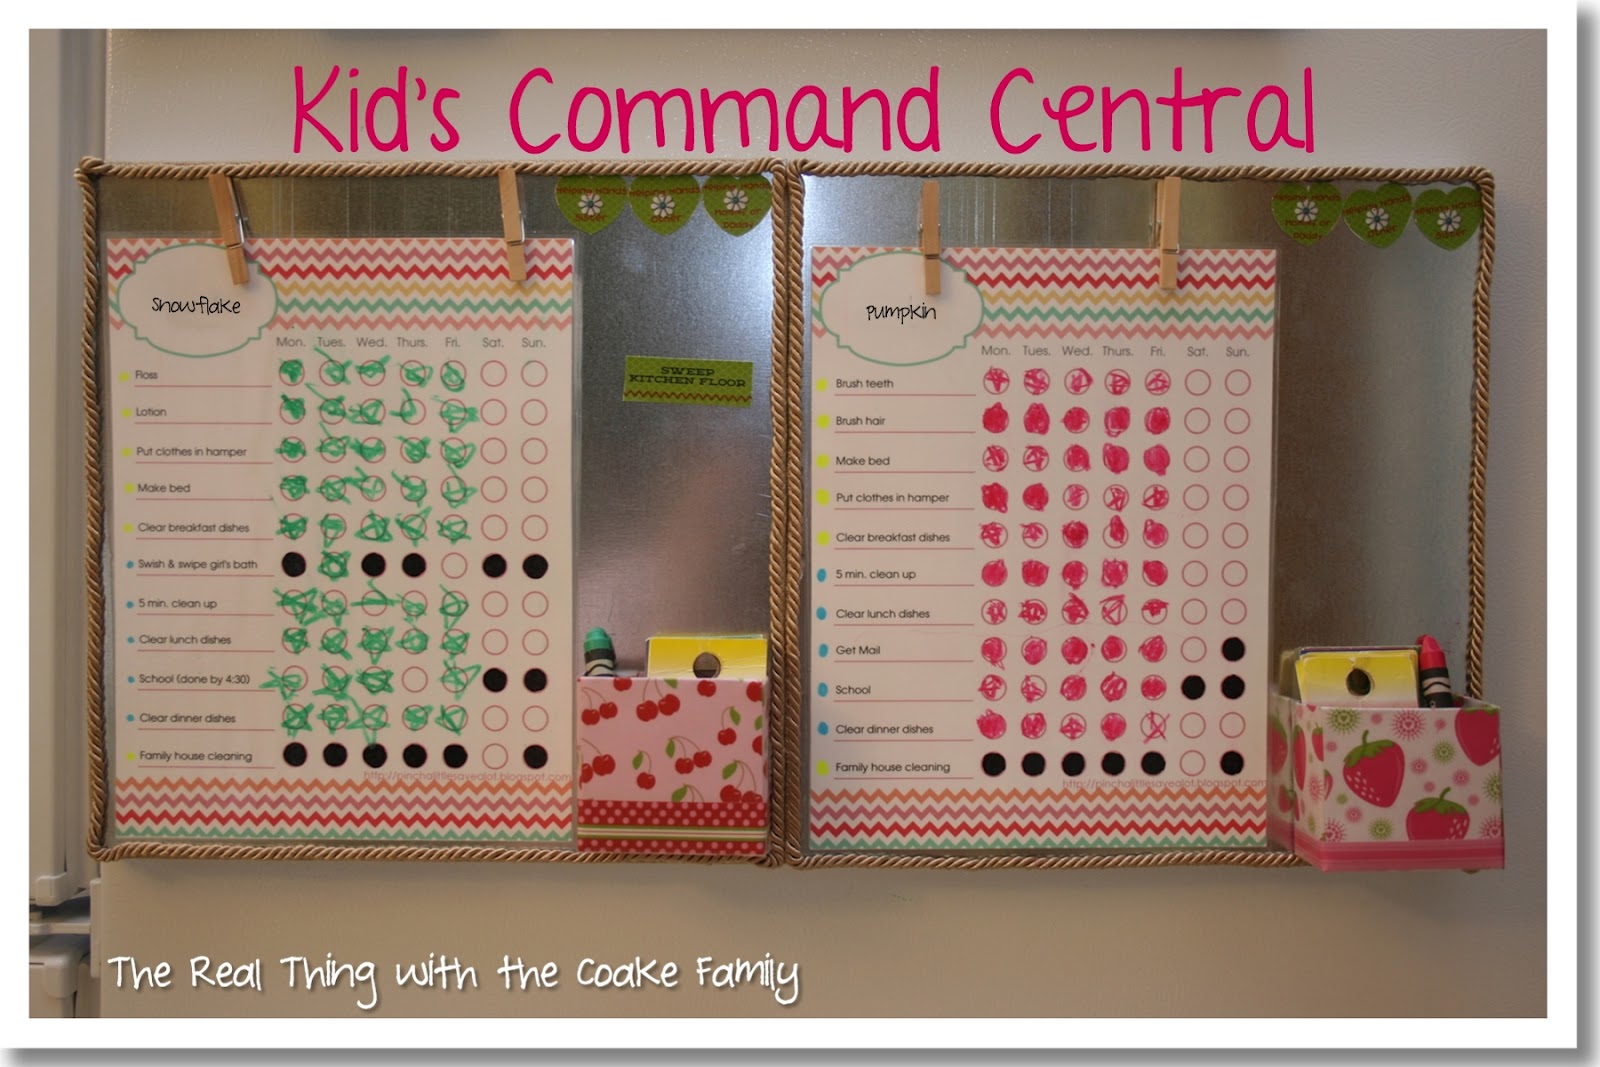
Doesn’t it look pretty, organized and simple? I’m so happy with how it turned out. We have been using this portion of our Command Central since May. It has been working really well! So, let me show you some of the details and tell you how you can either get some of these things or make your own.
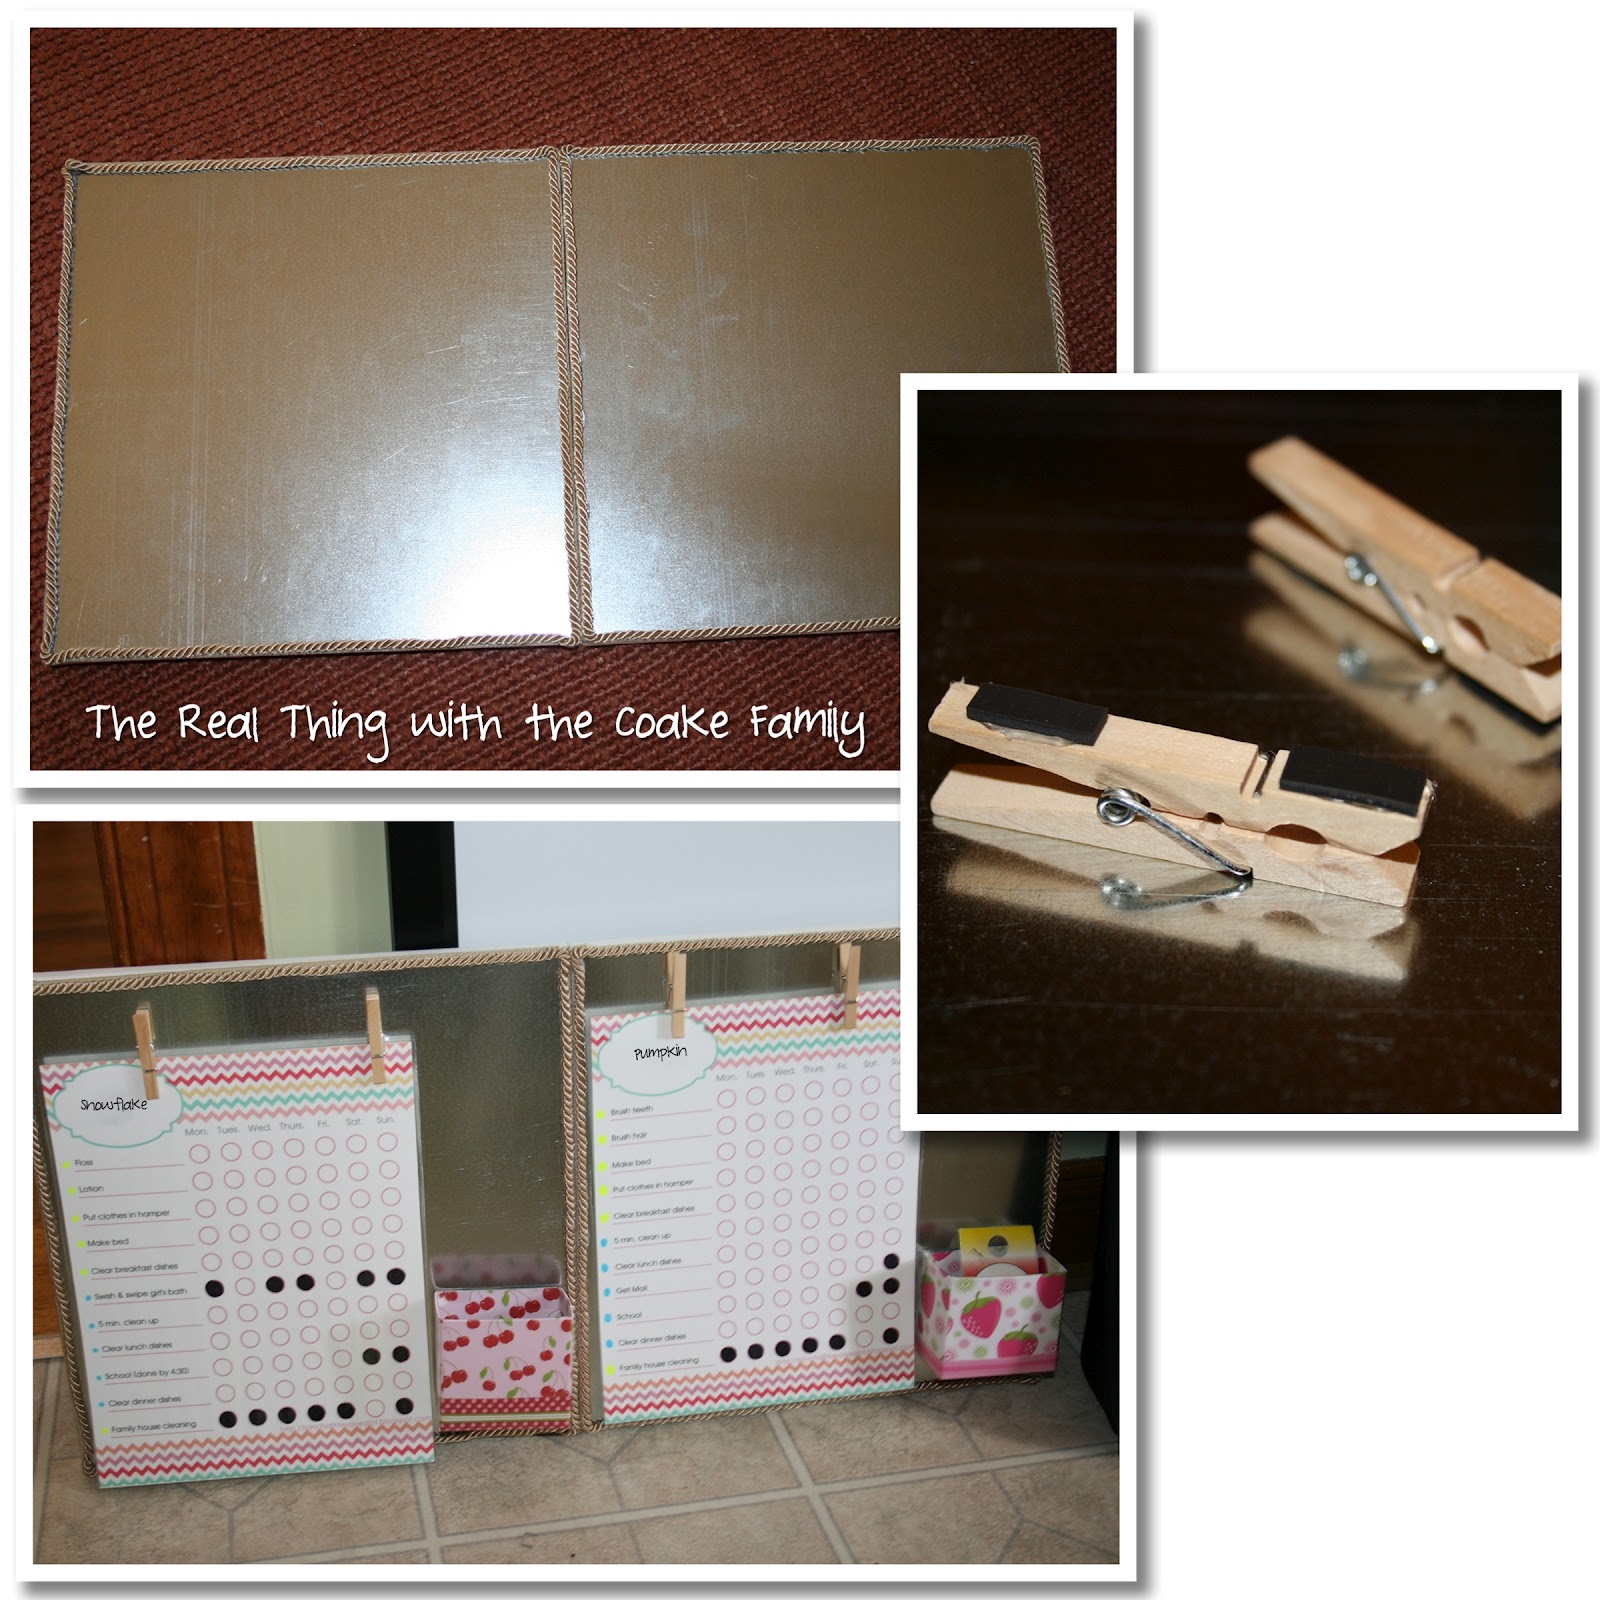
Once I had the boards put together and adhered to the artist canvas(you can read about that process here), it was time to put all the pieces together.
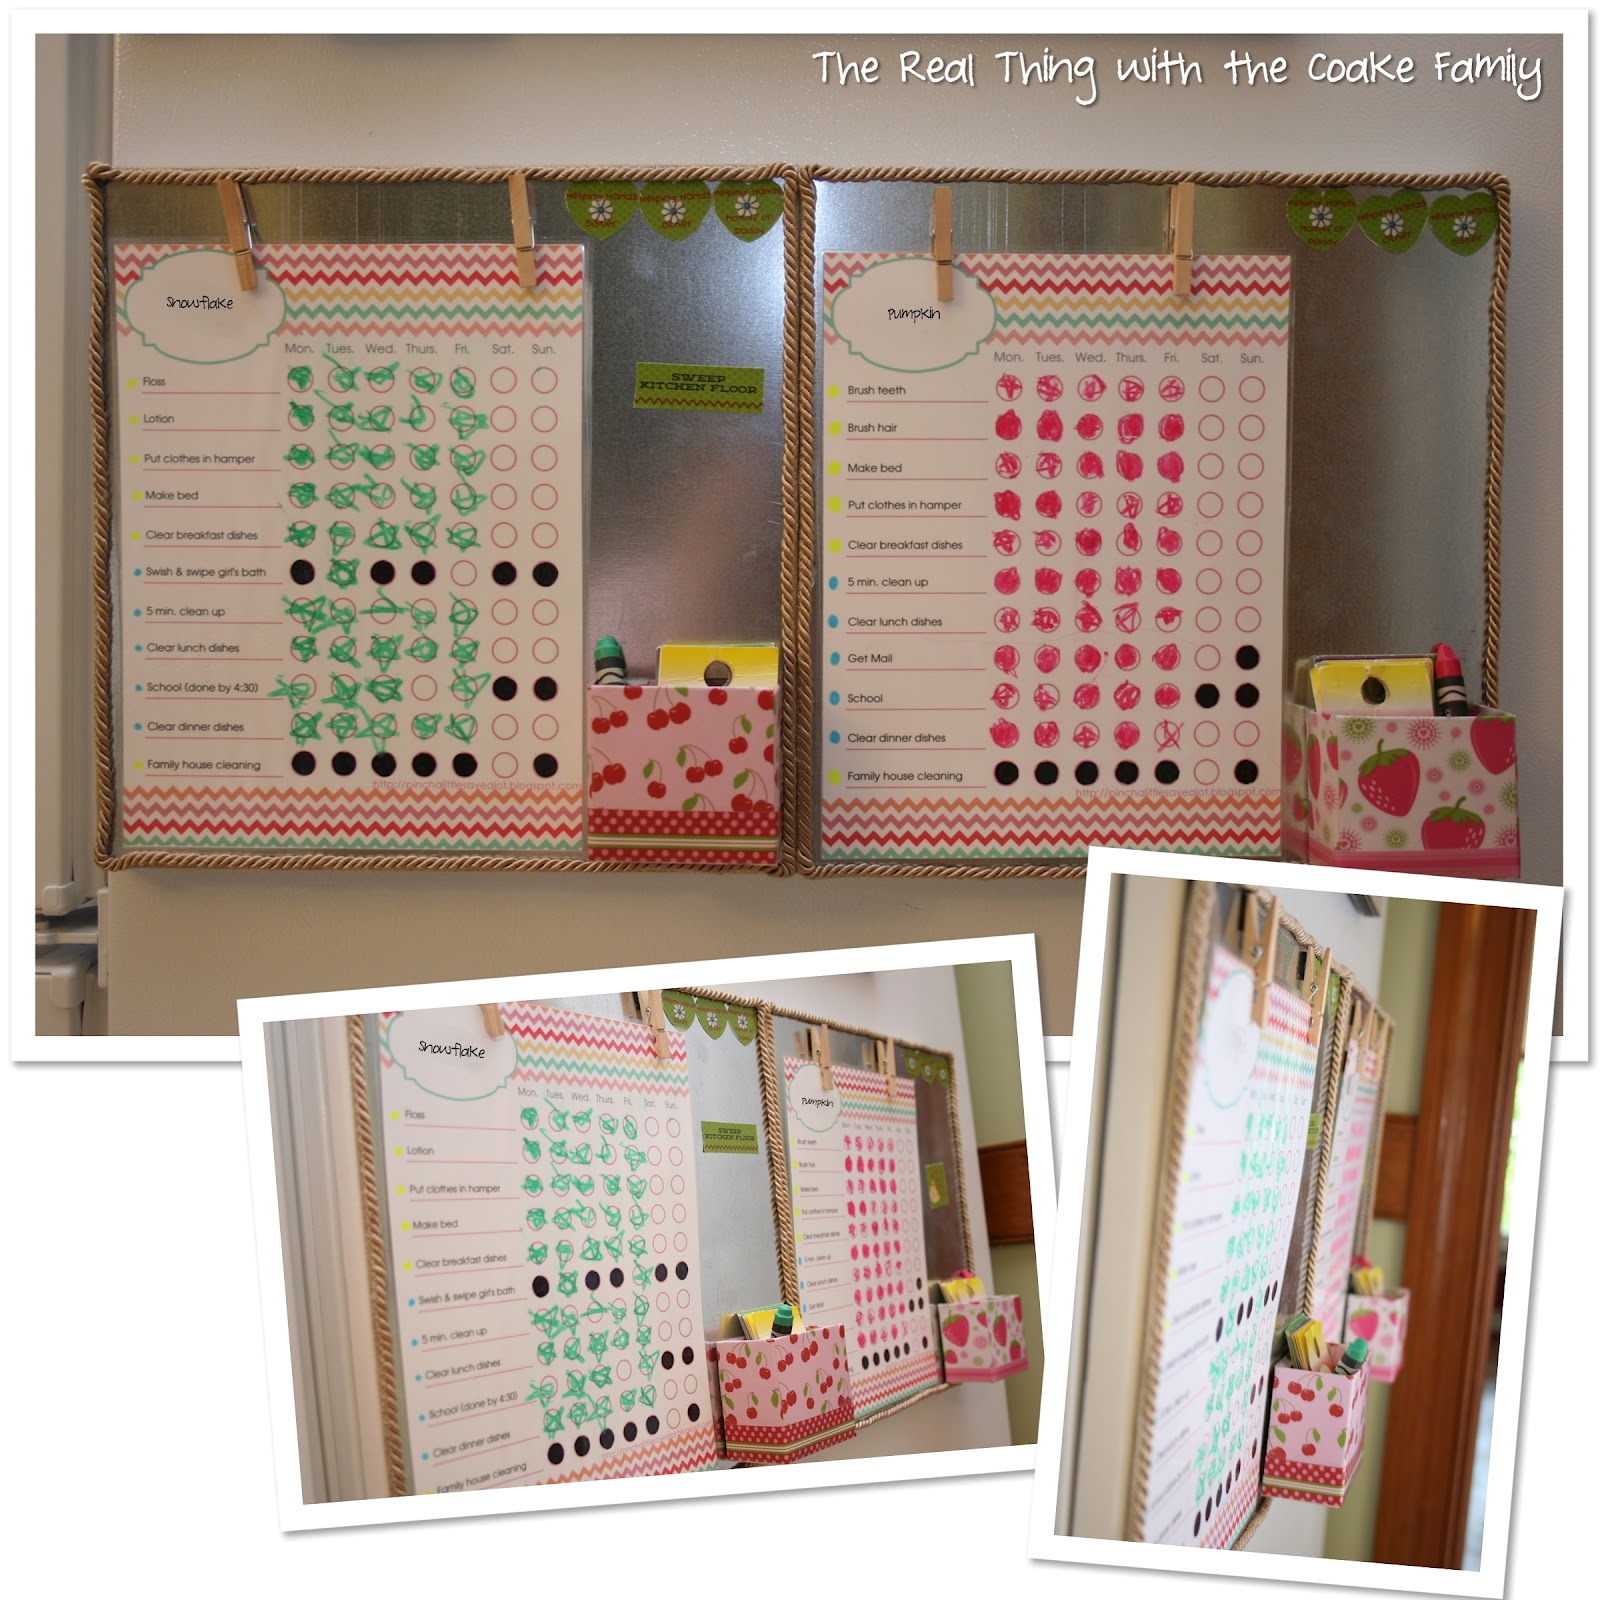
I started with my paper covered boxes. I had added magnets to the back of them, so they would work on the magnetic board. These boxes were for holding tickets (I’ll talk about those another time), bonus bucks and their dry erase crayons. In the process of making the boards, I found these little mini clothespins and knew they would be a perfect addition. I used hot glue to add magnets to the back of the clothespins. They were used to hang up the actual responsibility list my girls need to complete each day.
I found the chore chart(responsibility list) as a free printable at Pinch a Little Save a Lot. You can click here to get a free chore chart I created. I’ll talk about what I put on these charts next week.
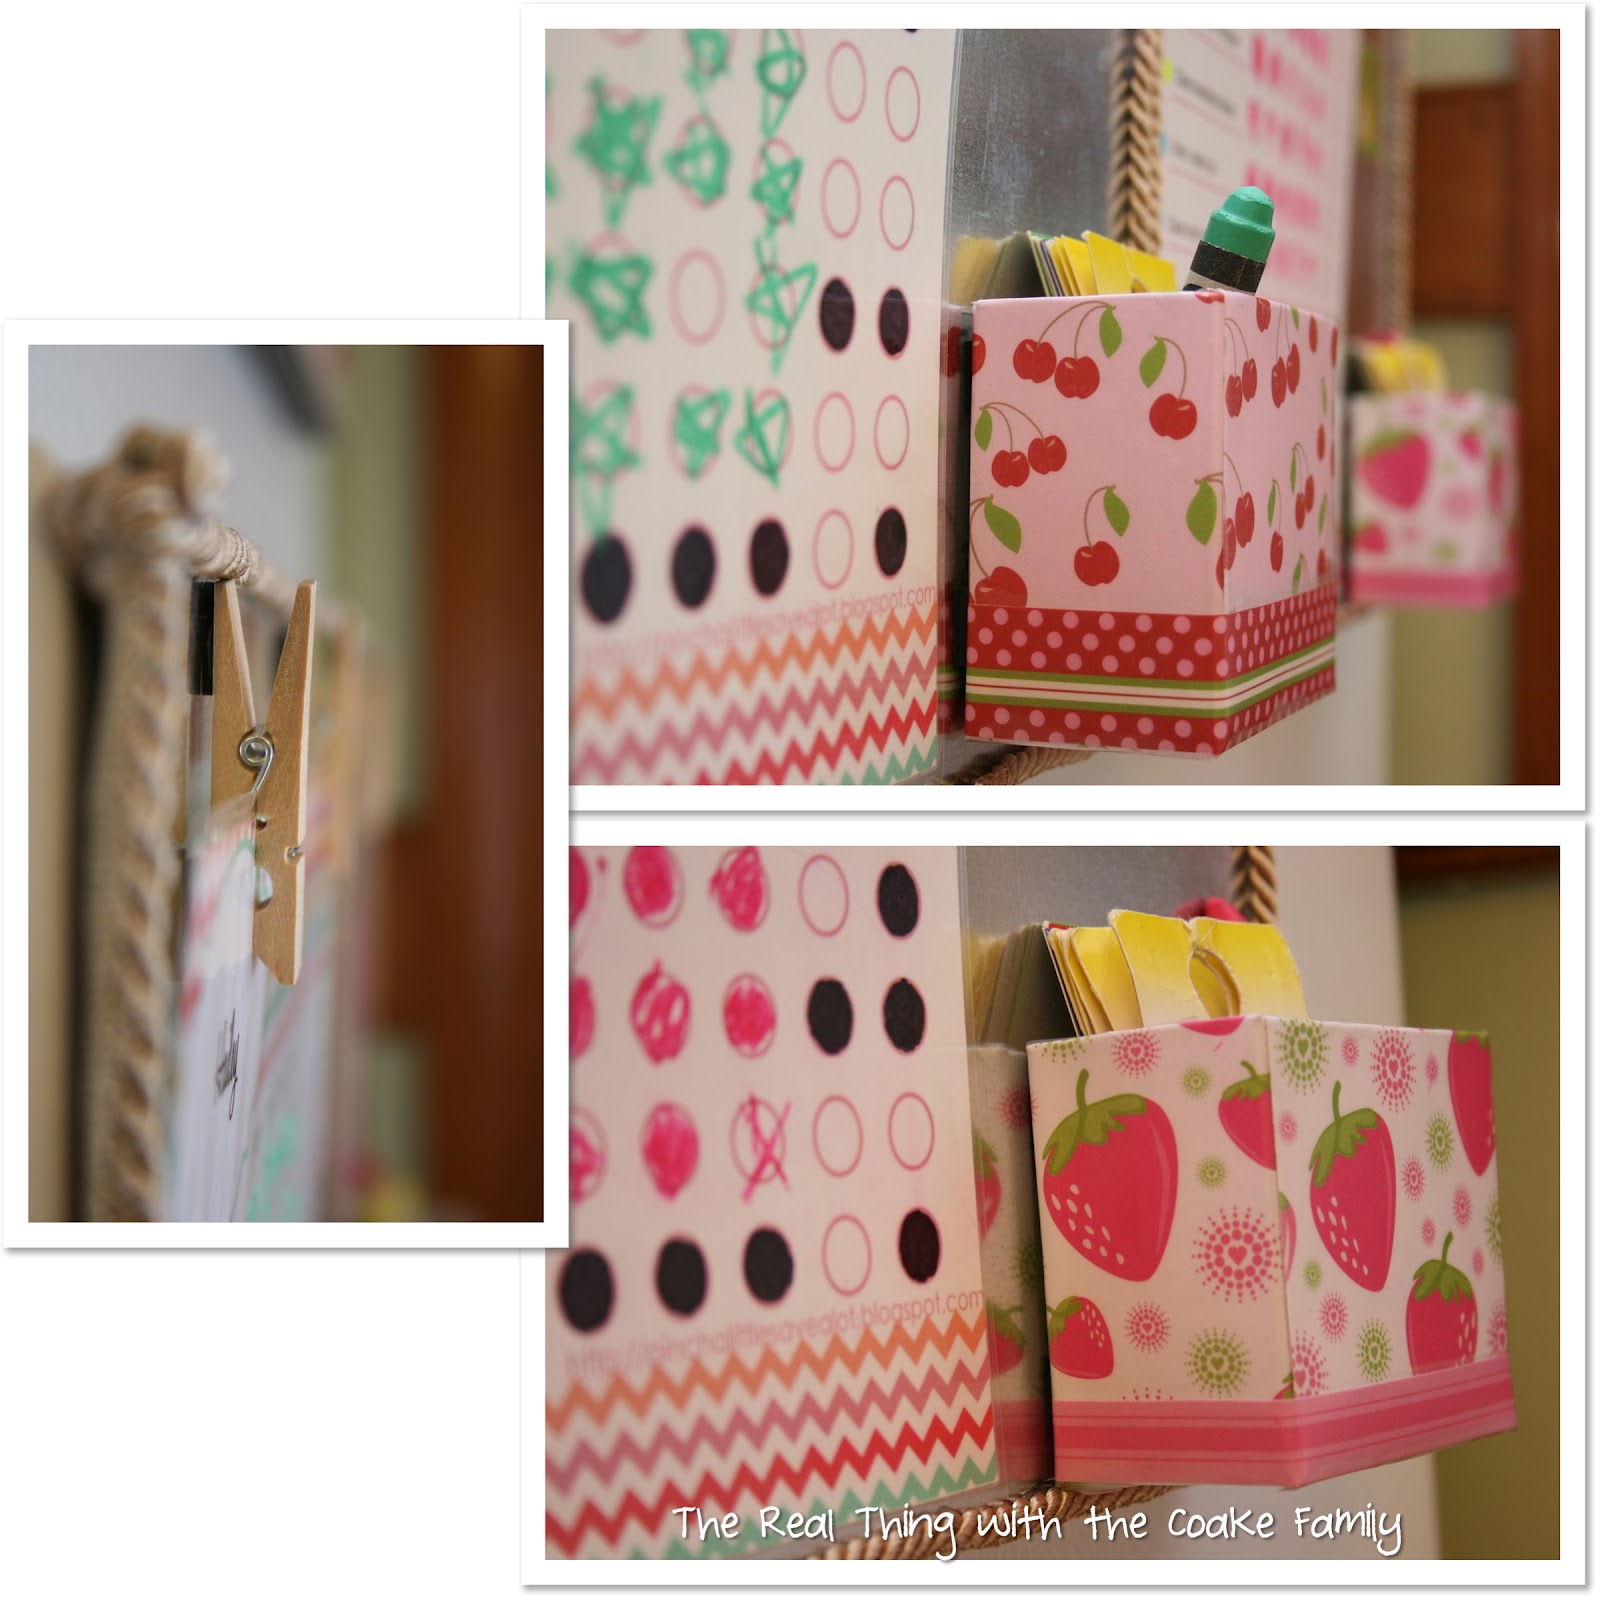
I think the boxes and the clothespins look pretty, so I’m showing you another set of pictures of them!
For the last part of the kid’s command central, I used magnetic paper . Did you know there is such a thing? Neither did I, until I started this blog and read so many other people’s fantastic ideas. You can buy paper that can go through your printer AND it is magnetic. Fantastic, simple and easy!
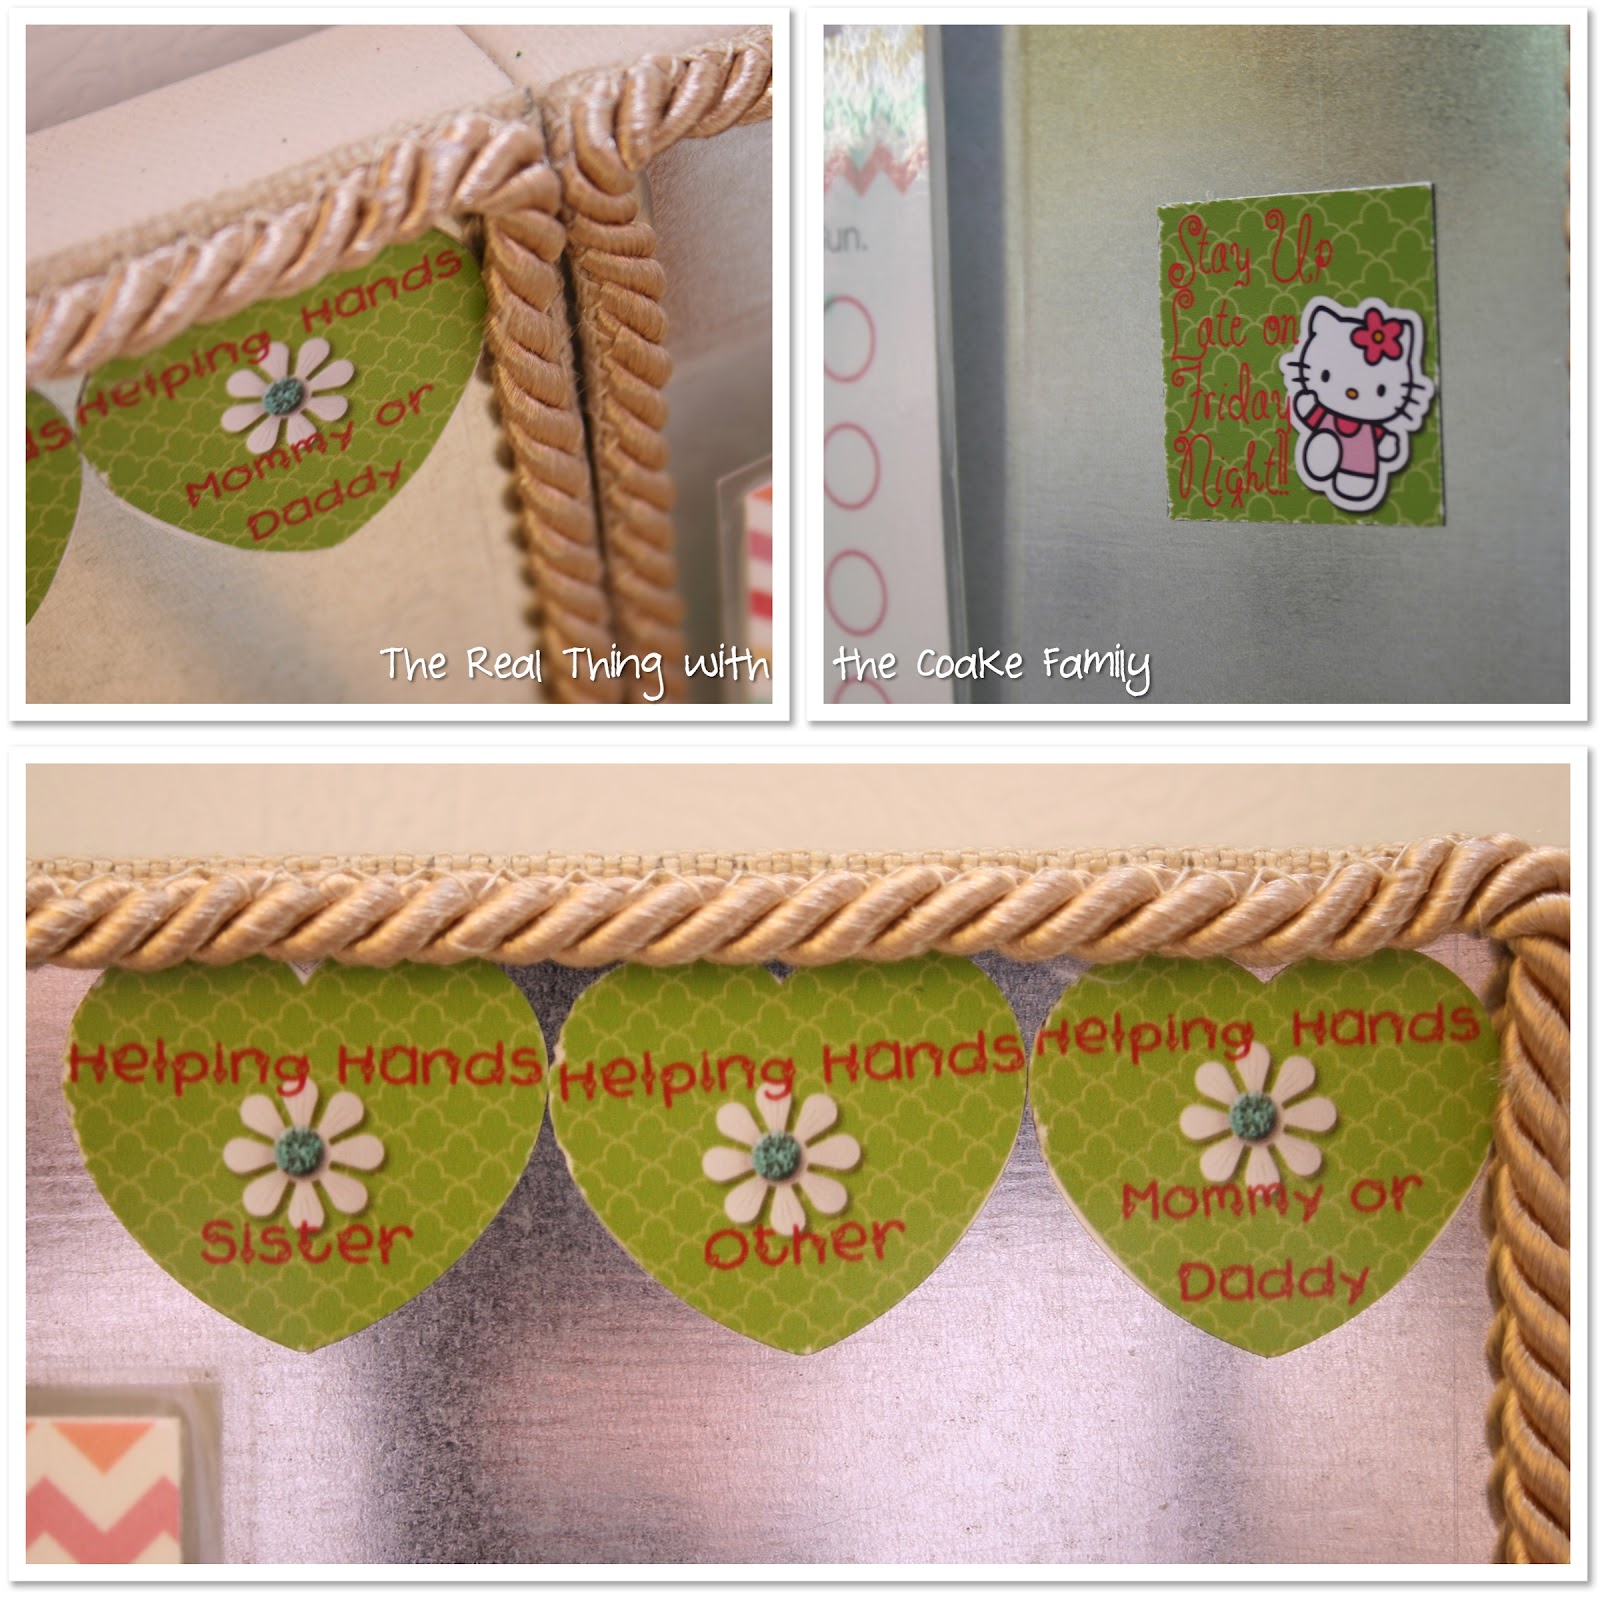
I used my trusty scrapbook software to make these magnets. I sized them so I could use my punches to cut them out. That way they got a perfect cut and I didn’t even have to break out a pair of scissors! LOVE IT! The magnets are for things the girls need to do, consequences, or benefits they earn. I feel like I sound like a broken record, but I’ll talk more about that in my post next week. That way this post won’t get too long.
There you have it, the completed kid’s command central! Doesn’t it look great?! Not only does it look good, but my girls like the boards. It also has been helping things run more smoothly and I think it really helps that my kids know what is expected of them as well as what the consequences are as well as the benefits of doing what needs to be done. It really helps me and Mr. T having it downstairs where we see it plenty, so we are doing much better with our follow through and consistency.
One last look because I’m proud of what I made. 😉
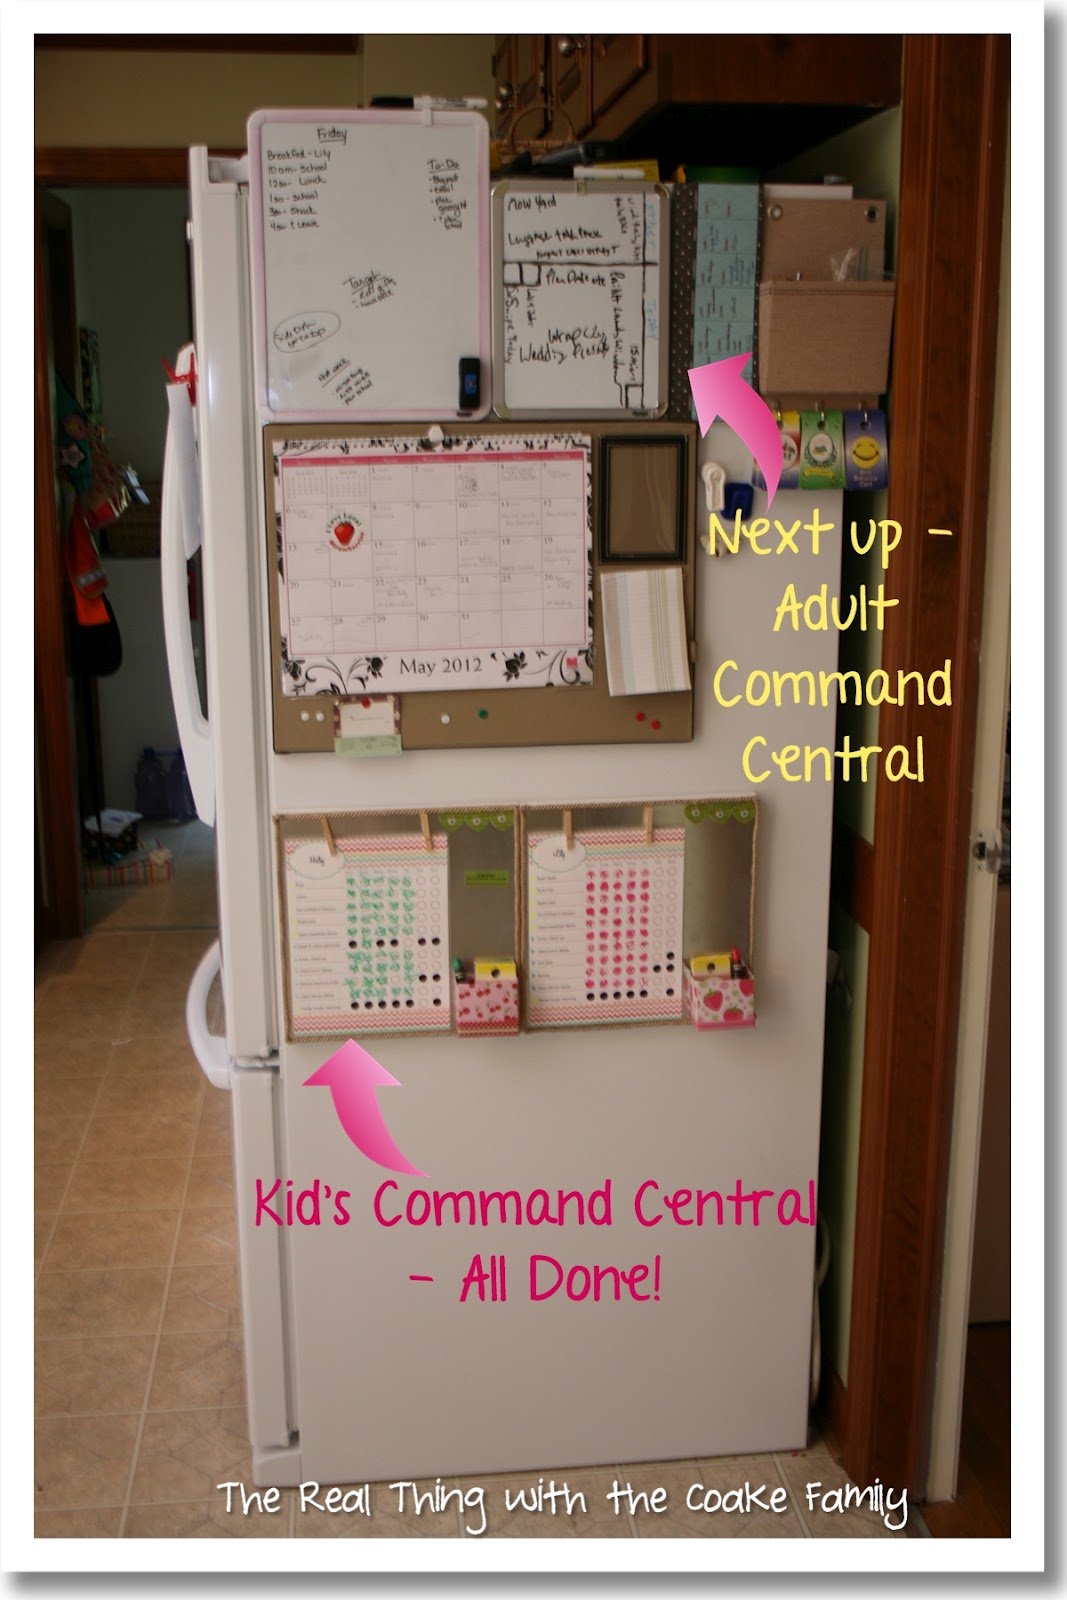
Next week, I’ll talk about some of the ins and outs of the kid’s command central and what we are using it to accomplish in our family and with our children. After that, I will start showing you the ‘adult’ portion of the command central, which is completed. I’m still avoiding finishing the center calendar section. I think next week, I should have some time to do the tiny patient work I need to do. Then it will be all done! That will be so nice!
Thanks so much for stopping by and seeing how this portion turned out.
Read more posts in my Command Central Series:
- Paper Covered Boxes
- Magnetic Chore Boards
- Kid’s Command Central (this post
- Kid’s Command Central -Parenting Battle-plan
- Fabric Covered Artist Canvas
- Adult Command Central
- Calendar and Menu Command Central
- Final Reveal!
- Menu Planning & Printable

that is such a great idea. I wished I had thought of something like this when my kids were growing up. I just used a poster board with their names on it and what chores needed to be done. When I first saw it, I thought it might be something near the phone to take messages, and leave notes. My girls are all grown and out of the house but 1 so, I am thinking I will make one as an animal chart for the farm. Horses, chickens(lots)ducks and geese and the peacocks. This way we will know if any particular animal needs care in a different way, meds, shots, ect. And for our pet sitters when they come sit at the farm when we have to go someplace for the weekend, or night.
Thank you!
What a fantastic idea! I love the idea of modifying this to use for keeping track of your animals special needs. Brilliant! So glad you put it into the comments so others can see it.
These is so great!! I would love for you to link up to Tasty Thursdays at The Mandatory Mooch. The party is still open until Sunday night. https://www.mandatorymooch.blogspot.com/2012/08/tasty-thursday-4.html
Thanks, Nichi
what a terrific idea! very organized
Thank you so much!
Such a great idea! Love the cute boards. They look clutter free on the frig too! Would love for you to come visit my Get Social Sunday link party and show off your awesome blog!
https://alivedinhome.blogspot.com/2012/08/get-social-sunday_18.html
love this idea – may have to play around with the idea and make one up for my kiddos…thanks for sharing – have a crafty week
tina
one crafty mess
love this. I’ve just posted about my kids chore charts, and my command centre post will be up next week
Thanks so much!
My oldest just started school and I’ve been looking for a way to keep all her stuff organized among all the craziness of a normal week. Thanks for some of the ideas. Oh and magnetic paper … I never seen that before!
This is a fantastic idea. I really need to get started on ours! And I had no idea there was such a thing as magnetic paper!!
So glad I could help and let you know about magnetic paper….fun!
This is such a cute idea!! Thanks for linking up to our Strut Your Stuff Saturday! We loved having you and hope you will come back soon! -The Sisters
This is so organised – and I love the idea of magnetic paper too. Who knew!
Sarah
https://acatlikecuriosity.blogspot.co.uk/
I love how colorful and pretty it is.
I found your site from diydreamer’s link party, and this is a great idea! Thanks for sharing. I’d need to find a spot for this for my four kids because our fridge is enclosed, so we don’t have that precious beside-the-fridge central spot anymore.
Bonny @ https://thedomesticatedprincess.blogspot.com
Thanks so much! I would think you could adapt this idea for any space you have. A wall space would work well. I adhered mine to the fridge with command picture hangers which will work on any surface. Hope that helps!
This is such a great idea! I can’t wait to see how you use it (and your adult version, too).
We’d love for you to link up at our Finished Friday blog party.
Thank you so much! I’ve had a really busy weekend and didn’t have time to get over to your link party. I will do my best to remember to come link up tomorrow. Thanks so much for the invitation.