We are almost there! Yay! I’m almost done with my Command Central. I have one thing left to do and I will be able to reveal the final of all three parts together to you. Yay!
This week, I’m going to show you the calendar and menu planning portion of my command central. It is the center portion. I have the Adult Command Central on the top and the Kid’s Command Central on the bottom with this section in the middle. Today, I’m going to show you how I put the Calendar and Menu portion together.
 I started with my old calendar. It was a set I bought at Target, probably about 5years ago. I realized when looking at it, that I could tear it apart and use a few of the pieces in my new command central. If you don’t have something like this, you could just use an eye screw in the artist canvas to hold your calendar. If you want something to hold the corners of your calendar in place, you could use a piece of laminated cardstock for the same purpose.
After covering my artist canvas in fabric, I started taking apart my old calendar board for the parts I wanted. I took the hook from my old calendar and used E6000 to glue a thumbtack to it. I can than use the thumbtack pushed into the wood of the artist canvas to hold the calendar. Once again if you don’t have a calendar from which to pillage, just use an eye screw to screw into the canvas and hold your calendar.
I also, hot glued the calendar plastic pockets to by fabric covered canvas to hold my calendar in place. Once again, if you don’t have these pockets, you could make your own. Just cut the appropriate size triangles out of cardstock. Laminate them and hot glue them in the correct place on your board. They will help keep your calendar from swinging all over the place.
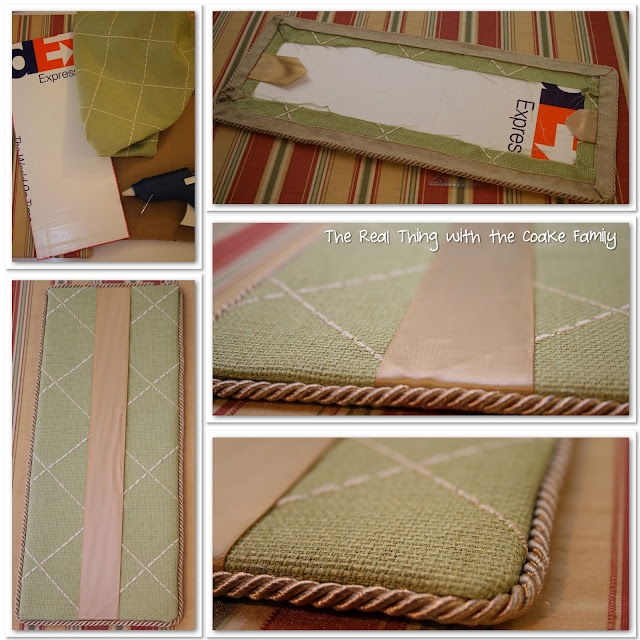
Next up was to create a portion of this board for menu planning. I cut a piece out of an old box, covered it in the same fabric I used for the Adult Command Center and trimmed it with the same trim I used in the Kid’s Command Central. I used hot glue for all of that work. I used the same fabric and trim so the 3 pieces of my command central would tie together and hopefully look good. As you can see, I used a ribbon down the center. You will see my plan for that below.
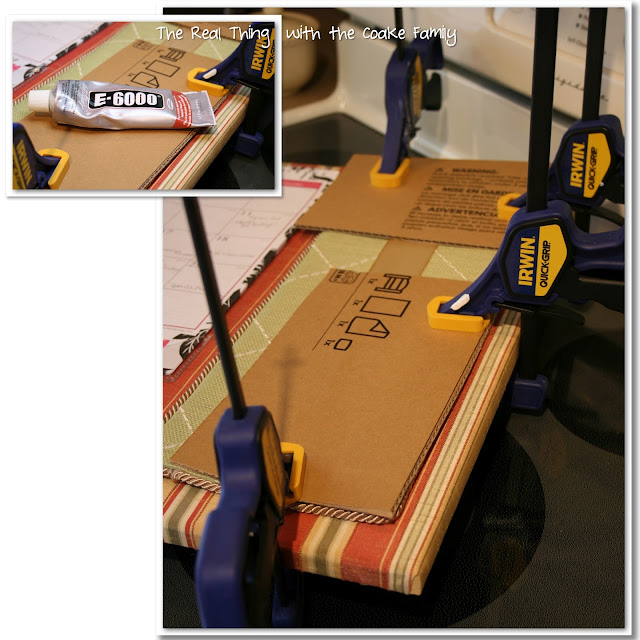
I needed to attach the menu planning portion to the canvas for the middle section. Once again, it was time to use E6000 and Mr. T’s handy clamps . Before we did this, we reinforced the back of this section with cardboard, just like I showed you in the Adult Command Central post. Easy, cheap and it works really well!
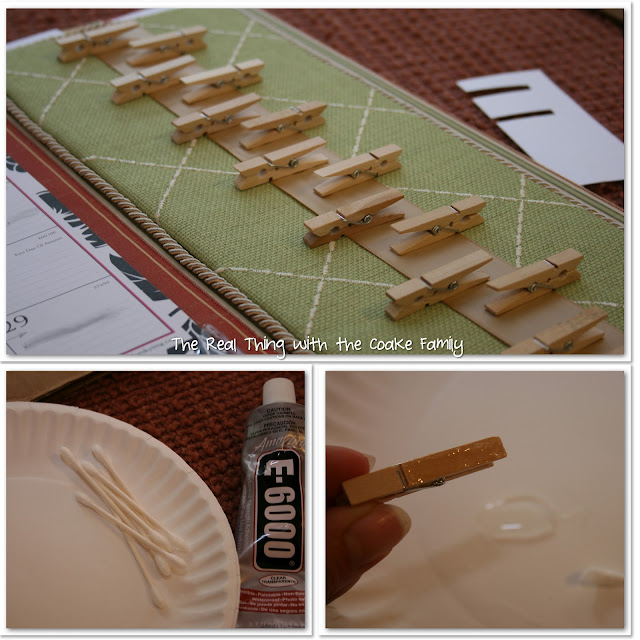
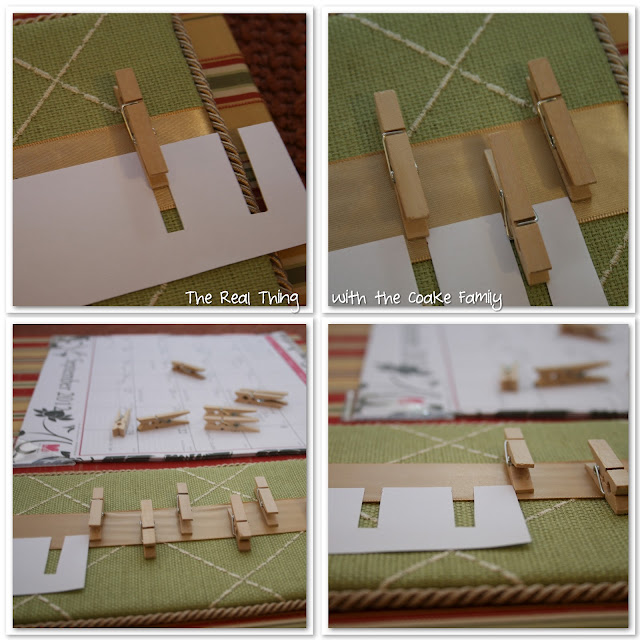
I used mini clothespins on the menu planning section of this portion as well as on the Adult Command Central. It took me a while to figure out the placement of the clothespins. I wanted 14, one for lunch and dinner for each day of the week. Once I figured out spacing that would work for me, I made a template. Super simple and cheap. I just measured my spacing and cut openings out of an index card. Then I used that index card to get the spacing correct all the way down the ribbon.
I used my E6000 again, because I felt like it would give me the best hold for as much use as this section will get used. I wanted to be precise about the glue though and not end up with excess. I used a q-tip to apply the glue precisely to the back of the clothespin. It worked really well.
Using my template to space the clothespins down the ribbon.
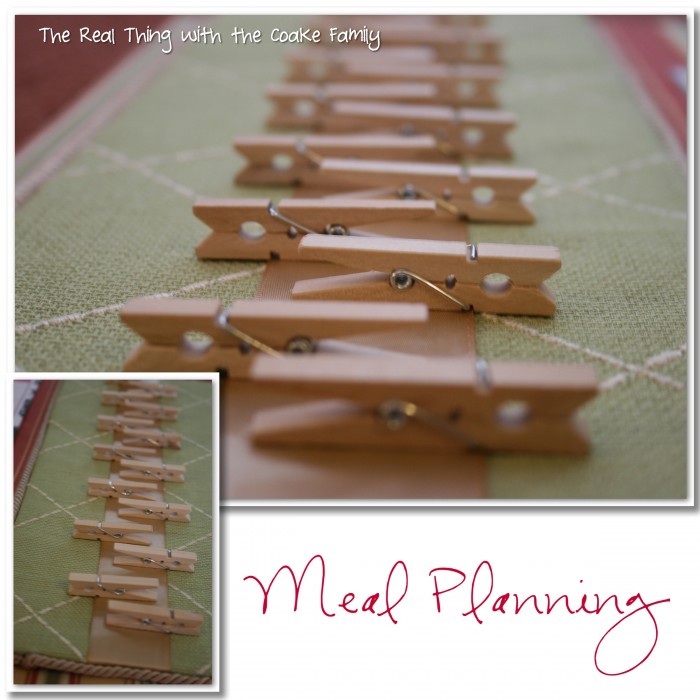
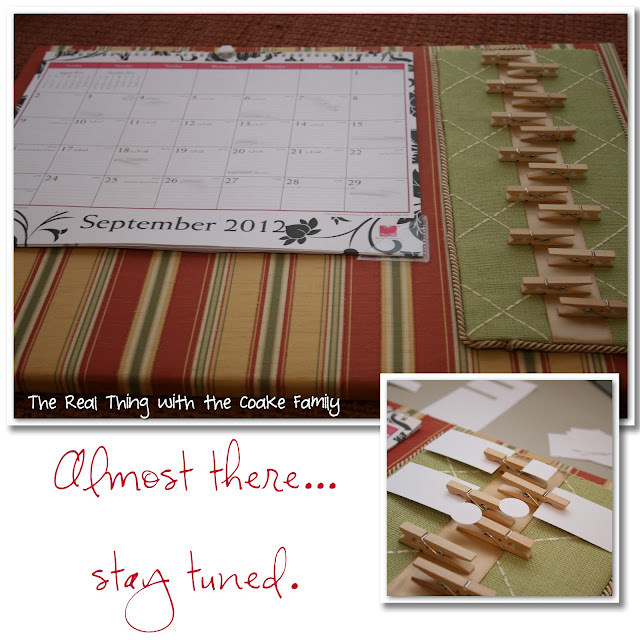
Meal planning section, doesn’t it look pretty? I can’t wait until it is done!
I still need to add a few mini clothespins below the calendar. They will be used to hold notes or invitations, etc. As you can see in the small picture above, I am working on my layout for the designations for the days of the week and the cards that will contain the actual meal plan.
Next week, I will have the final reveal for you! Yippee! (Fingers crossed I can find time among the way too busy week) Then the week after that I will have a printable for you for the menu planning section.
Thanks so much for joining me in this journey to be more organized, reduce the clutter on my fridge, and in one way to take back my sanity!
Read more posts in my Command Central Series:

Impressive!
Here from the Hop.
Thanks!
Looks great!
Love it that you are recycling an older calendar too!
Thank you!
Wow! Such a great idea and super project!!
Thank you!
That looks beautiful! I have tried a few menu planners, I found a digital one worked best for me, but I wish I had something that pretty in my kitchen!
Thank you! What digital menu planner do you use? I love digital things!!! I kind of have to have the visual in the kitchen because both my husband and I cook dinners, so he has to know what is going on, but I would love to hear about your digital menu planner.
This is awesome! Love the organization.
I would love for you to share this at my Flaunt it Friday link party. 🙂 https://www.blissfulbucketlist.com/2012/09/flaunt-it-friday-13.html
I am also your newest follower. I would love for you to follow me back when you get a chance so that we can continue to share ideas. 🙂
Sarah@
http://www.blissfulbucketlist.com
Thank you so much! I love the organization as well…it is really helpful to me and our whole family.
Is this your original idea? Well, it’s a great idea and love the step by step instructions.
Thank you!
These are pretty amazing. I checked out your Kid’s magnetic command station and I love that too. Stopping by from Happy Go Lucky. Hope to see you at True Aim!
Thank you!
Great idea and beautiful too! Here from the Hop.
Thank you!
I love how beautiful everything looks covered in fabric. What a beautiful custom command center!
Thank you so much!