
Well, I’m back with the final installment of my Command Central series. You’ve already seen the Final Reveal…ohh la la! I finally finished! Yippee.
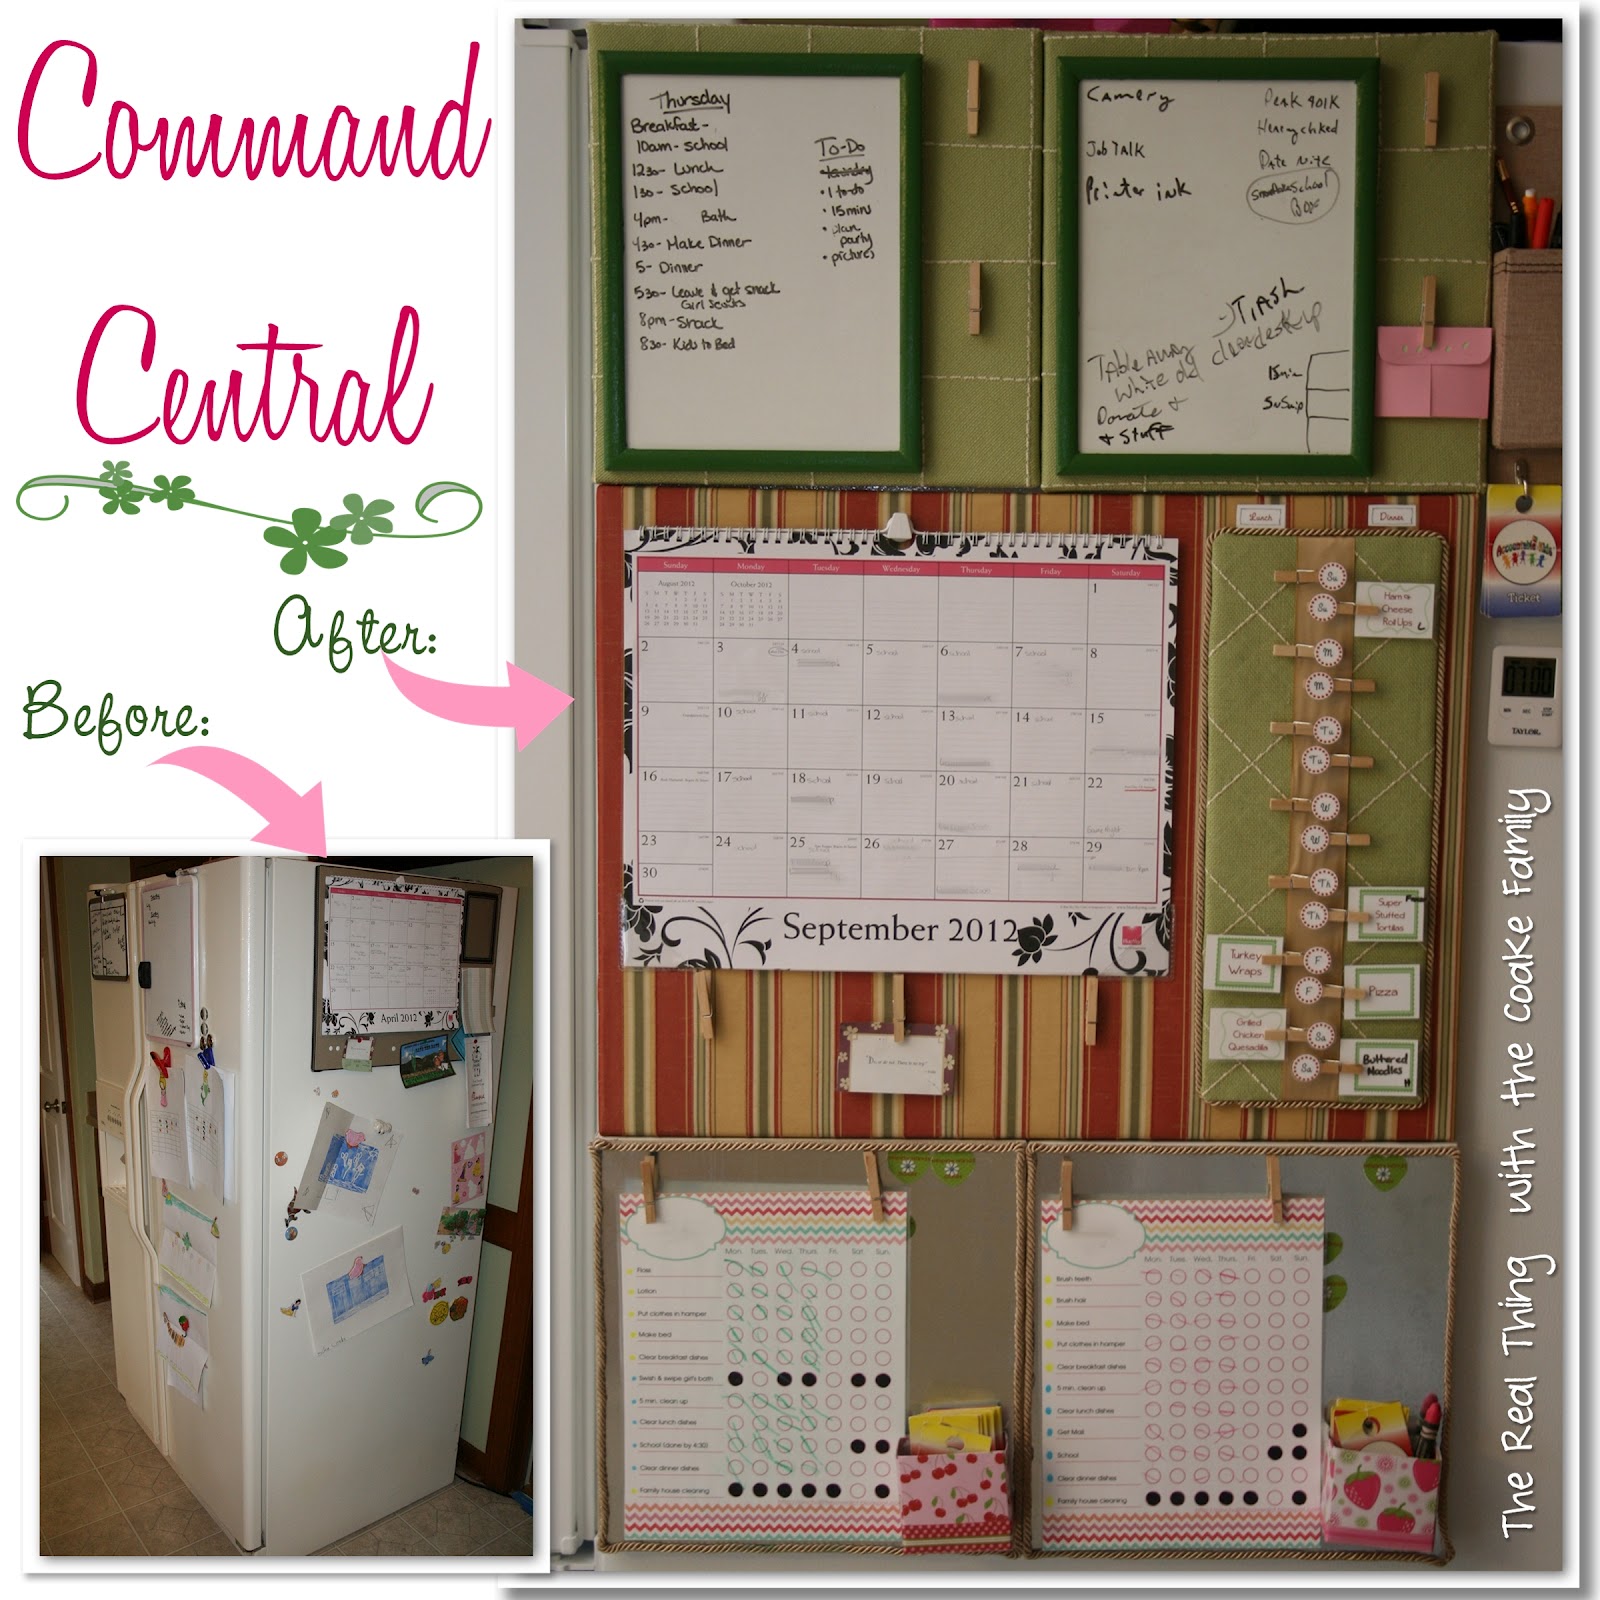
When I last left you on the calendar and menu planning section, you knew it looked like the picture below.

All finished it looks like this:

Today, I wanted to show you how I put the menu planning section together and give you a printable for your own menu planning.

In our house, it works to plan lunches and dinners for 1 week. We shop one time for the whole week. This saves us time and money by not making multiple trips to the store. I designed my menu planning portion with two sides. A side for the lunches and a side for the dinners.

After I made the board that would hold of the mini clothespins, I needed to put the whole thing together.
I’m sure for those of you who have been following this whole process, it will come as a complete shock that I used my E6000 glue AGAIN. Shocking, right?!
I put the glue right on the back of the ‘Lunch’ and ‘Dinner’ signs and adhered it above the menu board directly to the fabric.
For the day of the week tags, I put the glue directly on the mini clothespins and pressed the day of the week tags onto them. That way I wouldn’t end up with the glue in the wrong place on the day of the week tag.

Keep going putting the glue on the clothespins and adhering the day of the week tags…I just like taking pictures, so you get more views of this process. You can tell by the spiral manual on the calendar that this was during a school day for us…multi-tasking to get this done in time for you all! Ahhh! Don’t you feel the love!?

I really like this new menu planning system. It is so easy to rearrange things if we end up with lots of leftovers or we end up eating out. It is also easy to see what we are eating for today as I take down a meal when we have eaten it. To me, it makes it less confusing and easier to see what’s up next.

I had this on hand organizer on hand. For now, it is holding all the extra or not currently being used cards. I keep it on top of my fridge directly above the command central. As you may be able to tell, I printed my menu tags on cardstock and laminated them. I have many blank cards. I can just write a meal on the card with a dry erase pen. Once we have made it, I just erase it and it goes back in the box. I don’t really like this box, but I had it on hand and it will do until I figure something out that my big hands can get the cards out from without needing to dump all the cards out.
Another thing I’m doing with the menu cards is writing on the back (with dry erase pen) what the sides are that go with the meal. That way the front of the card is not overly cluttered, but I still know what the plan is when I look at the back. So far, it is working well.
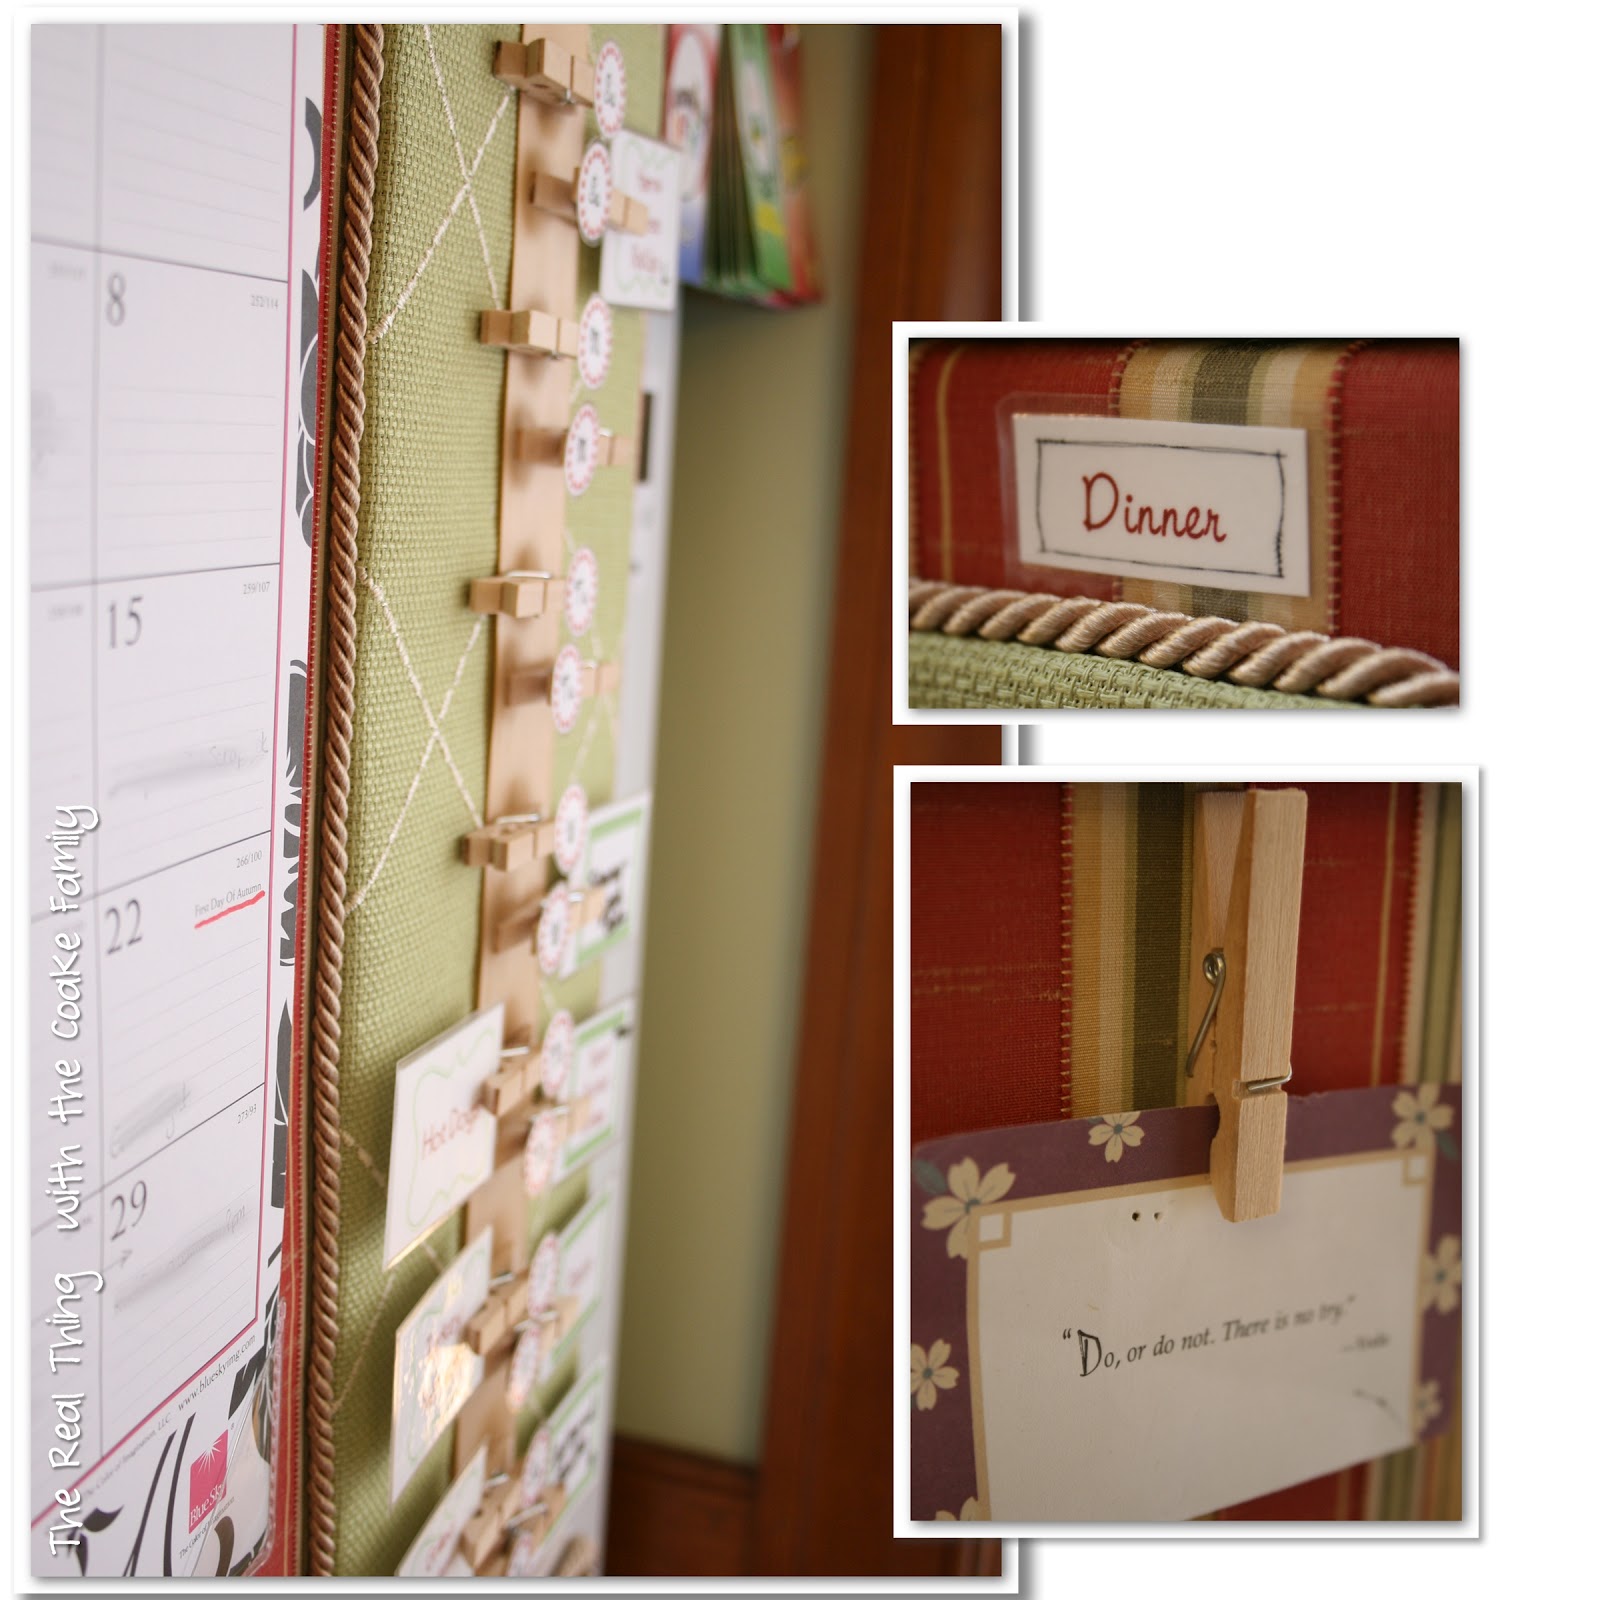
I made a set of my menu tags for you to print and laminate your own. One thing I will mention should you decide to make something similar to my menu planning board, pay attention to how you cut these. If you look at the picture below, do you see how the cards on the right have room for the clothespin and it doesn’t cover up the meal?
I didn’t think the whole thing through as well as I needed to. I should have cut the lunch cards with the space on the right side so they would have room for the clothespins as well. For whatever reason, I only thought of leaving the space on for the cards on the right. So, if you use my printable, please pay be mindful of your cuts, if you want to leave room for your clothespin. Of course, this really only matters for those with words pre-printed on them as the blank ones can be turned over to get them in the correct position.


The finished sizes of the pieces are designed to be as follows:
Lunch and Dinner tags = 1/2″ x 1 1/2″
Meal tags = 2 1/8″ x 1 1/2″
Day of the week circles = 3/4″ circle
(I have a circle punch this size, which is why they all line up near the edge of the paper…no need to cut those out, just punch away!)
I hope you have enjoyed all my Command Central posts. I would love to hear about it if you make any of all of the parts. Enjoy your menu planning printable!
Read more posts in my Command Central Series:
That’s seriously so adorable! And it gets rid of the “what’s for dinner” questions! Thanks for sharing!
Aww, thank you! Yes, it does get rid of the “what’s for dinner’ question and allows for easy rescheduling of things when things change. It is working really well for us.
You are so organized! I love this idea! Thank you for sharing it with us!
Thank you! It helps me be less all over the place when I am organized.
Another awesome post. I found this one at the Clean & Scentsible linky!
Diana
Diana Rambles
Bento Blog Network
Link Rink
Thanks!
This is a great idea! I wish I had the space for something like this. Great post 🙂
Visting from the Tatertots & Jello link-up 🙂
one year birthday bash giveaway {oct 1 to 12}
Thank you! You could very easily make something like this and use any wall space you have. I just used my fridge because I have no wall space in my kitchen…gotta use what you’ve got. 🙂
I like what you did here- very cool. Our fridge doesn’t have an open side- maybe I can find a wall someplace instead.
Thank you! Yes, an open wall would work really well with what I made. It is just artist canvas that I used. They can very easily be hung anywhere. I just used my fridge because I don’t have any wall space in my kitchen. Have a great night!
I like what you did here- very cool. Our fridge doesn’t have an open side- maybe I can find a wall someplace instead.
I love this project…so creative. I would love for you to share at my linky party Tasty Thursdays going on right now. Thanks, Nichi
https://mandatorymooch.blogspot.com/2012/10/tasty-thursdays-11.html
Thank you!
Wow….what a TERRIFIC idea….I can see other uses for it as well. Including chores, To Do’s, Errands, projects for the work-from-homer, etc. Thanks for this inspiration!
Thank you! Yes, it could be used for so many things, you are right. Lots of ideas…You are welcome!
I have been wanting your whole organized command central frig idea for month now and didnt know where to start!!!!! THANK you now to just figure out where to get the maget stuff as I wont have a WM and KM where I live. No craft stores at all!!!! Thank you! Where did you get your calendar??? my kitchen is B/W Love that calendar. Tam
I got my calendar at either Target or Office Max. I’m not sure which. I got this years at Office Max and they had the same calendar again this year.
Hope that helps….maybe they have it online.
KC