I mentioned last week in my post, The Tale of 4 Refrigerators, that I would show you my new command center this week.

I don’t have it quite all the way done. I have about 2/3rds of it completed. So, I can’t show it to you this week.
I didn’t want to leave you completely high and dry, so I have a little sneak peak along with a tutorial on how to complete this part of my command central.

Part of the command central I made required some sort of magnetic organizational tool that could hold my girls tickets and dry erase crayons.
I looked a lot of different places and couldn’t find something I liked that was the right size for my needs. It was time to make something of my own. Again, I searched for just the right size container I could transform. My solution was found in a 52 cent Jiffy Corn Muffin box. Gotta love the price!
I was able to cut the box in half. It was the perfect depth, width and height for my needs. I covered the two halves in paper to make them look pretty. I also added contact paper on top of the scrapbook paper to add some durability as my kids will be using these and I am sure they will use them hard!
To show you how I covered the boxes for my command central, I am going to show you another project I worked on back in April.
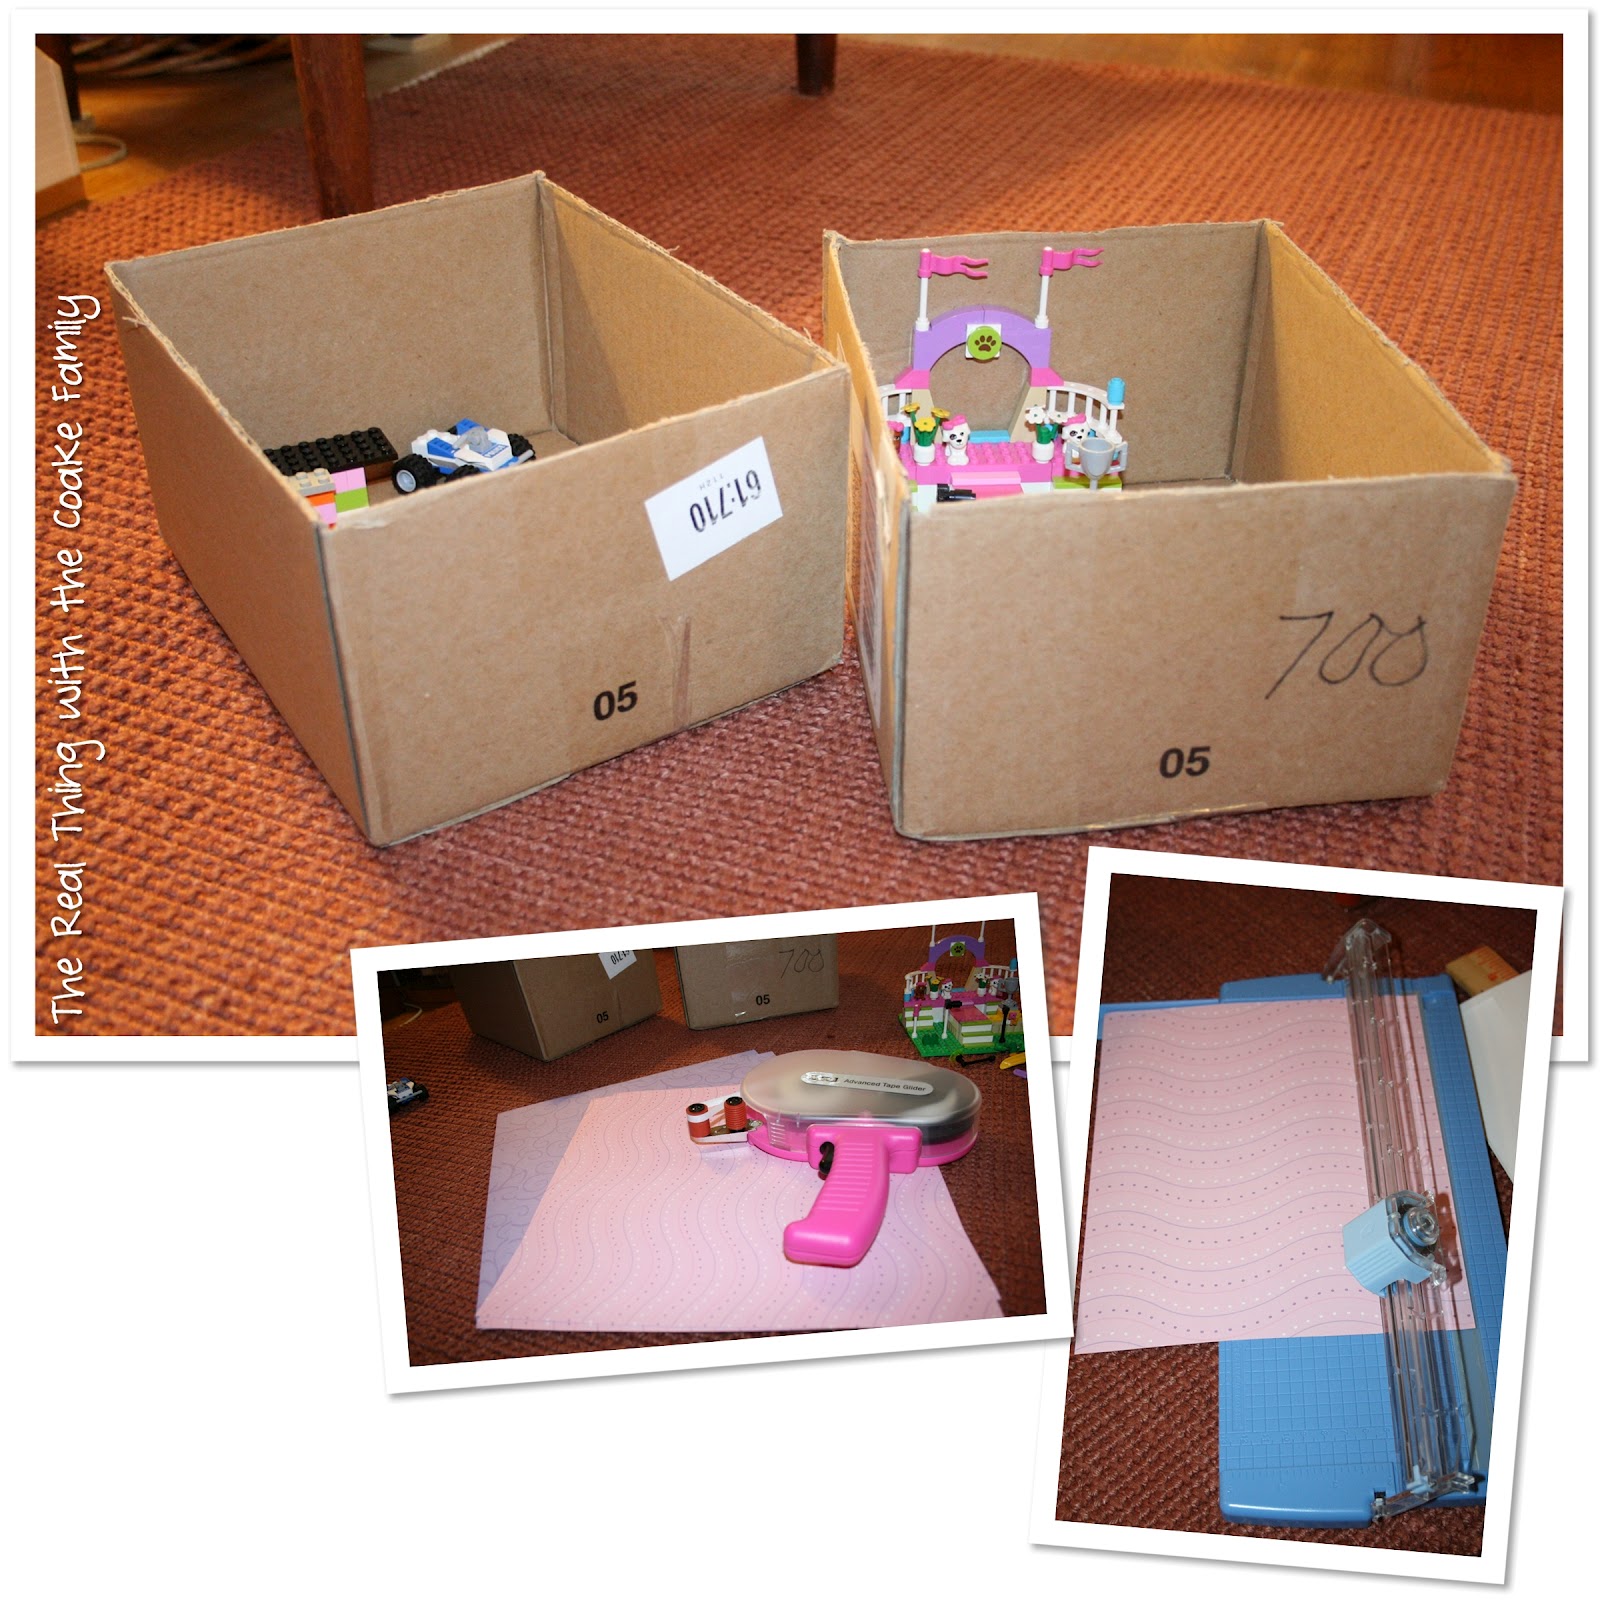
My girls love legos. They can often be found building and making creations. The problem was, they were taking over the whole desk at which Pumpkin sometimes completes her school work. Not wanting to force them to have to tear their creations apart, I came up with the idea to give them each one box that could go on the shelf in the playroom closet. Each box could hold their creations until they are ready to break them apart.
Above, you can see the supplies I used to cover these boxes. I used two ordinary cardboard boxes, scrapbook paper, double sided adhesive(affiliate link), and paper trimmer(affiliate link) along with a ruler.

Measure your box and add an additional 2+” to the width of your box for covering the inside bottom of the box. Put adhesive on the paper. Carefully place it in the box. You can see the box on the left is my first attempt. The box on the right is my second attempt. It was much easier to get a ‘professional’ look to the covered box with the ends overlapping.
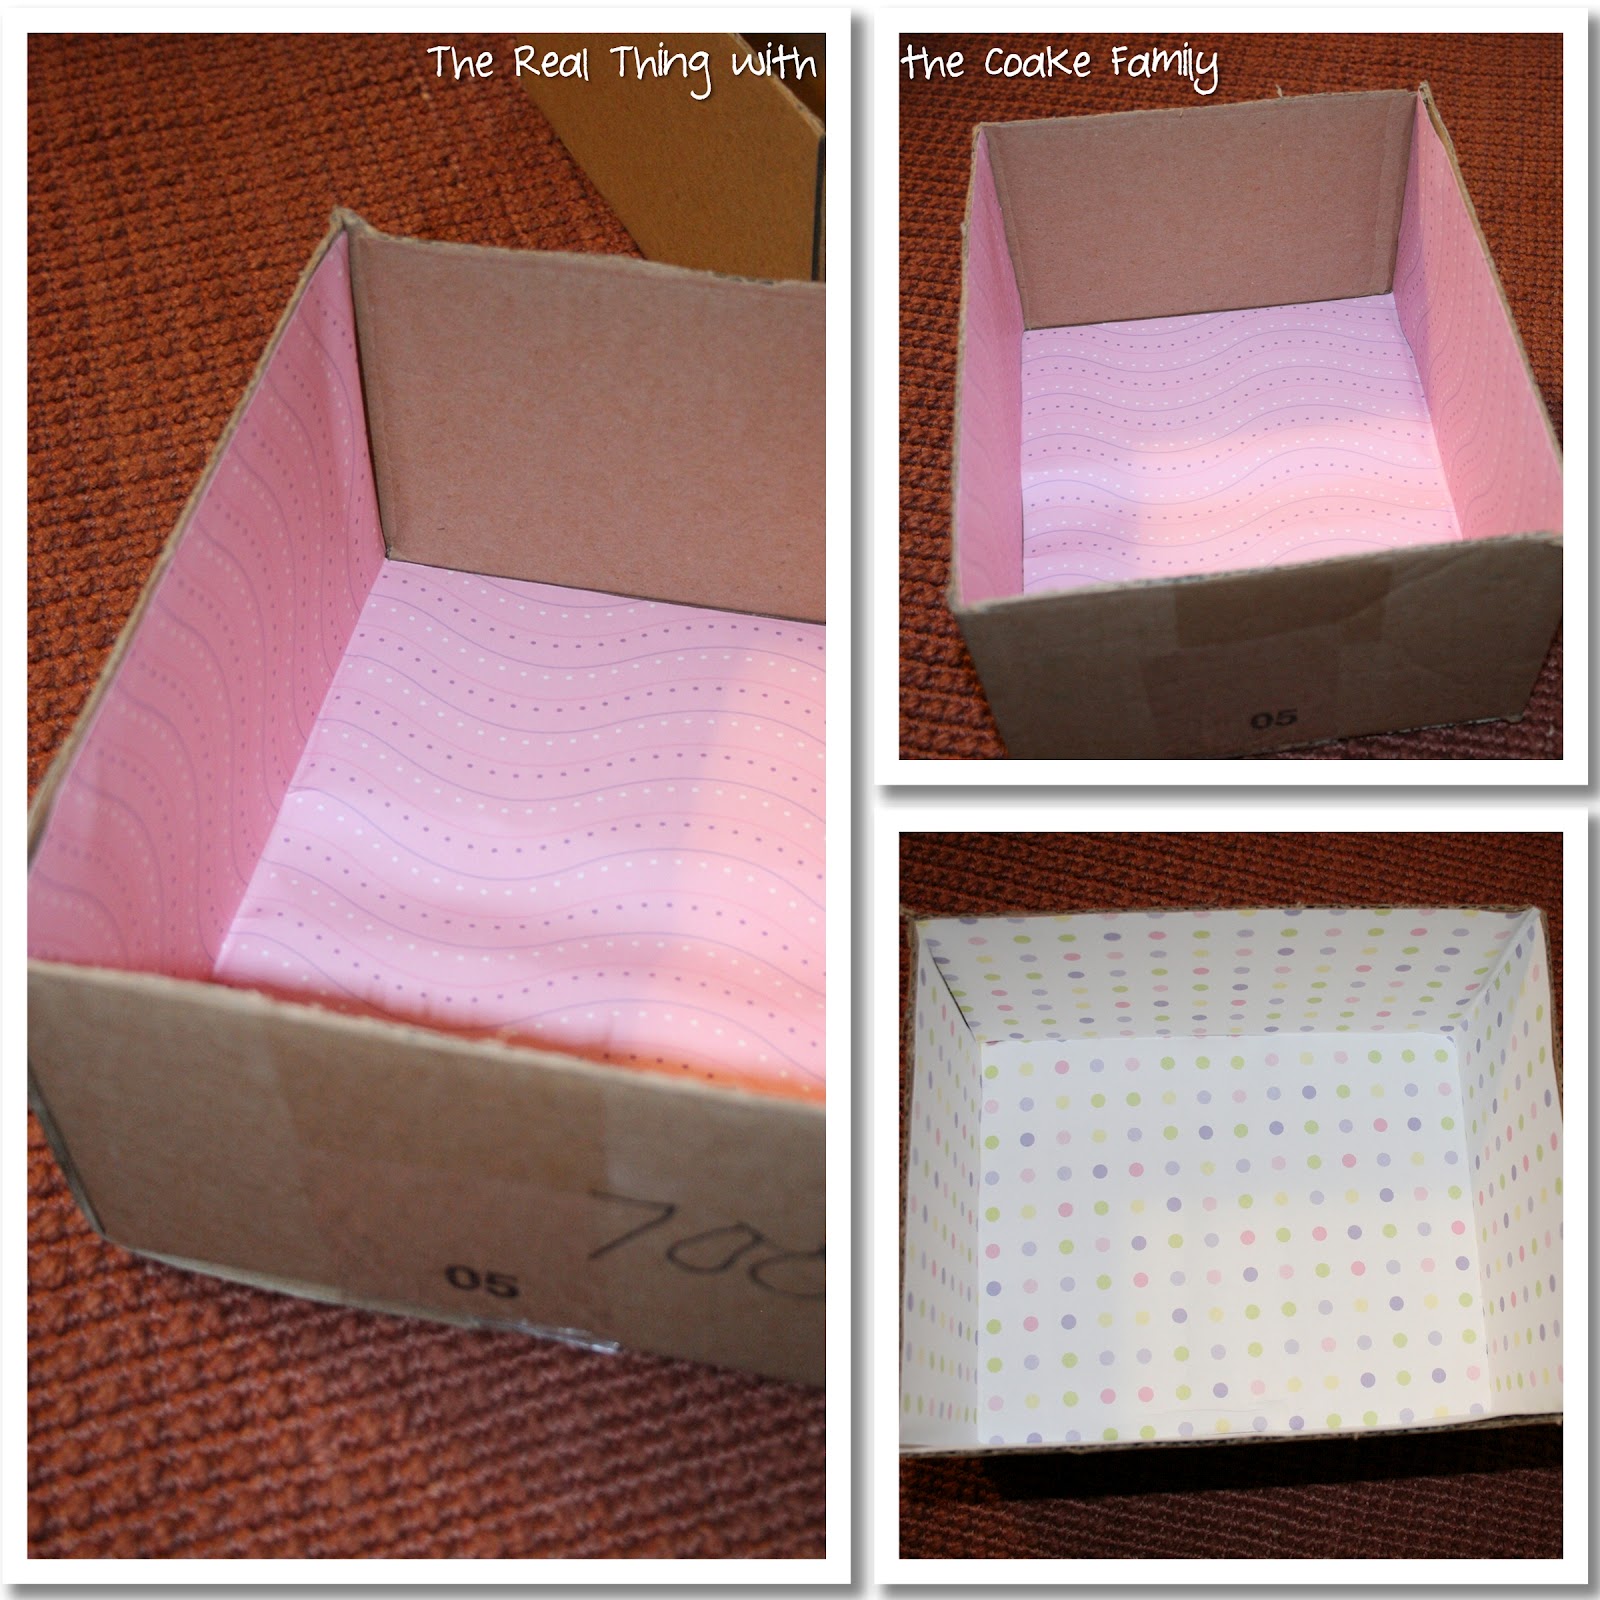
Measure and cut your end pieces adding an additional inch or two (not pictured above because I didn’t figure it out until the second box and the pictures didn’t turn out well enough). Put the adhesive on the back of the paper and carefully put it in the box aligning the bottom of the paper up with the bottom of the box. Once you have completed the ends of your box, you will measure the inside sides of your box and cut your paper to those exact measurements. Carefully line up your paper as you are placing it into your box. It should be OK if it is not exact as you have the extra paper from the ends of the box to give you a little wiggle room.
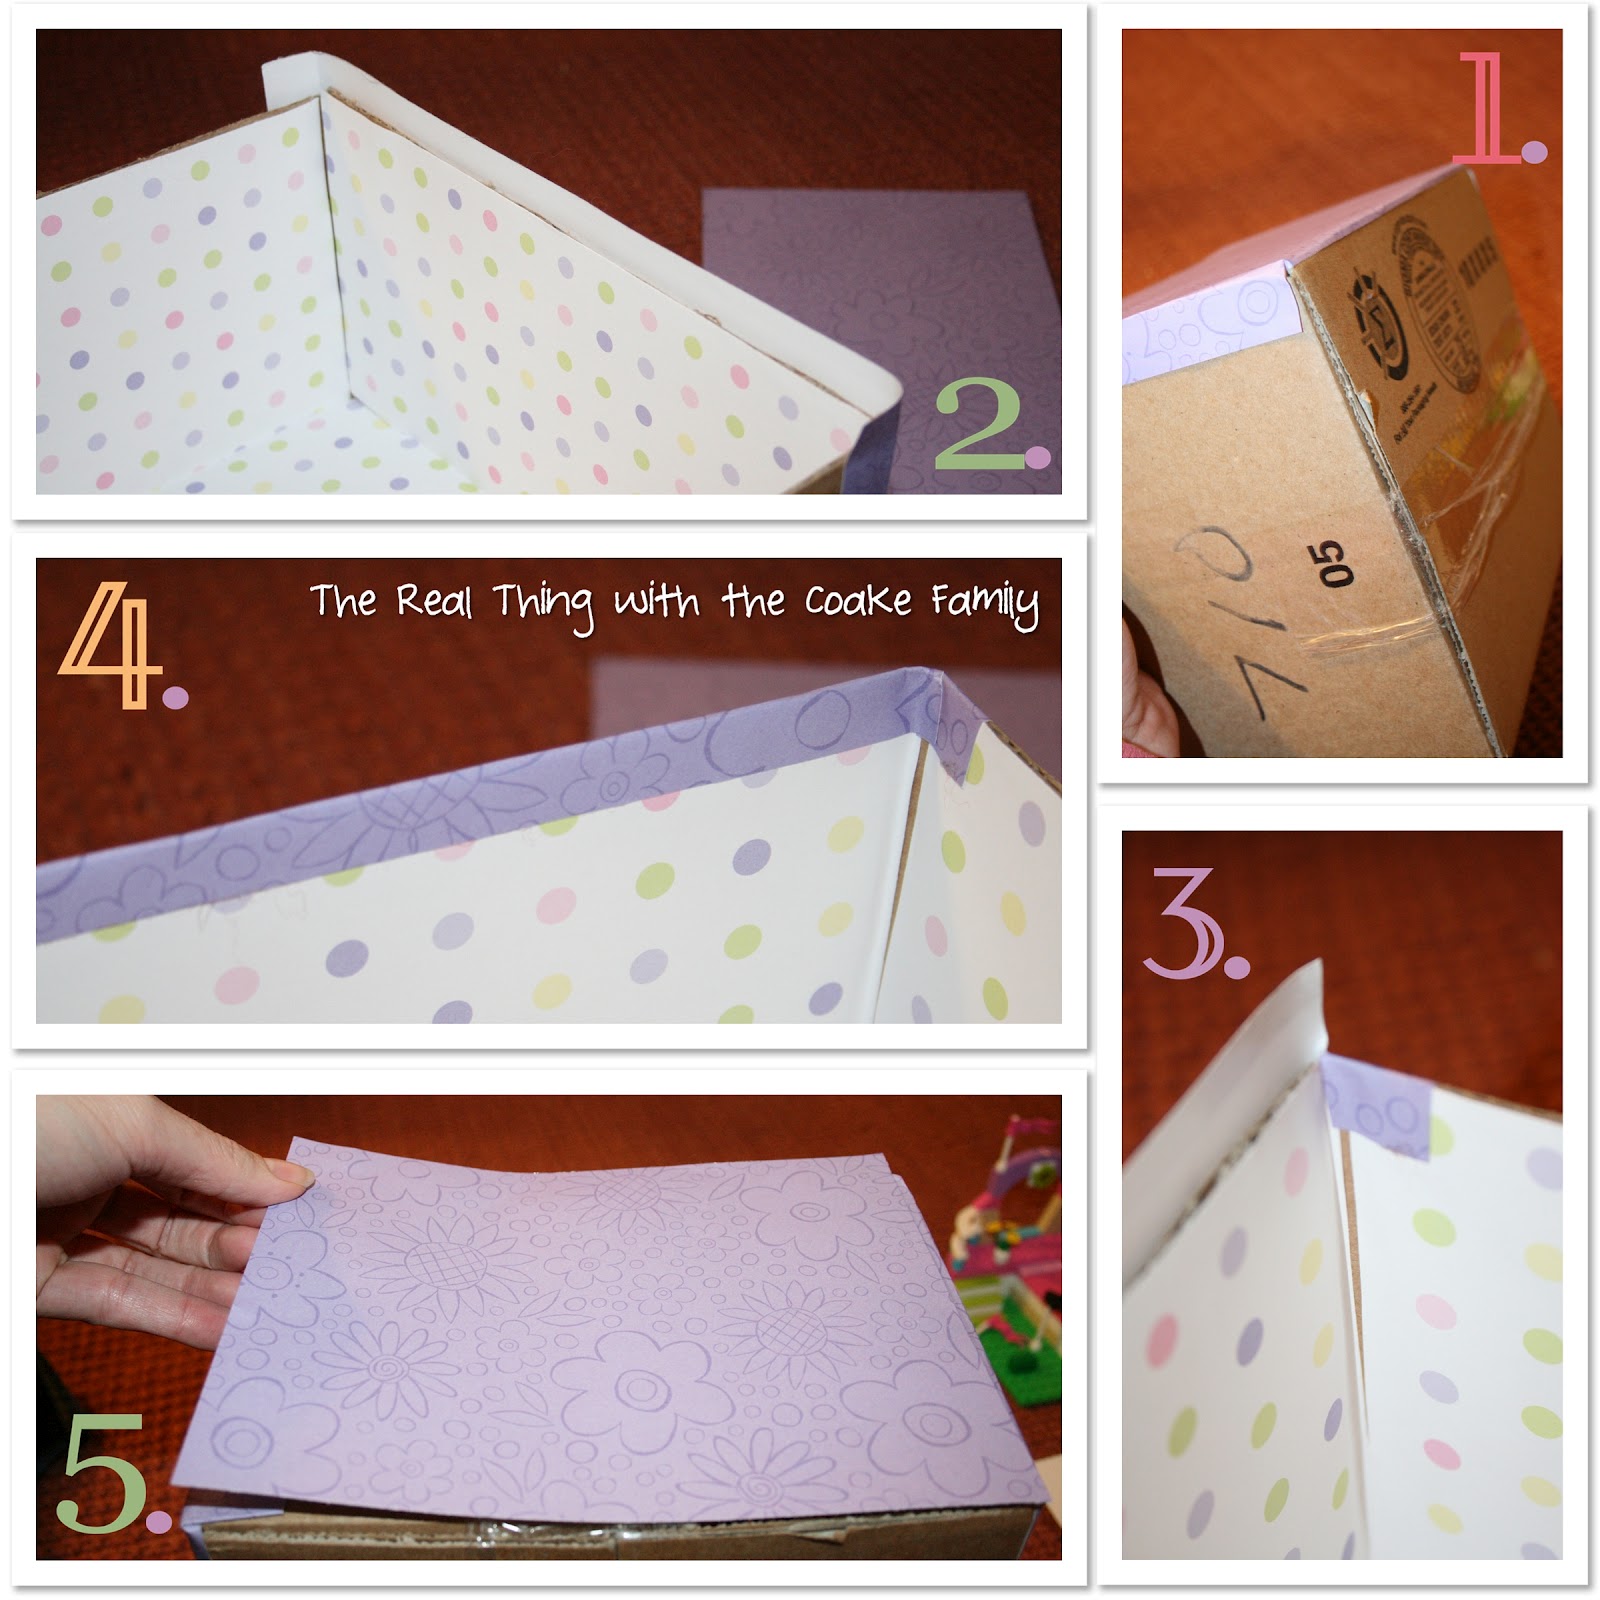
Now it is time to cover the outside of your box.
- I was trying to use the scrapbook paper I had and therefore cut some of my measurements short. I would recommend adding an additional two inches to your measurement. That will give you a good allowance for the bottom of the box as well as the fold over the top of the box. I also recommend starting with the ends of your box adding an additional two inches to the width and allowing that extra to fold over the side. This will give you a ‘professional’ looking finish and give you a little wiggle room for the ‘exact cuts for the sides of your box.
- Bring the paper up and around the side of the end of your box.
- Cut the paper at the corner. Fold the extra paper over into the box first.
- Fold over the paper on the end you are covering.
- Once you have completed steps 1 through 4 above for both ends, measure and cut exactly for the two sides of your boxes. Once again, I would recommend adding an additional 2 inches to the height of your measurement to allow room for the bottom and the top fold of your paper. Align your paper as exactly as you can to the side of your box. You will have some wiggle room if your ‘exact’ cut is off a little bit because you have the extra paper folded around the side from the end pieces.
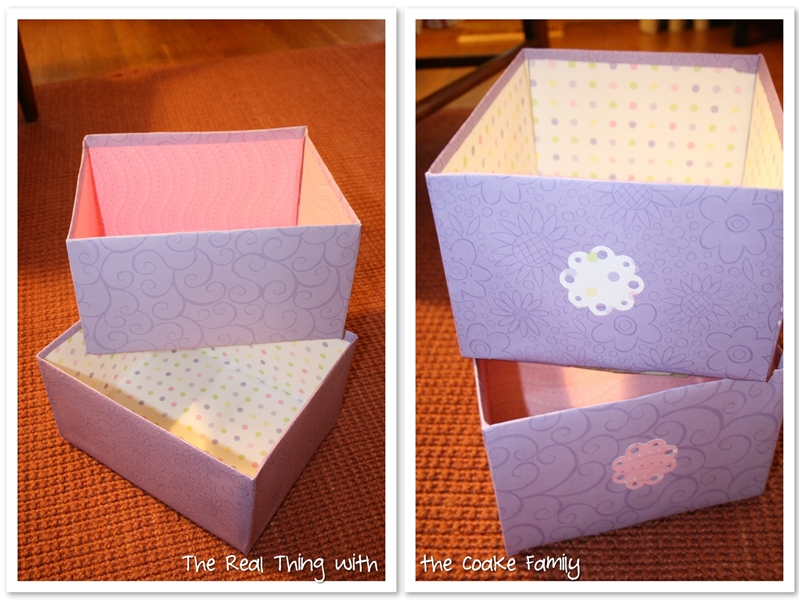
Beautiful paper covered cardboard boxes! As you can see, I added a label to the end of each box.

Filled with the current Lego creations! They could barely wait for me to finish taking a picture to run off with their boxes and create new things to fill them up even more.
For my command center boxes, you remember the ones we started with? I followed this general concept for covering them with paper. However, I made sure the bottoms were covered with paper and I did not cover the backs. I also added contact paper(affiliate link) on top of the scrapbook paper to give these boxes a bit more of a durable finish.
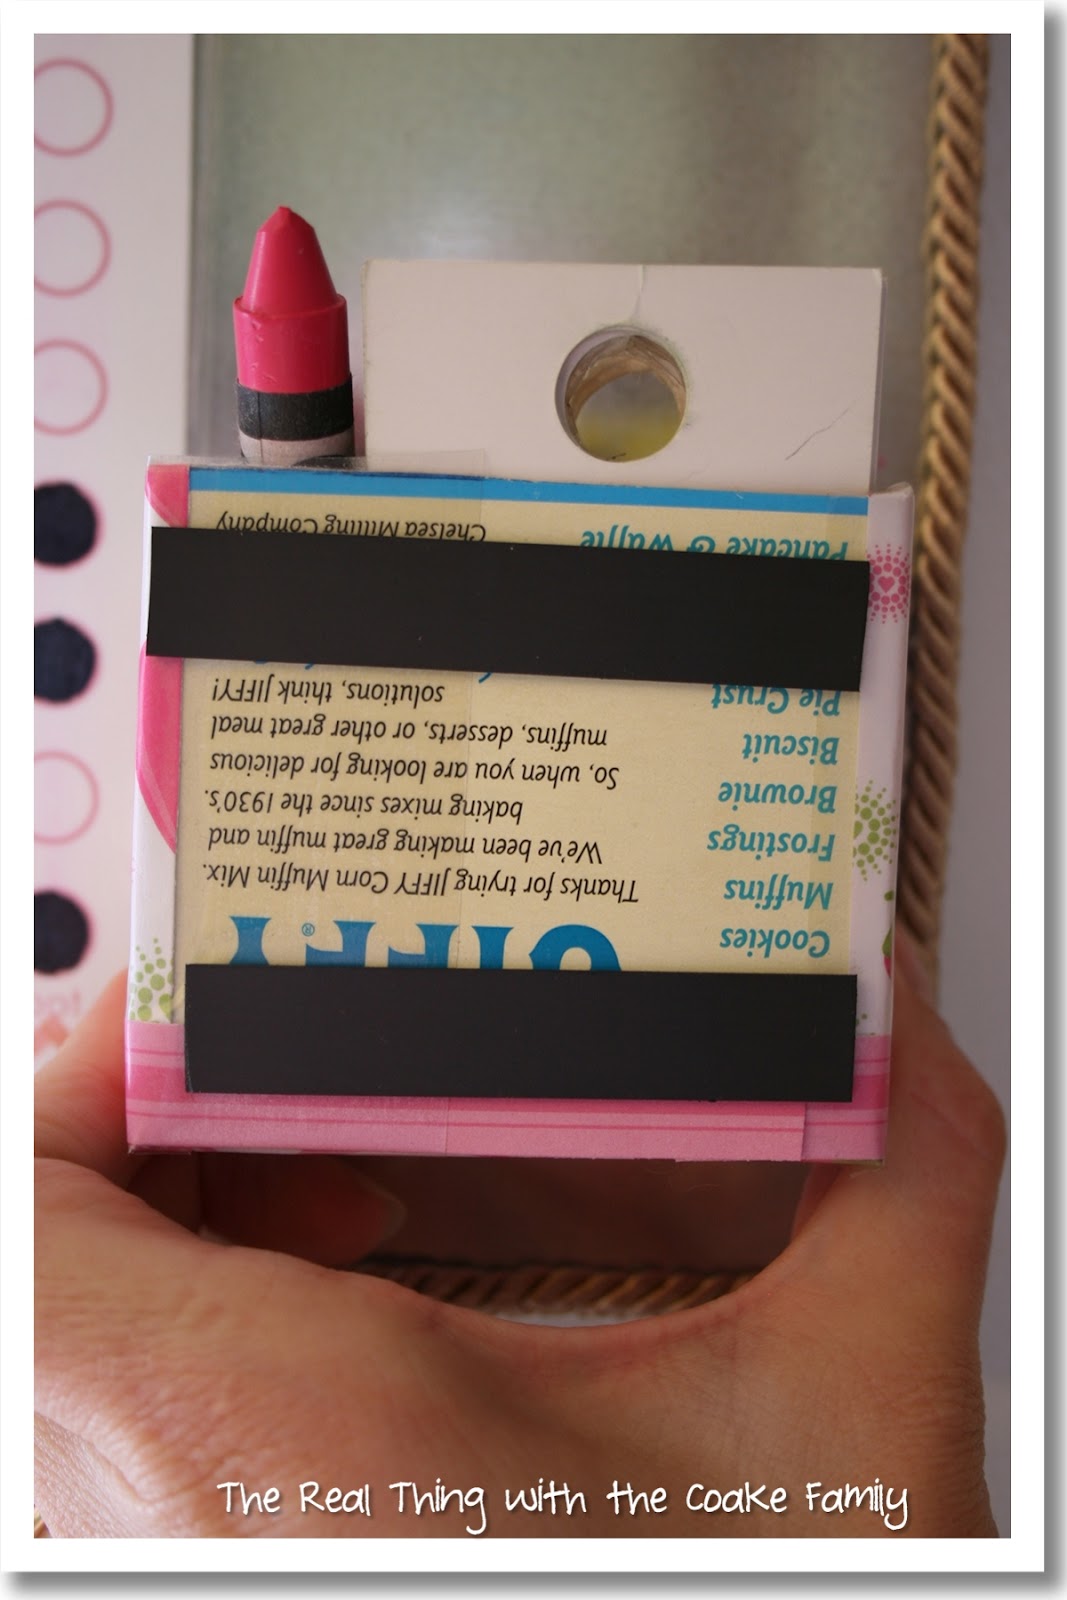
I needed the boxes to be magnetic, which was easily accomplished by adding two strips of magnets to the back of the now covered boxes.

The finished products for my command center. One box covered with cherry paper and one box covered with strawberry paper.
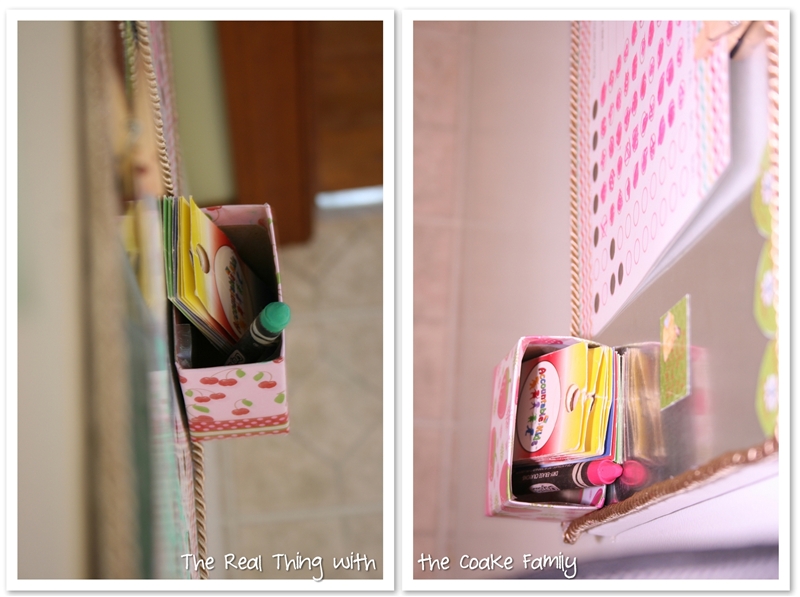
Our boxes hard at work, holding tickets and dry erase crayons on the kid’s portion of my command central.

Paper covered boxes
I’ll be back next week with more on my command central. Can’t wait to show you the next part of the kid’s boards (which turned out so cute!).
Read more posts in my Command Central Series:
Love this! What a great idea! Thanks for sharing at the Pomp Party! Pinning to our Pomp Party board!
These look great! I’ll have to save my next Jiffy box and make one for my magnetic makeup board.
I have that exact same purple and polka dot paper! This is such a great idea to help get organized with using stuff I already have on hand.
Great idea!! Stopping by via Cheerios and Lattes Linky!
Who needs expensive baskets when you can make those! I love the ones on the magnet board. I’d love for you to link up this (and any other ideas you’d like to share) at “One Creative Weekend” on OneCreativeMommy.com.
Thanks so much! My kids really like them and they work well, especially for the price. 😉
What a great idea! I need to do this and get organized! I would love for you to come link up your blog to my Get social Sunday link party!
https://alivedinhome.blogspot.com/2012/08/get-social-sunday.html
This is such a great idea. I love the way you reused the boxes.
Great job! I love how resourceful you were!
Becky B.
http://www.organizingmadefun.com
Organizing Made Fun
Thanks so much! Gotta be resourceful sometimes in order to be organized (stay sane) and stay on budget.
It’s party time over at Debt Free Mommy Blog! Please come by and link up your spaces with Making Space Mondays link party #10. I hope to see you there at http://www.debtfreemommyblog.blogspot.com! -Tabitha
This looks great!!! My ‘command centre’ isn’t nearly so cute!
Thanks so much! I think any command center is fabulous…it helps you stay sane and keep on track! Yours is also finished and I need to finish mine…boo!
Really cute, I love the paper covered magnetic boxes! I’ve shared this on my Facebook page 🙂
loveeee that cherry box!
Hope you’re having a great Thursday, one day closer to Friday! Drop by nichollvincent.blogspot.com and say hello!
love this, and the kids boxes are just so pretty
Thank you!
Oh!! This is GREAT!!! Useful and pretty!
Thanks so much for sharing this at The DIY Dreamer.. From Dream To Reality!
Super cute and functional – I love it! New follower from Little Becky Homecky and Serenity Now. Check out my blog and follow me back if you like. Have a great week! 🙂
Thank you so much!
They are so cute!
Thank you for visiting my link party!
Thanks so much! Your link party is great, thanks for hosting it!
Visiting from Clean & Scentsible link party, the little paper covered boxes look great, I especially love the papers you used. Am now following you on facebook, can’t wait to see how your Command Central project turns out.
Stacey-Lee 😀
Thanks so much! I can’t wait to see how it turns out as well. I still need to finish that last part…I am totally avoiding it. Gotta get over that. Thanks again!
So cute! Thanks so much for sharing with us this week!
Take care,
Trish
I need to do this. Like, I seriously need to turn a bunch of old diaper boxes into SOMETHING and ge them out of the way :-] Thanks so much for posting this and giving me both inspiration and hope that I will soon have new storage bins {and an empty storage shelf!}!
What a simple yet effective organizing tool. I need to do this with my kitchen cabinets that house small things like pens and stuff. Thanks for sharing.
Thank you! They are working really well for us.