
In my quest to get my Command Central completed, I have moved on from the Kid’s Command Central to the Adult portions of our command central. Let me show you what I did.
I used the same 12 x 12 Artist Canvas for this part of the project that I used in the Kid’s Command Central. That way it will all be the same size and line up all pretty on my refrigerator. I didn’t want the plain white of the canvas though, so I found some fabric on clearance at Joann’s that I thought would go with the fabric I used in the calendar portion of the command central. I covered both the adult portion and the calendar portion of the command central with fabric. It was super easy. Let me show you how.

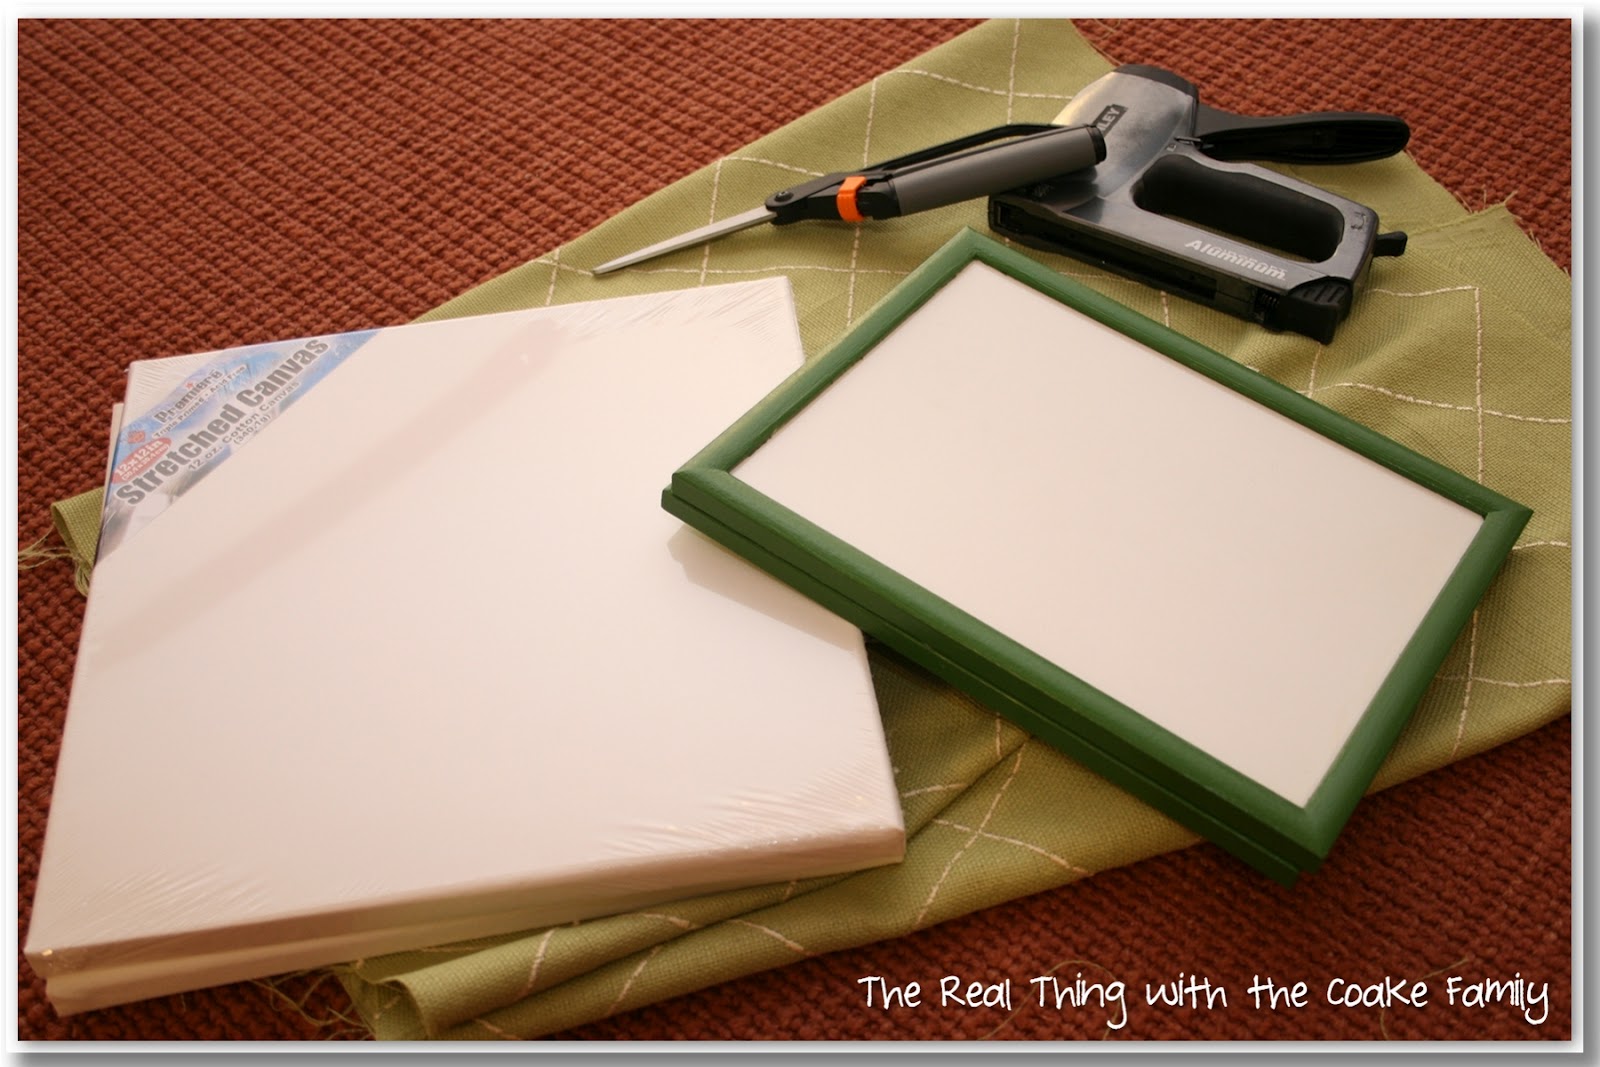
Gather your supplies. For this part of the project, you will need two 12 x 12 Artist Canvas , scissors, staple gun, staples, and a bit less than 1 yard of fabric. I’m showing you pictures from both the adult portion and the calendar portion. They use different fabrics…just so it is not confusing.

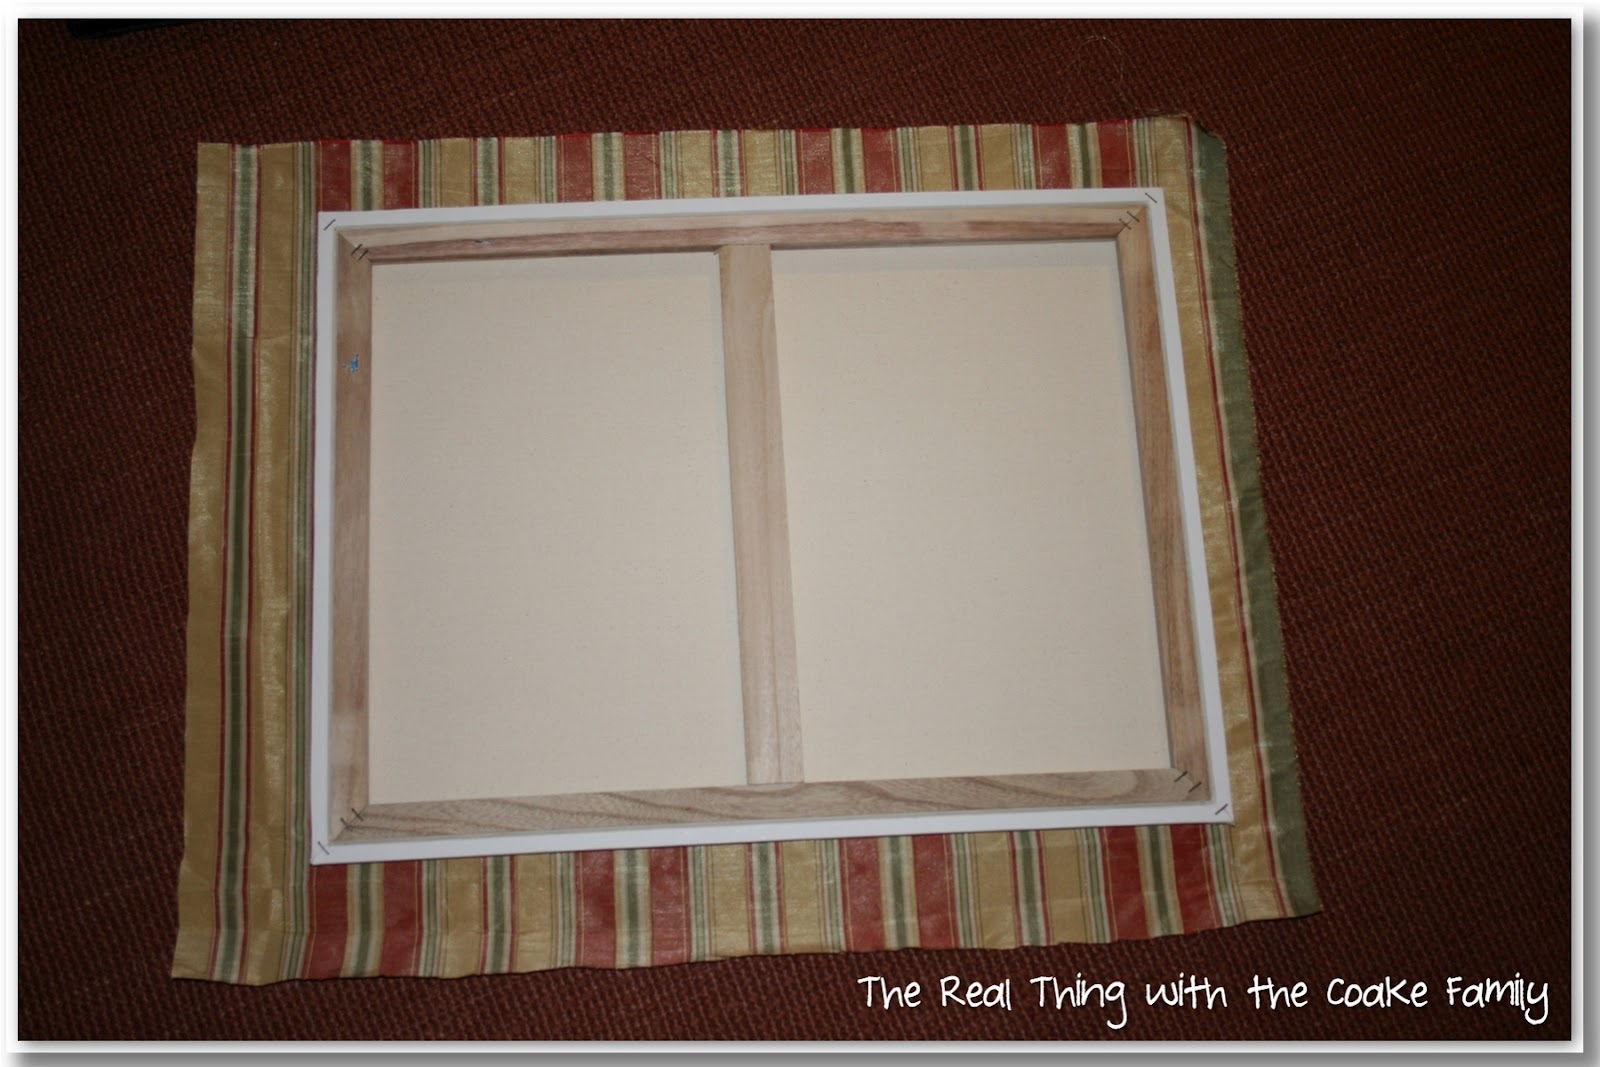
The first real step that you need to do, is to figure out the orientation you want for your fabric. With both the adult portion and the calendar portion, I had fabric with a distinct pattern that I needed to decide which orientation I liked better for the fabric. It was a factor especially with the moss/sage color fabric in the larger picture above as I had just 1 yard of that fabric and needed a small amount of it for another part of this project. I had to make sure I had enough if I used the orientation you see above. Whew….just enough!
Cut your fabric leaving an additional 3 or more inches to allow for wrapping the fabric up and over the edges.
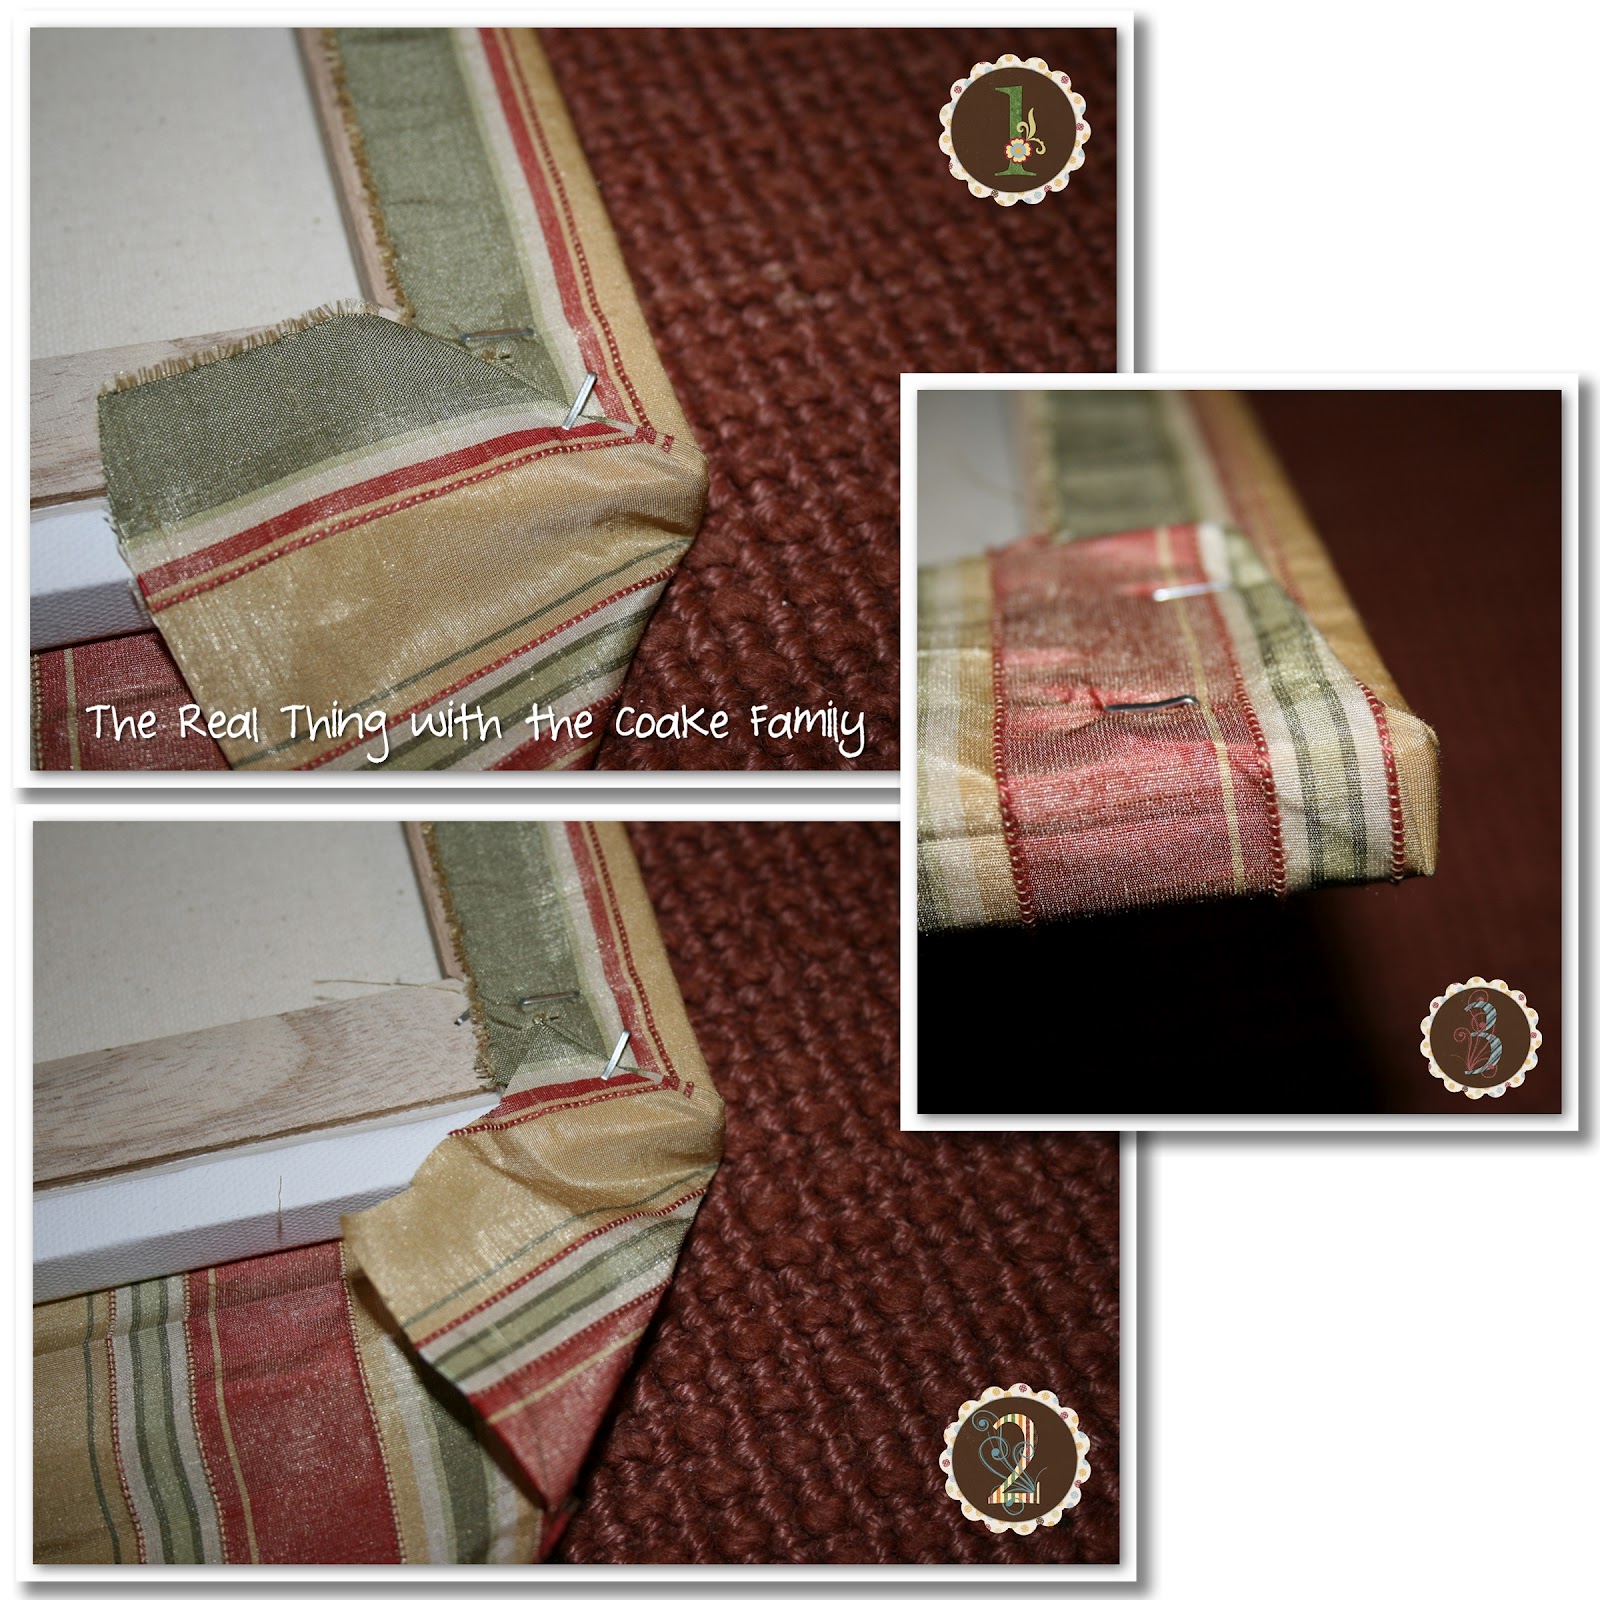
For the corners:
- Pull your fabric up at about a 45 degree angle. Staple in place.
- Cut off excess fabric (necessary in my case as I want this to mount flush on my refrigerator.)
- Pull remaining fabric up making a neat straight line with the fabric and stapling in place.

The corners completed…they look very neat and tidy.
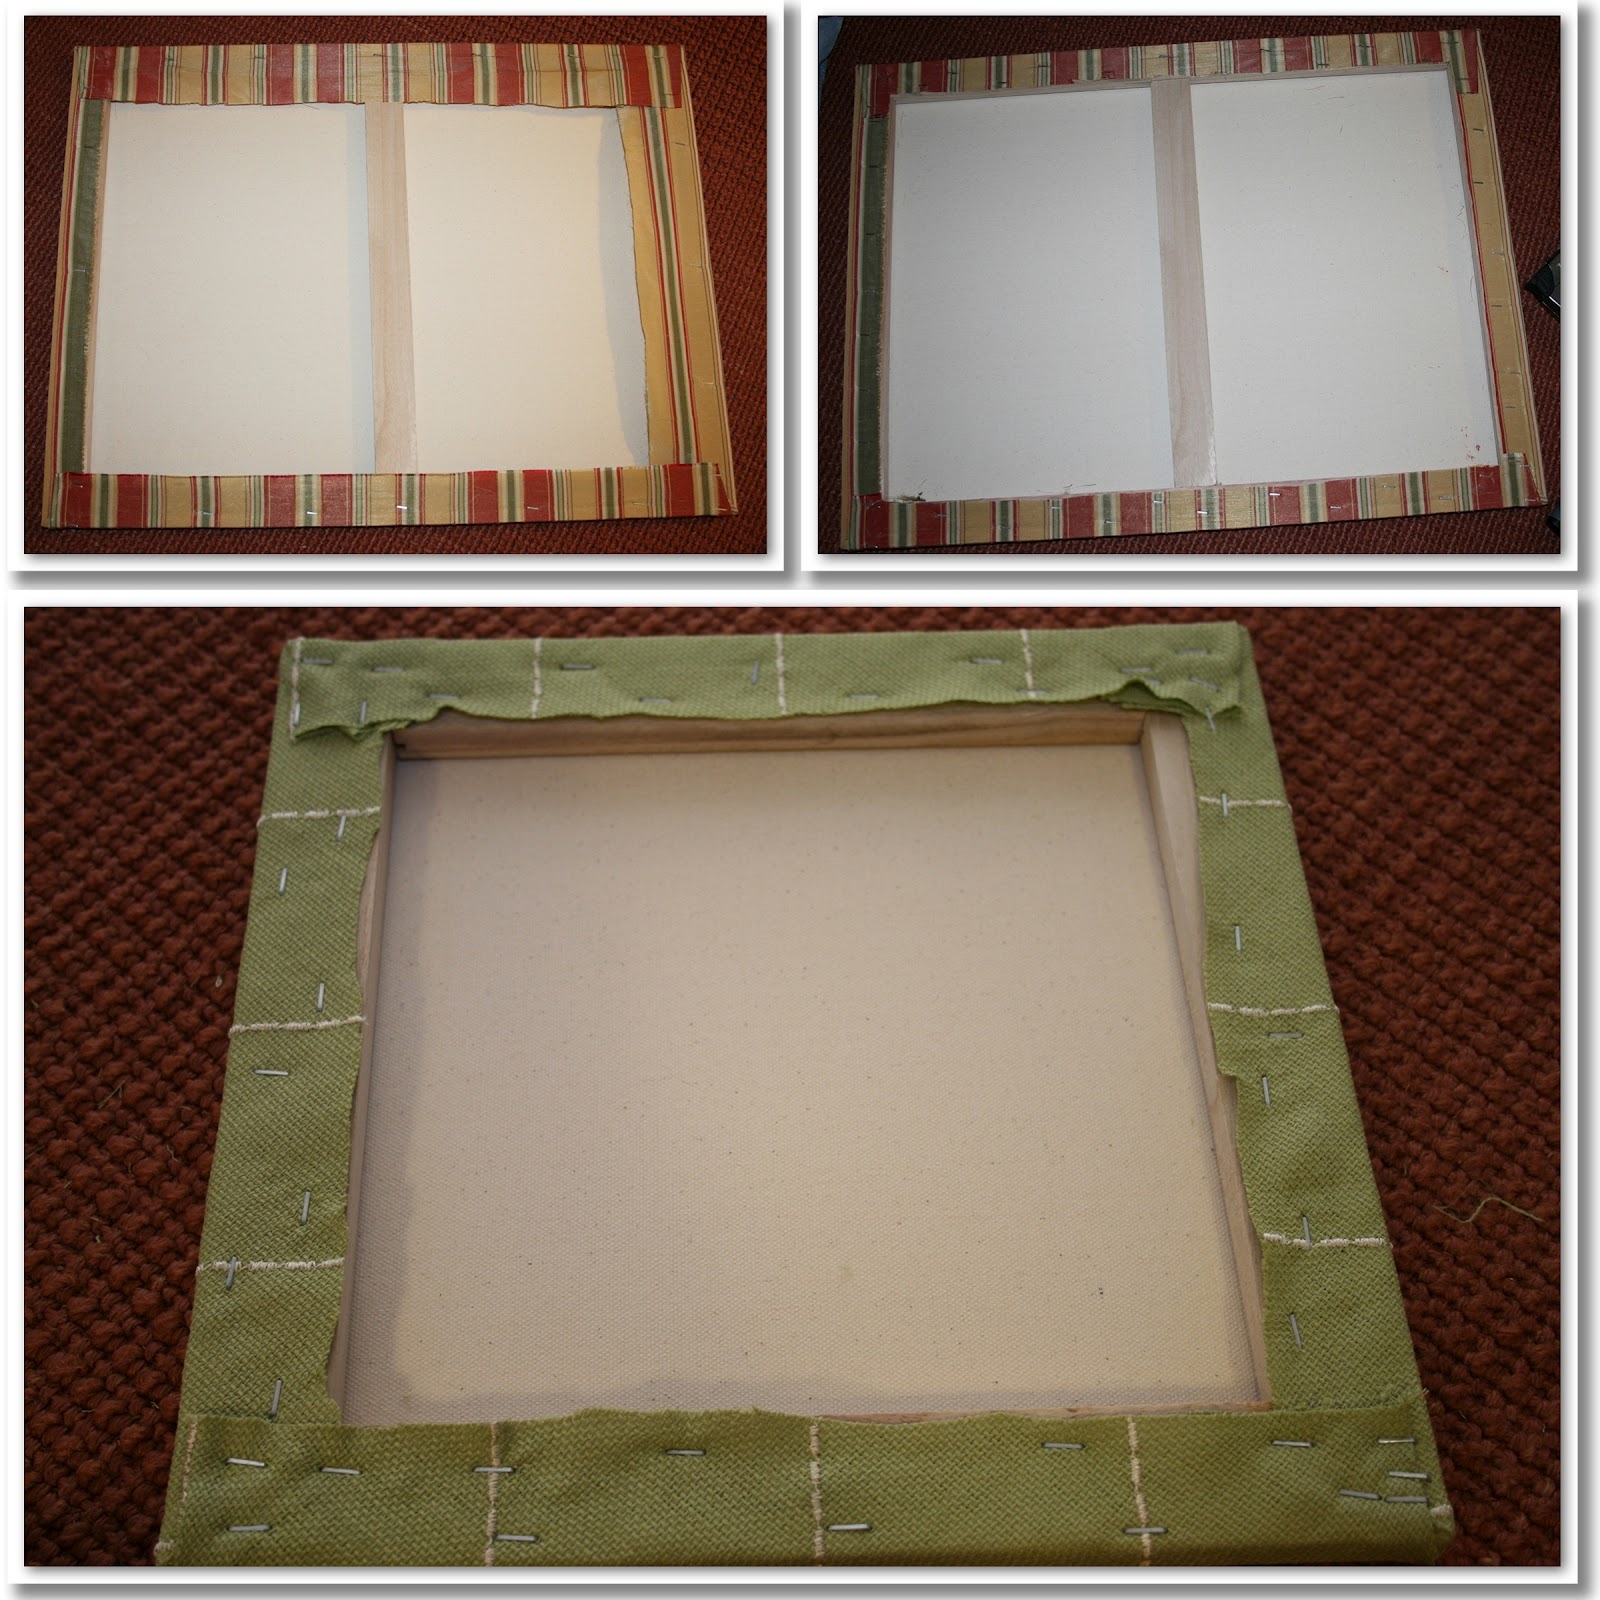
You can see above in the upper left, when I was done with the whole canvas, I had extra fabric. Simply go back and trim the excess off(shown in the right and bottom pictures). I added extra staples at this point as well to make sure the fabric was secure and wouldn’t slip around too much.
You are already done with this project. Easy, wasn’t it? They look pretty, too!
In the next command central post, I will show you a bit of what I added to these boards and what to do to complete that part of this project. I hope you will come back and join me to see more.
Read more posts in my Command Central Series:

Can’t wait to see the final reveal of your command central!!
Me too! I’m still not done with it and I really need to get it done. It is driving me nuts to have it still on the to-do list.
Looks like it’s coming along nicely. Can’t wait to see the final product. Thanks for stopping by today and leaving me a sweet comment about the Sunny Seed Oatmeal cookies. Have a great rest of the weekend!
Blessings,
Nici
Love these – we’re moving soon and we have a desk built-in in the kitchen area that I need to make into our command center. Pinning for later inspiration! I’d love for you share this at my MightyCrafty Mondays link party: https://mightycrafty.blogspot.com/2012/09/mightycrafty-mondays-round-10.html#.UEYCD5bTDfY
Thank you for sharing at MightyCrafty Mondays!
Oh COOL!!! LOVE the burlap looking one!
Thanks so much for sharing this at The DIY Dreamer… From Dream To Reality!
I love this art work! Thanks for sharing at It’s Overflowing. I’m finally following you!
XO, Aimee