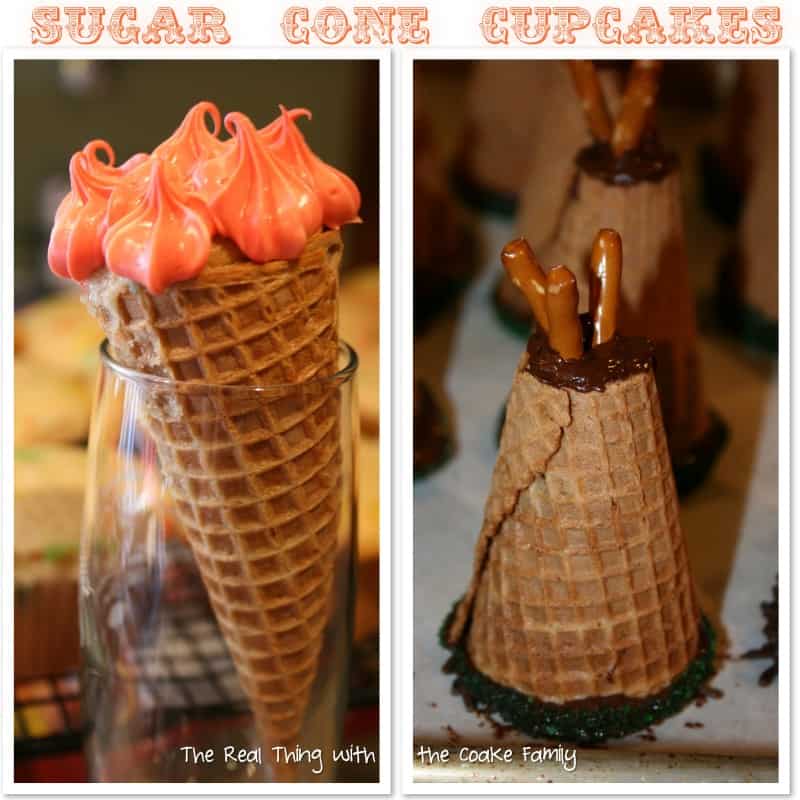
I have now made cupcakes in sugar cones two times. I think they are so fun and cute in their end result, but I also think they can be a frustrating to bake as they are hard to arrange and keep from tipping over in the oven.
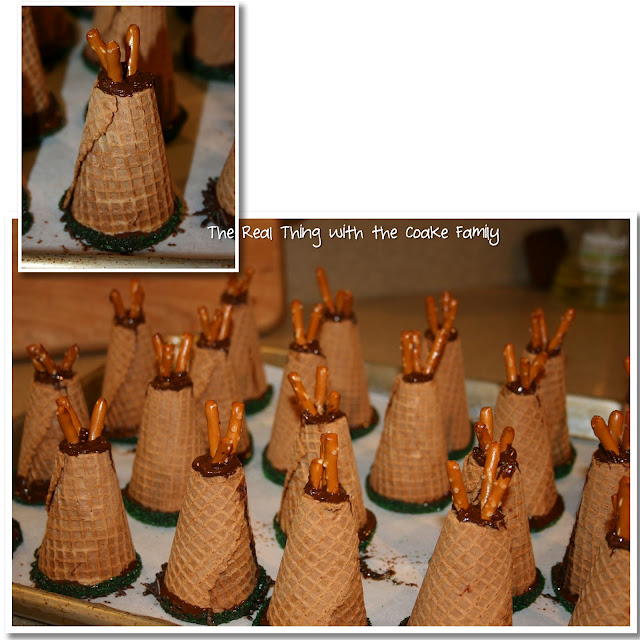
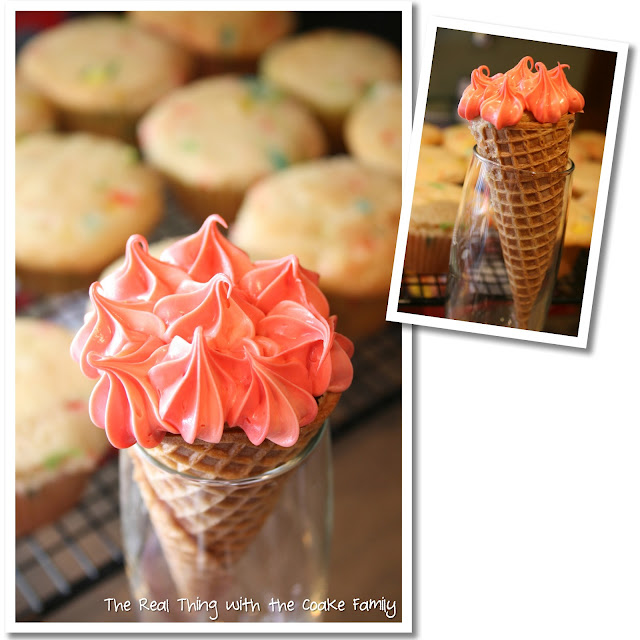
I tried one method the first time I made them (the Teepee’s above) and improved on that method when we recently attempted to make Olympic Torches in a sugar cone.
If you want information about the Thanksgiving Teepee Cupcakes, you can visit Sties Thoughts as she gives a great tutorial on how to make them. Thanksgiving Teepee Cupcakes, Revisted
To learn more about the Olympic Torch Cake Cones, you can visit Not Your Momma’s Cookie, as she shows you how to make them. Olympic Torch Cake Cones (Btw, she tells you to make the cake, mix it with frosting and fill the cone that way. She does not tell you to bake them in the cone. For some reason, that just didn’t sound appealing to me, so I chose to bake the cake in the cone.)
Rather than show you how to make a certain cupcake in a cone, I am going to show you the best way I have found to bake the cupcake in the cone.
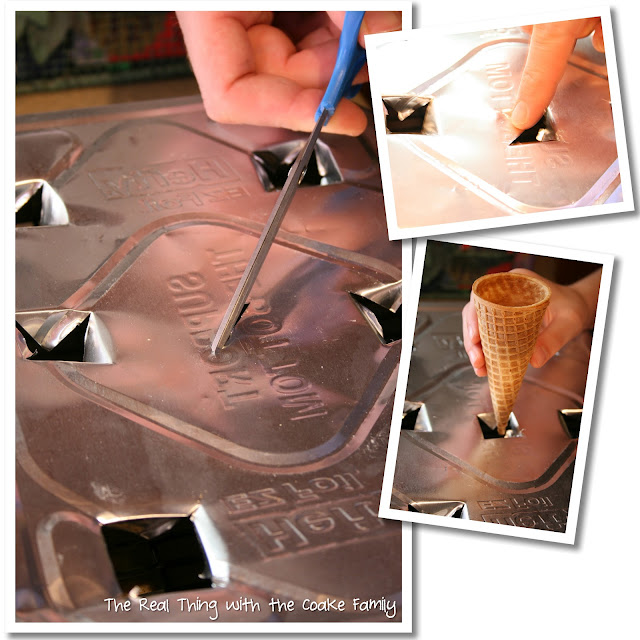
For this process, you will need a large disposable metal baking pan as well as a baking rack and sheet pan that fit together. You don’t need a disposable pan large enough for a turkey. I believe mine is 13 x 9, but it is deep. That is key to the stability of the cones.
With the pan upside down, use scissors to cut an X in your pan each place you want a cone to cook. Carefully use your fingers to push the cut pieces through the pan. Your cone should now fit in the pan and sit deeply into the pan. The hole in the pan should be large enough that the cone will sit with the bottom of the cone extending below the bottom of the pan. Confused? Probably, it is hard to write that out well. Look at the picture below.
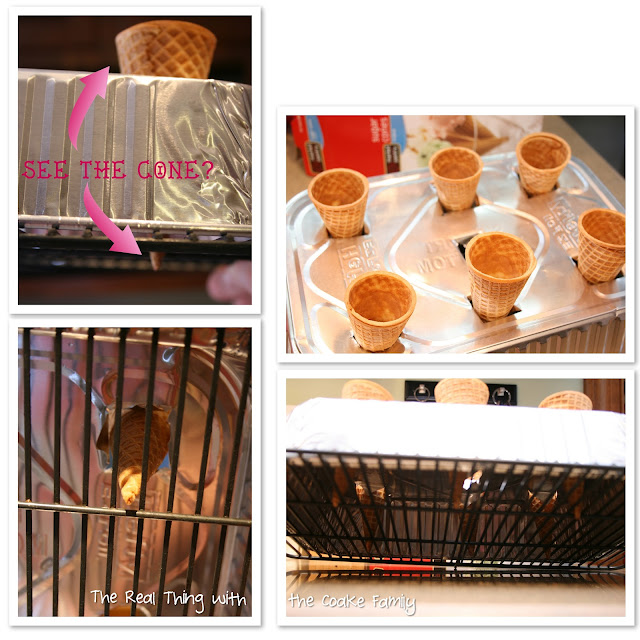
Can you see how the cones fit into the hole and extend down below even further than the pan? That is the key to my method. Place your pan on a baking rack, the kind you would use to cool cookies on. I got my sheet pan and rack in a set together at Costco years ago, so they fit perfectly together. You will want to nestle each cone in between two wires of the baking rack. This will hold the cone in place and not allow it to tip over while it is baking in the oven. Genius! Why yes, thank you! Every once in a while I come up with a great idea. (Aren’t I humble today!? Haha!) Okay, my bragging aside, I do think this is a great idea and not only that it actually works and works well.
Once you have nestled the cones in the baking pan and in between the rungs of your baking rack, put the whole set up on your sheet pan. This will allow you to easily put it in the oven as well as prevent the cones from burning at the tips. You can see that above.
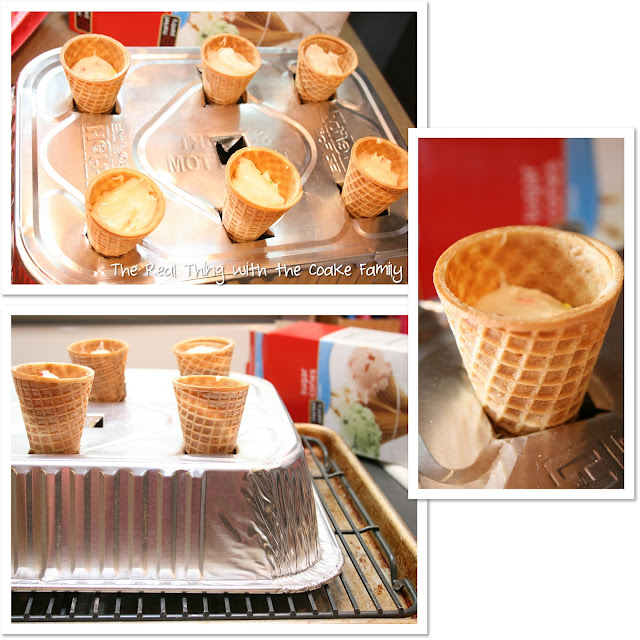
Fill your cones with your cake batter. Only fill them as full as the cone on the right above. (I know it doesn’t look like enough, but it is.) I use a small cookie scoop I got from Pampered Chef. One scoop is the right amount. If you fill it more full or an additional scoop or even half scoop extra, it will overflow when it bakes.
Filled too full! It really isn’t a big deal if they overflow. While they are still a little warm, just gently remove the extra cake (and eat it, too!). It will usually leave a little cake residue on the cone, which doesn’t bother me, but I am not super perfectionistic about such things.
Your last thing to do, is let your imagination go crazy with how you would like to decorate your cupcake in a sugar cone.
So far, I have made Thanksgiving Teepee’s. They were sooo good! Instead of frosting, they had melted chocolate….soooo yummy! Thanksgiving Teepee Cupcakes, Revisted
My last attempt was for Olympic Torches. I think they have great potential, but we didn’t get a real red and orange color frosting, so it doesn’t look like a flame at all. Mr. T helped me with the frosting and said it wasn’t possible to get an actual red and orange from our food coloring. I didn’t have time that day to help with it and I know it is hard to get a deep color (but I know it could have come out deeper than this). I think if I were to try these again, I would try a different food coloring. I think there are some paste and/or gel dyes that are supposed to work really well. Anyway, they were yummy and we still called them Olympic Torches even if they don’t really look very flame like. Olympic Torch Cake Cones
What kind of cupcake in a sugar cone will you make?
More Cooking Fun:


These are so cute. I made cupcake cones a few years ago and mine were a huge mess oi!!! I love how you used the metal tray to hold them. I think I used a cupcake tin but the holes were too big and well, NOT one of my better baking experiences! I love yours though. Have a wonderful day. hugs, mb
I’m sorry your experience was such a mess! I am glad mine didn’t go that way. Thanks so much…you have a great day as well.
Cake, cones, chocolate, frosting- it all sounds good to me!!!
love this idea and will follow on the way out.
Carolyn
Thanks so much!
what a fun idea!
Thanks!
These are so much fun. Great work. Jodi @ http://www.meaningfulmama.com
I’ve always wanted to know how to do this! Thanks for sharing it…I pinned it to try later!
They are great!!! Very original! I’m going to try and make some too 🙂
Thanks so much for sharing this at The DIY Dreamer.. From Dream To Reality!
How creative! I am sure these taste delicious.
Thanks for linking up at Friday Fun Party. 🙂
Adorable!! What a great way to do this! I have always wanted to try it nut never could figure out the best way! Super! Thanks so much for sharing again at Uncommon! Featuring you on our FB page today!! Happy Saturday! 🙂
Thanks so much! Thanks for featuring it on your fb page as well…so sweet! Have a great week!
Aaaand, how do you suggest not burning them??? I just put mine in and in 5 minutes the tops of the cones were black! Do you use a lower temp? Did I miss that in your instructions?
It’s been so long since I’ve done this so let me try to remember. If you go back and look at the pictures, can you see how I put the cones on the wire rack and then set that on the sheet pan? That should help keep the tips of the cones from burning because it’s keeping them kind of insulated. However, if you tried that and it didn’t work, I’d suggest using aluminum foil to do the same thing. Just like you’d cover the crust of a pie to keep it from overcooking, cover the tips of the ice cream cones and that should help.
HTH ?