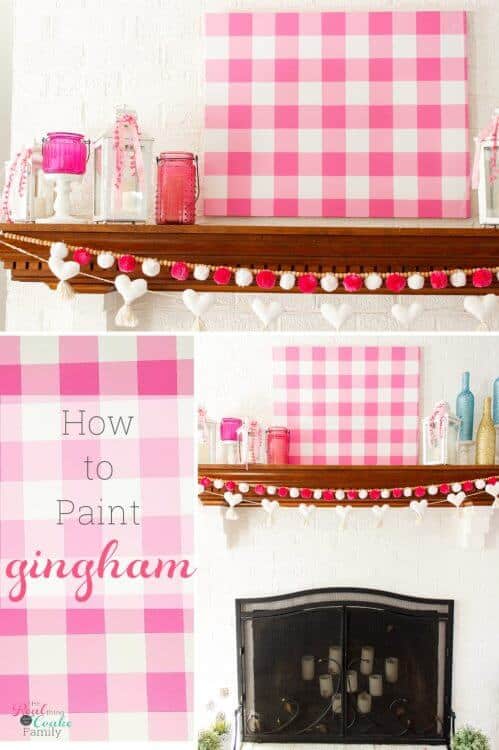
I’ve had this in my mind to make for a couple of months now, but as things go with a family….I didn’t have the time until last week.
I’ve been wanting to make a large gingham canvas for over my fireplace.
My plan is to use it as the background and layer other things on top for the various seasons and holidays.
I had no idea how to paint gingham and was a little concerned if I would be able to pull this one off or if I’d need to buy a few canvases to get it right, but I got it right on the first try. Yay!
It wasn’t as hard as I thought it would be and it’s another perfect mom craft….do a little work. Leave it to dry and take care of work, family, etc. Then come back and take care of the next step. These are my favorite types of crafts these days because I’m having so much fun adding cute things around my house, getting my craft on and still managing to keep up with feeding those suckers I love and call my kids. ?
How to Paint Gingham
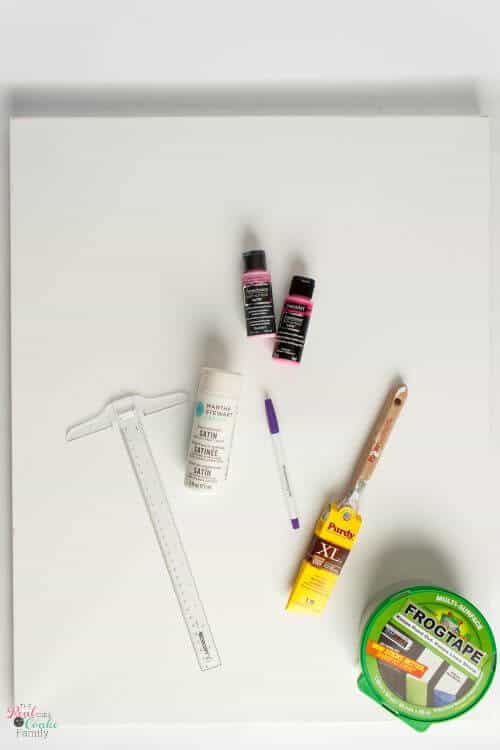
Supplies:
- Canvas (mine is 22″ x 28″)
- Paint – you will need 2 shades of the same color
- Paint – you may want white paint or 1 more color. I didn’t end up using white paint as I thought the canvas color worked fine instead of painting the whole thing white.
- Paintbrush
- Disappearing ink fabric marker (affiliate link)
- T-square (affiliate link)
- Frog Tape (affiliate link)
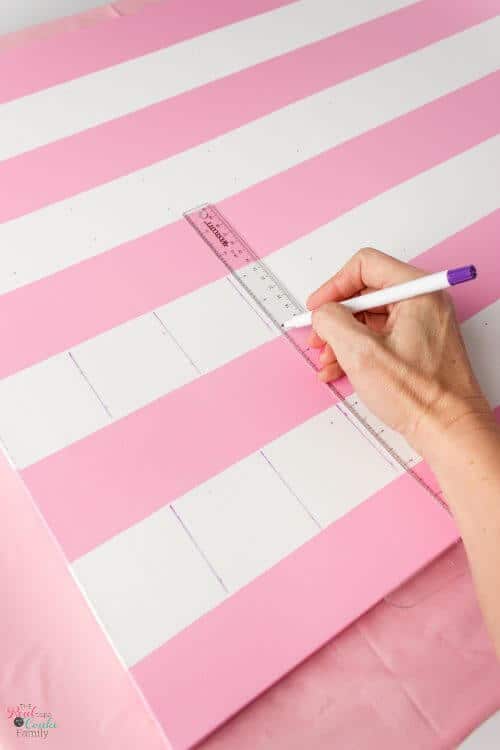
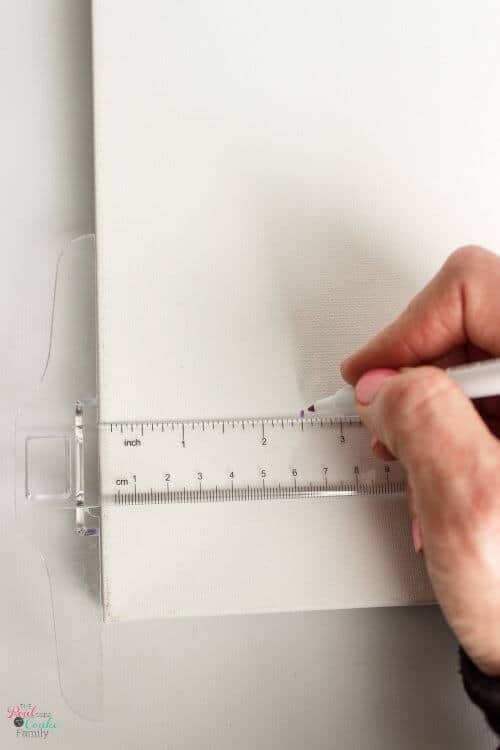
Step 1: Mark off width of gingham stripes
Use the disappearing ink pen to mark off the width of your gingham.
Go all the way across the canvas making these marks at the intervals needed for your width.
Mine was 2.5″ wide, so I marked 2.5″, 5″, 7.5″ and 10″ and then started again using the t-square to mark those intervals across the full 28″ of my canvas.
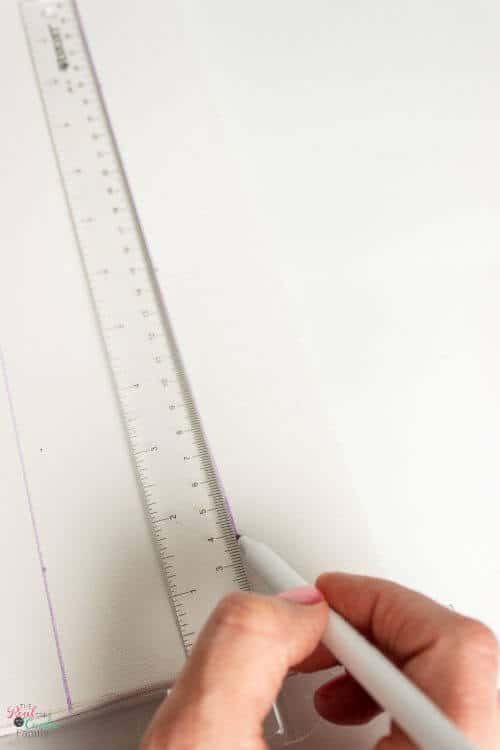
Step 2: Connect the dots
Using the t-square on the edge of your canvas, connect the dots you made using your disappearing ink marker.
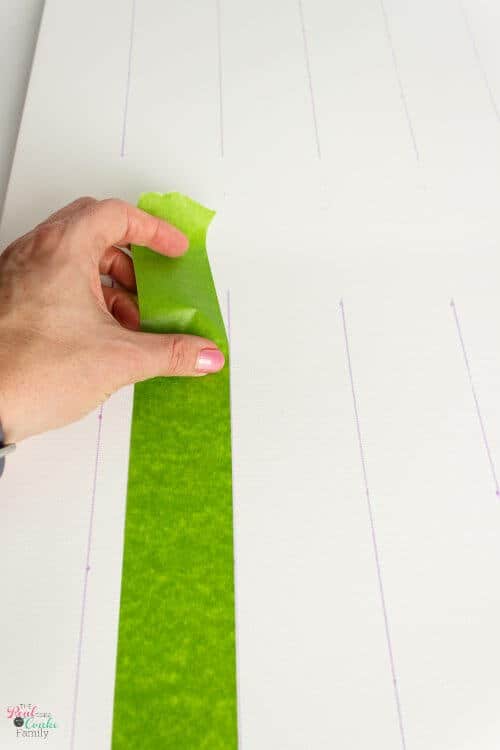
Step 3: Tape off every other line
You need to tape off every other section. That way you’ll paint stripes on your canvas.
Make sure you tape off the sides as well.
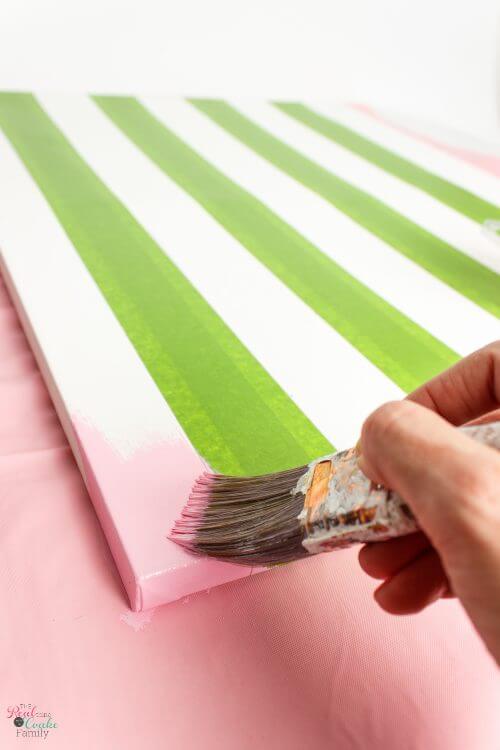
Step 4: Paint
Paint your stripes. Make sure you paint the ends and sides as well.
For my canvas, I needed 2 coats of the DecoArt Americana Multi-Surface Pink Cadillac.
Remove tape when the paint is dry.
Step 5: Mark off stripes in opposite direction
Using your disappearing ink pen, mark off your stripes going in the opposite directions from the one you just painted.
Make sure to only mark with the disappearing ink marker on the canvas, not on the paint.
Step 6: Connect the dots
Once again, use your t-square and connect the dots to make lines for your new stripes.
Step 7: Tape off stripes
Just like the last stripes, tape off every other section. Make sure to tape off the ends as well.
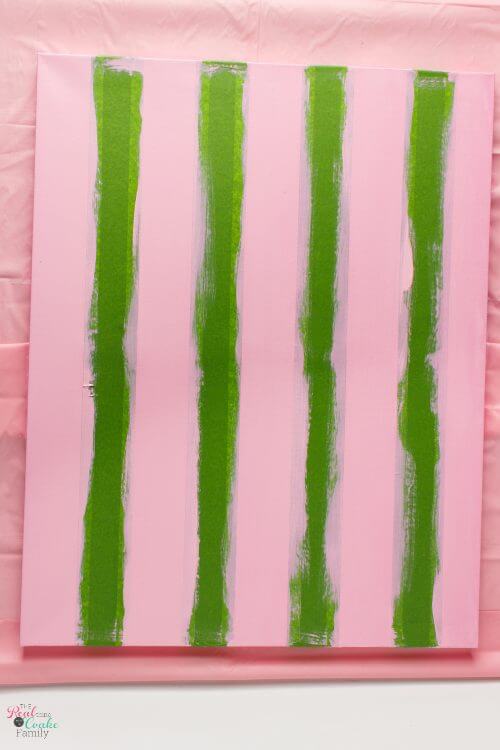
Step 8: Paint
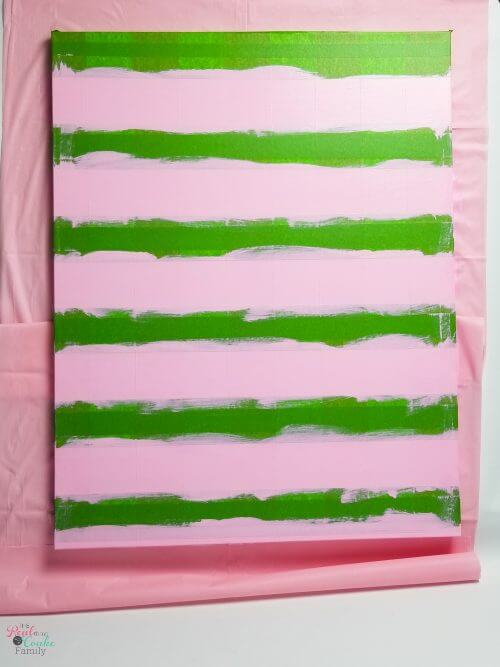
Using the same color paint, paint your stripes.
Allow this paint to dry completely.
Leave this tape on.
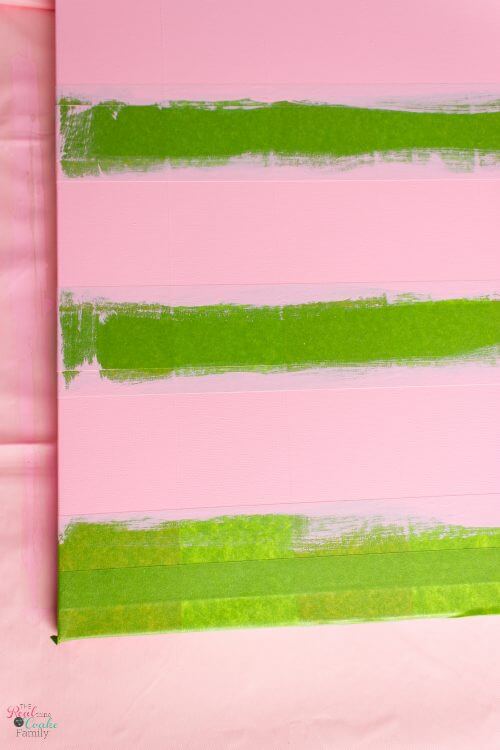
Can you see how you can see the original stripe below the tape? Your going to use those as a reference in the next step….to me this is where it gets confusing.
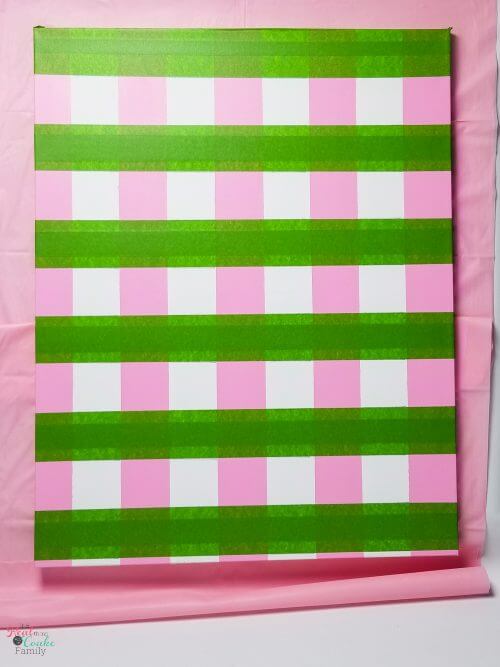
Step 9: Tape off the white stripe or place you haven’t paint
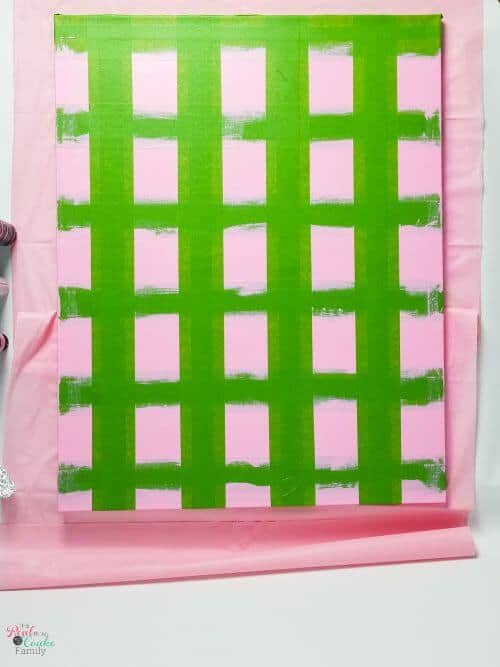
Leave the tape on from the last step and tape off the stripe that has was not painted.
Be sure to tape the sides and ends.
Step 10: Paint with second, darker color, paint
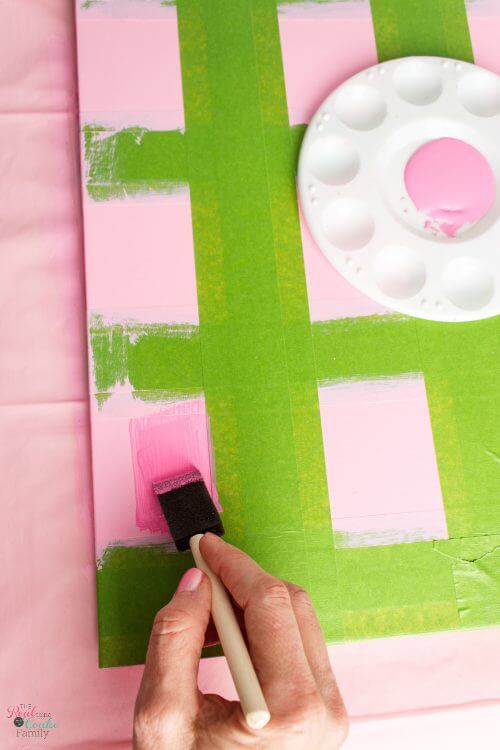
Paint the remaining squares with your second paint. The darker color paint.
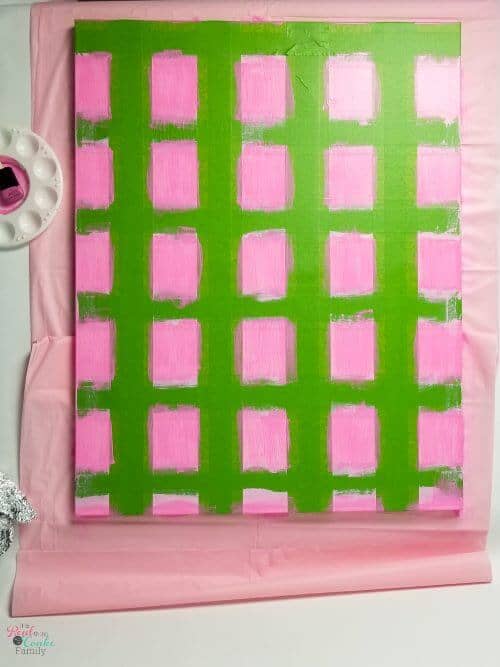
Mine took 3-4 coats to be as dark and even as I wanted.
Allow to dry completely.
Step 11: Remove tape
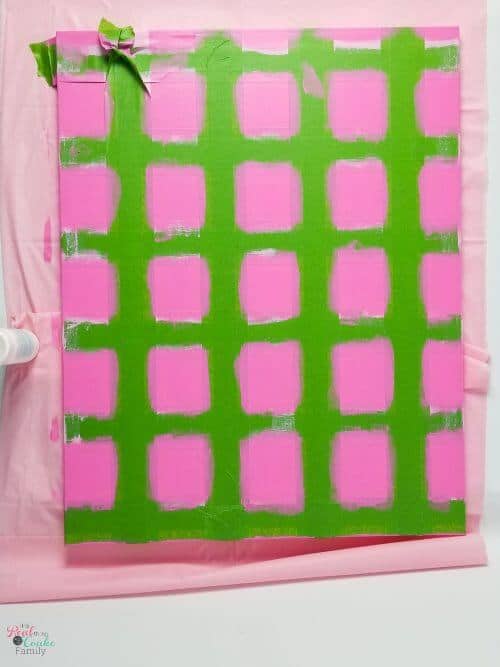
It takes a little patience to remove the tape because it is all layered on top of each other, but it is also super fun!
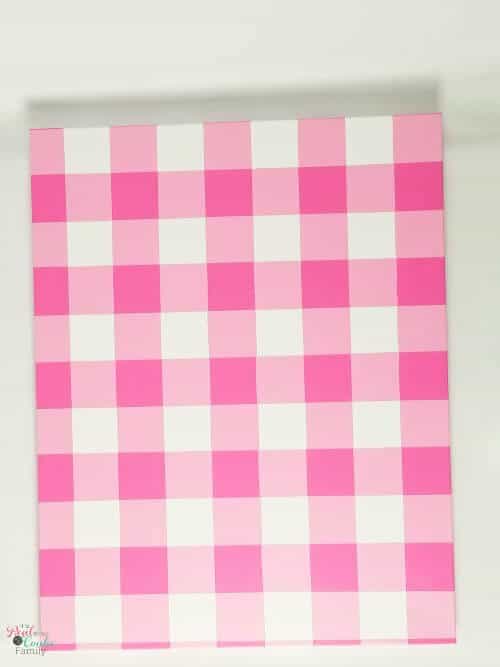
Voila! Gingham canvas!
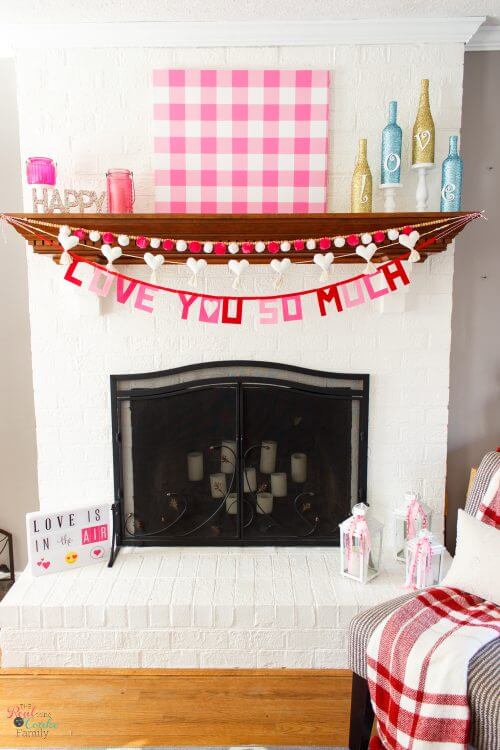
As I said, I wanted to put mine above my mantel which the colors pop on the white paint from our makeover a few years ago.
Right now, my mantel is ready for Valentine’s Day, but I plan to use this all year round and change out the layers that I’ll be putting on top of the canvas.
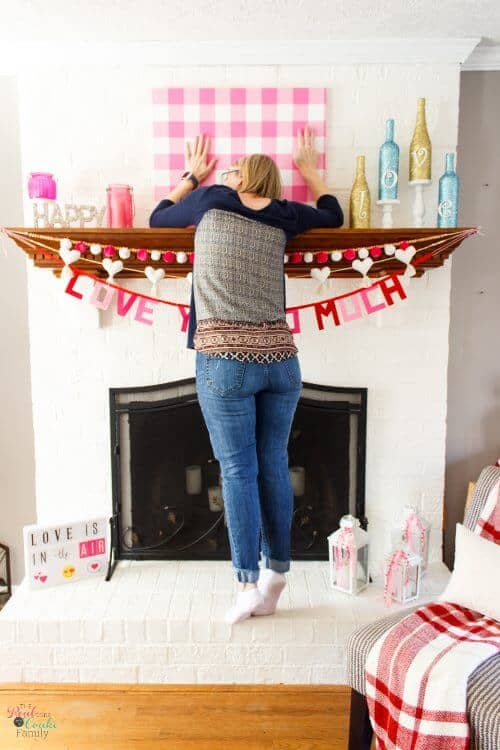
Have I mentioned how much I love ? my gingham wall art? Yep….I actually hugged it. ?
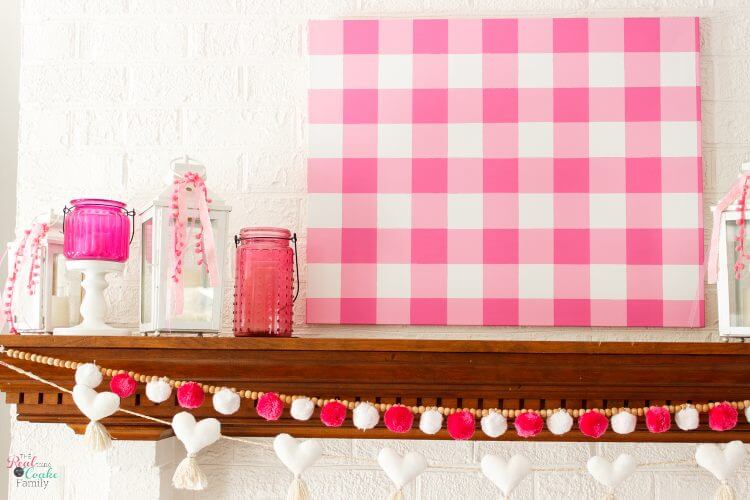
It’s going to look so good with the various layers I’ve thought of throughout the year! I love the little hurricane lamps up on the mantel. I don’t know why I never tried them up on the mantel before and I had even thought of getting rid of them since that is another old makeover I was getting a little bored with….but put them on the mantel and suddenly they feel new again.
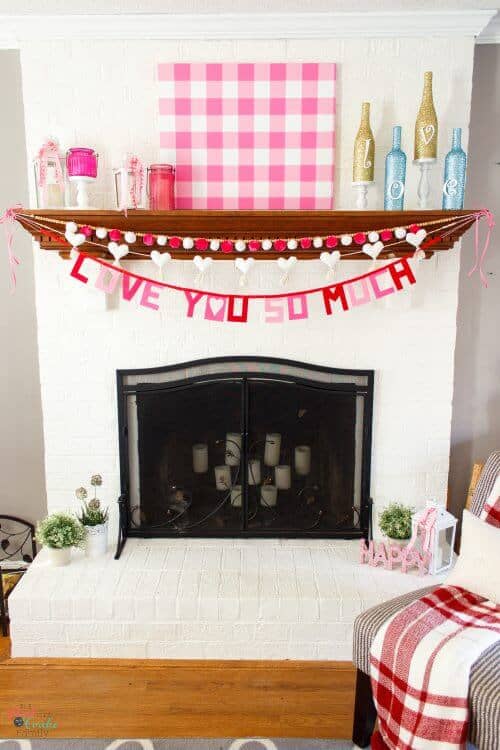
I still want to work on my Valentine’s decorations a little bit. I love the glittery wine bottles I made a few years ago, but I think I need something else in that same gold and blue to balance things out.
I swear I squeal with excitement every time I look in my living room and see this gingham wall art! I’m so happy I made it and I can’t wait to start adding the layers….that’s next week!
Have you ever painted gingham? What tips and tricks can you share? Leave me a comment below. Can’t wait to learn some new tricks!

Great idea! Thanks for sharing! I’m not big on pink, but I really like the effect, I might try another color…but, it is perfect for your mantel. BTW, I am also stealing your idea of using candlesticks to elevate your LOVE bottles, I’ve made several with different words and have always thought they were missing something…and now I know…elevation! Depth! So, thank you for sharing!
Oh thank you! I’m so glad you love it and that you’re changing it to colors that you prefer. That’s always my goal…show the idea, but for people to change it to suit their personality and taste.
I’m also so glad that the wine bottles on candle holders was helpful. While I love elevating some of them, those bug me because it is either both the gold or both the blue that are elevated. I wish I’d thought of that part when I made the bottles, but that is being so picky on my part. ? I’d love to see your gingham wall art when you make it. Tag me on Instagram @realcoake and I’ll be able to see it. Looking forward to it!
Just found you thru Pinterest and love this! Thanks for the tutorial.
Thank you! So glad you found me and that you love the gingham wall art. Have fun making it!
Thank you so much for joining the Happiness is Homemade Link Party. Susan craftingafamily.com
Thanks for hosting!
KC,
Well done and super cute! Now to figure out where I can add a little gingham… pinned for later )
Thanks,
Denise
Thanks! A little gingham is good anywhere! ??
Looks lovely and what a great tutorial! Thanks so much for sharing.
Thanks so much!
this came out very pretty and elegant for valentine’s. Looks perfect on your mantle. Thanks for linking gup with us at #OMHGWW and hope to see you next week!
Thank you! Thanks for hosting!
Super cute project I love how it really pulls the fireplace decor together. Happy Valentine’s Day, Kippi #kippiathome
Thanks! I love how cheery it makes the fireplace….and me! ??