• Home
  • Contact
  • Privacy Policy & Disclosures
  • Nav Social Menu

    • Email
    • Instagram
    • Pinterest
    • YouTube

Real Creative Real Organized

Creativity and Organization for Mom Life

  • Crafts
  • DIY
  • Organization
  • Travel
  • Mom Life
  • Holidays & Special Days
    • New Year’s
    • Valentine’s Day
    • Mother’s Day
    • Easter
    • Father’s Day
    • Fourth of July
    • Halloween
    • Thanksgiving
    • Christmas
    • Seasons
      • Spring
      • Summer
      • Fall
      • Winter
    • Olympics
    • Birthdays
  • Shop
Home » Holidays & Special Days » Birthdays » Real Easy Rapunzel Banners/Pendants

Real Easy Rapunzel Banners/Pendants

November 11, 2011 by KC Coake 6 Comments

Share away! 😍

  • WhatsApp
  • Email
  • Facebook

Read my other Rapunzel Birthday Party Posts:

Rapunzel/Tangled Birthday Party Favor Bags
Really Cute Lanterns
Real Rapunzel Birthday

Today I wanted to show you how I made those cute banners you may have noticed in the background of the pictures of Pumpkin’s 5th birthday. Real Rapunzel Birthday. You really could use this pattern to make pendants for any party or occasion. I know to some people this won’t be considered real easy as my title suggests, but I thought they weren’t hard, just some time and figuring out how to put them together.
I liked using these rather than the other versions I found. The other versions were print your own (which I didn’t want to use all that ink to print enough) or making them entirely from fabric. For me, this seemed like a nice in between version that I could handle making relatively easily.

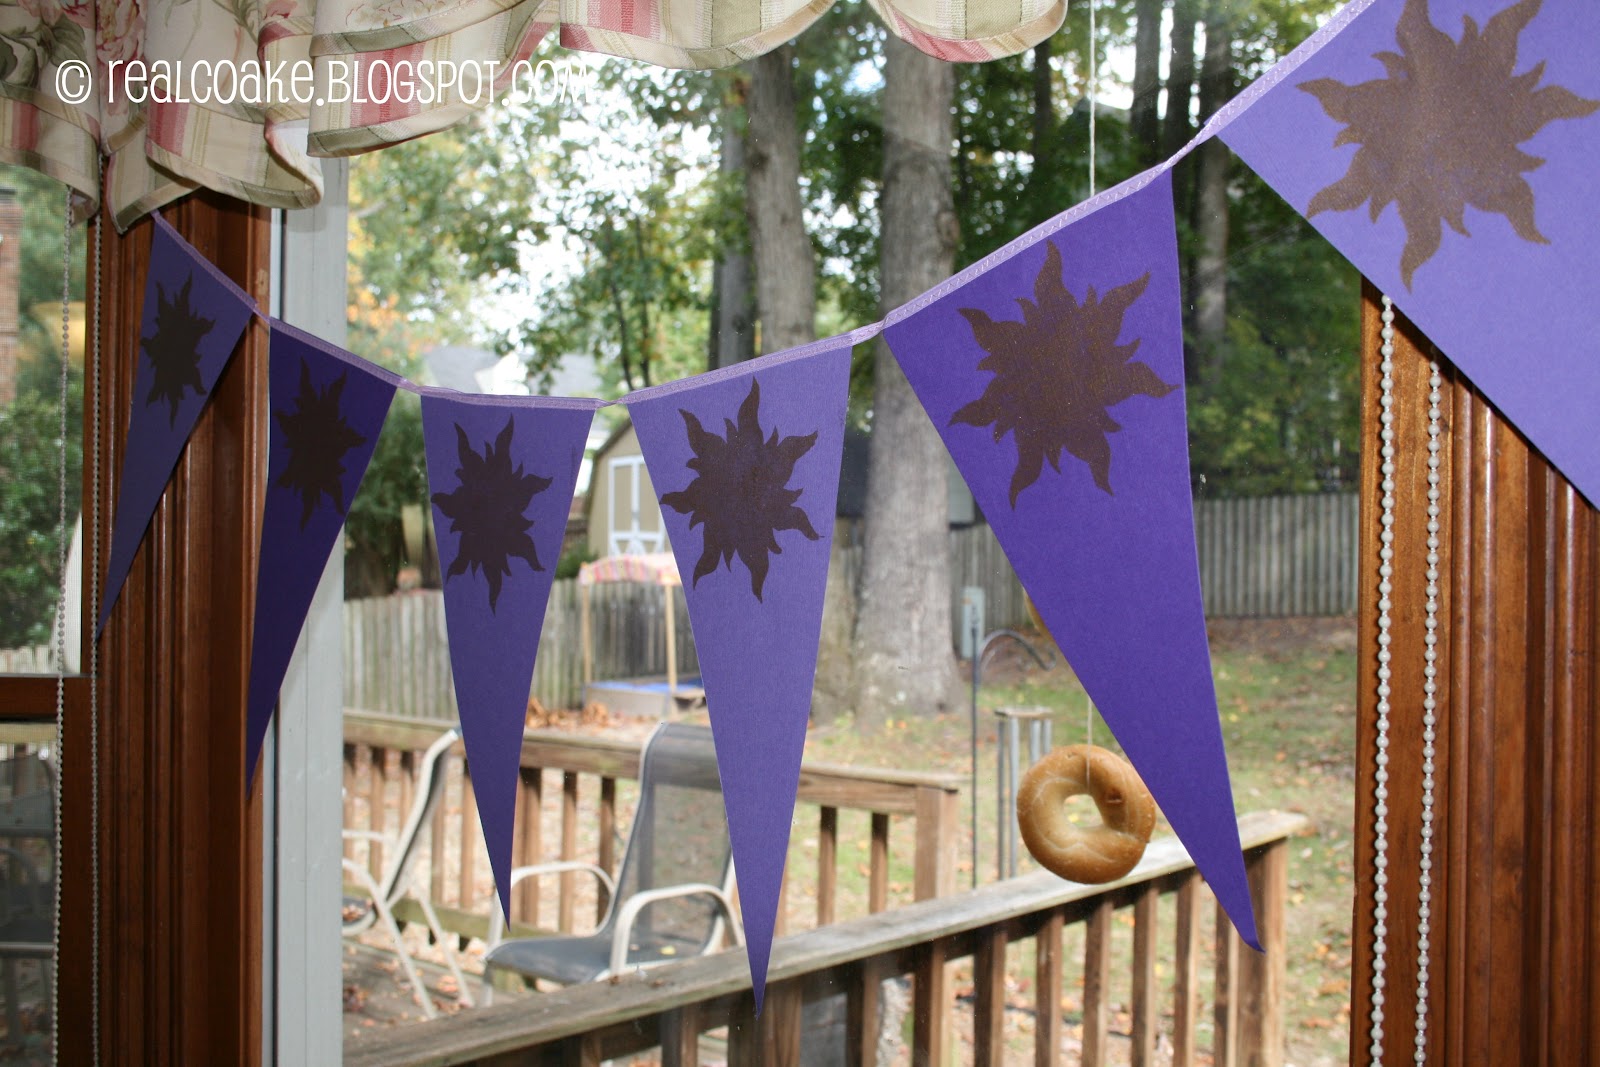
The banners

(and the bagel bird feeder outside…made by pumpkin. It
has nothing to do with the party, but since you can see it I thought
an explanation would be nice.)

I got the information on how to make the pendants from this site: Great Fun 4 Kids: Tangled Party
I also got my template for my sun from her site. If you right click on the picture of the sun on her site, you can save as and have your own template.

This seemed pretty straightforward, but once I got to making them, there was just a little more to it than I thought there would be. I thought I could add a bit to what was already on her site. She is from New Zealand where they use a different size paper. Her directions didn’t work with the 12×12 scrapbook paper that I was using. At least they didn’t work the way that I did it, maybe this is really straightforward to everyone else, but I found it a tiny bit hard to get them to all come out exactly the same.

To get 3 equal pendants out of each 12×12 piece of scrapbook paper, you need to do the following:

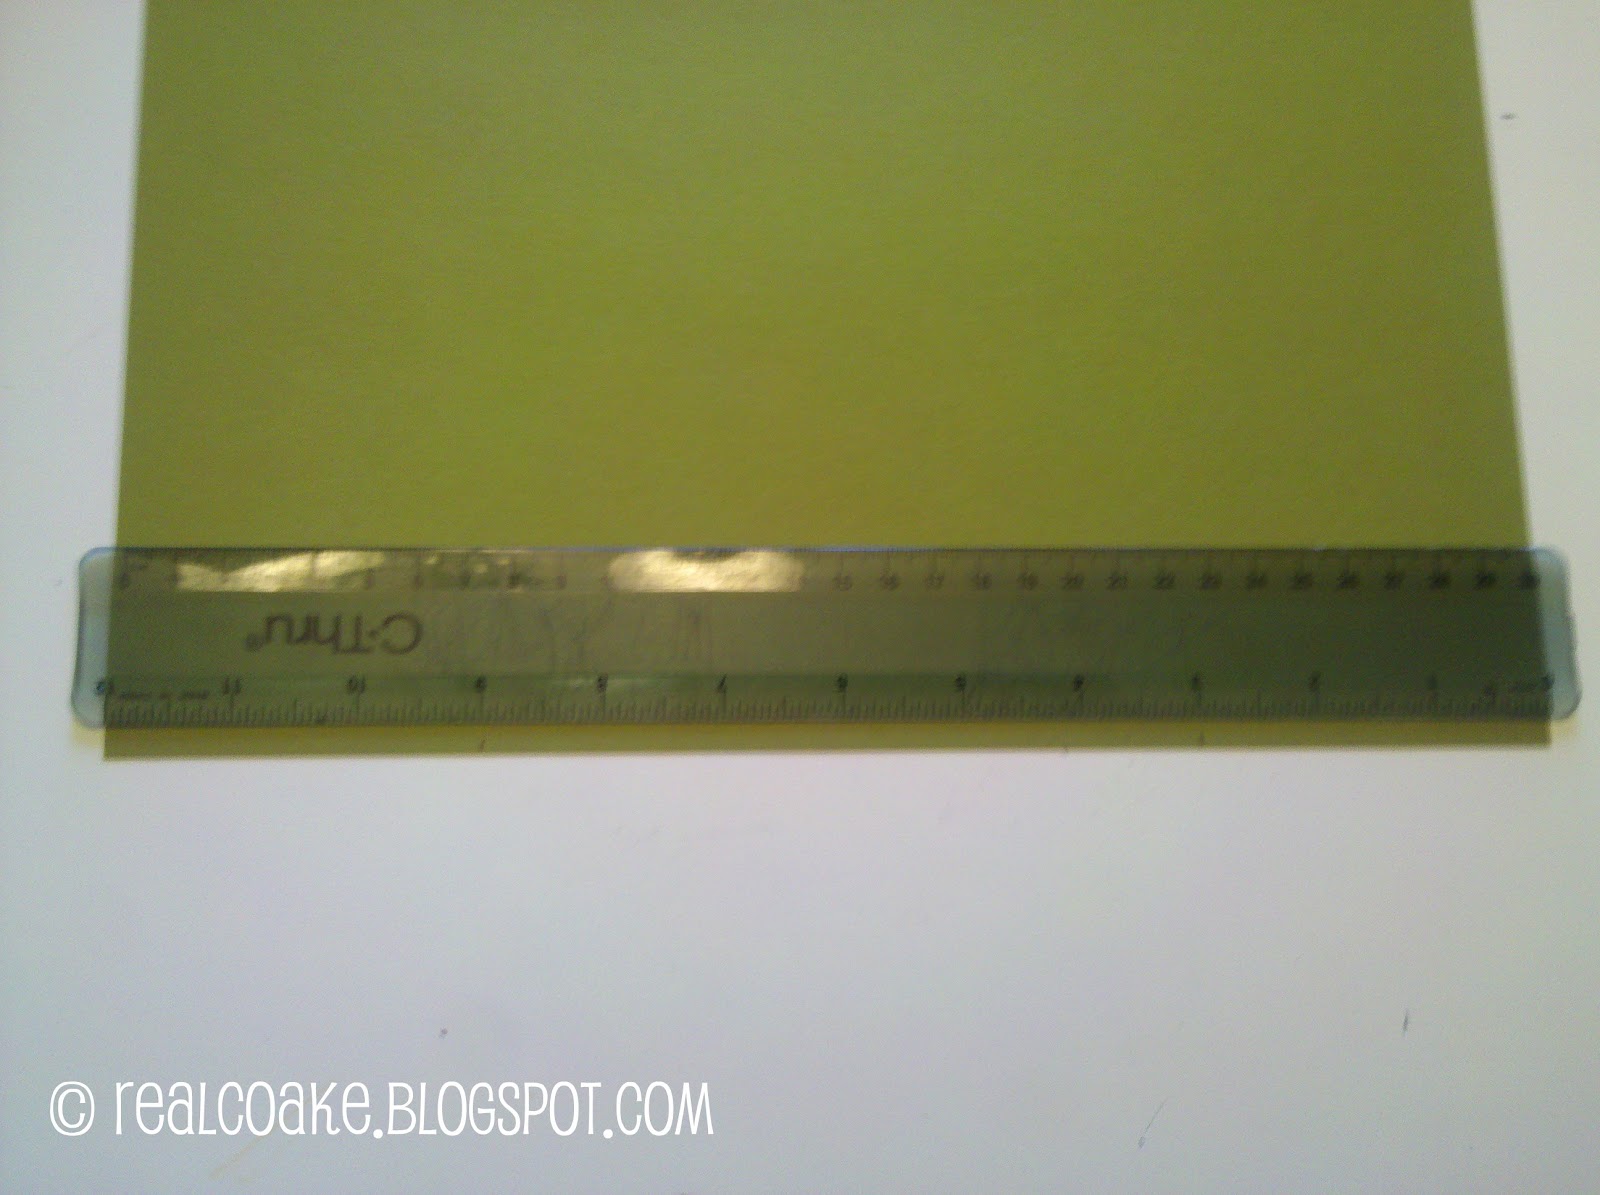
1. Use a ruler to mark the center point of the top of your paper.

2. At the bottom of your paper, mark at 3″ and 9″ as shown.

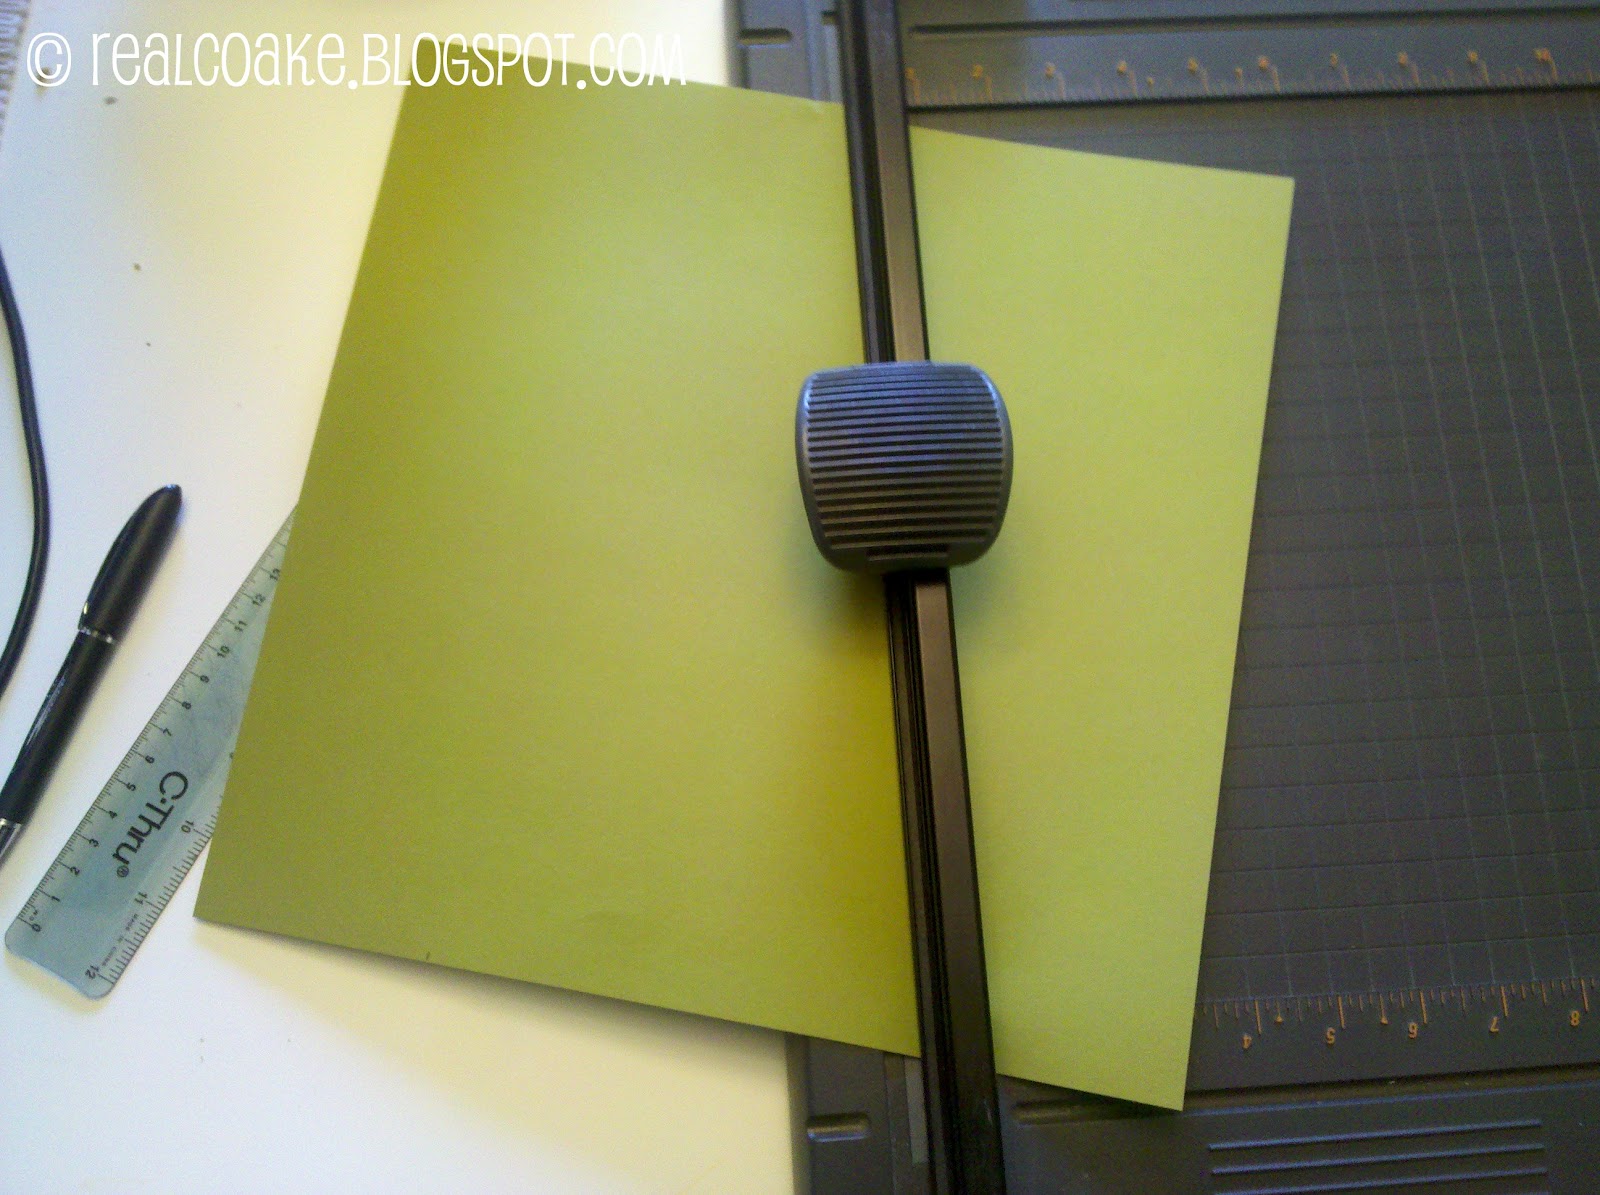
3.  Cut from your center point to your 3″ and 9″ points.

After making the first 2 cuts from the center point to the 3″ & 9″ points
4.  Take the piece on the left and cut it from the bottom (either the 3″ or the 9″ point) to the outer edge of the top of the paper.
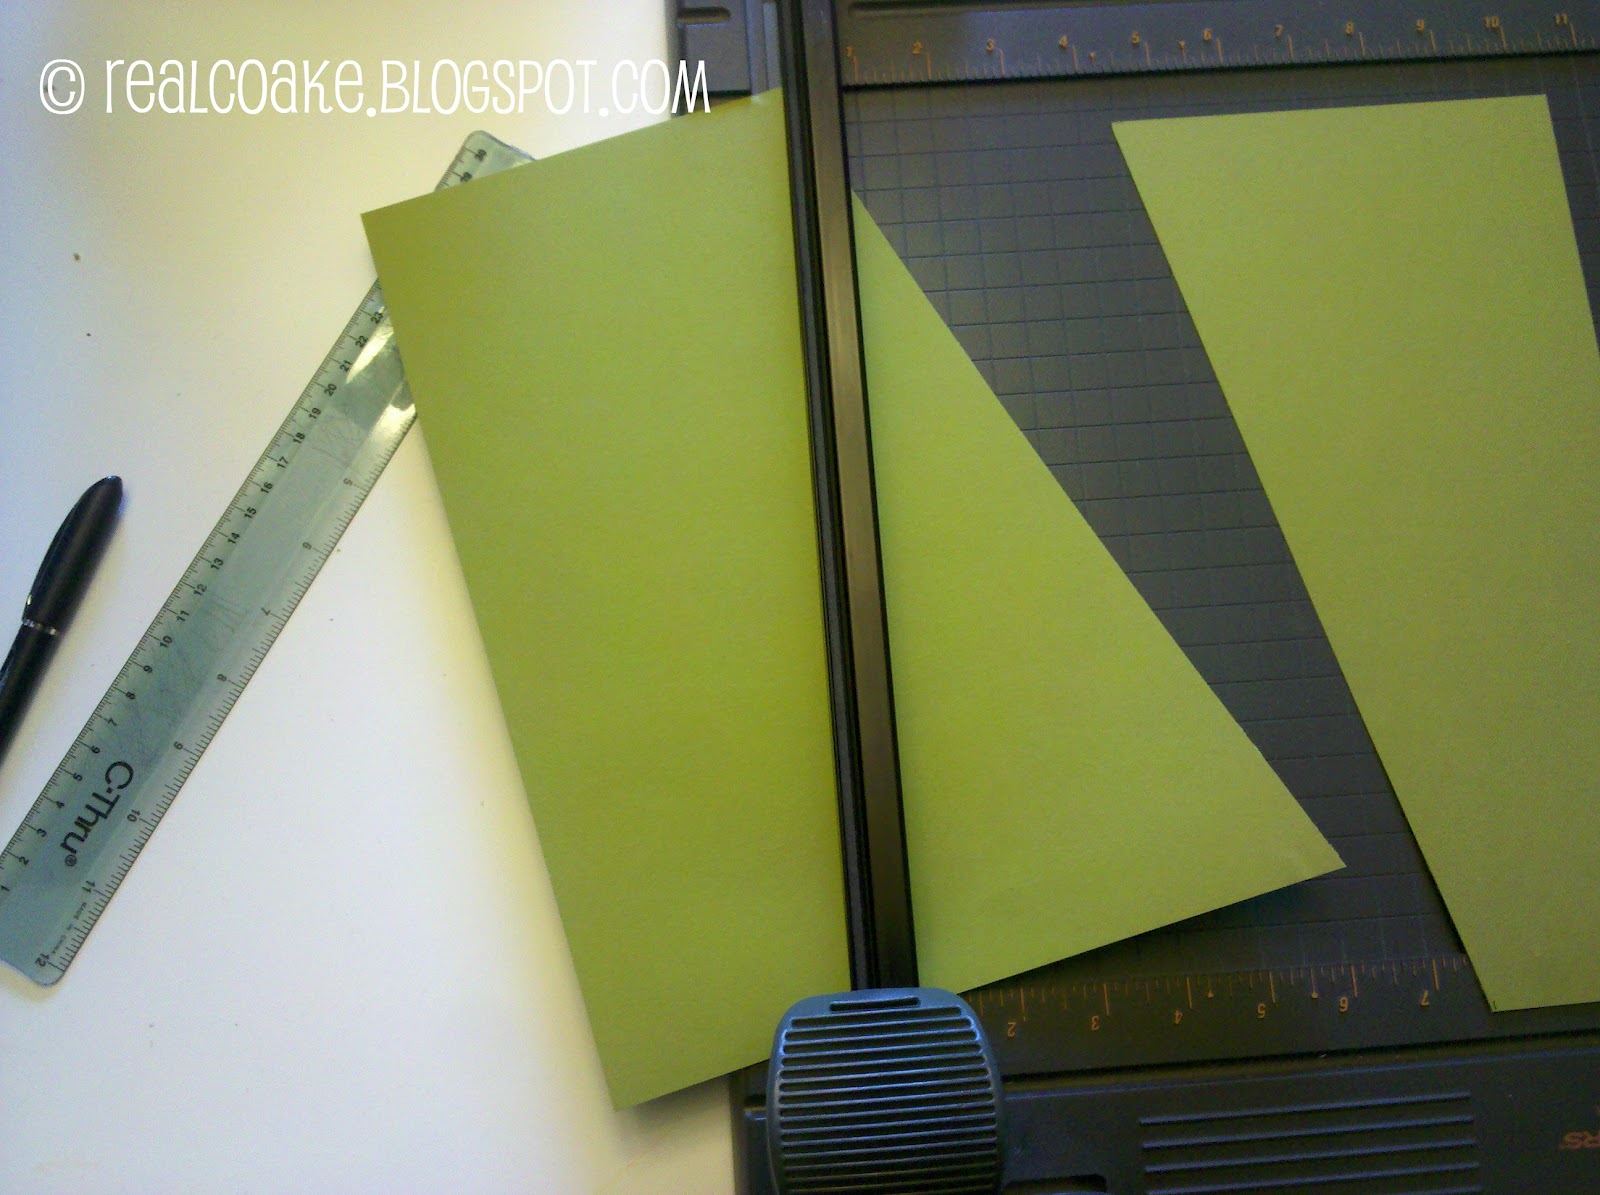
Lined up for the cut – it is lined up on the cutting mat with the blade and
bar for the blade up.
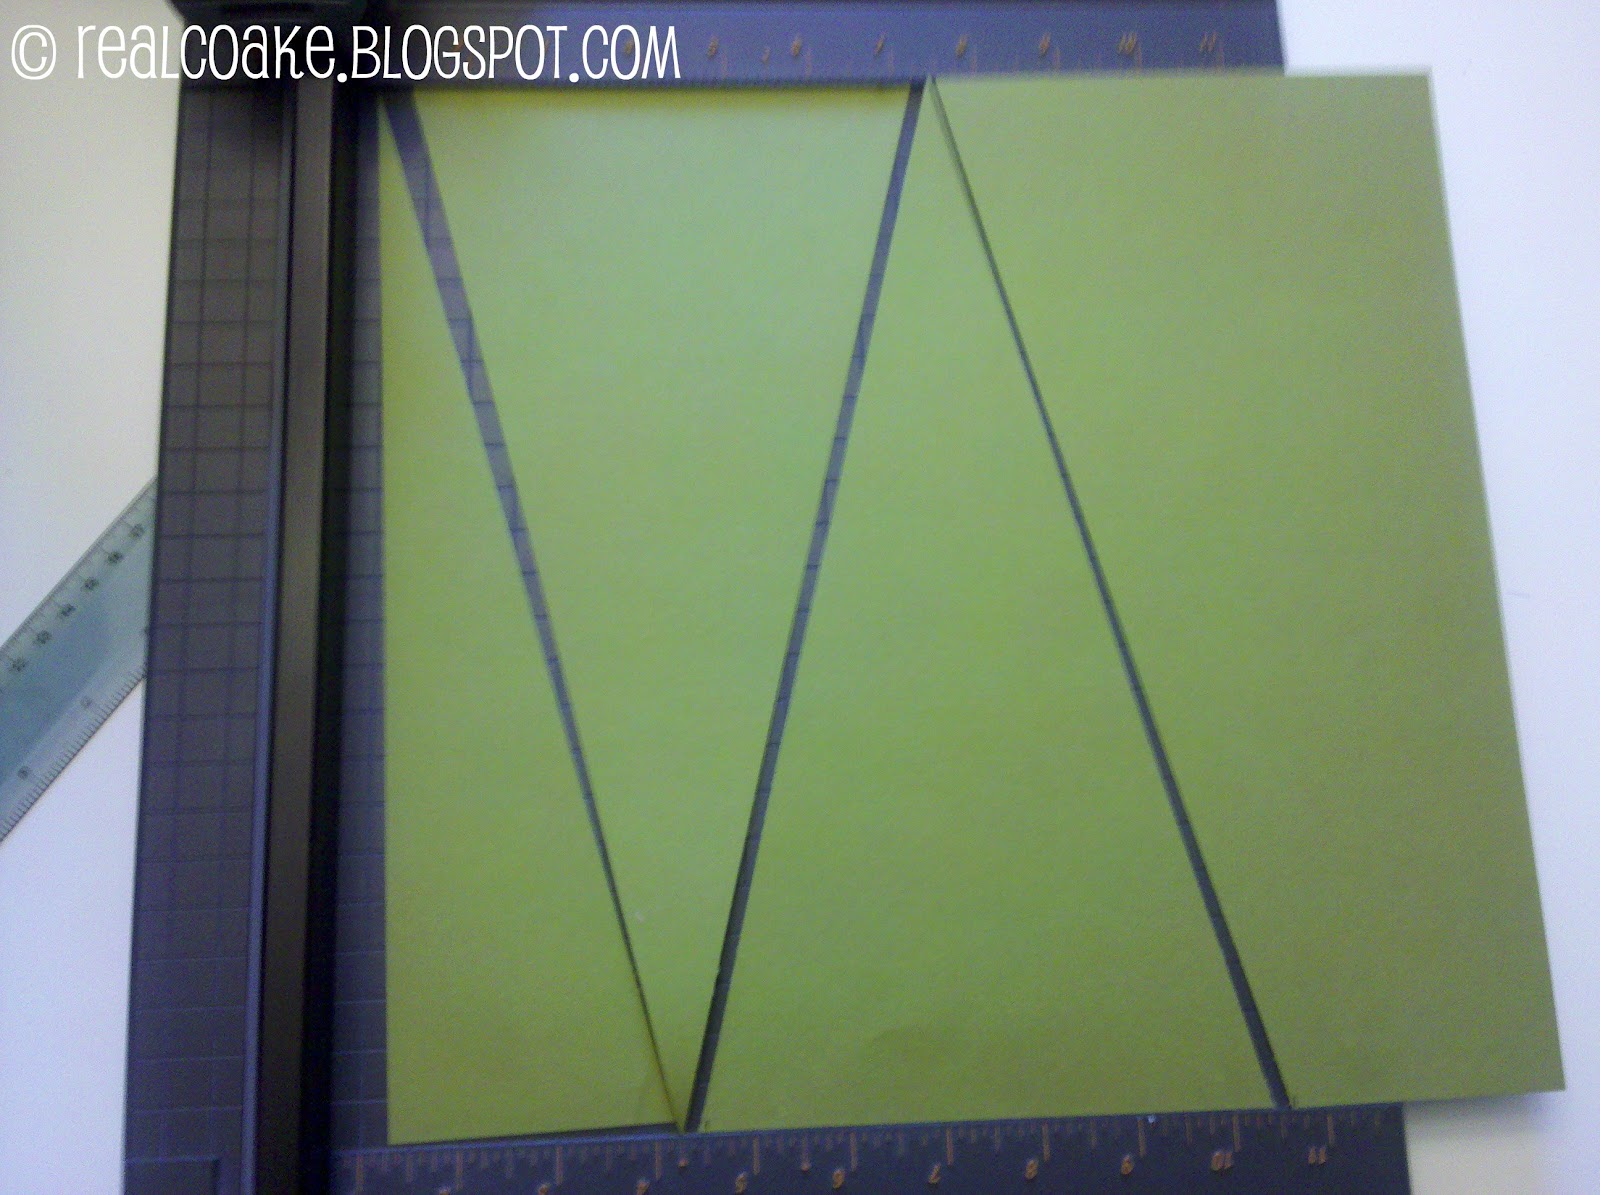
Here is what your 12×12 paper looks like now.
5.  Do the same thing for the other piece of paper – in my example it would be the right piece of paper.
6.  You are done and should have 3 equal pendants as well as 2 extra small pieces of paper.
Now that you have figured out how to cut out the pendants, it is time to add whatever decoration you want to add. In my case I was making these for the Rapunzel party. We chose to add the sun to our pendants. I printed the sun template out in a 4×6 format so it would be the right size to stencil the pendants. Mr T.3 then painstakingly cut out 3 of these from contact paper so I could use them as my stencil and have minimal paint leakage below the stencil. He has way more patience for these things than I am! Thank goodness!
To stencil the sun, I used regular acrylic gold craft paint. I have many stencil brushes, so I used one of those and made sure I was using it relatively dry. That means, dabbing most of the paint off prior to stenciling with it, then starting in the center and working my way out. If you have never stenciled before, I am sure you can google for how to stencil to get you going.
The last thing I did to complete my pendant, was to sew it to a ribbon that I used to hang it up. I used the same roll of ribbon that I purchased for $0.50 and used to tie a purple bow on the Rapunzel hair as part of the invitations. You can see that in this blog post: . If you have never sewn on paper, it is really simple. Just make sure you are using the right needle. I used a lightweight needle and a zig zag stitch and really liked the way it turned out.
Here is a picture of that detail:
Final product hung up – you can also see the lanterns I made
that I will blog about in another post
One more look at another pendant:
Now that the party is over, Mr T.3 seems to think we should sell these decorations to someone else planning a Tangled/Rapunzel themed party. I will let you know if we decide to do that as maybe someone out in my vast blog world might like to buy them.
More to come another day. I plan to let you know about the lanterns we made as well as the favor bags.
Enjoy your day!

More to Enjoy! 😍

10 Minute Craft Ideas ~ Glitter Snowflakes
Sewing a Pom Pomrific American Girl Doll Comforter

Share away! 😍

  • WhatsApp
  • Email
  • Facebook

Hi! I'm KC. I'm a single mom of 2 girls who loves all things creative. Whether it's making something crafty or tackling that DIY project, I'm gonna have some fun and stay organized in the process. 😊 Read More…

Follow Me:

  • Email
  • Instagram
  • Pinterest
  • YouTube
Previous Post: « ‘Real-‘ly Handy Birthday Party Organization Tip
Next Post: ‘Real’ly cute Lanterns »

Reader Interactions

Comments

  1. Cheryl Roth says

    November 12, 2011 at 2:58 am

    Nicely done DIY. I’m a new follower w/ GFC from the Lots of Lovin’ hop. Hope you follow back. Cheryl
    https://hearttoheartathome.blogspot.com/
    https://createabeautifullife.wordpress.com/ 

    Reply
  2. Mizz Review Lady says

    November 12, 2011 at 5:09 am

    Very nice! Beginning on the 21st I am going to be doing a Birthday Mania event with atleast one party related company review each day. Everything from favors to gifts to goodies!  I am now following you from the hop and would love a follow back over at https://mizzreviewlady-mommyreviews.blogspot.com/ Thanks 🙂

    Reply
  3. kccoake says

    November 12, 2011 at 7:23 pm

    Thanks!

    Reply
  4. kccoake says

    November 12, 2011 at 7:24 pm

    Thank you, I will check out your reviews. Sounds interesting.

    Reply
  5. Anonymous says

    January 6, 2013 at 5:16 am

    So did you decide to sell these? I am looking at making them soon….wanted to check first! You can email at val dot uria at gmail dot com.

    Reply
  6. K Coake says

    January 9, 2013 at 2:16 am

    They are gone…so sorry. I hope you have fun making yours. They were pretty easy to make.
    Take care,
    KC

    Reply

Leave a Reply Cancel reply

Your email address will not be published. Required fields are marked *

Primary Sidebar

Popular Posts

  • IKEA built in hack with storage and desk Great IKEA built in hack for simple shelving and desk
  • Valentine's ideas like this are perfect for our family. We can have some fun celebrating Valentine's day and have some fun together as a family. Looks easy, too! Activities for the Family ~ Valentine’s Bean Bag Toss

Meet KC

Hi! I'm KC, Welcome to my blog!
Click here to Learn More About Me…

Free Member Program:

Let’s Be Social

  • Email
  • Instagram
  • Pinterest
  • YouTube

Copyright © 2023 · Sprinkle Pro Theme on Genesis Framework · WordPress · Log in