I’m so super excited for today’s Real Organized post! I simply LOVE having areas of my home organized. I have wanted to organize my kitchen pantry since we moved into this house 9 years ago. I finally got to turn my dream into a reality. Today, I’m going to show you my pantry makeover, but more importantly, I’m going to give you great ideas for you kitchen pantry as well. Ideas that will not only organize your pantry but will help you plan your meals and your grocery list quickly as well as help you be a little more efficient when actually cooking.
Today, I’m going to show you my pantry makeover, but more importantly, I’m going to give you great ideas for you kitchen pantry as well. Ideas that will not only organize your pantry but will help you plan your meals and your grocery list quickly as well as help you be a little more efficient when actually cooking.
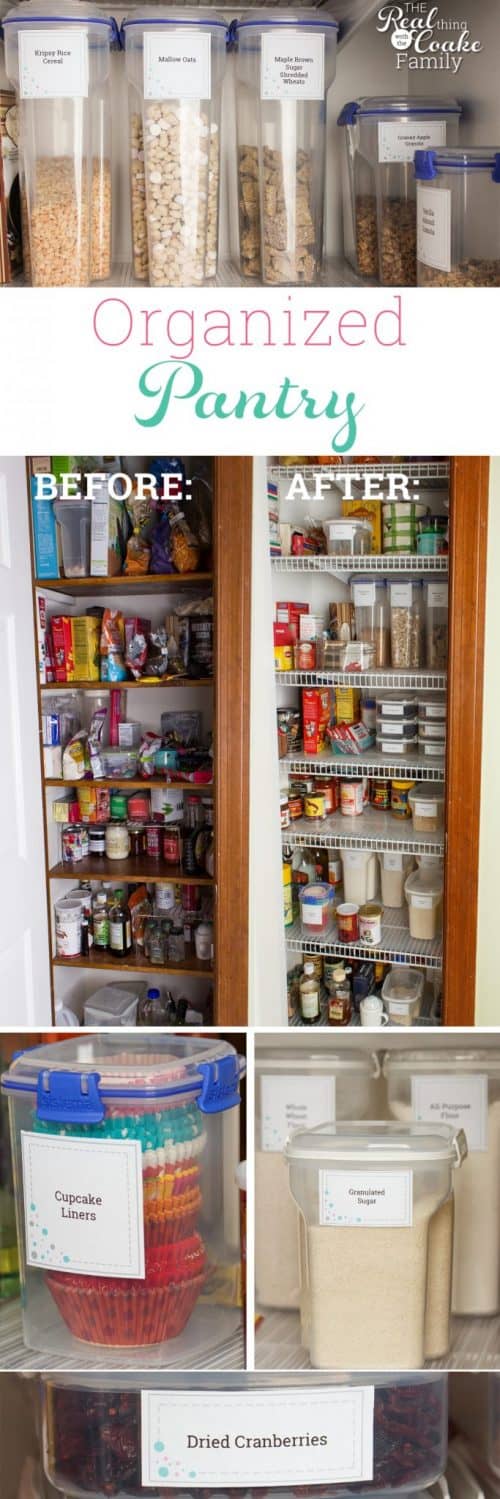
I don’t know about you, but I LOVE looking at the drool-worthy pantries on Pinterest. I’ve longed for an organized pantry for many years, but budget and time held me back. As I started the post with, I’m going to show you my pantry, but I know that not everyone needs or wants to do a DIY project like I did with mine, so within this post, I’m going to give you ideas for other pantries and other ways to scale this project down to work for your busy life. No matter if you need to do a full-scale pantry organization like I did, or a simple refresher, I’ve got tips and ideas for you to get that kitchen pantry organized.
Regardless of the state of your current pantry, organizing it or sprucing it up, will help you plan your meals for the week more efficiently as well as make an accurate grocery list each and every week. The goal with this slightly larger project is to make the planning, shopping and cooking your meals more efficient in the long run.
This post is part of my #RealOrganized series. If you want the whole series, just click the graphic above or you can click here to sign up to have each week of this series and all the freebies directly emailed to you. The goal of this series is for you to be able to organize some of the things that as moms, we have to deal with on a yearly, monthly, weekly, or daily basis. By getting these things organized we can free up time in our week as well as space in our homes and minds. The main goal is to feel more organized and less clouded as moms so we can find time and space to spend with our family as well as do things we love and find fulfilling.
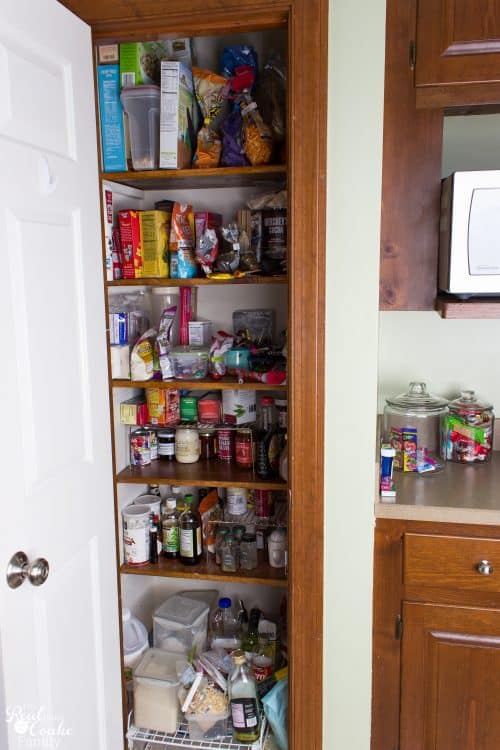
At my house, I have a small closet pantry. I know not everyone has a pantry. Some of you have a cabinet or two. Some of you have a nice walk in pantry. Take the ideas I share here and apply them to your space.
The biggest thing you need to remember is to buy according your space and your family needs. So, if you have a walk-in pantry and only 1 child, you may not need to buy in bulk even though you have the space. If you have 2 cabinets and 4 kids, you may not want to buy in bulk unless you have somewhere else to store it or it is things every eats up quickly. Use the space you have in the best way possible for your family.
As you can see above, my pantry was cluttered and overrun with stuff. It just happens over time.
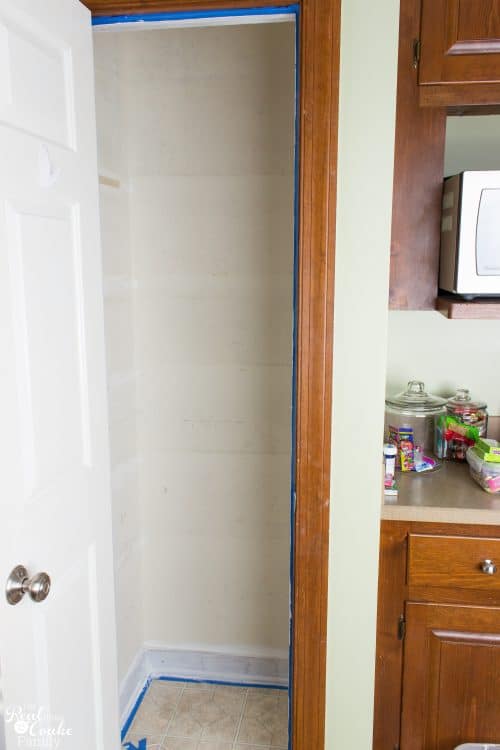
The first thing you need to do is go through EVERYTHING in your pantry. Yep, everything. I’m sorry. I know it is a pain in the rear end, but you need to get rid of that half bag of pasta and that jar of spaghetti sauce that expired in 2006. Right! Yep, we all have stuff like that in our pantries. Just let the stuff and the guilt go. I promise in the end you will be glad you did.
You will need to take everything out of your pantry while you are sorting. This is a good project for a Saturday or Sunday as you will probably not have time during the busy week for this one.
Now, if you do have a half bag of pasta and you want to add it to your meal plan for this week or next week to eat it up, go for it! But don’t keep things unless you will use them in the next week. No cheating and keeping a whole bunch of stuff that you want to use. Only keep that which you know you and your family will eat up in the next week. (This is of course excluding your staple items.)
In my case, the shelves were going so those got pulled out as well. I started with a fresh coat of paint. I went with a white in a semi-gloss. That way it will clean up easily.
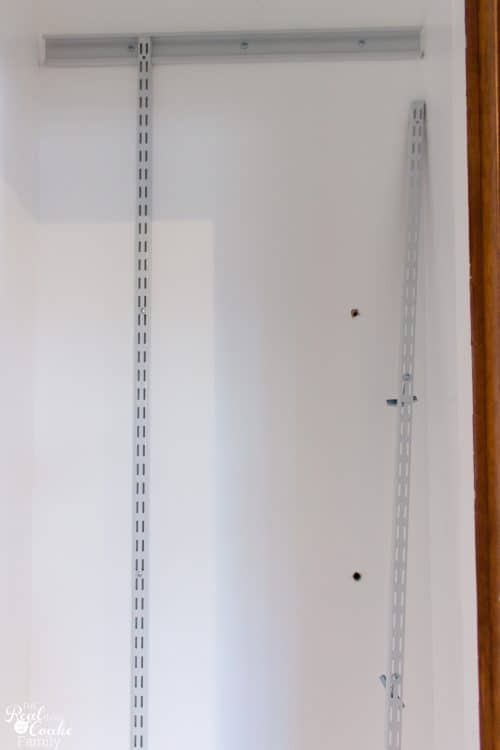
If you are doing a major reorganization, like I did, explore your options for shelving and select what works for your space.
I’ve told you about the Closetmaid closet systems (affiliate link) in other posts (like my daughter’s closet makeover). I love them. I love that as my needs change I can easily change things with the track system. It is fairly easy to install. You can design your own closet space via the Closetmaid site or pay a professional to design the space for you. Their fee for designing it for you is VERY reasonable.
If you are doing more of a freshen up, you may want to go ahead and paint shelves or at the least, I would recommend that you give your pantry or cabinets a good cleaning. You already have everything out, so it is the perfect time.
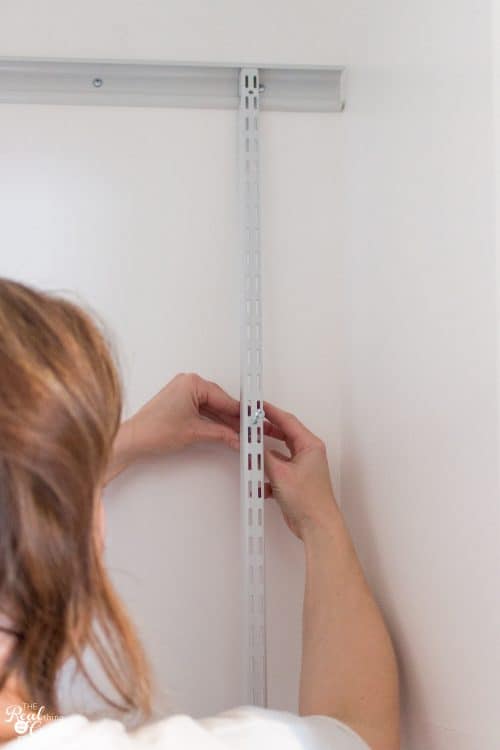
For those who are installing shelving, to install the track system, you first install the Hang Track. If possible, you want to go into studs. That wasn’t possible for us this time, but they have mounting hardware that is designed to be used if you are going into studs as well as if no studs are available. When installing the hang track, check and double check that it is level. That is the most important part.
After installing the hang track, you will install the standards or the part the shelf brackets will clip into. Once again it isn’t that hard. We had to use the mounting hardware for when you don’t have studs available. It was a bit harder than when you can just go right into a stud. I had a hard time getting the molly bolts through the holes I had pre-drilled, but eventually, I got everything in correctly and I was good to go to get things organized.
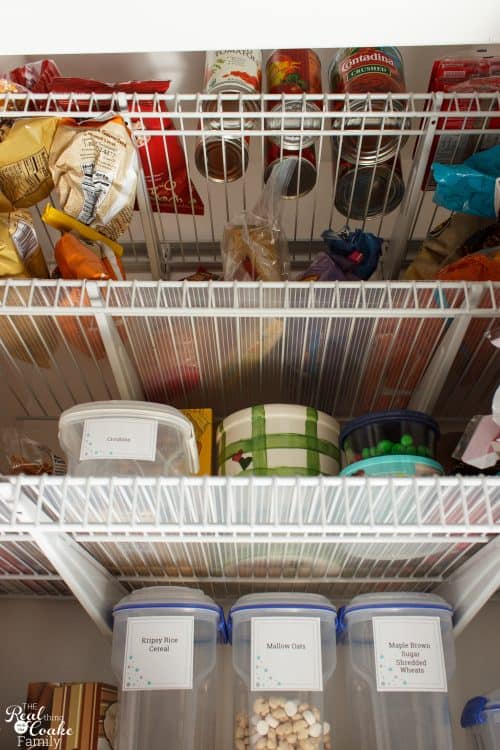
The last tip I want to give you about your actual space is to use ALL of your space and to think outside the box in terms of your space usage. For me, I came up with the genius idea, if I do say so myself, to add a couple of narrower shelves up at the top of our pantry. Our pantry measures slightly deeper than 16″. I selected the close mesh Closetmaid shelving (which is meant for pantries) that is 16″ deep for almost all of the shelving, but as you can see above I used some 12″ deep shelving up at the top.
That allowed me to eek out as much storage space as possible. Since my pantry goes to the full ceiling height, I can take advantage of that space up there for some storage of bulk items. By using the 12″ deep shelves, I can still access the items up there on a stool.
Think through your space. Are there ways that you can eek out some extra space that may not be for everyday items, but will help you organize and store the things you and your family need.
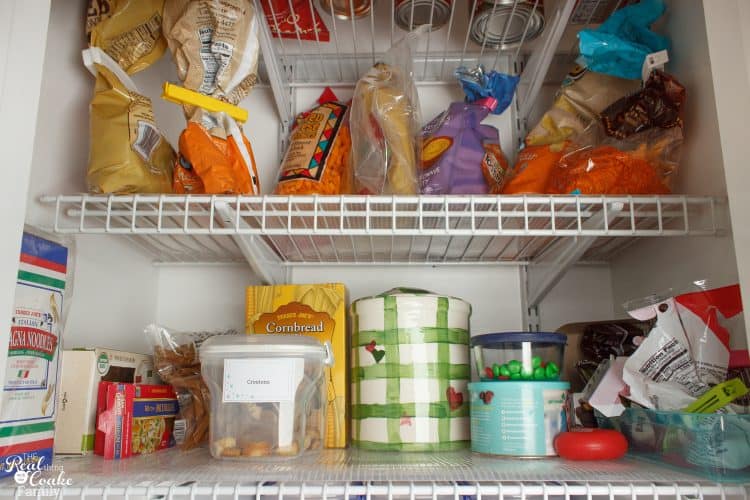
Just to show you more close up, what I mean, you can more clearly see the difference in the shelf width here. It works really well for this 12″ shelf to hold our bags of chips and such.
You may also notice that I put down a shelf liner on all of the shelves, except that top one with the extras(barely visible at the top of this picture). I did that so I could easily see through the shelving to see what extras I have. This is the shelf liner I used (affiliate link) which I LOVE and has worked great and still looks great over a year later.
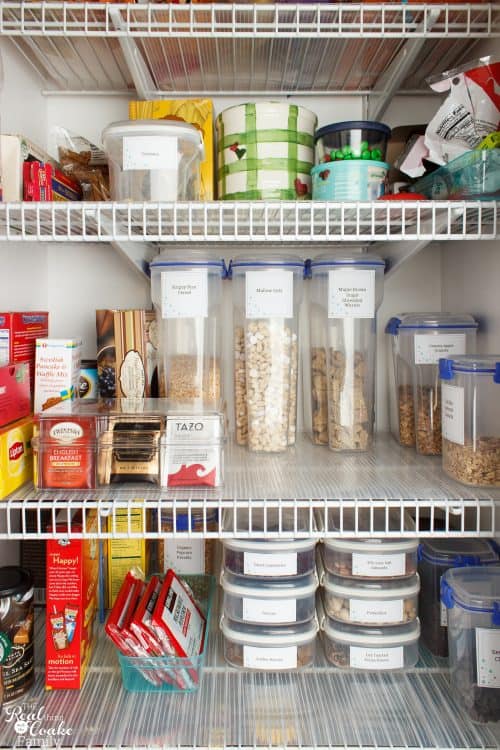
Now, it is time to put things back in your pantry. You will want to group like things together.
Honestly, you may need to live with everything out of your pantry for a few days to think through your plan and come up with how you want to group things.
That is what I did. I tend to work that way. I need some space and time to process what we use when so I can group things together.
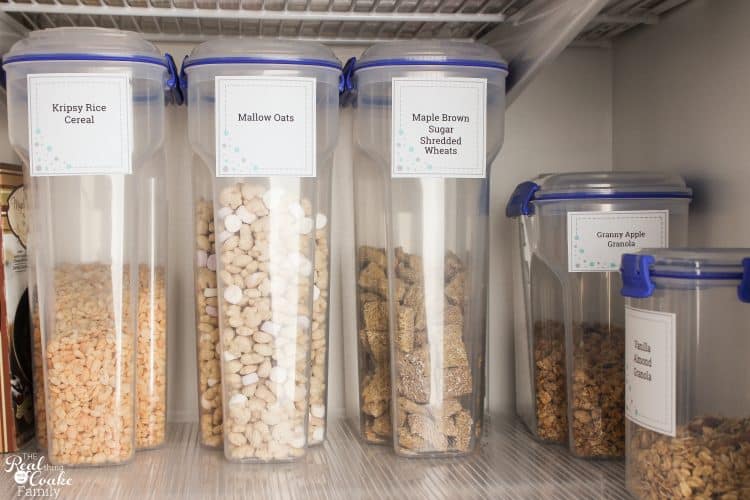
One easy grouping was our breakfast shelf. It contains all of our cereals, granolas, oatmeal, teas., etc. All the things that we use every morning for breakfast. Keeping it all together makes it really easy to grab what we need and get breakfast taken care of easily.
I highly recommend buying containers for storing your staple items. I’ve got the cute labels for them at the end of this post as well.
The containers keep your food fresh as well as make it really easy to see what you need when you are planning your grocery list for the week.
They also look great and a great looking pantry just makes for a smile to start your day. I swear I hear angels sing when I open my pantry…but that is just me. 🙂
These are the containers I used here: cereal, larger granola, smaller granola (affiliate links). The prices of these vary a ton on Amazon. I’m not sure they are the best deal, but at least you can see what they look like.
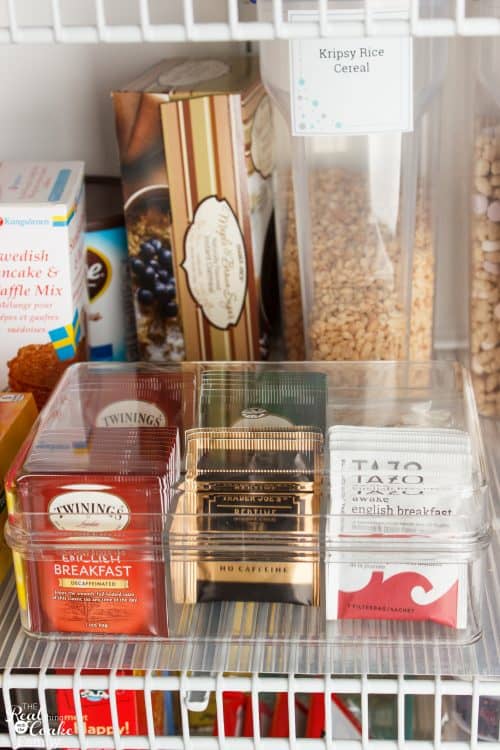
When you are organizing your items, look for unique storage solutions that will save you space and once again allow you to quickly and easily see what you need as you are planning your grocery list.
Also on my breakfast shelf, I have this fantastic tea caddy. I got it at The Container Store. I love it! I love that it saves me space as well as makes it really easy to see what tea I have and what I need.
Oh, and by the way, I got all of my containers at The Container Store. I did spend about $150+ on them all, which to me is a splurge, but a splurge well worth it. Almost all of the containers I used (except the tea caddy and blue ones) are Sistema and I’m quite happy with them.
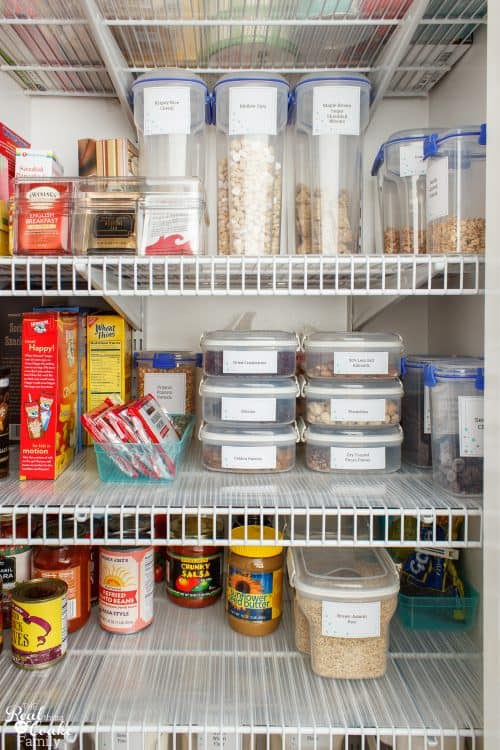
Another space planning tip for your pantry is to think through what gets used the most in your pantry, place those items on the easiest to reach shelves(especially for those who need to reach). If you have younger kids and want them to be independent, put snack items a bit lower so they can help themselves.
For us, the middle shelf is our snack shelf with some chocolate on the side. It is an easy to reach shelf for the kids to grab healthy snack options and feed themselves. One less thing for me to do and one less question for me to answer. Love it!
As a side note, really the chocolate belongs with the baking things, but even though it is now in containers, our dog ate a bag of chocolate chips when we used to keep them lower with the baking items. One $400 trip to the emergency vet is enough for me to NEVER have chocolate within reach of our dog again. Keep things like this in mind when you are planning your space.
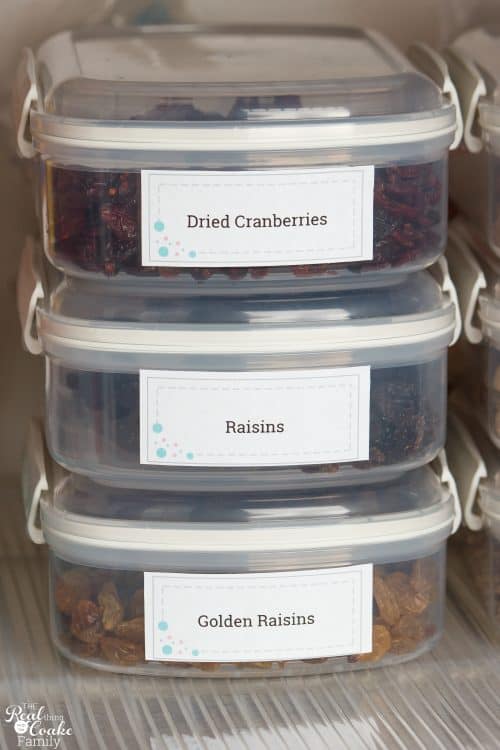
If your budget can swing it, take your staple items out of those plastic bags and store them in containers. It makes them super easy to find and use as well as know when we need more now. Plus, the labels are just so cute! I have them for you at the bottom of this post.
These containers are the toppings and toppings duo containers (affiliate links).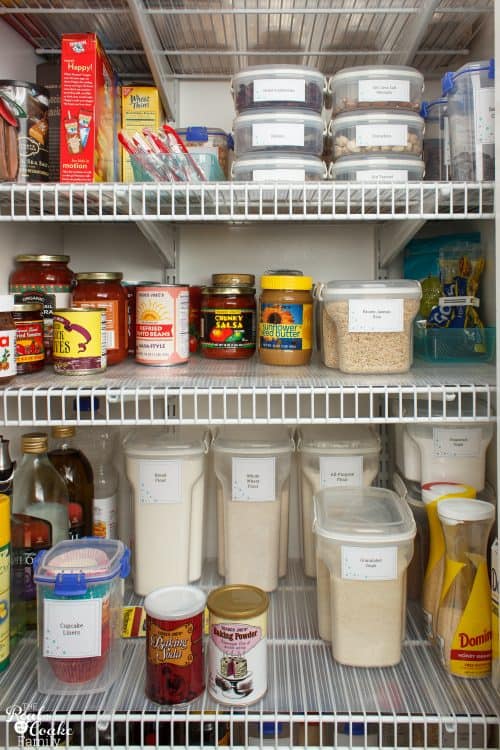
Continuing to group like things together, I made a shelf that was more narrow and I keep all of my canned goods on that shelf. I don’t need the same height as I do for the cereal shelves, so I can save some space here.
Remember that, if your system is modular, you don’t have to have all of your shelving spaced the same distance. That can help you add an extra shelf and therefore more storage space to your kitchen pantry.
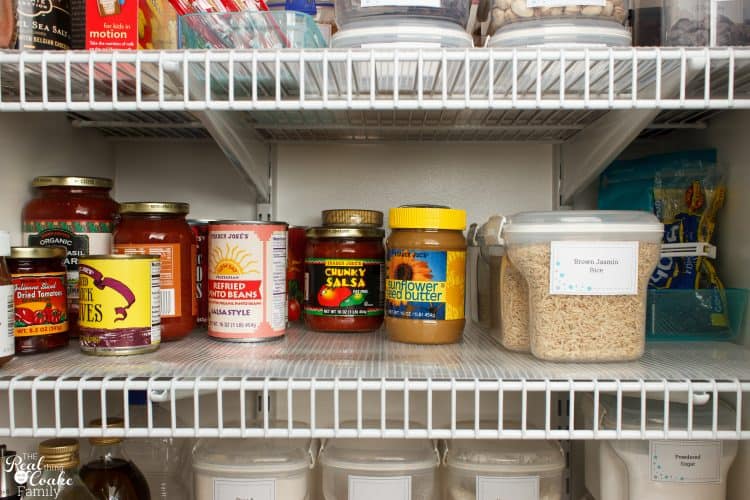
When adding groceries to your pantry, stock from the back. That is a little tip from grocery stores. When they add new items, they add them to the back of the shelf so they sell the older stuff and continue rotating product that way. Your pantry should be the same way. That way you won’t end up with the jar of peanut butter from 2010.
As you can in this close up of the canned goods shelf, I put my rice in containers.
I also had a few items that I don’t use enough of to justify having a container for them. I found that I can corral small bags that I’m not putting in a container in a small open container. Do you see that little blue container to the right? That container holds Cous Cous and an open bag of beans. It corrals them and keeps them neat and out of the way at the same time.
The containers for the rice are actually considered to be part of the Sistema baking line and they are labeled as being for icing (affiliate link). They work perfectly for the rice, powdered sugar, and my cornmeal.
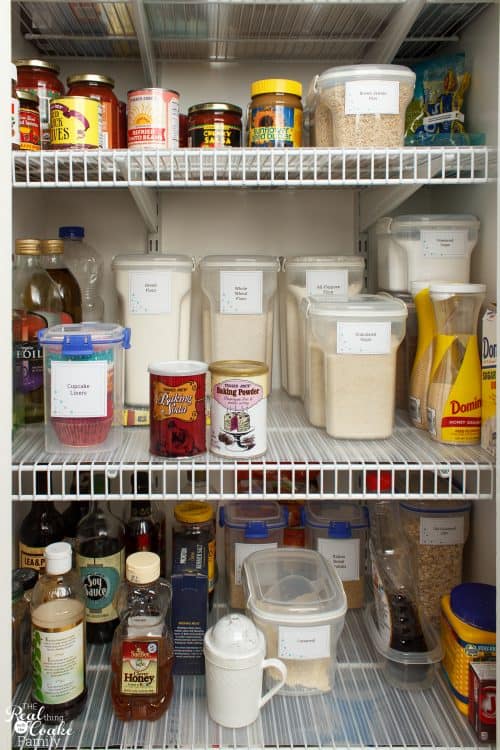
I’m sure you are sick of hearing it, but group like things together. Baking supplies are so great grouped together. It will make your cooking time way more efficient to know exactly what you have and where it is in your pantry.
I know you hear them, too….the angels singing! Look at my baking shelf! Could it be any more awesome? If you go back and look at the before picture, most of these items were on those collapsible shelves on the floor. I tend to have at least 3 kinds of flour on hand as well as 3 kinds of sugar, etc. It gets messy. This is not. 🙂
It honestly makes it so much easier when I go to cook. With things in containers and the space more light and bright, I can easily see what I have as well as what I need.
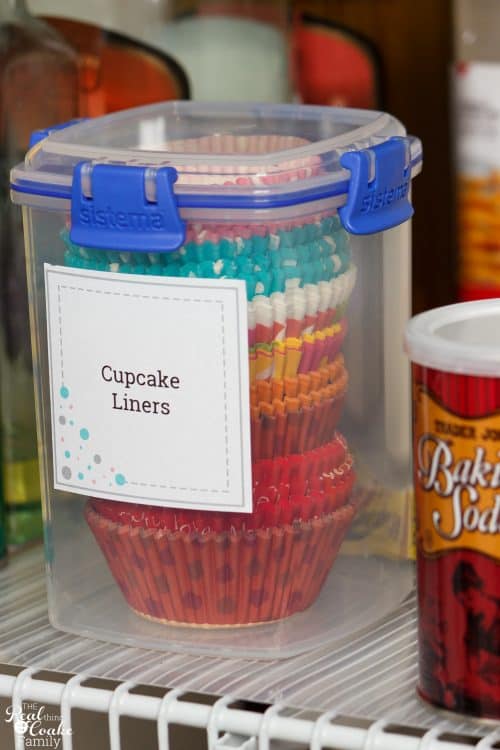
Have some fun with your organization!
I seem to have a thing for cupcake liners. I put the cuteness into a bin to keep them neat and tidy and let me see the cuteness.
This is the same container (affiliate link) I used for the granola as well as bread crumbs and chocolate chips.
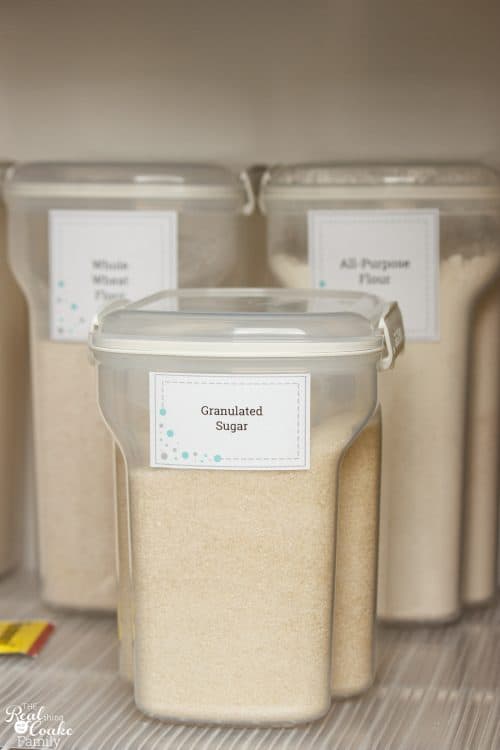
The last thing I highly recommend is that you label everything! I’m not kidding. Label everything.
Not only does it look really nice (and make those angels sing!), but it means you know exactly what is in each container. No guess work.
My sugar and brown sugar are contained in the Sistema Bakery Sugar container (affiliate link).
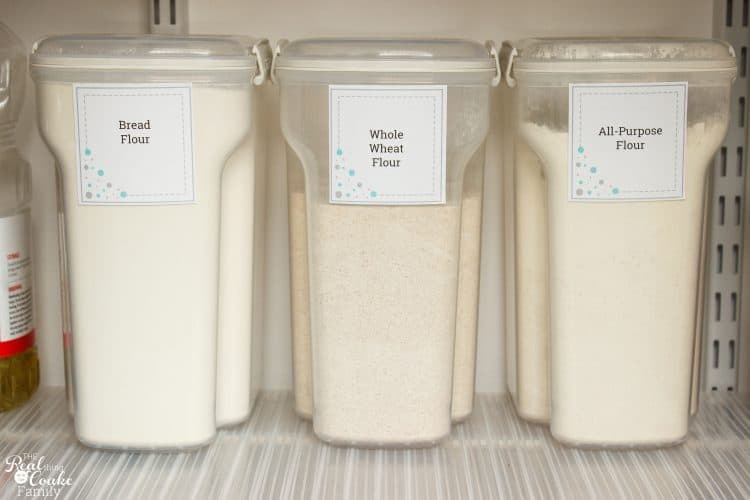
Why hello flours! Nice to meet you. 🙂 They are just sitting there all labeled and inspiring me to make something.
The flours are in the Sistema flour container (affiliate link).
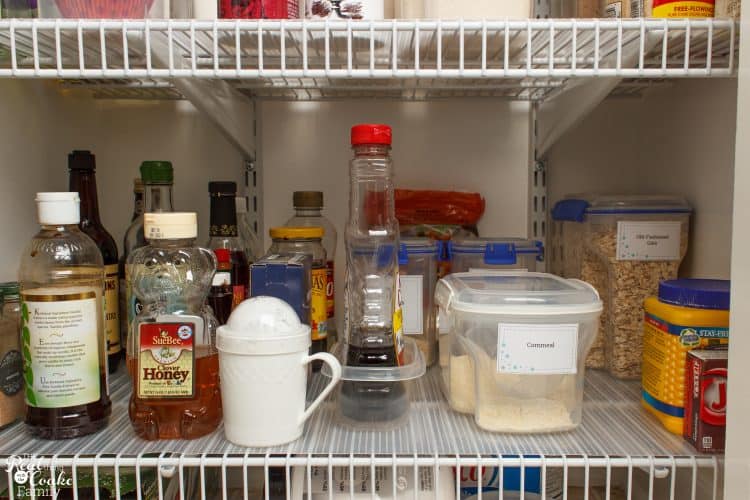
Continuing with the broken record…I’ve grouped like items together. The bottom shelf has all of the bottles that are needed for cooking as well as oats, cornmeal, and bread crumbs. Probably more of a cooking shelf where the shelf above is a baking shelf.
The bottom shelf has all of the bottles that are needed for cooking as well as oats, cornmeal, and bread crumbs. Probably more of a cooking shelf where the shelf above is a baking shelf.
Tip – See how our bottle of syrup is in a little plastic bin (one that is meant for storing food)? That keeps the syrup from getting on the shelf. I don’t remember where I saw that idea, but I thought it was a genius idea and have been doing that for quite a while now. Works great!
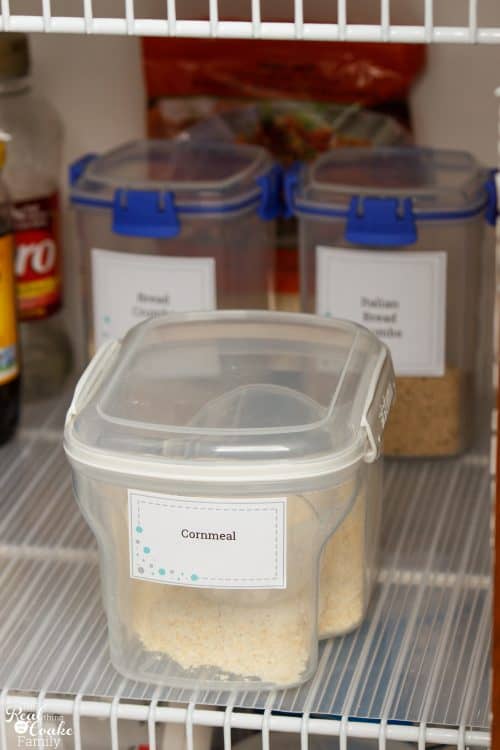
The labels make it so easy to know what is in each container. In case I didn’t drive that point home enough yet, label everything. It may seem like an unnecessary step, but when you can’t remember what is in the container or the kids are constantly pestering you to know which cereal is which, you will wish you had taken the time to label.
They are also adorable and add a little bit of joy to my day when I see them.
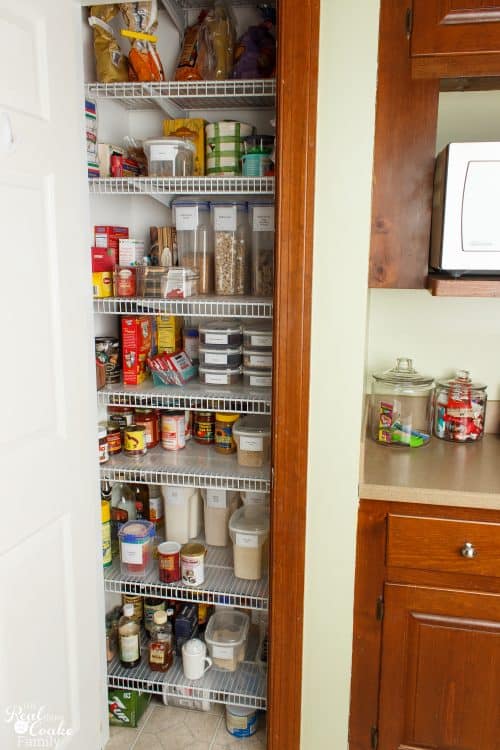
Now, your pantry organization may not be as dramatic of a makeover as mine, but I promise if you take the tips I’ve given you in this post and apply them to your space, you will be happy with the end result.
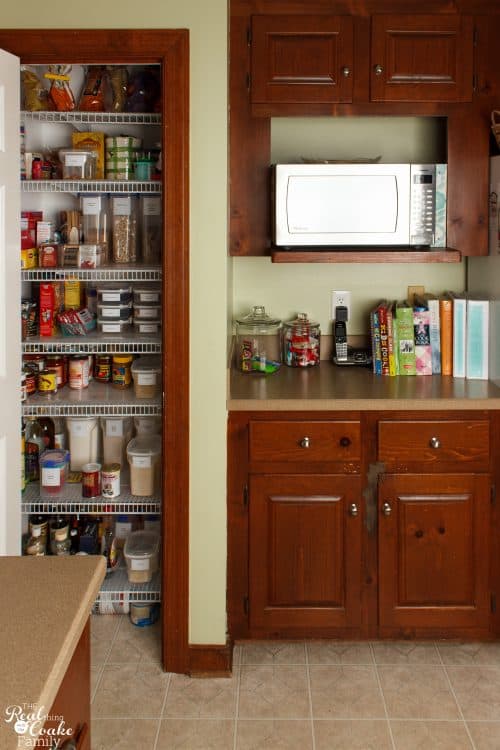
You will also be happy that you know what you have. You will be able to see what is in your pantry. That means that you will see that half used bag of pasta and you will plan a meal to use it up next week.
An organized pantry means you will have like things grouped together and be stocking your pantry from the back. That will help you plan your grocery list and save you money by not overbuying and not wasting money on things that make it to the pantry only to expire before you find them again.
It also means you will save time when cooking because like thing will be together, making it more efficient to get what you need….not to mention you won’t spend 15 minutes looking in the pantry for that can of beans you know you bought.
While I realize that organizing your kitchen pantry is NOT a 30-minute project like I have tried to keep most of these Real Organized projects, it is one that will make a difference on a weekly if not daily basis in your life.
To inspire you to hear those angels sing when you open your pantry, I’ve got two different label sets for you. They are fully editable so you can print labels for anything and anywhere in your house…not just your pantry. You can also pick the color of your font as well as the size and the actual font. That allows you to match your style. Then the angels will be singing in your style. Awesomeness! 🙂
Better yet, you can snag the whole Organizing Big Bundle at a steal of a price and get all the printables in this Real Organized series in one place….so many great organization tools in one big bundle. You are going to love it! Just click below to see the Big Organization Bundle.
I’d love to see before and after (or just after if that is all you have) pics of your organized kitchen pantry. You can share them on Instagram and tag me (@realcoake) as well as use the hashtag #RealOrganized. As long as your account is a public account, I will see them. I’m super excited to see your organized pantries!


Ok KC,
We are soul sisters! I look at your pantry and my stomach does flip flops. I have containers and usually cut out the package title and cooking instructions (like on wheat berries) and tape them to the container, but I simply love your labels so when I get back from my ski vacation, I think I will get your labels and make all my containers gorgeous. Everyone thinks I am a mental case but you and I are the new normal!!!!!
Additionally I have two daughters! They are grown now and my oldest has labeled all her containers in her cupboard. Oh, the apple does not fall farm from the tree!
Now, on the creativity level, I am handicapped so maybe I will gain some knowledge from you.
Hugs.
🙂 I love that you left me this comment! So nice to meet a soul sister! I love that your daughters have continued the trend. It will be fun to see what my daughters do when they are grown and on their own. Yes, you and I are the normal….we have to be…we can’t be crazy. 😉 So glad you enjoyed my post and my containers and labels. Your comment put a smile on my face today. Thanks!