I shared this post last week at The Frugal Girls. In case you didn’t make it over to read it, I’m sharing it with you here today. I want to show you How to Recover a Chair. It is not a hard process, but it does take a little bit of time and a dose of patience. Not always my strong suit(the patience part), but sometimes you just gotta do what you gotta do, right?
I don’t know about you, but in addition to my holiday crafting, baking and activities, I’m also trying to get my house ready for company and for the holiday’s.
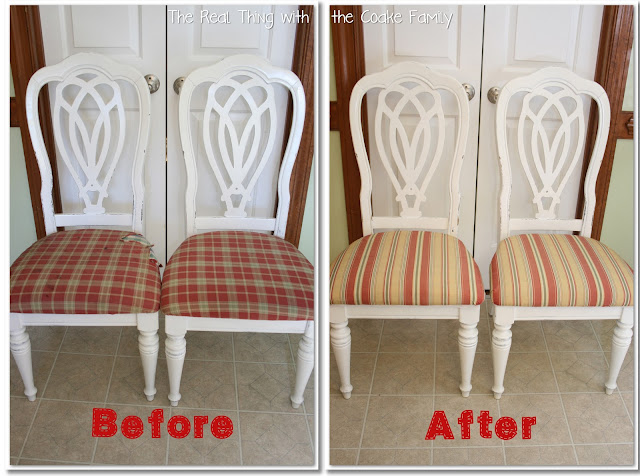
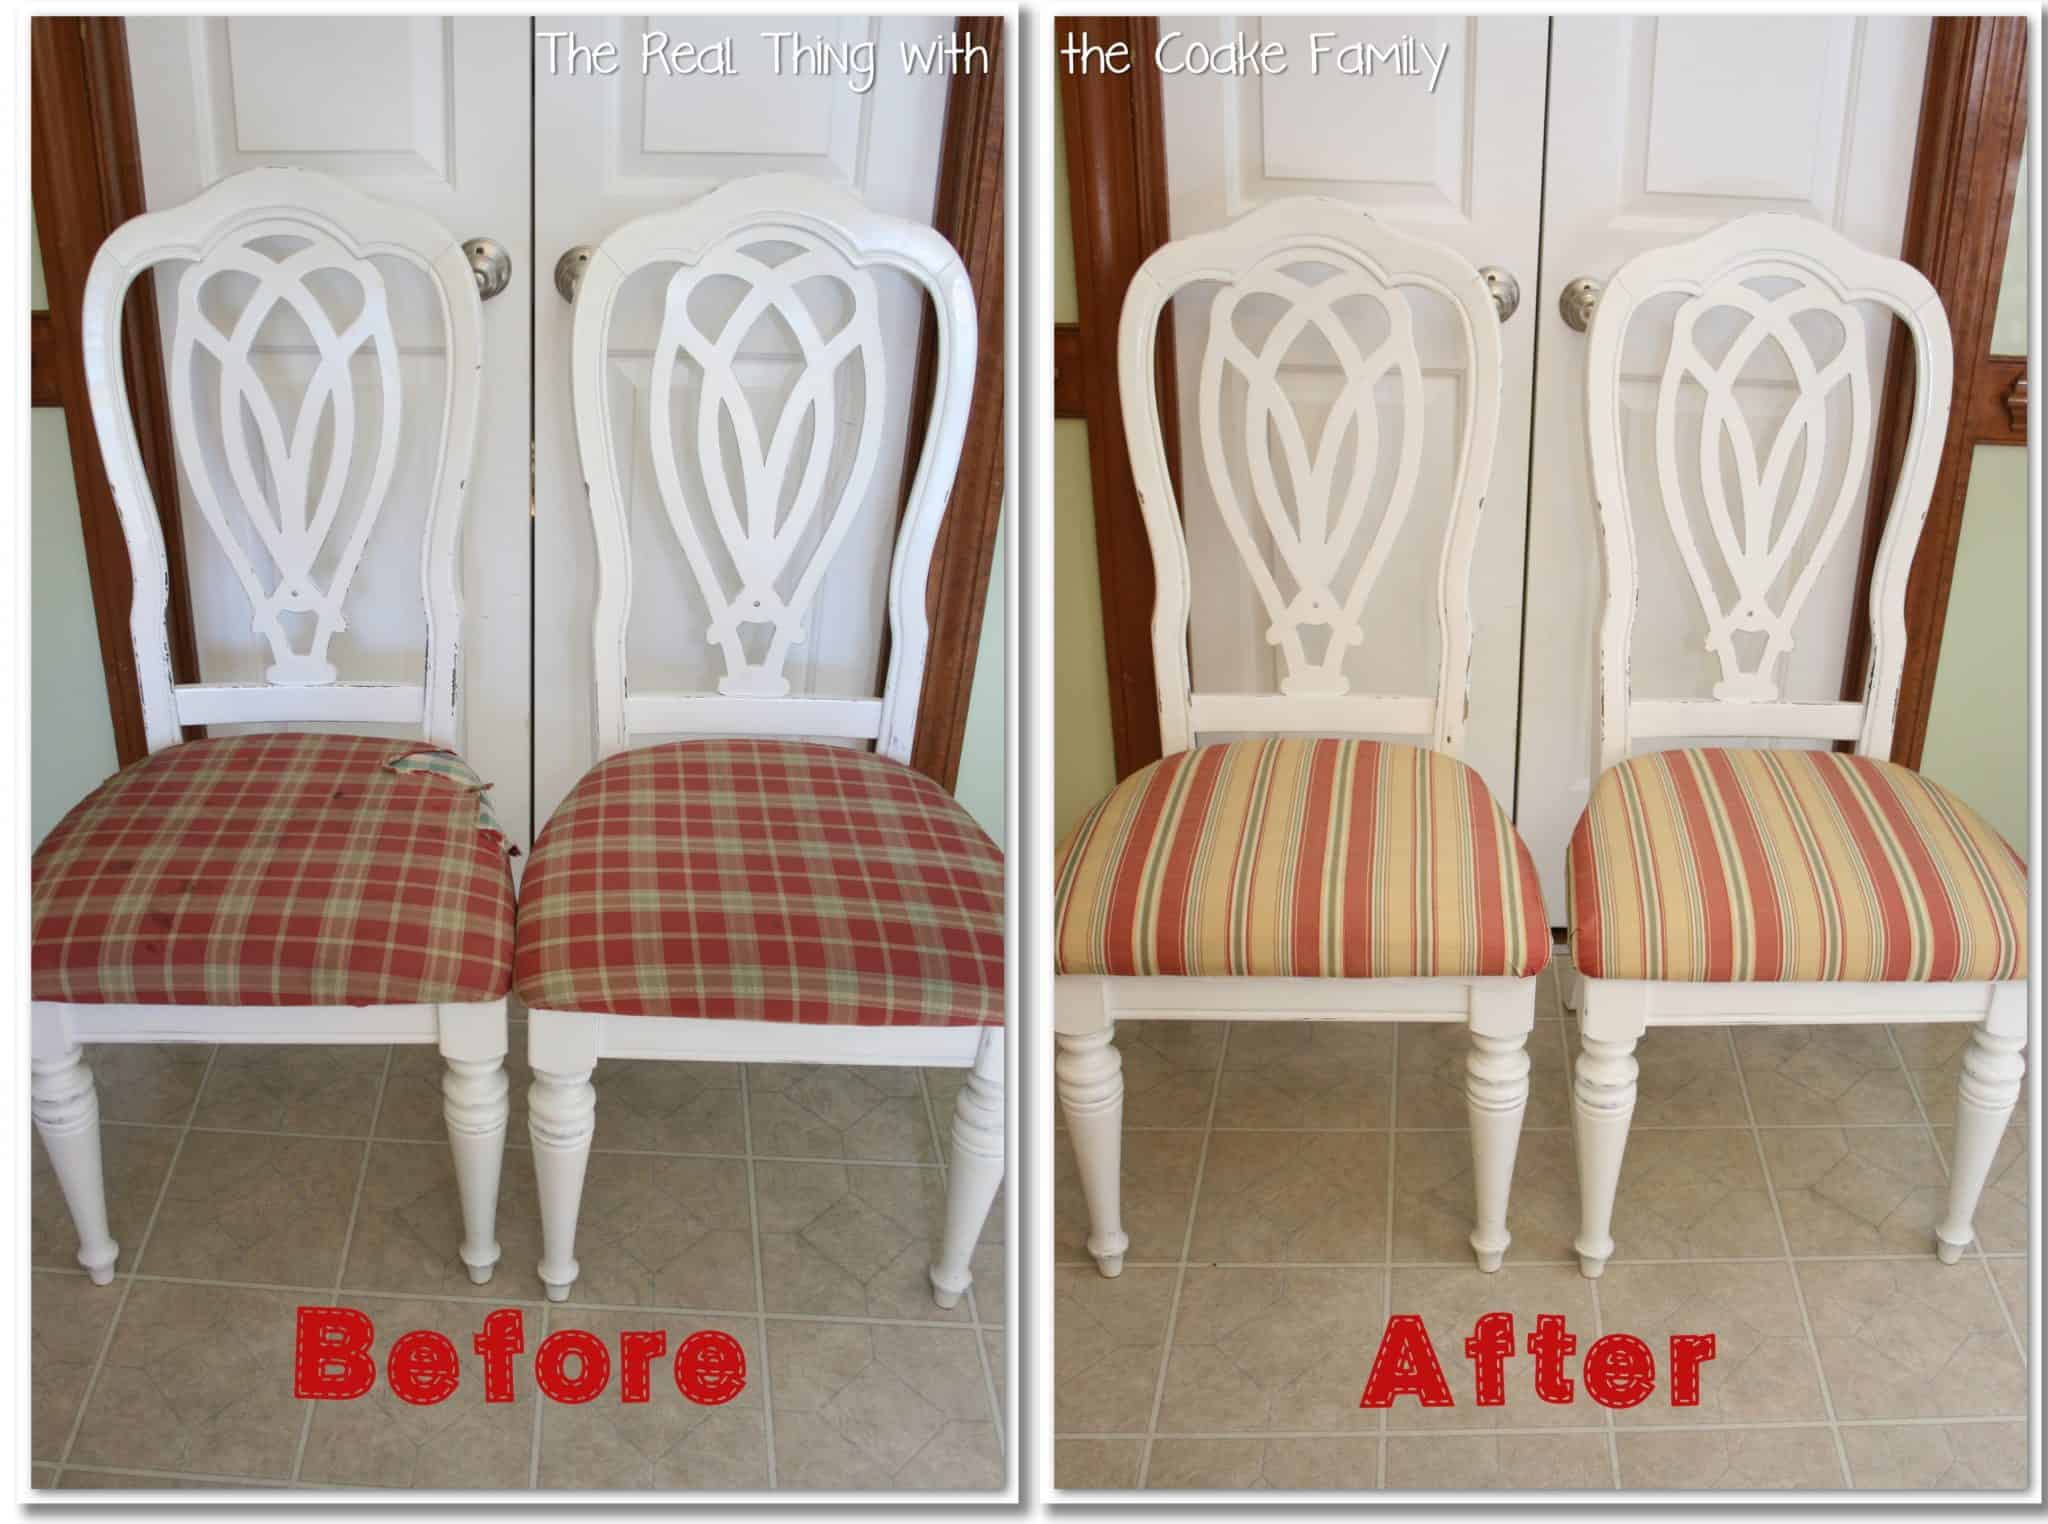 My kids had destroyed our chairs, as you can see above in the before picture. At one time, the chairs has looked nice…I think that time passed a year or two ago. I knew it wouldn’t be too hard to recover the chairs, but I also knew the fabric would cost me a pretty penny. Over the summer, my local JoAnn’s was moving down the street. They put everything on sale. I found the fabric at 75% off!! Huge savings for decorator fabric. I picked up plenty and used some in my Command Central. I have plans to use some in curtains and a few other projects, but I always seem to have more ideas than time….some day!
Back to the task at hand. I’m embarrassed to show these pictures, so please don’t judge. Not only had the stain guard worn off the fabric, but apparently my kids found a hole and decided the chairs would look much better with really large holes in the fabric. Oh Kids, I love you but why do you have to be so hard on the house?
I didn’t want friends and family seeing the chairs looking this bad…I do have some standards. So, it was time to tackle this project.
Let me show you how, in case you have little monsters children in your house as well.
You will need:
Screwdriver
Pliers
Staple Gun
Staples
Fabric
Stain Guard Spray (optional)
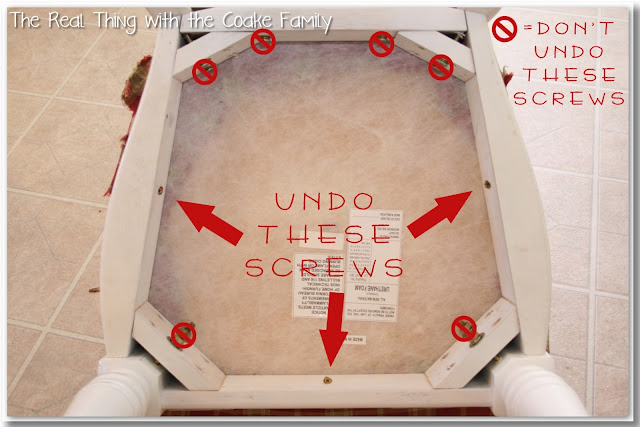
First, turn your chair over and locate the correct screws to release the seat. You can see my seat above. Yours may look slightly different, but you want to look for simple screws not those with washers and bolts. Those hold the legs onto the seat. Should you undo some of those, it is not a big deal to re-tighten them. My seat had only 3 screws holding it to the frame of the chair.
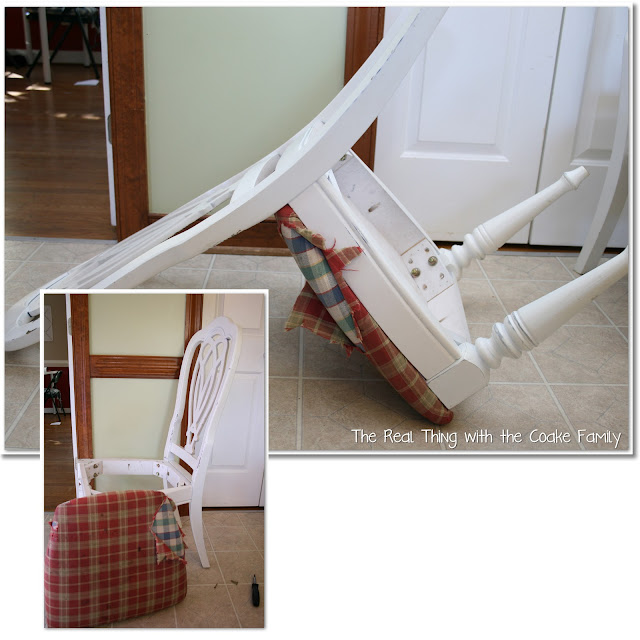
I found it easiest to work on my chairs upside down on the floor. You want your chair and seat cushion to look like the picture in the inset…chair in tact and seat cushion removed.
Now you need to remove your old fabric You don’t actually have to do this if your fabric is whole. You could just skip to the next step and add fabric on top. As my fabric had holes in it that would bunch up and look unsightly under new fabric, I needed to remove my old fabric.
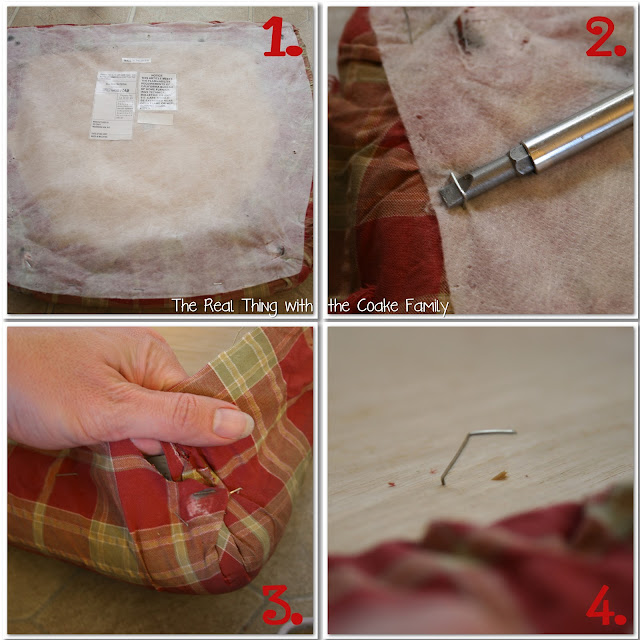
1. My chairs had a thin white fabric on the underside….with a ton of staples in it.
2. I used a flat head screwdriver to gently extract the staples.
3. I got tired of the ‘nice’ method of taking the staples out….there were soooo many staples. I decided to try pulling (i.e. ripping) the fabric up. For the most part, it worked and the staples came up and out of the chair and fabric.
4. Occasionally a staple would not come out all the way. If this happens to you, just use a pair of pliers to pull the errant staple out.
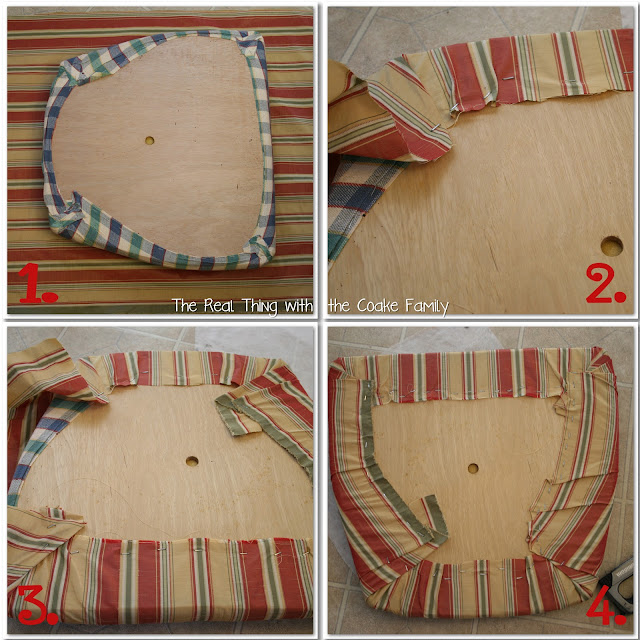
1. To cover your seat cushion, cut your fabric. I wasn’t very precise about my cutting. For the first cut, I used my old fabric to make sure I got the right size. The cuts after that, I just put the cushion down and cut a piece large enough to wrap up and around the seat cushion.
2., 3., & 4. Once you have your fabric cut, start stapling with your staple gun and pulling the fabric tight as you go. If your fabric has a pattern, take time to line up the pattern or get it straight. When you get to the corners, use extra staples and folds to get the fabric to lay correctly. Once you have the fabric stapled, go back around and add extra staples for added security. (Really I did this because there were so many staples in the bottom of my seat and I figured the professionals who did it the first time knew what they were doing and lots of staples were needed….maybe, maybe not, but it made me feel like I knew what I was doing!)
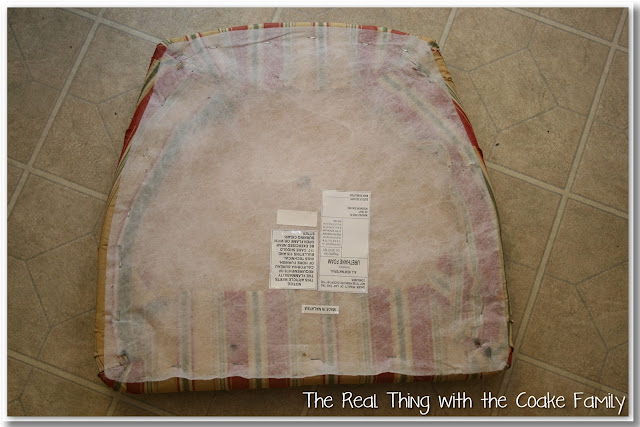
I decided to put the thin white fabric back on the underside of my chair cushion. I thought it would look a bit nicer than just the fabric. That way when I am crawling around on the floor picking up toys, I can look at the bottom and admire my work. Lol! It really isn’t a necessary step, but it is an option if you want a more polished/finished look.
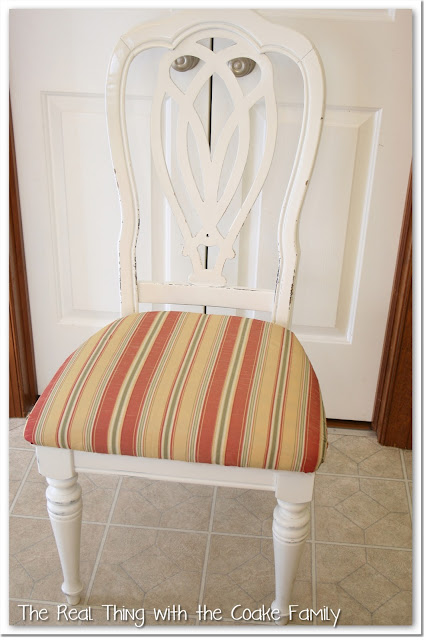
Voila, a little time and elbow grease and I have much better looking chairs! I would highly recommend using some type of stain guard on your newly covered chairs before putting them into use around your home.
Doesn’t that look much better and much more ‘company/holiday’ ready? I’m so glad I took the time to recover the chairs. It really wasn’t hard, it just took time and elbow grease.

Isn’t it amazing how something so simple can make such a huge impact! The new fabric looks fantastic!
Kindest regards,
Jennifer
Yes it is amazing! Thanks! The kids have already got stains all over this fabric, too. Not sure if I didn’t put enough stain guard on or what…so frustrating! I guess I will be doing this again soon…boo!
KC
the chairs look great!
Thanks, Dara!
I love the new look of your chairs. The change of fabric really makes the chair! Well done. 🙂
Thanks Libby! My mom saw the chairs for the first time today and said something really similar. 😉
Take care,
KC
These came out great! My mom has a few chairs that look like your used to…this has given me the inspiration to try and help her fix hers!
Thanks for showing them off!
https://mommysordinarymagic.blogspot.com
Thank you! I’m glad I could provide some inspiration.
Have a great night.
Take Care,
KC
My chairs definitely need a makeover, thank you so much for sharing at the Sunday showcase!! I’m going to give this a try!
~April @DimplesandDelights
Thanks!
Great chairs and great tutorial! I need to paint and recover my dining room chairs, I will wait till after the holidays though! Thanks for sharing.
I am now following your blog!
Cynthia at https://FeedingBig.com
Thanks, Cynthia! I hope your holiday’s are great and that when you have time to get to your chairs they turn out just as you would like them to look.
Take care,
KC
The chairs look fabulous now!
Thank you!
They look great now. I love how the fabric now makes them look so clean and fresh!
Thanks! I only wish they still looked nice. Somehow the kids have already stained them and they no longer look clean and fresh. Guess I needed more stain repellent on them or different fabric…really frustrating.
Take care,
KC
I have had 6 chairs sitting here for 6 MONTHS! I need to paint them and recover them – I picked up some tips for sure! Sharing on Facebook!
So glad I could help. Thanks for sharing on facebook! I appreciate it.
KC
They look great. I recently did the same thing. I also added a think vinyl too. Now I can wipe my chairs clean and protect the fabric. 🙂
Thank you! I bet you like having the ability to wipe the chairs off. I don’t personally like the look of the vinyl on top, but I certainly can see with kids (at least if yours are like mine) it would make things last a lot longer.
KC