Do you have any fun Christmas crafts planned this year? I love Christmas crafts! They are just so fun and usually they add to my Christmas decorations, so I love that my house gets a bit more Christmas cheer. This year, while walking through Hobby Lobby, I saw the cutest burlap Christmas trees. I just loved them, they were so cute. There was a problem. The price. I couldn’t believe what they were charging…but then again, I’m admittedly cheap. I decided I could totally knock of those darling burlap Christmas trees.
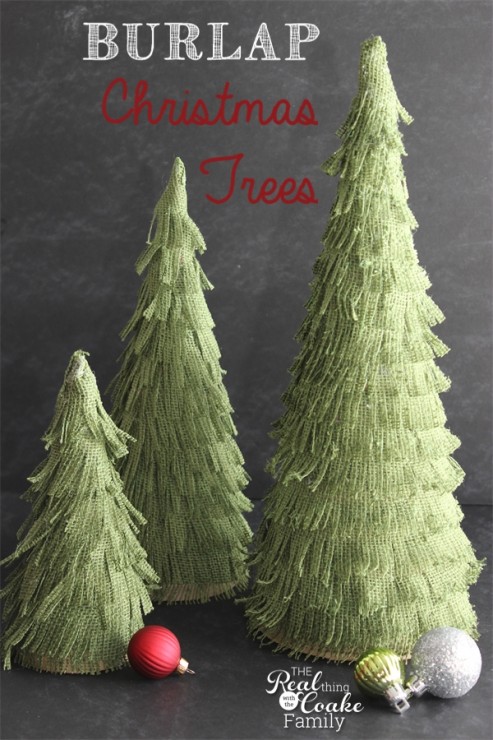
Well, what do you think? I think my new burlap Christmas trees are adorable! Would you like to make some for your Christmas decorations? I’ve got you covered with a tutorial and some tips to help you get through this Christmas craft. Yay! Let’s have some fun!
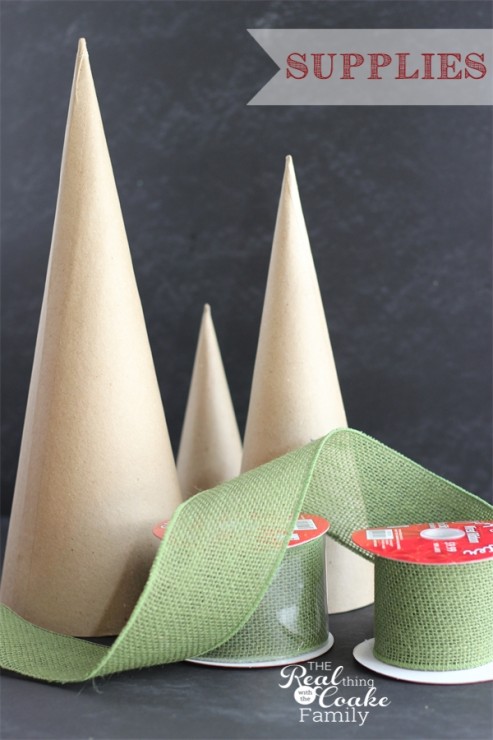
Supplies:
- Paper mache cones
 (affiliate link)
 - Burlap ribbon
 (affiliate link)
 - Scissors
- Hot glue
- Hot glue gun
You will want to start by wrapping your ribbon around your paper mache cone to get an approximate length of ribbon to go all the way around and up the cone. The burlap ribbon I found was wired. If your ribbon is wired as well, cut the wiring off your ribbon on one side.
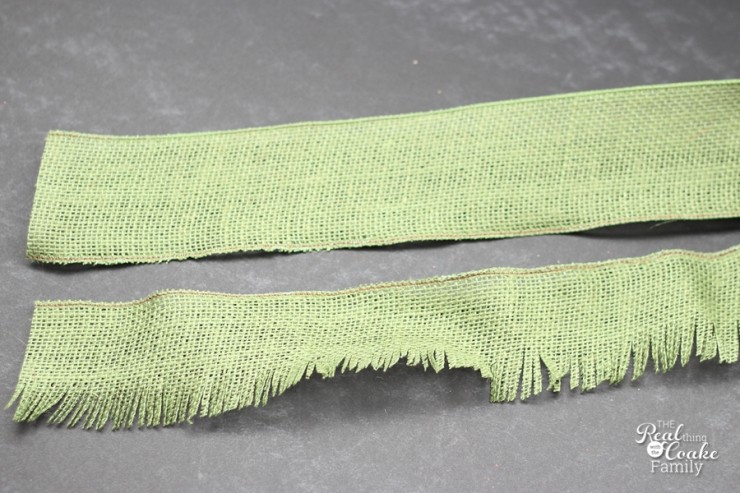
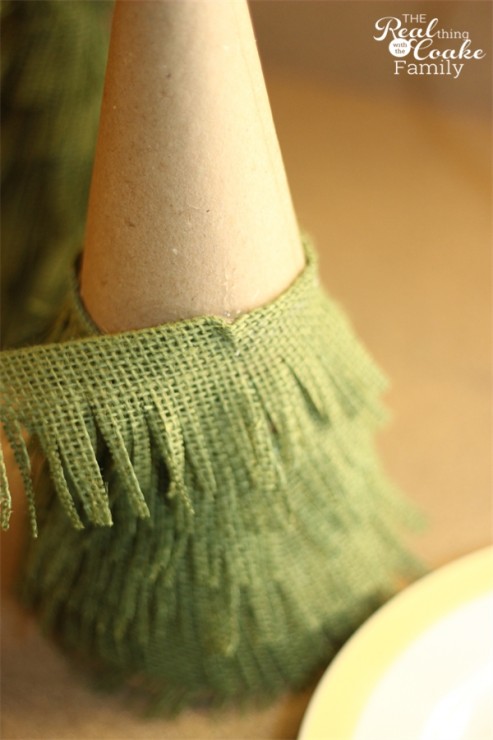
Use your scissors to cut small cuts about 1/3 to 1/2 way through the ribbon. Do this for the entire length of your ribbon. I think these fringe scissors![]() (affiliate link) might make easy work of this job. Toward the end of the ribbon, make sure your cuts are only 1/3 of the way through the ribbon.
(affiliate link) might make easy work of this job. Toward the end of the ribbon, make sure your cuts are only 1/3 of the way through the ribbon.
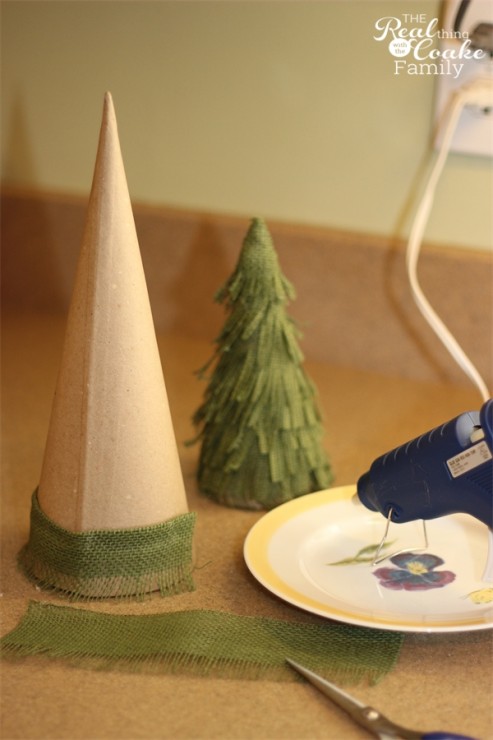
You will want to cut a length of ribbon to go around the base of your cone as well. Start by gluing it in place. This way you will have a piece that covers the entire base and doesn’t need to be wound at a slight upward angle.
I had thought that bottom would look better with a different look than the rest of the cone. Rather than cutting the 1/3 to 1/2 slits in the ribbon, I pulled pieces of the burlap out to give a more frayed look. In the end, it showed the cone more than I prefer. My recommendation to you would be to use the same type of slit cuts in your ribbon for your base ribbon as well as the ribbon you use to wind all the way to the top of the cone.
At the bottom of your cone, the wider portion, you will find that your ribbon will need some little pinches in it to keep it going at an upward angle well. Just put a dab of hot glue in the area where you need to make a little pinch, then pinch and keep going.
My ribbon was quite wide. I found that folding my ribbon over by about 1/3 made it more manageable and covered the cone better. It also helped protect my hands a little bit from the hot glue. I will warn you, you hands will look like burlap when you are done. Between the burning hot glue and the burlap, my hands were a wreck, but I got a cute Christmas craft, so it’s all good!
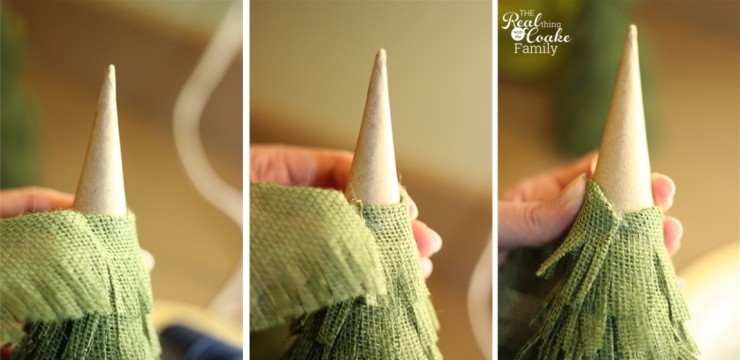
Toward the top, or narrow, portion of your cone, it will be more difficult to keep your ribbon going upward.
I found that I was able to wrap about one turn. Then I needed to fold the ribbon over to go up to the next level. I did that by figuring out how I wanted to fold the ribbon, putting a dab of hot blue both beneath and in the fold. Then folding the ribbon over. Hold it in place until the glue has had a chance to set. Now you will be able to continue your next row.
Keep going like this until you reach the top of your cone. At the top of your burlap Christmas tree, you will want to fold the ribbon under to finish it off. I tried the tops a couple of different ways. I thought the best was kind of folding it under while also cutting away some of the extra bulk of the ribbon. It is just a bit of trial and error to find what will work and what you think looks good.
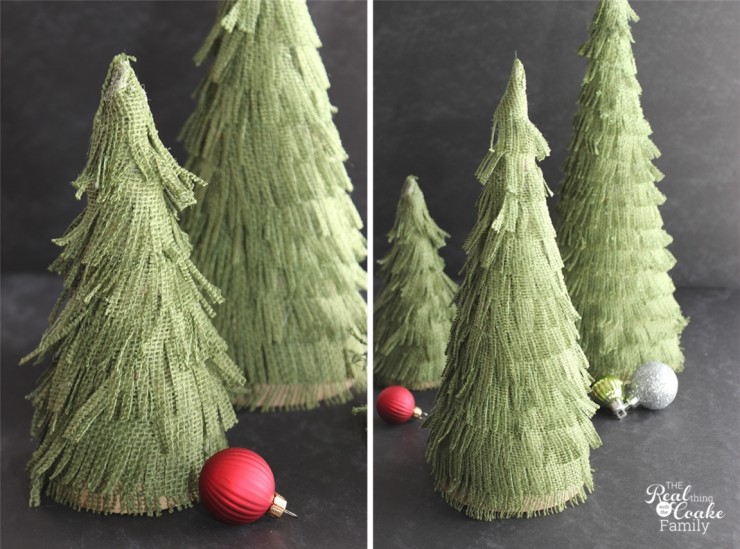
Above are my small and medium burlap Christmas trees. If you look closely, you can see that I finished these tops differently. The small cone on the left, was finished with my fold over, cut and tuck method. The medium tree was finished by kind of pulling the ribbon over the top and gluing it in the place. I prefer the look of the smaller tree. What about you?
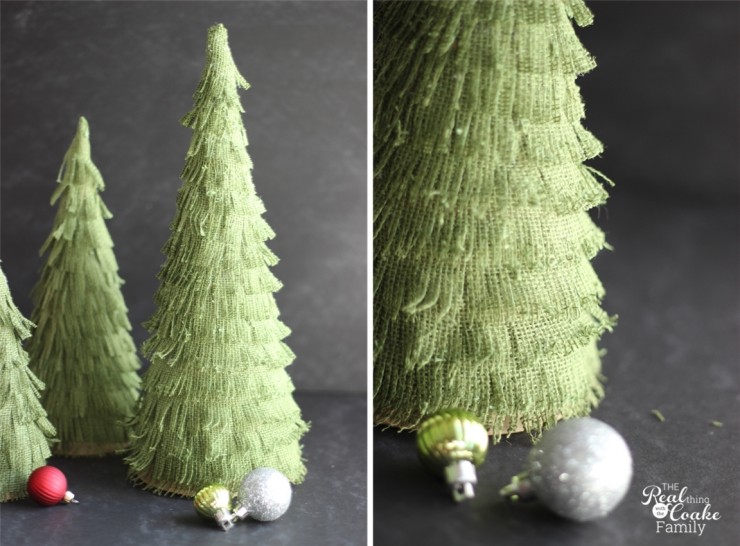
My favorite tree from this Christmas craft is the largest tree. It was the last one I made, so I had kind of figured things out. I love the texture and the fluff of the cut burlap.
I was originally going to place these on candlestick holders and put them on my mantel. I forgot that I did a few more Christmas crafts and had something else for the mantel. Though I tried them there, they also just didn’t look as good as I wanted them to. They were too green with my green garland.
They look really cute I in a basket with some poinsettia and other items or on an end table with these cute Christmas Perler Bead costers I made. They would also look really cute with this felt Christmas garland I made in the background. So much Christmas fun!
What Christmas crafts do you have planned or are you already done for this year?
These are gorgeous! I haven’t done much crafting yet but I did make a wreath yesterday.
Thank you! What a pretty wreath!
KC
You burlap trees are darling. Would you be willing to share this at our Making Monday link party? We would love it and think our readers will, too. Thanks. Have a fantastic day. https://www.abrightandbeautifullife.com/making-monday-17/
Thank you so much!
KC
What a fun idea! I just got my hands on a pair of fringe scissors and this is a great idea to try them out!
Thanks! I think the fringe scissors would make super quick work for this project. I thought of them but didn’t want to spend the money. Have fun!
KC
Wow, these look great and doable! Pinned it.
Thanks! They are very do-able. You may have burlap hot glue burned fingers, but they are so cute it is worth it.
Take care,
KC
These are absolutely ADORABLE!!! They might be my favorite Christmas craft so far!!!
Thank you so much! That is sweet of you to say!
These trees are awesome! I must get some fringe scissors! Love, love , love! Pinned and sharing. Thanks for joining us at Family Joy Blog Link-Up Party!
Thanks so much!
These are so awesome! Love them, of course I love all you make. Thanks for linking up to The Creative Exchange Holly:)
Thanks so much!