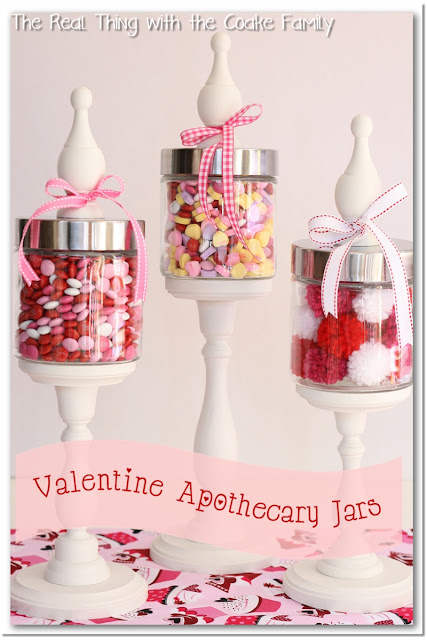
Have you ever seen decorative apothecary jars? I have and I have coveted them. They look so pretty and make such a nice decoration, but alas, they are usually out of my price range. Today, I’m going to show you how to make your own apothecary jars for a fraction of the cost of purchasing them. It was surprisingly easy, too. Yippee! These are things I love…cheap, attractive and easy! It doesn’t take much people, it doesn’t take much! 🙂
I’ve got my jars all ready for Valentine’s Day. First, I’m going to show you how to make your own. I’m also going to show you a tip on how to fill the jars without breaking the bank. They take a surprising amount of ‘stuff’ to fill up.
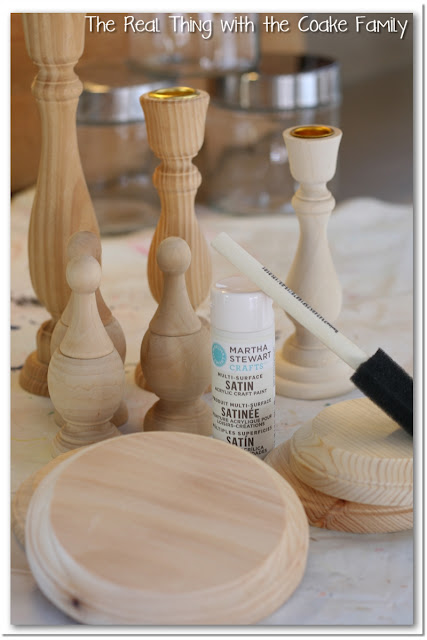
Supplies:
- 3 different sized wood candlestick holders, mine are 6″
 , 7″ and 9″
 (affiliate link). I got them from 3 different stores
 - 3 wood finials
 (I got mine at Hobby Lobby)
 - 3 – 5″ circle wooden
 (affiliate link) ‘plaques’
 - 3 – 4″ circle wooden
 (affiliate link) ‘plaques’
 - 3 glass jars with screw type lids (I got mine at Hobby Lobby. They are about 5″ tall. I think they are some of the smaller of this type of jar. I had larger jars initially, but then started thinking about how much ‘stuff’ I would need to fill them and went smaller. You can use any size you prefer)
- Paint
- Paintbrush
- E6000 Glue
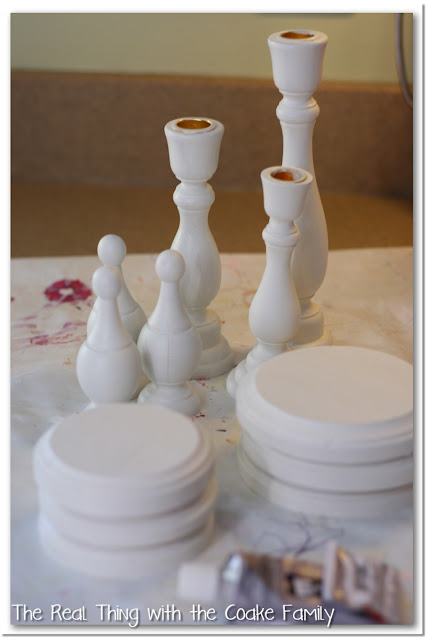
Start by painting your wood pieces. I used a Martha Stewart Acrylic paint in a Satin finish (affiliate link) . I don’t like to use spray paint as it is terrible for the environment…so that means I get to paint things. I kind of like it and find it a bit soothing. It took 3 coats to get the coverage I wanted on most of the pieces. Two of the candlesticks were darker and required a 4th coat. Had I started with primer, it would have been less.
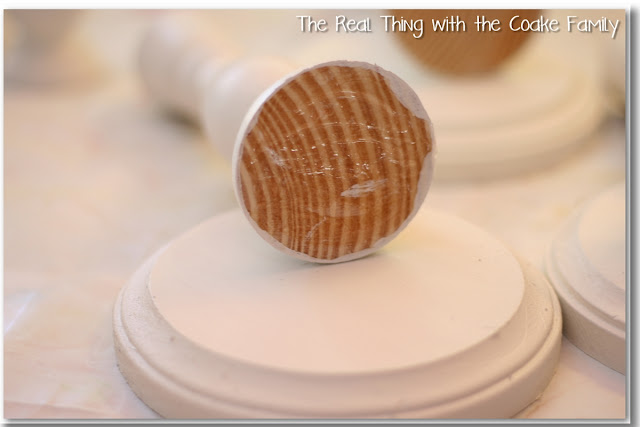
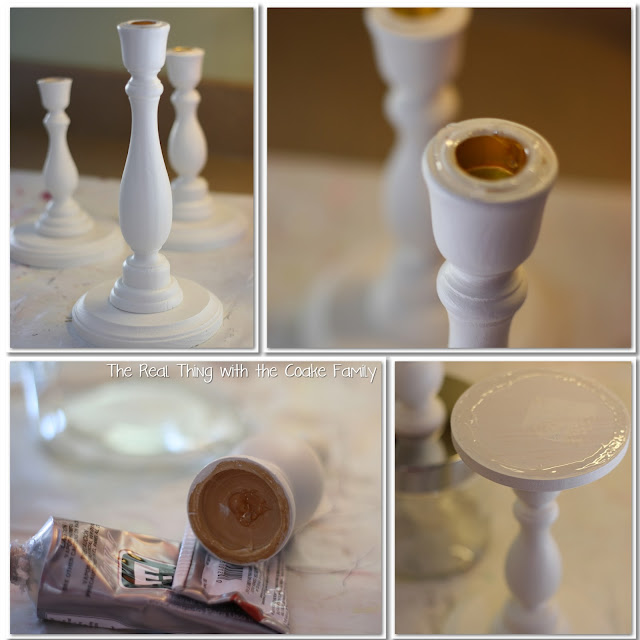
Once your paint is dry and has had some time to cure (maybe overnight). Use the E6000 glue to adhere the bottom of the candlestick to the 5″ wooden circle plaque. Try your best to center it. It probably would be a really good idea to mark the center point with a pencil on both the plaque and the candlestick and do your best to match them up.
You can see above top left, the candlestick glued to the 5″ wooden plaque. Above top right, now that I have done this, I would recommend removing the brass insert in the top of the candlestick as it will make it more likely that your jars will be level when you are done. Mine are not level and I think this piece is the cause. Either which way, use your glue to adhere the top of the candlestick to the 4″ wooden plaque. I liked the look of using the plaque with the decorative edge facing down and the flat side facing up. Once again, marking the center of the plaque probably would have been a good idea to make it easier to center the pieces.
Give that piece time to dry.
While you are waiting, use your glue to adhere the finial to the top of the glass jar trying to get it centered.
Once the glue on the candlestick part has dried, use your glue one last time to adhere the glass jar to the ‘stand.’ As you can see above lower right, you only need glue at the edges (if you are using jars similar to mine) as the jars are slightly raised in the center.
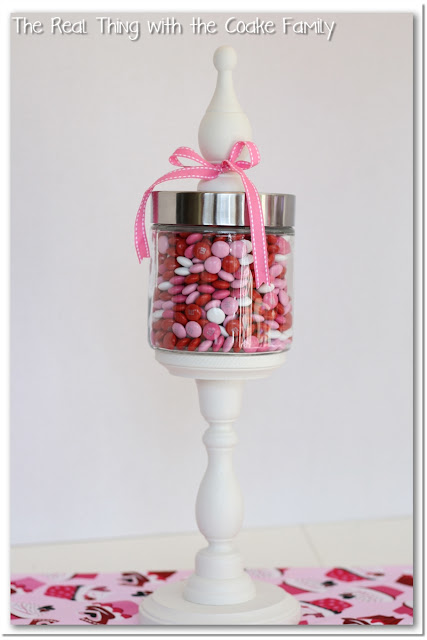
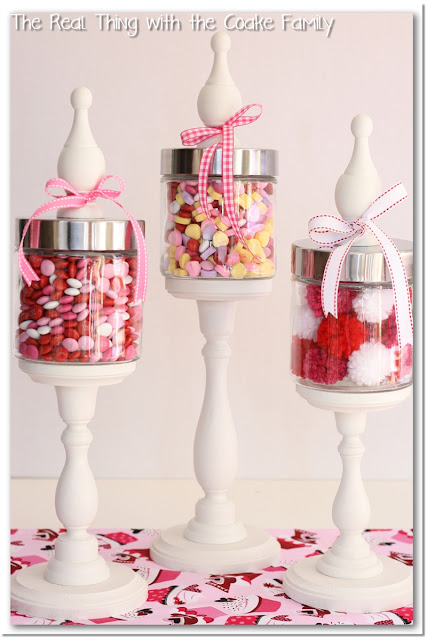
Now you have beautiful decorative apothecary jars to fill and have fun decorating.
Wanna see what I did with mine for their maiden voyage?
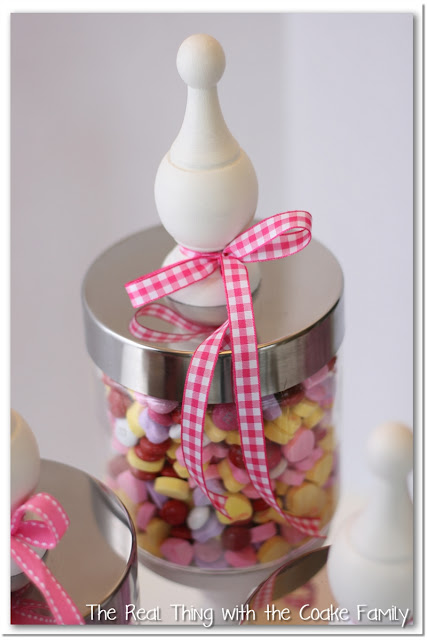
Since Valentine’s Day is just around the corner, I added some ribbon in Valentine’s colors to the finials on my jars.
Next up was filling the jars. They sure do take a LOT of candy to fill! I started with 2 bags of M&M’s thinking that would be enough for all three jars…ummm totally off. Let me show you a trick to help fill the jars without breaking the bank.
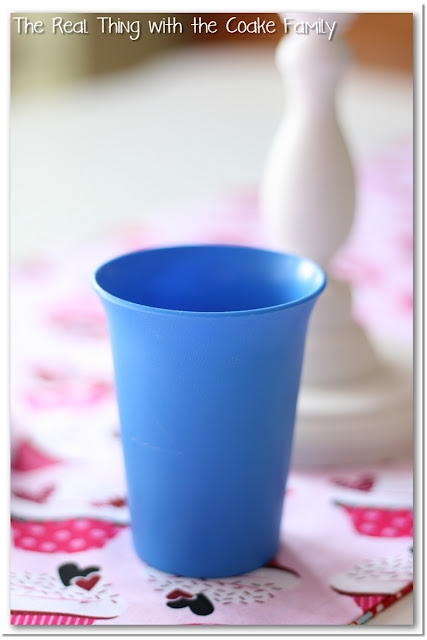
This is an old Tupperware kid’s cup from when my girls were little. I keep them around for when other little kiddos come to visit.
Turn it upside down and place it in the center of your jar. You could also use an empty toilet paper roll (though it doesn’t take up as much space) or an empty clean soup can. I added Valentine wrapping paper around one of my cups, thinking that as the candy got eaten it may look better than the plain cups. I think this paper I chose looks rather dorky and busy as the candy is getting lower. I think a solid color would be better.
To fill my jars, I used 2 bags of M&M’s and 1 bag of conversation hearts. The conversation hearts filled way better than the M&M’s, but M&M’s are much more yummy, so we have more of those! I didn’t want to buy more candy, so I got out my pom pom makers and made more pom poms….I know those of you who have been reading my blog for a while are totally shocked by this turn in the tale. Hehe!
There you have my new apothecary jars. They are on the table runner I showed you how to make last week and are part of our Valentine’s table that I will show you next week.
I’m sure I will show you other ideas of how I fill these jars throughout the year. I think they are going to be a lot of fun. Do you have any jars like this that you use to decorate? Any filler tips for me/us? Can’t wait to hear them!
Here are all the other apothecary jar posts I’ve done in the last year with the tutorial and other decorating ideas. Just click on a picture to be taken to that post.




These are beautiful! I love the cup idea…those were my favorite as a kid. 🙂
Thank you! Yes, I drank from cups like those when I was a kid as well. My mom still has them…I guess I am carrying on the tradition. 😉
KC
What a great idea with the center filler! I am always shocked at how much candy it takes to fill what I think is a small jar! Do you think someone receiving this as a gift would think that was cheesy? Actually, that’s what they do with those pre packaged gift baskets though, isn’t it?
Thanks! Yes, I found it really shocking how much it took to fill them up! I don’t think they would think it was cheesy to see that in the middle. They might wonder why it was there, but then once they went to change the filler out once, they would know what a genius you were for putting them there!
Take care,
KC
Where do you get the candle sticks
I had to look at quite a few craft stores to find them. I found mine at Hobby Lobby, but I just edited the post and added a link to a set of these on Amazon to make it super easy to find. Hope that helps!
Love the jars. Really pretty. What a great way to save on candy for filling them. C3
Thanks, Mom!
KC
Oh I love how your jars turned out and what a great idea to put something in the center so you don’t need as much candy! Although I don’t ever say no to more candy 🙂
Thank you! 🙂
KC
Great idea, they look wonderful! I’m thinking of doing this with the jars from my burnt-up candles.
Thank you! I think it would work perfect with those jars. They are a great size. Great upcycle, too.
KC
Adorable! Turned out so great! I agree the apothecary jars are expensive! I did find one on sale at HomeGoods for $10 and scooped it up!
Thank you. Yes, If I saw one for $10, I would totally scoop it up as well. I think I want more…now that I have one set, I can so many uses for them. Could get addicting!
KC
I love how they turned out and that they are much smaller than several that I have seen. They look like they are the perfect size! Thanks so much for the tutorial!
Thank you. You are welcome for the tutorial…I love tutorials, so I share them a lot!
KC
Thanks for the tutorial! What a great idea. I will definitely be pinning this.
Thank you and you are welcome!
KC
Oh my gosh, I don’t know which is more clever… the way you made the jars, or the plastic cup inside to make the candy fill the jar more… ha ha, very clever! I’m pinning this. thanks for sharing. Little Bit from http://www.DecorateWithaLittleBit.com
Thank you!
KC
Great thrifty knock off! I might have to try some of these in time for my older daughter’s 4th birthday party. I’d love it if you stopped by to link up at Thrifty to Nifty Thursdays at A Jennuine Life. https://www.ajennuinelife.com/2013/02/thrifty-to-nifty-thursdays-6.html
Thanks so much! I bet they would look cute filled up for a party.
KC
This are adorable. (And quick and easy) Thank you for sharing at Finding the Pretty & Delicious Linky Party.
Sarah
https://sarahmschultz.blogspot.com
Thanks!
Super creative and pretty! and I love the trick to make them look “Full”!! hopped over here from the Craft-O-Maniac party! Following you on FB now from my personal page to make it count (Lizy)
Thanks for posting,
Lizy @ https://justdipitinchocolate.blogspot.com
Thanks! The ‘trick’ saved me a lot of money and will be used plenty in the future.
KC
You did such an awesome job! I love how they turned out… the pom poms are too cute! You photos are fab, too!
Take care,
Trish
Thank you, Trish! Thanks so much for the idea and ispiration!
KC
So dang cute!
Thanks! 🙂
SOOOOO cute! Love the cup idea! Brilliant!
Thanks!
K.C.,
Where did you find the round wooden plaques? I can’t seem to find these sizes anywhere!
Maureen
I found them all over the place. Then at the end I realized I only had enough for 2 jars not three…doh! So, I got both sizes at my local AC Moore. I really think I got some of the others I had purchased earlier at Hobby Lobby. Hope that helps.
KC
I am in love with Apothecary Jars! I’d love for you to come link this up at my Tuesday Time Out!
Melanie Reasons To Skip The Housework
Thank you!
KC
These are beautiful- and I have to say the pom poms are genius- and absolutely darling! I think they might be my go to filler from now on! 🙂
xoxo,
Amy
Thank you! I have been on a pom pom kick for a little while now…but they are just so stinking cute!
Take care,
KC
very cute! great tutorial
pinning!
gail
Thanks!
KC
These are beautiful. I was thinking of adding cotton balls or q-tips. What does everyone else think of it?
I am so going to try this for grab bag gifts.
Thank you for sharing with us.
Thank you!
KC
Love these jars! And white is so pretty. I’m pinning these 🙂
I found you today at the Monday Funday Linky. I hope you can stop by my blog and leave a comment, too!
~ Megin of Vmg206
http://www.vmg206.blogpsot.com
Thank you!
KC
Would you mind sharing where you purchased your jars? Do they come in various sizes? I think I’d like one that is taller and not as fat. Excellent tuitorial and thanks for sharing.
I got the jars at Hobby Lobby. Yes, they do come in various sizes. I know there was one that was taller, but I believe it was the same diameter, but they have tons of different types. I hope you find something that will work for your desired look!
KC
Thank you. They are so beautiful, can’t wait to try one. Your sight is awesome
You are welcome! Have fun and thanks for the nice compliment on my site. 🙂
Any suggestions for finding the jars you used? My Hobby Lobby doesn’t have that size, and I have looked on line and can’t find anything close to yours. 🙁
Dollar tree sell this jars.
I just saw jars like these at the Dollar Tree! I bet I could find most of the other supplies there, too. I just bought a wooden plaque at Hobby Lobby for another project I am working on.
Sounds fun!