• Home
  • Contact
  • Privacy Policy & Disclosures
  • Nav Social Menu

    • Email
    • Instagram
    • Pinterest
    • YouTube

Real Creative Real Organized

Creativity and Organization for Mom Life

  • Crafts
  • DIY
  • Organization
  • Travel
  • Mom Life
  • Holidays & Special Days
    • New Year’s
    • Valentine’s Day
    • Mother’s Day
    • Easter
    • Father’s Day
    • Fourth of July
    • Halloween
    • Thanksgiving
    • Christmas
    • Seasons
      • Spring
      • Summer
      • Fall
      • Winter
    • Olympics
    • Birthdays
  • Shop
Home » Crafts » Gorgeous Double Mat DIY Picture Frames

Gorgeous Double Mat DIY Picture Frames

March 27, 2015 by KC Coake 2 Comments

Share away! 😍

  • WhatsApp
  • Email
  • Facebook

It feels like it has been a long time since I was making progress on finishing my living room or since I have shared anything with you. Recently, I’ve started making progress again and I’m loving the results. Today I wanted to show you the picture frames that finally got finished and up on the walls.
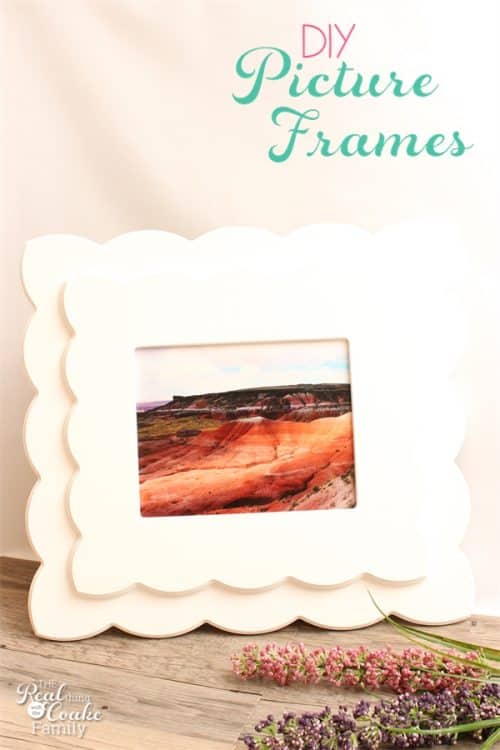
Take stock unfinished picture frames and create these beautiful diy double mat picture frames. These will looks so great in my home decor!

There is nothing like having pictures or art on the walls when they have been blank for a year! About a year ago, we took down the chair rail in our living room, painted the fireplace and started on our makeover. In the process, I made some fun state and letter wall art as well as freshened up the lamps and got a new entertainment center. Progress was happening. Then the holidays happened and all progress stopped.

I won these Cut It Out Frames probably 1 and a 1/2 years ago…maybe 2 years ago. I love them and I have always wanted some of these frames. I swear I entered every giveaway for them that I saw. It paid off! I won a $75 credit to purchase frames. I selected 3 double mat frames and they arrived at my home. They sat for a really long time. In September last year, I began painting them. The holidays hit and they sat until March of this year. I finally got them done!

Let me show you what I did, what worked, and what was a fail for me. Hopefully you can learn from my mistakes and make your own diy picture frames a bit easier. 
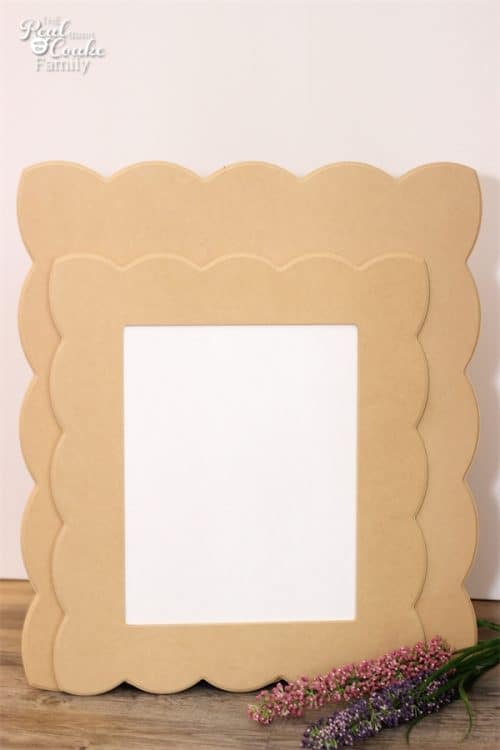
Take stock unfinished picture frames and create these beautiful diy double mat picture frames. These will looks so great in my home decor!

The double mat Cut It Out frames come as two separate frames. They do that so that you can finish them any way you want and it won’t be a problem.

I love the scallop look of these frames. They are the Brooklyn Frames.
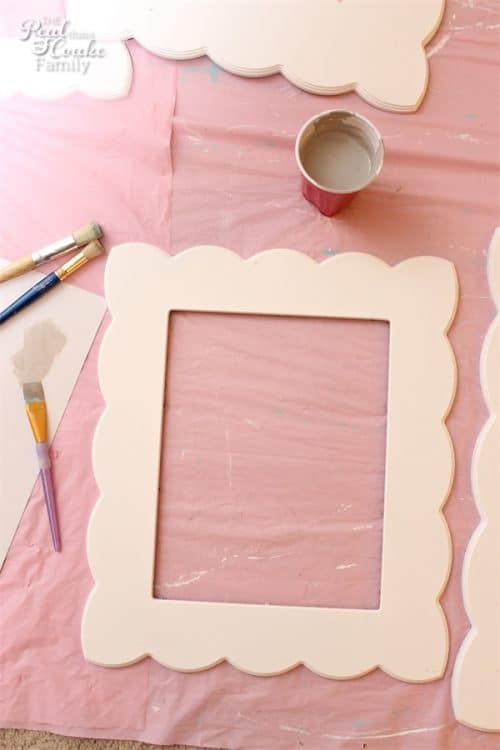
Take stock unfinished picture frames and create these beautiful diy double mat picture frames. These will looks so great in my home decor!

In September last year I painted the frames. The directions that come with the frames say to use acrylic craft paint or water-based, all-purpose enamel or oil based paints. I honestly have no idea what I painted them with last year. I’m guessing it was a Martha Stewart Acrylic paint in a white.

I wanted to add another finish to the frames to give some interest and try something new.
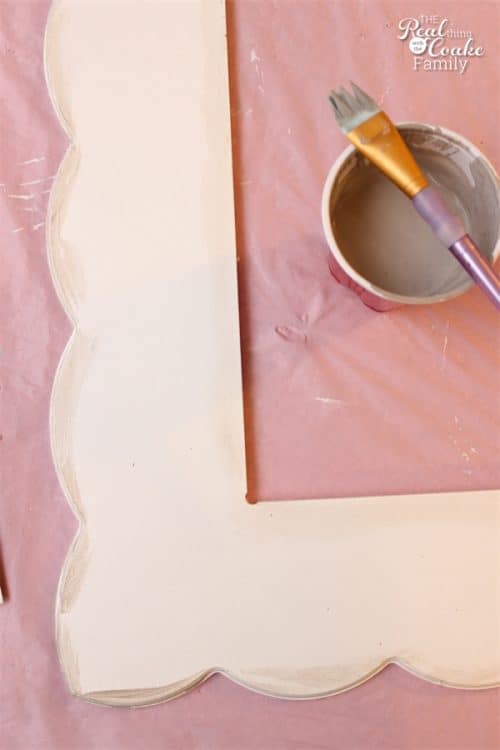
Take stock unfinished picture frames and create these beautiful diy double mat picture frames. These will looks so great in my home decor!

I bought a glazing liquid from Lowe’s and mixed it with the gray paint I used on the walls of our living room. I had not ever worked with glaze. I wanted to get a slightly antiqued kind of look…probably more toward a shabby chic type of look.

I mixed the glaze and the paint. 4 parts glaze to 1 part paint. I brushed the glaze/paint mixture onto the edges of the frame.
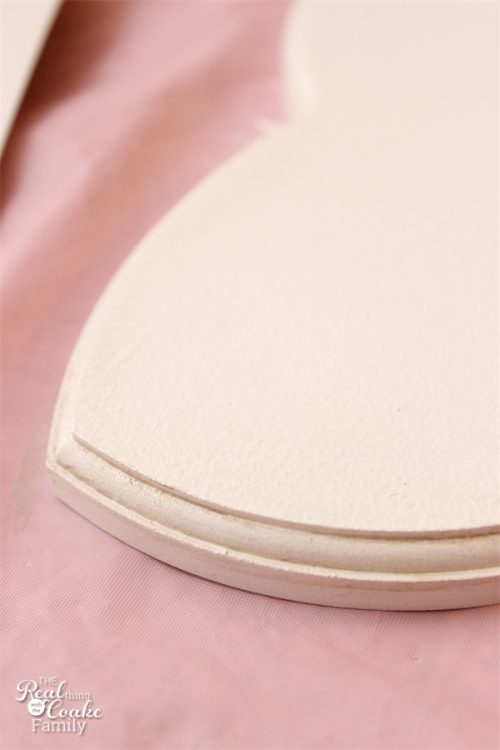
Take stock unfinished picture frames and create these beautiful diy double mat picture frames. These will looks so great in my home decor!

I then used a rag to wipe the glaze off and just leave a small amount of the color. I let the frames dry.

I hated how it looked. It just looked dirty. Never having tried this technique before, I wasn’t fully certain what it would look like.

At that point, I thought about you guys. What? Well I knew I was making a blog post about these frames and I thought to myself, “They aren’t going to want to read a post about frames that I painted and that is it.” I thought I needed to do something else to the frames so you guys would be interested. Then I thought about what I wanted and what I thought would look good in my living room. I decided to just paint the frames white again because that is what I decided I thought would look best in my living room.

I disliked the frames with the gray glaze so much and just wanted this project done that I didn’t take any pictures of how they looked with the glaze on them. I just wanted them done. It had been over a year and a half of wanting these frames on my walls. I was done being patient. I grab the closest white paint available, which was our white trim paint. Just a traditional paint for walls. Painted one coat over my disaster of an attempt at antiquing the frames and decided to call them done.

They still have a slight bit of that glaze showing through if you know it was there or are looking for it. I’m OK with that. The frames now look white and not like I don’t know how to clean. Seriously…I looked at the frames when they had the glaze on them and thought I would always be trying to wipe them clean, but that was the way the gray glaze just looked. Uuugh! Anyway, now they are white. Yay!
Take stock unfinished picture frames and create these beautiful diy double mat picture frames. These will looks so great in my home decor!

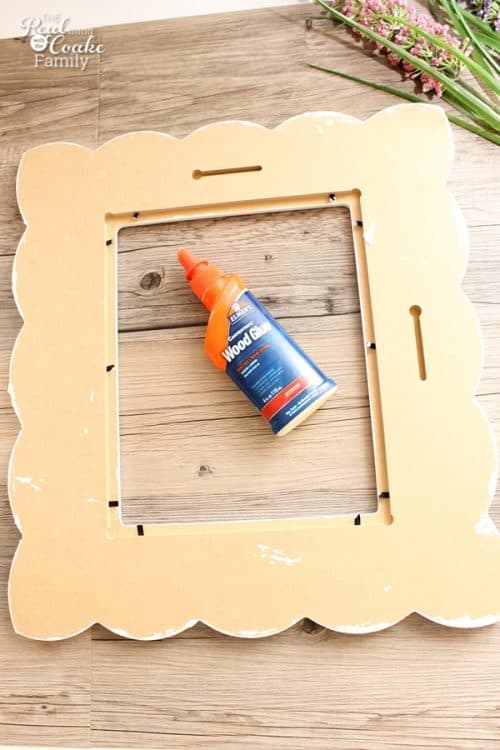
To attach your double mat frames together all you need is wood glue (affiliate link). It is crazy easy to do this process.
Take stock unfinished picture frames and create these beautiful diy double mat picture frames. These will looks so great in my home decor!

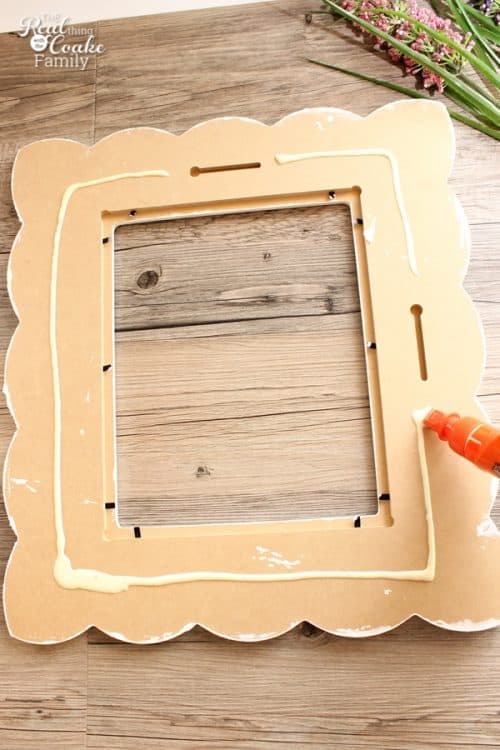
Run a line of wood glue (affiliate link) around the inside of your frame on the back. This is what my line looked like. This should be on the smaller frame or the frame that will be the front of the two frames.
Take stock unfinished picture frames and create these beautiful diy double mat picture frames. These will looks so great in my home decor!

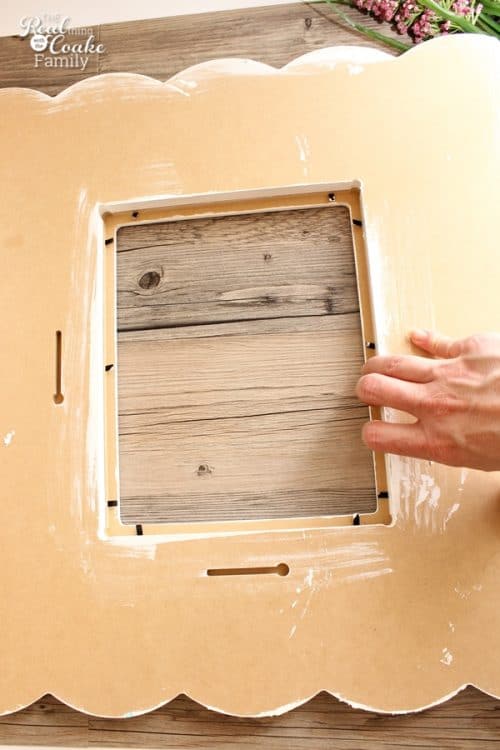
Place the larger, or back frame, on top of the smaller frame (the one you just put the glue on) and line the inside part of the frames up. I just used my hands to make sure all four sides were totally lined up. If you don’t line them up, you won’t be able to easily put a picture into your frame.

Lastly, just add your picture or art and hang your frames.
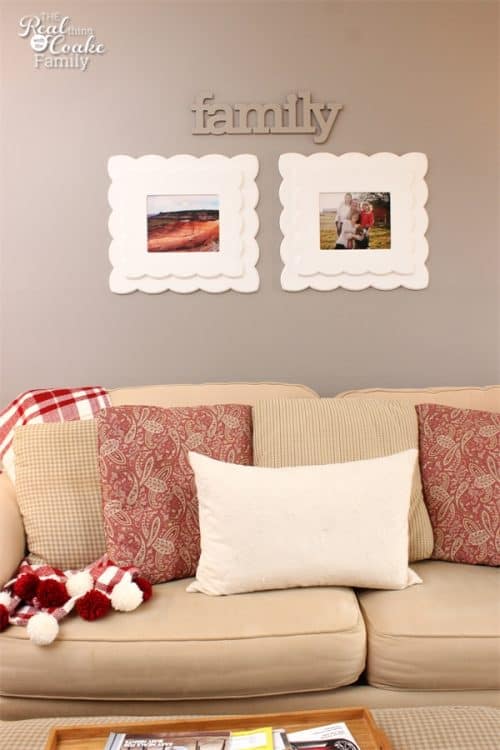
Take stock unfinished picture frames and create these beautiful diy double mat picture frames. These will looks so great in my home decor!

I placed two of the frames above the couch in my living room along with the family sign that you see (which is not done and I will have a post about that coming up soon).

I debated about centering them over my couch or centering them on the wall. I went for centering them on the wall, because I am prone to rearranging often and possibly this will keep me from needing to move the frames as well.
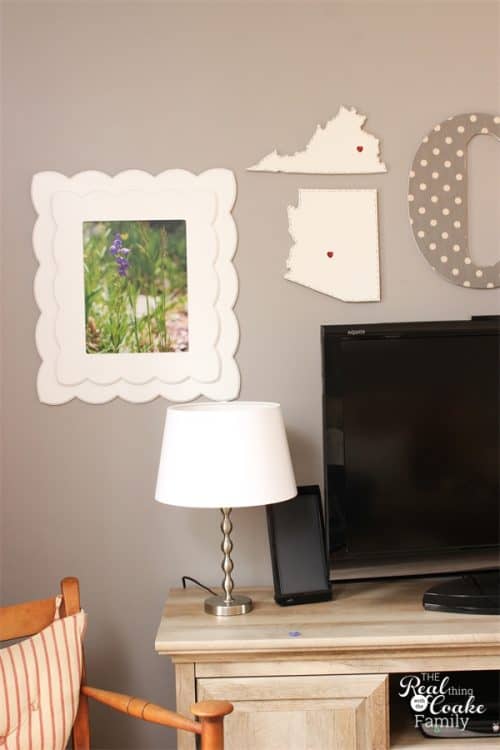
Take stock unfinished picture frames and create these beautiful diy double mat picture frames. These will looks so great in my home decor!

I’ve always dreamed of having my own photography on the walls of my house. With these new diy picture frames, I am doing just that.

I’ve also always dreamed of changing the photography out to match the season. I’m going to need to get busy taking some pictures to fulfill that part of my dream. For now, I filled the frames with a few of our favorite shots from the road trip(part 1 and part 2) my daughters and I took last summer as well as a recent family picture.

Take stock unfinished picture frames and create these beautiful diy double mat picture frames. These will looks so great in my home decor!

In the end, I can’t show you a new technique you could try on your own pretty frames. What I can show you is how to follow your own gut about what will look good in your home as well as how to put this type of frame together. I love the crisp white of the frames on my gray walls. I think it looks great and I’m super happy with this new addition to my living room. The picture in this frame is from the Painted Dessert. It was a spot that my girls and I loved on our journey last summer. Now we get to be reminded of the beauty and the amazing trip we took on a daily basis. In my book, you just can’t beat that! I will take the glazing mishaps to have gotten to what I did and to have one more chance to listen to my instincts. I always need practice at that. How about you?

More Fun for You:

More to Enjoy! 😍

Manicure or Pedicure in a Jar a Mother's Day Gift Idea
Glittery Joy DIY Christmas Decorations

Share away! 😍

  • WhatsApp
  • Email
  • Facebook

Hi! I'm KC. I'm a single mom of 2 girls who loves all things creative. Whether it's making something crafty or tackling that DIY project, I'm gonna have some fun and stay organized in the process. 😊 Read More…

Follow Me:

  • Email
  • Instagram
  • Pinterest
  • YouTube
Previous Post: « My 13th Stitch Fix ~ Stitch Fix Review
Next Post: Colorful PB Teen Knock Off Wall Art »

Reader Interactions

Comments

  1. Lisa Howard says

    March 27, 2015 at 11:37 am

    They look fab darling! LOVE them! Hope you are doing well.

    Reply
    • KC Coake says

      March 27, 2015 at 5:10 pm

      Thank you sweetie! I have been thinking about you lately and wondering how you are doing. I hope you are doing well as well! Thinking of you.

      Reply

Leave a Reply Cancel reply

Your email address will not be published. Required fields are marked *

Primary Sidebar

Popular Posts

  • OM to the Cuteness! This M&M Cookie Recipe in a Mason Jar is so cute and the cookies are so delicious. These are fun, unexpected Easter gifts for friends or family or my family. Easter Mason Jar Cookie Recipe
  • Genius shelving unit and desk using an IKEA Expedit. Perfect storage solution for a child's room, entertainment center, or home office. IKEA Expedit Turned into a Great Shelving Unit with Desk

Meet KC

Hi! I'm KC, Welcome to my blog!
Click here to Learn More About Me…

Free Member Program:

Let’s Be Social

  • Email
  • Instagram
  • Pinterest
  • YouTube

My Latest Insta Posts:

Happy Valentine's Day! I've been meaning to post t Happy Valentine's Day! I've been meaning to post the pic of my winter/valentine's day mantel since...well a while now. That's life sometimes, right? Hope you have a good weekend with some relaxation and that someone in your life shows you how much you mean to them, even if that means you show yourself the love. It still counts!⁣
PS. The tutorial on making the wreath is in the link in my bio.⁣
💖
Merry Christmas! 2020 sure has been a wild ride fo Merry Christmas! 2020 sure has been a wild ride for so many reasons. I'm sure you have your story just like I do and then there is the collective world story. I won't be sad to see it go, but for now, I'm just gonna sit in my living room enjoying my cute Christmas decorations and a glass of wine. Here's hoping you have a great holiday week. Stay Safe and Healthy. If you want a craft to get you through the long Covid winter, the link to the cute gingham canvas is in my bio. ⁣
🎄 ⁣
#RCRO #RealCoake #RealMoms #RealCrafts #Christmas #ChristmasCrafts #Christmas2020 #ChristmasMantle #ChristmasMantel ⁣
#christmasdecor #HomeDecor #ThatsDarling #PursuePretty #ABMAtHome #BHGhome #MyHouseBeautiful #HappyHouseDreams #ElleDecor #ApartmentTherapy #CraftyMom #CreativeLifeHappyLife #becreative #colorfullycrafted #abmcrafty #bhgcelebrate #diyblogger
If you decorate for Christmas, are your decoration If you decorate for Christmas, are your decorations traditional colors or other colors? I love walking into my living room and seeing all the cute Christmas decorations! I ❤ my non-traditional colors and pom poms!! 😍 You can make that cute little gingerbread house out of a birdhouse. All the details are at the link in my bio.⁣
🎄
2020 being what it is, I set up a sanitizing stat 2020 being what it is, I set up a  sanitizing station by our back door. It involved an easy DIY and some cute printables. Do you have an organized sanitizing station at your house? 😍 You can see it all on my blog via the link in my bio. ⁣
😷 ⁣
#RCRO #Organizing ⁣
#organized #organize #organizer #organization #covid-19
Do you decorate for the seasons? My pom pom wreath Do you decorate for the seasons? My pom pom wreath is my favorite thing to add when there isn't another season or holiday to decorate for. This was my mantel last spring. ⁣
Learn how to make a pom pom wreath at the link in my bio. ⁣
#RCRO #RealCrafts⁣
🧶
Who else is struggling to stay organized right now Who else is struggling to stay organized right now? It feels like there is so much less going on and it 'should' be easy, but I'm struggling to stay focused and organized. Thank goodness for my mom to do list to help keep me sort of on track and actually getting some stuff done. Snag yours at the link in my bio. #RCRO #RealOrganized #RealOrganizedMom⁣
📋
Who could use some fun about now? It's been a roug Who could use some fun about now? It's been a rough year for literally the world. As moms, I think we have taken a huge hit as well. The demands placed on us this year seem to have tripled. I think it's time to have a sucker - maybe made out of wine 😂 and plan something fun or maybe even just 5 minutes alone or without a kid needing us. 🤣 #5minutesformom #realmoms⁣
🍷 ⁣
#honestmotherhood #uniteinmotherhood ⁣
#motherhoodunplugged #momLife #StayHome #weareallinthistogether #ohheymama #our_everyday_moments
The thought of celebrating the 4th of July seems s The thought of celebrating the 4th of July seems so weird to me this year, not only with social distancing but also seeing all the failures of our country, it makes me feel a little less like celebrating. I love these simple stars I made last year. 🤩 They feel kinda perfect for this year....just a nod to 4th of July and a bigger nod to cuteness. 😉  You can learn how to make them at the link in my bio @realcreativerealorganized ⁣
⭐ ⁣
#RCRO #RealCrafts #diyhomedecor #Crafts #4thofJuly #4thofjulydecor ⁣
#crafty #crafting #redwhiteandblue #crafter #CreativeLifeHappyLife #RealMoms

Copyright © 2021 · Sprinkle Pro Theme on Genesis Framework · WordPress · Log in