• Home
  • Contact
  • Privacy Policy & Disclosures
  • Nav Social Menu

    • Email
    • Instagram
    • Pinterest
    • YouTube

Real Creative Real Organized

Creativity and Organization for Mom Life

  • Crafts
  • DIY
  • Organization
  • Travel
  • Mom Life
  • Holidays & Special Days
    • New Year’s
    • Valentine’s Day
    • Mother’s Day
    • Easter
    • Father’s Day
    • Fourth of July
    • Halloween
    • Thanksgiving
    • Christmas
    • Seasons
      • Spring
      • Summer
      • Fall
      • Winter
    • Olympics
    • Birthdays
  • Shop
Home » Holidays & Special Days » Seasons » Fall » Thankful DIY Wall Art

Thankful DIY Wall Art

November 4, 2013 by KC Coake 12 Comments

Share away! 😍

  • WhatsApp
  • Email
  • Facebook
I love creating quick and simple crafts. It also might be dorky to admit, but I’ve always wanted to be able to decorate my house for each season and/or holiday. We don’t have the kind of budget that has allowed me to do that, until I figured out I could do a lot myself. I’m totally OK with that! In fact it is fun! I have made quite a few wreaths for holiday’s/seasons, but I get bored easily, so it was time to try something else. I decided to make some DIY wall art. You won’t believe how easy and inexpensive making your own wall art is.
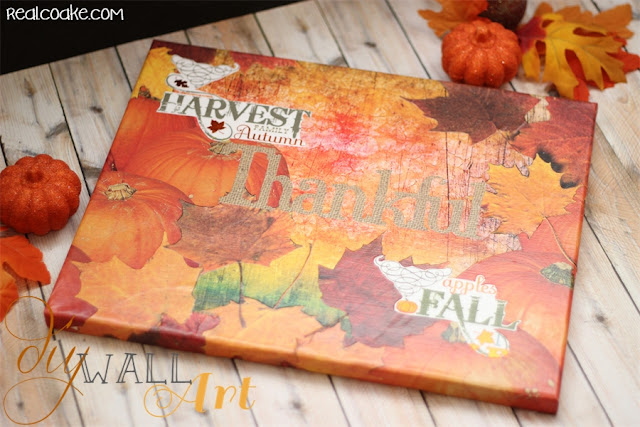
Beautiful, easy to create and inexpensive DIY wall art - perfect for each Thanksgiving decorations

If you read my blog often, you know I’m not going to leave you out in the dark. I’m going to show you exactly how to make your own DIY wall art as well.  Totally sharing the love with you all! Shall we have some fun? I’m ready, how about you?

Beautiful, easy to create and inexpensive DIY wall art - perfect for each season, Holiday's or to fill up bare walls. #realcoake
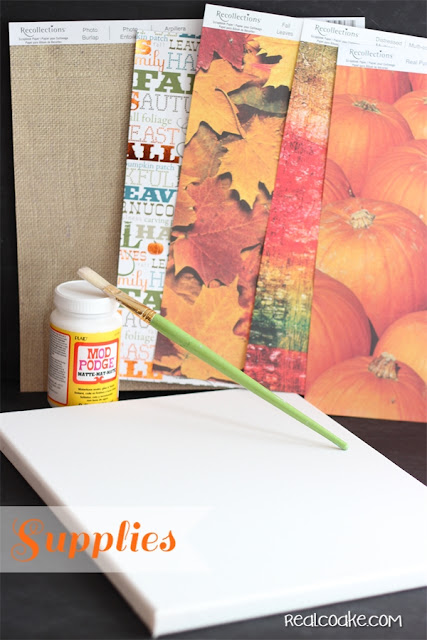
Supplies:
Art canvas – mine is 9 x12 (This packon Amazon looks like a good deal)
Paintbrush
Mod Podge
Scissors
Fall scrapbook paper
Brayer(or pizza dough roller)
Squirt bottle filled with water
Before we move on, let me mention that I would recommend, if you are on a tight budget, that you shop around for your canvas. I find a big difference in price between the three stores we have here. From $9 for one canvas (the basic cheap kind) to $6.50 for 2. That makes a difference to me. If it makes a difference to you, it will be worth it to check prices.
Last time I made my summer DIY wall art, I only used 3 sheets of scrapbook paper. This time I spent a little more and used 5 sheets. It just was what I needed to achieve the look I wanted this time. Since the sheets I pick are usually only $0.50, it is still very inexpensive.
Beautiful, easy to create and inexpensive DIY wall art - perfect for each season, Holiday's or to fill up bare walls. #realcoake
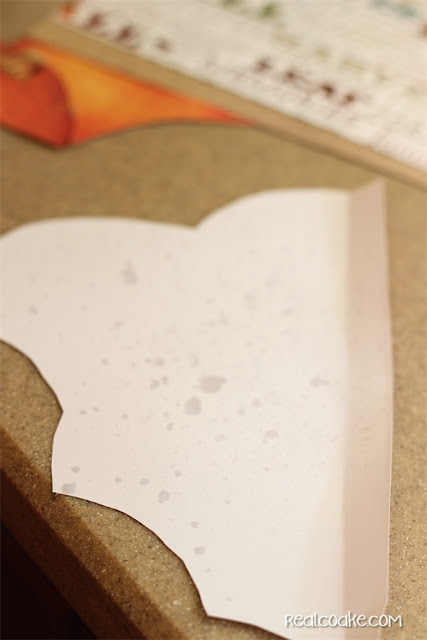
Start your DIY wall art by deciding which direction you want to hang it on the wall. Then take a few minutes to come up with an idea of what you want to do with your various papers.
Beautiful, easy to create and inexpensive DIY wall art - perfect for each season, Holiday's or to fill up bare walls. #realcoake
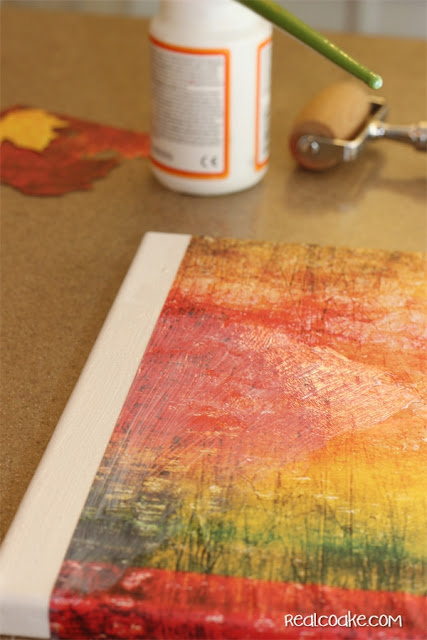
Take your time with your first sheet of paper as you apply it. You will want to paint your canvas with your Mod Podge, then lightly spray the back of your paper with water. This will help reduce the bubbling of your paper. If you have larger pieces that you are adding as you build your art, you will want to spray those lightly with water as well.
Use your brayer (or you can use a pizza dough roller like I do) to smooth out any bubbles or pockets in the paper.
Beautiful, easy to create and inexpensive DIY wall art - perfect for each season, Holiday's or to fill up bare walls. #realcoake
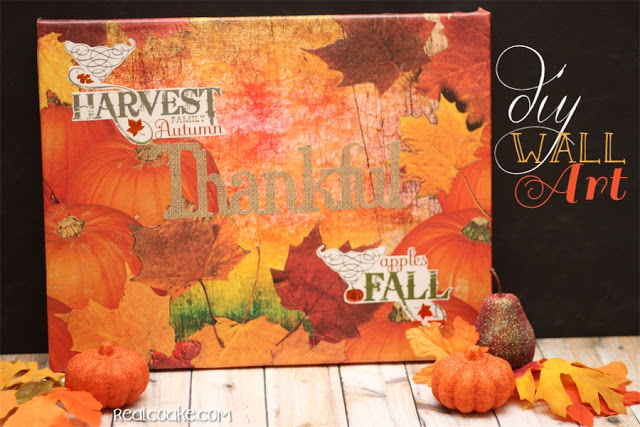
Just to give you an idea for your DIY wall art, I started with the one multi-tone paper. I added pumpkins on the sides. Part of my goal was to make sure the sides were covered when I was done. The other objective was to make a pretty piece of wall art.

After adding the pumpkins, I painstakingly cut out leaves from my leaf piece of scrapbook paper and applied them to the paper to cover up the odd pumpkin cuts and cover the canvas as well as to look pretty.

I wanted to add more. I really wanted this piece to be more Thanksgiving inspired, so I used my Cricut to cut out the word ‘Thankful’ from the burlap paper. The final touch was to add the ‘Fall’ and ‘Harvest words and swirls cut from another piece of scrapbook paper.

It was all about layering, adding more texture and visual interest as well as showing off the season.
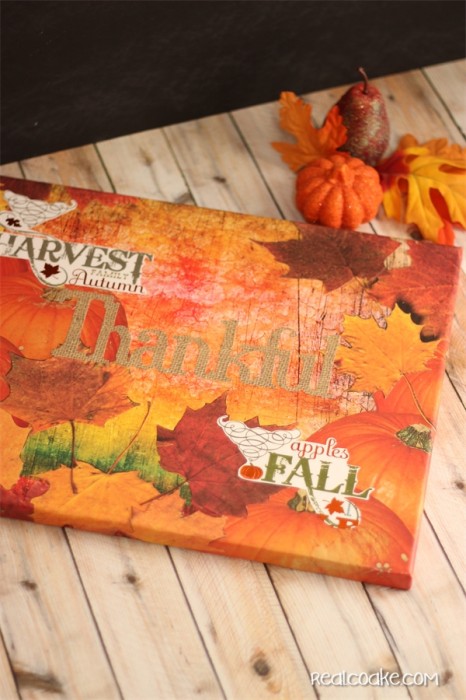
Beautiful, easy to create and inexpensive DIY wall art - perfect for each Thanksgiving decorations

When you are done adding all of your elements to the canvas with the Mod Podge, add a couple of layers of Mod Podge to seal your art and keep everything in place.
Beautiful, easy to create and inexpensive DIY wall art - perfect for each season, Holiday's or to fill up bare walls. #realcoake

This DIY wall art took me between 30 and 60 minutes to complete. For under $10 I have a new piece of art for our kitchen. I love that!

Am I the only one willing to admit that I’d like to decorate my house for every season? Or are there more of you who want to do the same thing? If so, what are your tricks and tips for doing it for low, low cost?

Happy DIY wall art making to you!
More to Enjoy! 😍

Halloween Crafts to Make for Dolls
Adorable and Easy 4th of July Snack Bags

Share away! 😍

  • WhatsApp
  • Email
  • Facebook

Hi! I'm KC. I'm a single mom of 2 girls who loves all things creative. Whether it's making something crafty or tackling that DIY project, I'm gonna have some fun and stay organized in the process. 😊 Read More…

Follow Me:

  • Email
  • Instagram
  • Pinterest
  • YouTube
Previous Post: « Anita’s Amazing Apple Bread
Next Post: Real Fun Features #37 »

Reader Interactions

Comments

  1. Kathy Wallace says

    November 5, 2013 at 3:03 am

    I love it! You did a really great job, thanks for sharing.

    Reply
    • KC Coake says

      November 6, 2013 at 2:29 am

      Thank you so much!
      KC

      Reply
  2. Erin | The Emerging Foodie says

    November 6, 2013 at 1:58 am

    Wow, this looks amazing! I love it. I am totally not artsy/crafty but I think I could do this easily! Love! 🙂

    Reply
    • KC Coake says

      November 6, 2013 at 2:35 am

      Thank you, Erin! The only tricky part is getting the paper to lay flat. If you lightly spray it with water, it will help a lot. I hope you have fun!
      Take care,
      KC

      Reply
  3. Tammy N says

    November 6, 2013 at 3:33 am

    Beautiful fall wall art! You found some great paper to use. It all went together so well.

    Reply
    • KC Coake says

      November 7, 2013 at 1:22 am

      Thank you! I did find some great papers. I wasn’t sure exactly what I was going to do until I got started. Love it when it all comes together really well.
      Thanks so much for stopping by and commenting.
      Take care,
      KC

      Reply
  4. [email protected] says

    November 8, 2013 at 3:16 am

    This is a fun project! And yes, making your own wall art is the best… I do it all the time 🙂

    Reply
    • KC Coake says

      November 10, 2013 at 8:01 pm

      Thanks! Don’t you just love making your own wall art…so fun. Do you have some of yours on your blog? I’d love to see them.
      KC

      Reply
  5. Deborah Davis says

    November 8, 2013 at 6:46 pm

    What lovely wall art! Thanks for showing us how you made it. I love to make artwork as well.Mostly pottery, though. I am going to have to try this! I am glad I found this post on Frugal Days, Sustainable Ways.

    Reply
    • KC Coake says

      November 10, 2013 at 8:05 pm

      Thank you! Oh, pottery sounds fantastic! How neat to make your own. Thanks for popping by.
      KC

      Reply
  6. anastasia anezinis says

    November 11, 2013 at 9:28 am

    I like it so much!Very good job!Well done!

    Reply
    • KC Coake says

      November 12, 2013 at 1:31 am

      Thank you!
      KC

      Reply

Leave a Reply Cancel reply

Your email address will not be published. Required fields are marked *

Primary Sidebar

Popular Posts

  • IKEA built in hack with storage and desk Great IKEA built in hack for simple shelving and desk
  • Valentine's ideas like this are perfect for our family. We can have some fun celebrating Valentine's day and have some fun together as a family. Looks easy, too! Activities for the Family ~ Valentine’s Bean Bag Toss

Meet KC

Hi! I'm KC, Welcome to my blog!
Click here to Learn More About Me…

Free Member Program:

Let’s Be Social

  • Email
  • Instagram
  • Pinterest
  • YouTube

Copyright © 2023 · Sprinkle Pro Theme on Genesis Framework · WordPress · Log in