I’ve got a fun and simple craft for you today that you can use in so many pretty ways. I’m showing you how to make a single layer flower from ribbon.
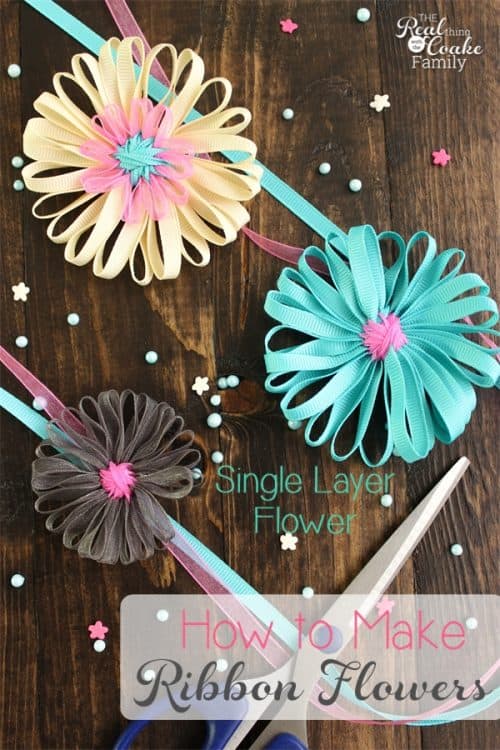
I decided to give this a try with the picture frame wreath I made a month or so ago. I had seen the ribbon flower loom![]() (affiliate link) on Amazon and since I LOVE the pom pom maker by the same company, I really wanted to give making flowers from ribbon a try.
(affiliate link) on Amazon and since I LOVE the pom pom maker by the same company, I really wanted to give making flowers from ribbon a try.
They are fun and simple to make. Let me show you how.
Today, I’m going to show you how to make a single layer flower. I’ll be back in another post showing you how to make a double layer flower and if you are interested, this same loom can make all different kinds of flowers, so I can show you more.
You can make your flower with ribbon, but you can also use yarn, fabric, and the package says ‘and more’…not sure what that means. 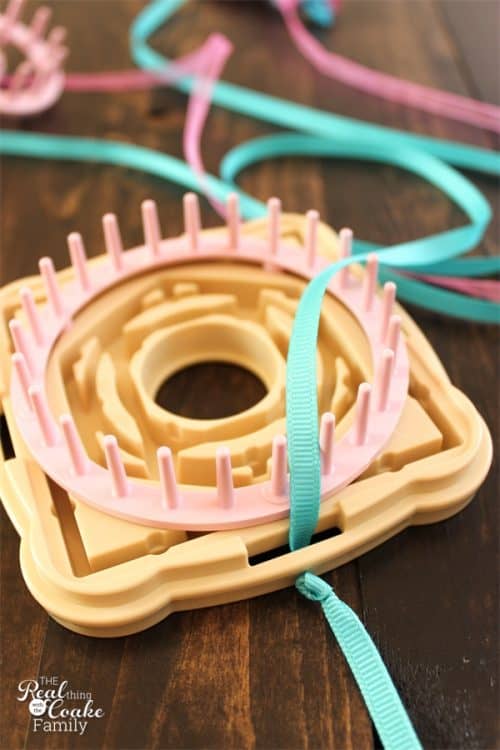
Start with just one of the pink rings on your loom. I’m using the largest ring to make the largest flower.
I have found that 1/4″ thick ribbon or smaller works best. Thread the ribbon through the hole on the side and place a knot about 4″ from the end. Feed it into the slit in the side of the loom to hold it in place.
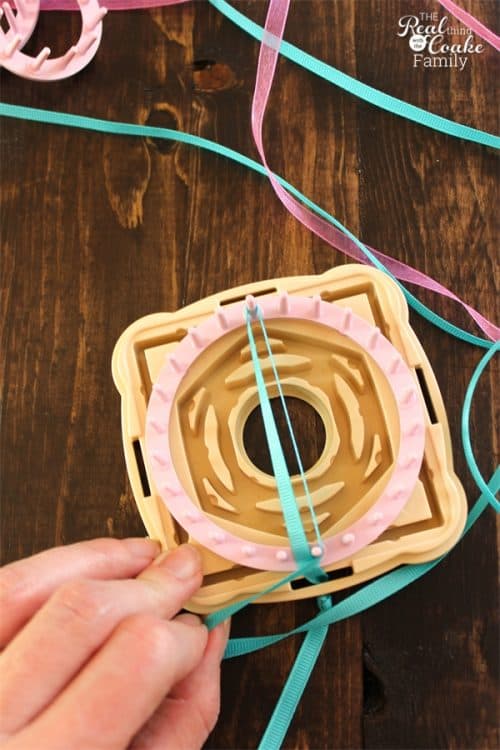
Begin winding your ribbon. Go up around the top spindle and back down and around the opposite spindle.
You will want to hold your ribbon taut as you wind it onto the loom. Sometimes it is helpful to hold a finger in the center of the ribbon wound onto the loom to hold it on. I found this most helpful with the sheer ribbons. They seem to pop off the loom a lot more easily.
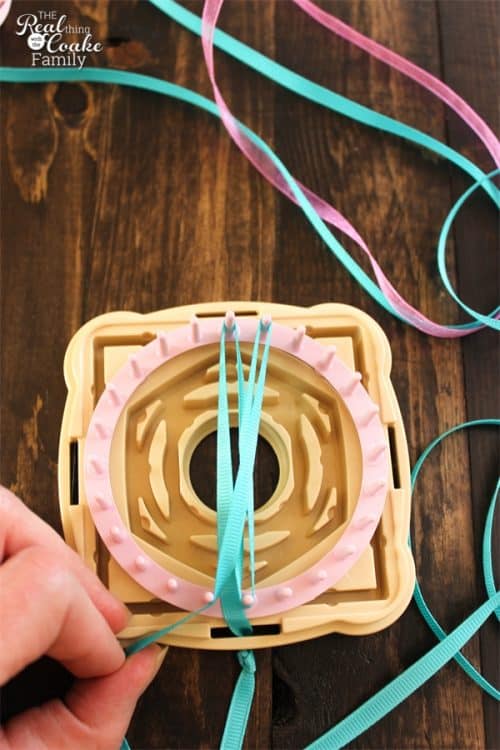
Wind the ribbon around the next two spindles going in a clockwise rotation.
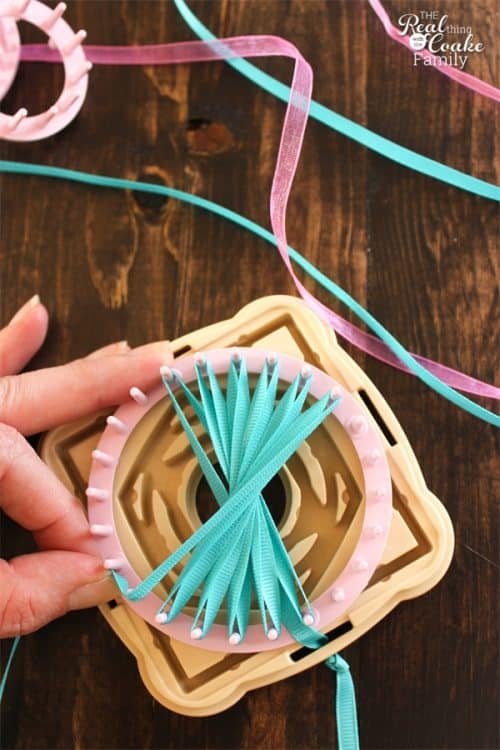
Continue around the loom in this fashion.
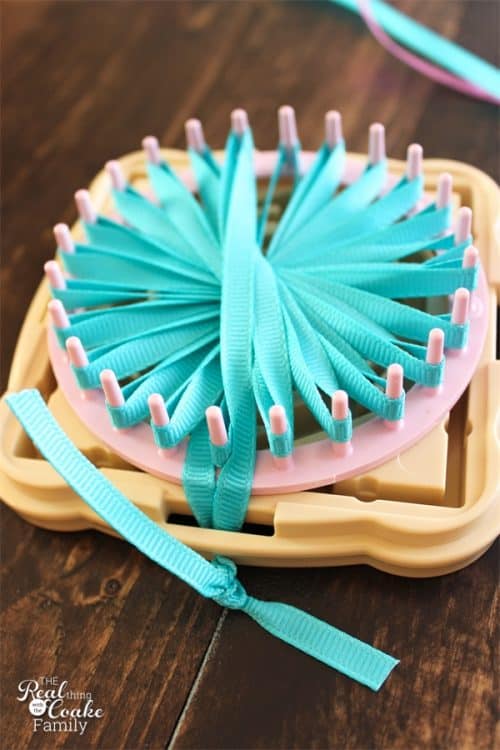
When you make it back to the starting place, pull the end of your ribbon through the hole and tie the two ends together. Secure the ribbon back into the slot on the side of the loom to hold it in place.
If you are working with sheer ribbon, keep your finger in the center of everything you have woven onto the loom as you tie the knot. It will feel like you need an extra hand, but trust me, if you don’t keep your finger in the center holding that ribbon on the loom, it will pop off and you will want to cry. Just saying…not that it happened to me multiple times or anything. 😉
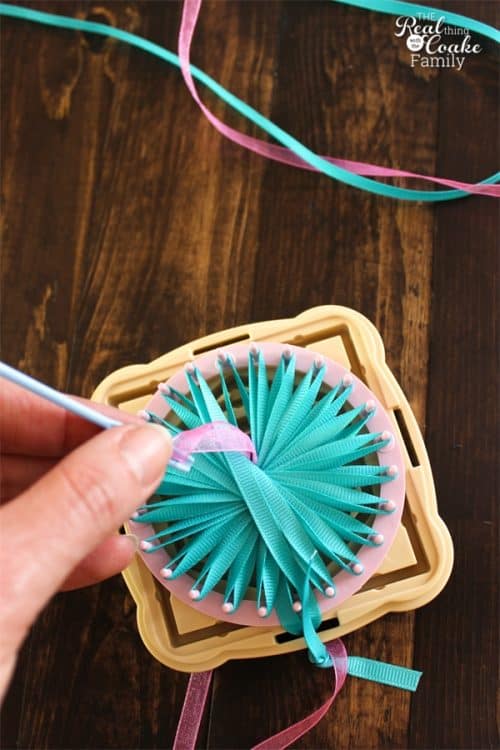
Thread another color of ribbon onto the needle provided with your loom. Pull the ribbon up through ribbon.
Can you see how I pulled it up between the ribbons that are wound around the same spindle? That is what you want to do. Hold the tail of this ribbon in place on the underside of the loom while you do the rest of the ‘sewing.’
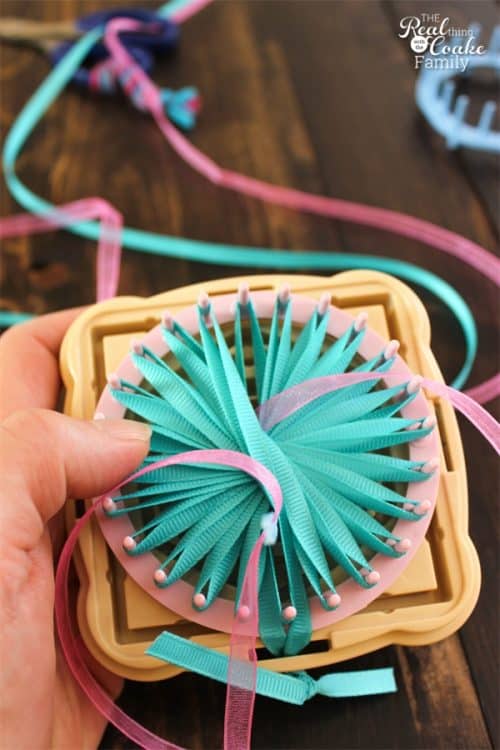
Pull your needle down through the opposite ribbon, once again going through the ribbon that is wound on the same spindle. Pull tight while holding the tail. Continue holding that ribbon tail so you can use it when you are done to tie a secure knot.
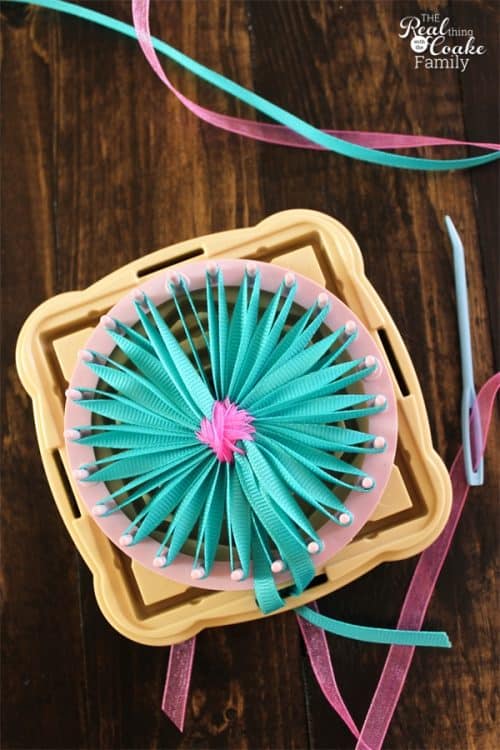
Once you have wound your way around the whole loom, you will have a pretty center to your flower.
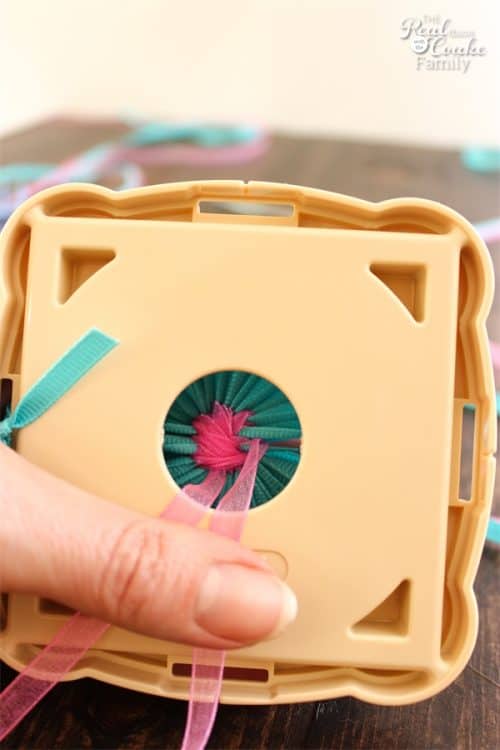
Tie a knot in the ribbon you just sewed into the center of your flower. Do this BEFORE you remove the pink circle part of the loom from the base of the loom.
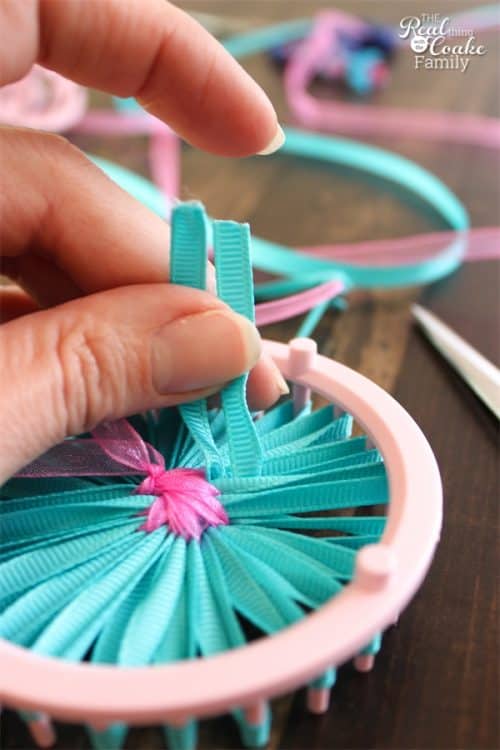
Clip the first ribbon to release it(the ribbon that was your initial ribbon and pulled into the slit on the side of the loom). Pull those two tails of ribbon around to the back side of the loom. In order to do this you will need to remove the spindle part of the loom from the base. I find it easiest to turn the loom over so I can get a good tight knot.
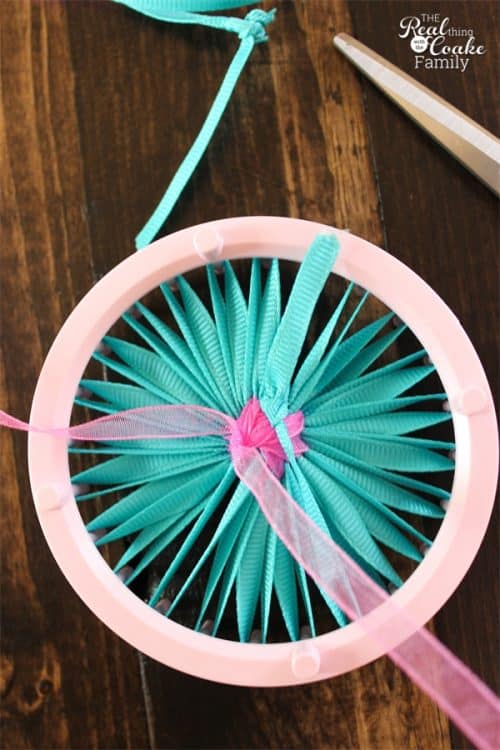
Tie off both of your ribbons as close to the center of the flower as you can. Remove the flower from the loom.

You have just created your first ribbon (or yarn or whatever you used) flower. Aren’t they so cute?!
I have used them on the picture flower frame I made as well as in our door decorating contest at Snap (a blog conference I recently attended). They do use a fair amount of ribbon, so I would recommend if you plan to make quite a few of these, that you get your ribbon in larger spools.
I can see these being a very cute part of decorations for a child’s birthday party or a smaller flower as an addition on placecards. Cuteness! The possibilities are endless. Love it!
How would you use your ribbon flower?
Don’t forget to sign up for my free email newsletter so you don’t miss a thing!
More Great Posts for You:

Leave a Reply