You guys! I’m so excited to show you that I finally finished the last project in my youngest daughter’s room! It took me over a year to complete her bedroom makeover, but I am finally done! Yay! Today, I’m going to show you the project that I avoided the longest….the box pleat pom pom trimmed bed skirt. It turned out so cute and it looks so nice to not be able to see under her bed anymore!
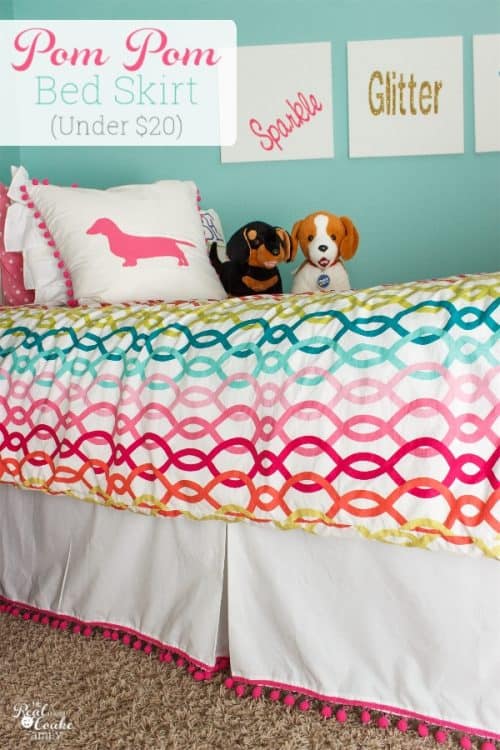
I don’t know why I avoided this project for so long. I had made a bed skirt before when I made the cute one of tulle for Snowflake’s room. I don’t know if you ever do this, but I built this task up in my head as this big monster project and then just did a great job of avoiding it. Great way to have some good Mommy guilt.
At any rate a few weeks ago, my daughter was having a friend over and I didn’t have anything else to do(shocking, but it actually happened), so I decided to put that time to good use. I made the bed skirt from start to finish.
At first, I was only going to get it cut. Then I decided to go ahead and pin everything, then I decided I might as well go ahead and sew the pom pom trim on. At that point, I figured I might as well finish it. After avoiding it for so long, it felt really good to be done.
The best part is that my daughter is really happy with the end result and loves that I am done with her room. Yay! Happy Mom and Happy daughter!
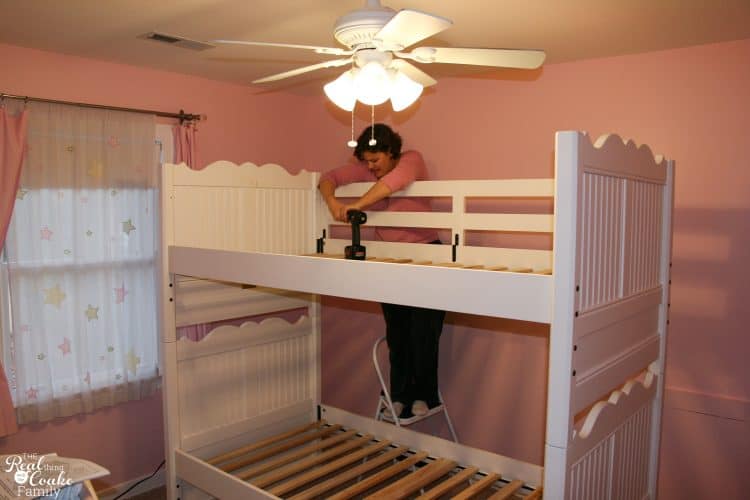
In order to understand why I’ve made both bed skirts the way I have, I want you to see the beds I’m dealing with. Back in 2009, we bought bunk beds for our girls. They shared a room for quite a few years. Then in 2014 we moved them each to their own room. You can see the before of the shared room as well as their rooms before the makeover of Snowflake’s room and now of Pumpkin’s room (I’ll have the final reveal for you at the beginning of next year).
At any rate, the bunk beds have the wood slats that you can see in the picture above. A traditional bed skirt will not work on the beds. If I wanted bed skirts for the beds, I had to make something myself.
The first step in making this bed skirt is to measure the length of the bed. In my case, I am only doing two sides of the bed, not all three. The sides that I’m making a bed skirt for measured 76.5″ long by 13.5″ high.
I had what I considered to be a genius idea….I started with an inexpensive flat sheet for my bed skirt. That way some of the hem was already done. My sheet was 96″ long, but I didn’t want to use the top double thickness part of the sheet. That left me with one side to hem.
I wanted to add a simple box pleat to the center of the bed skirt. I had to add the fabric for that. I decided to cut my sheet at 89.5″ long(which was 12″ for the box pleat and 1″ for the side hem) by 14.5″ high.
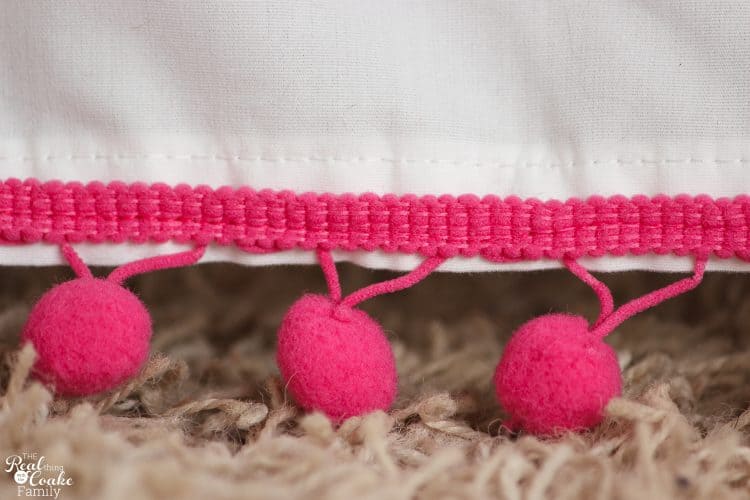
Hem the unfinished side edge of your sheet. Next, pin the pom poms in the pre-hemmed bottom area of the sheet and sew them in place.
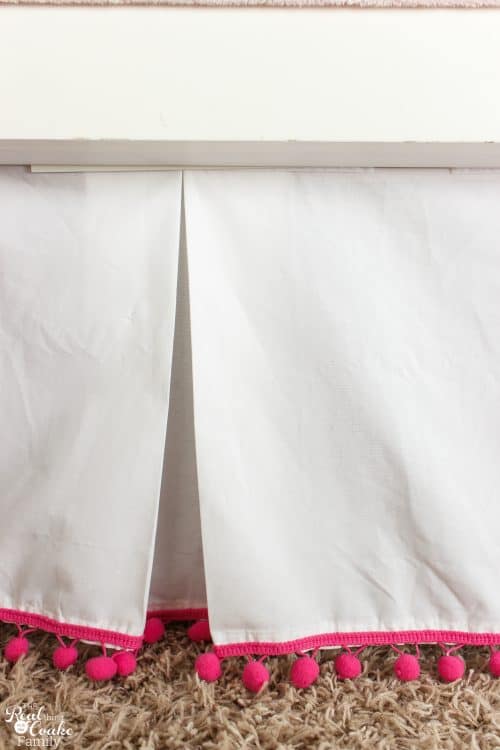
For the box pleat, measure to the half way point of your fabric. For some reason at this point my sheet measured 88″, so my halfway point was 44″. Then I took the extra fabric for the finished length I needed(76.5″), which was 11.5″ and divided that into fourths. That equals 2.875″ (half way between 2.75″ and 3″).
Use a disappearing ink fabric pen and mark the halfway point, which in my case was 44″. Then mark 2.875″ out to either side and again mark another 2.875″ from that point. You will have 5 marks on your sheet. I made my center mark and outer marks larger and the middle two marks smaller to make matching things up in the next step a bit easier.
Now, you will take the fabric and fold it so that the first 2.875″ is the inside of the pleat and the final 2.875″ mark that you made meets in the middle right on top of the half-way mark. So, the two larger marks will match up with the large center mark and the two smaller marks will be inside the fold and should be the inside fold of the box pleat. Pin that in place. I also recommend that you iron and pin all the way down the pleat so that as you sew it doesn’t get messed up.
Once you have that pinned in place, you will pin your top hem and at the same time pin in your home decor Velcro (affiliate link). Make sure, if your bed is like mine, that you pin the home decor Velcro on the right side(the pretty side) of the bed skirt so that you adhere the right side out when you are done.
Sew the home decor Velcro and hem at the same time.
I don’t use the full length of the bed in the home decor Velcro. I used long sections of the Velcro and had small gaps in between. It just helps cut the costs a little bit. So, when I was sewing, I would sew the straight line of the hem in between the sections of Velcro. Then I would sew the entire rectangle (all sides) of the Velcro. On almost all of the Velcro, once I was done sewing the entire rectangle, I was at the wrong side to continue hemming, so I would just sew right down the middle to get to the next section that needed to be hemmed. It made it all done in one step versus sewing the hem and then sewing the Velcro. I prefer one step over two. 🙂
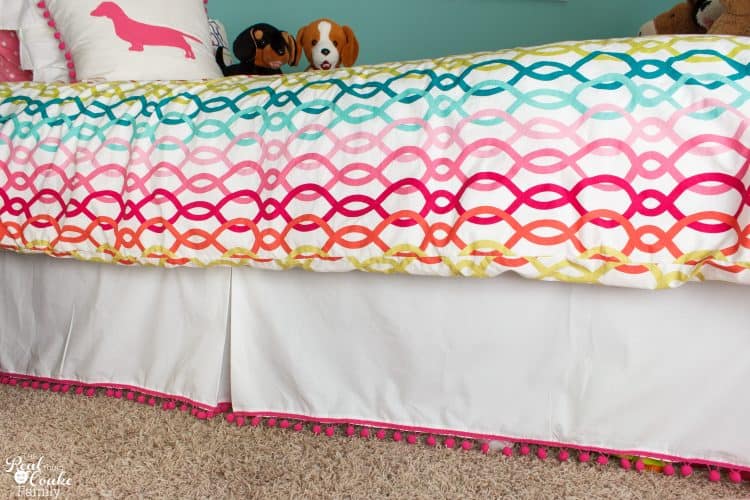
The last thing you need to do is follow the directions that come with the home decor Velcro (affiliate link) to adhere it to the bed. Then add your bed skirt and call it cuteness and done!
You could easily use fabric rather than a sheet and have more box pleats on your bed skirt, but starting with the sheet made this so much easier to me and we like the look of the single box pleat.
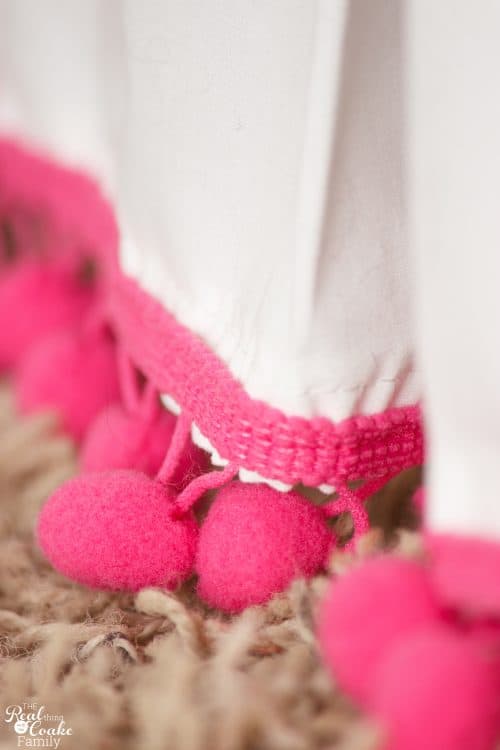
We love the fun look of the pom poms! They add some more fun and color for a tween room. Perfect!

As you can see the pom poms also match the Dachshund pillow that I made for Pumpkin earlier this year. They also match the wall art. Cuteness.
The whole project took me about 4.5 to 5 hours. As you can tell, I didn’t stop to photograph the steps like I usually do. I just needed to get this one done.
As to the cost, technically it cost me around $35 for all of the supplies. I need to make Snowflake a new bed skirt because the tulle skirt that I made almost 2 years ago has been destroyed by pets, the vacuum and whatever else has attacked it. So, I plan to use the rest of the sheet as well as the rest of the Velcro for her new bed skirt. So, if you have multiple bed skirts that you need to make, you should be able to make them with a single sheet, one box of the home decor Velcro and whatever additional accent you want to add, pom poms in this case.
In January, I will have the full room reveal of Pumpkin’s room. Can’t wait to show you!
Have you made a bed skirt? What tips and tricks do you have to help myself and others with our future projects? Please leave a comment below.
Don’t forget that I’m on Facebook sharing more fun ideas and posts. You don’t want to miss it! So follow me over there for all the goodness.
Ah yes, pom poms make everything just a little bit better! What a lovely little finish this pom pom trim adds.
Thank you! Yes, they do! Pom poms are just so fun. 🙂
It turned out to be so cute! I love it.
I never thought to adding pom poms to a bed skirt.
Thank you! They were a fun touch to add for my daughter’s room. 🙂
I love pom poms and your bed skirt is adorable. Thank you for sharing at the Snickerdoodle Create~Bake~Make link party! I am featuring at the party today!
Thanks so much!
I love this, and the handy directions! I would love to know where you found the bedspread.
Thanks so much! The duvet cover is from Pottery Barn Teen.
What a precious addition to the bed… I love it! It really adds a touch of fun to the spice (and hides under-bed storage items nicely).
Thank you!