• Home
  • Contact
  • Privacy Policy & Disclosures
  • Nav Social Menu

    • Instagram
    • Pinterest
    • YouTube

Real Creative Real Organized

Creativity and Organization for Mom Life

  • Crafts
  • DIY
  • Organization
  • Travel
  • Mom Life
  • Holidays & Special Days
    • New Year’s
    • Valentine’s Day
    • Mother’s Day
    • Easter
    • Father’s Day
    • Fourth of July
    • Halloween
    • Thanksgiving
    • Christmas
    • Seasons
      • Spring
      • Summer
      • Fall
      • Winter
    • Olympics
    • Birthdays
  • Recipes
  • Shop
Home » Holidays & Special Days » Birthdays » Pennant and Candles Birthday Card

Pennant and Candles Birthday Card

May 30, 2012 by KC Coake 8 Comments

Share away! 😍

  • WhatsApp
  • Email
  • Facebook
My brother has a birthday coming up. He won’t see this post because he will be river rafting the Grand Canyon on his birthday…so I can post without concern that he will see the card coming in the mail. Whew!

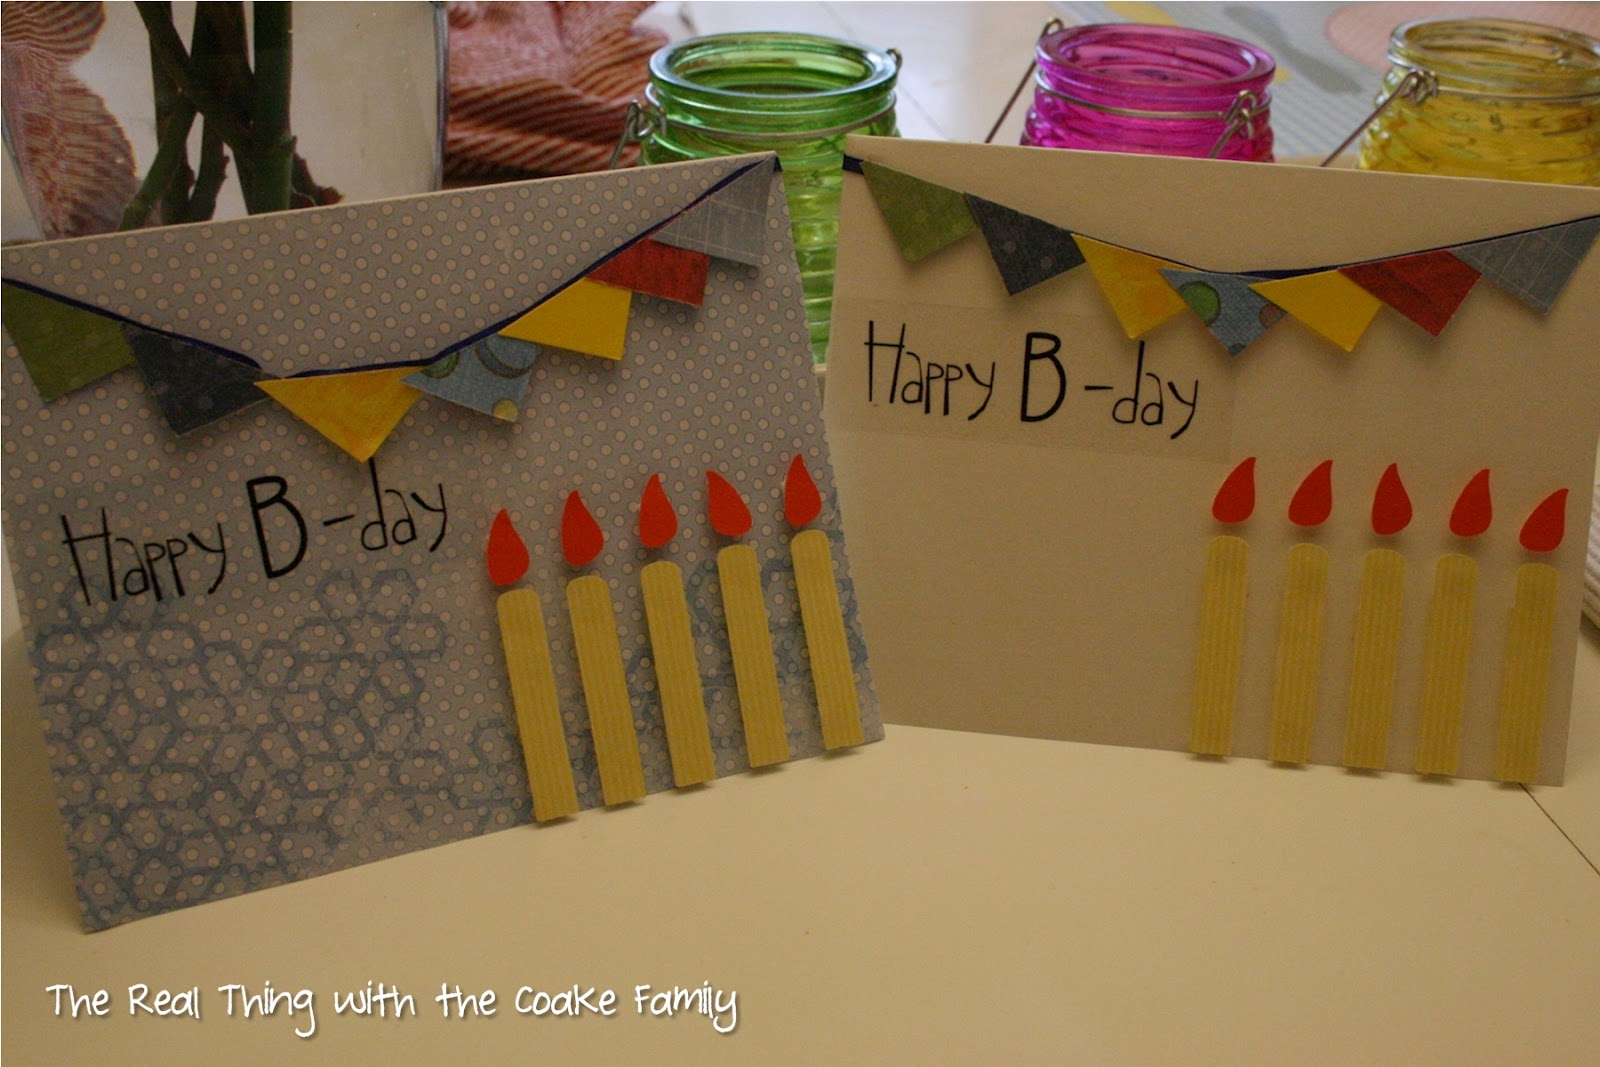
I made a cute card for him. It was easy to make.

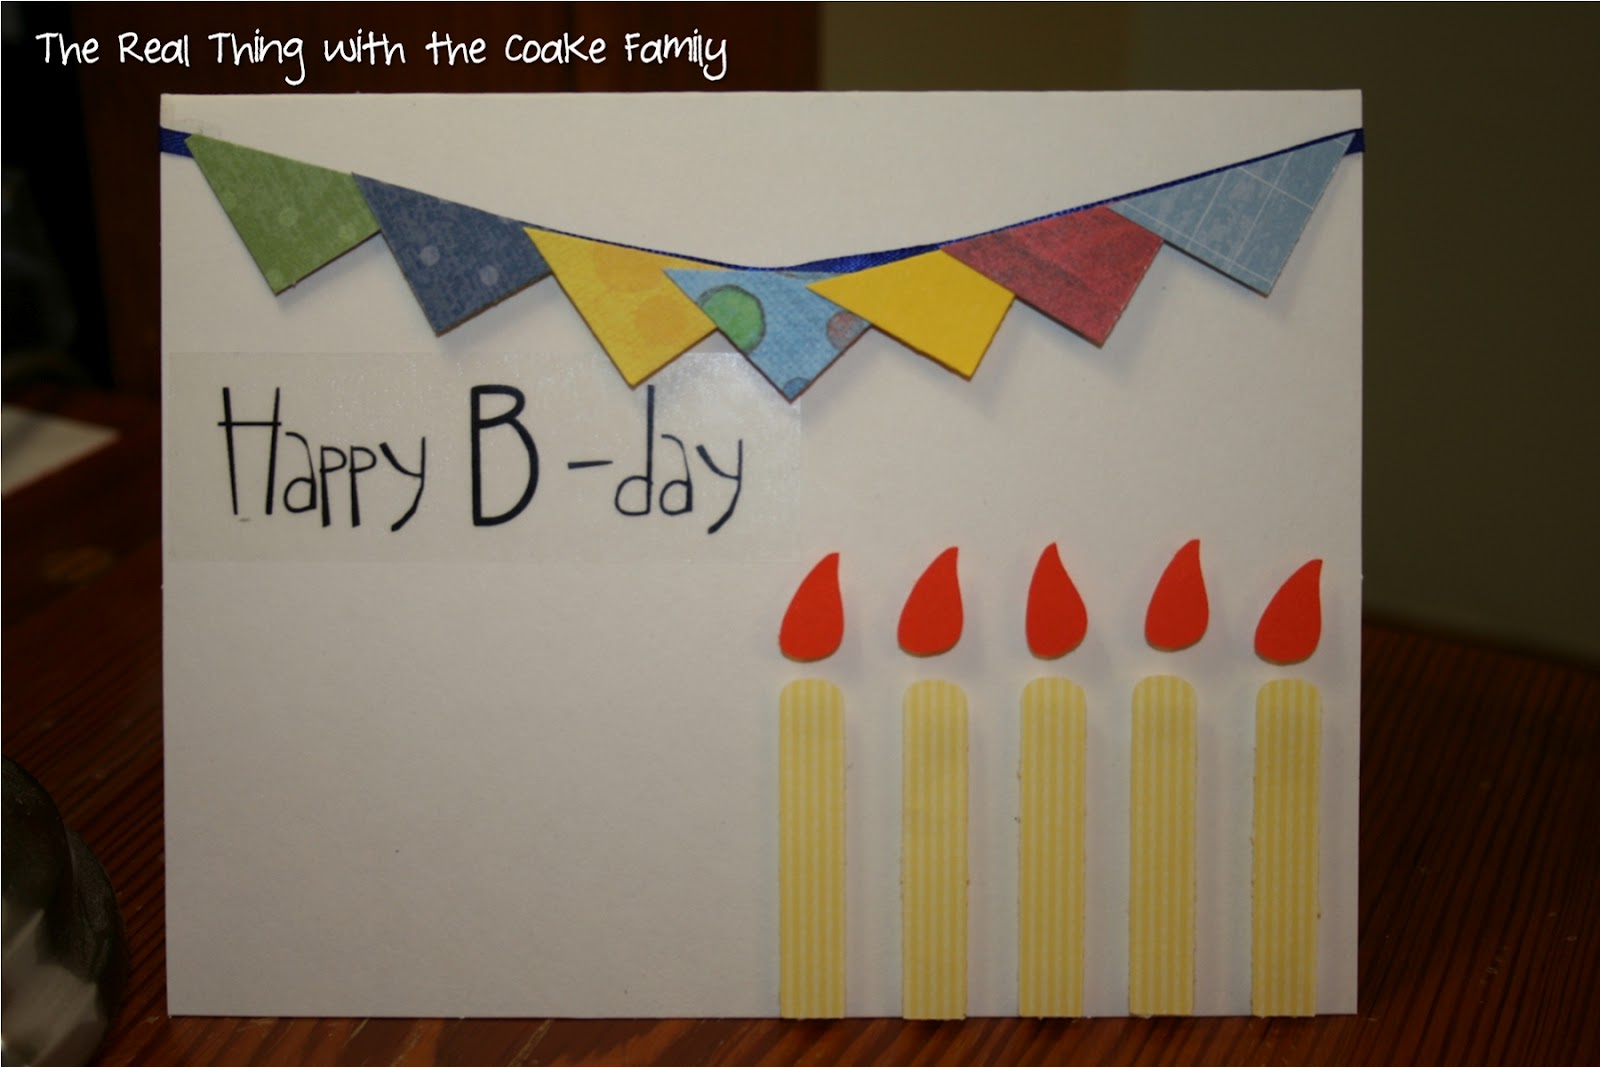
To make this card I used:
Plain card base
6.5″ x 5″ cut out of background paper (not in the card pictured above. I made 2 cards and improved on the 2nd try!)
4 – 1″ squares cut in half diagonally
1 – 1/8″ wide ribbon (about 7.5″ long)
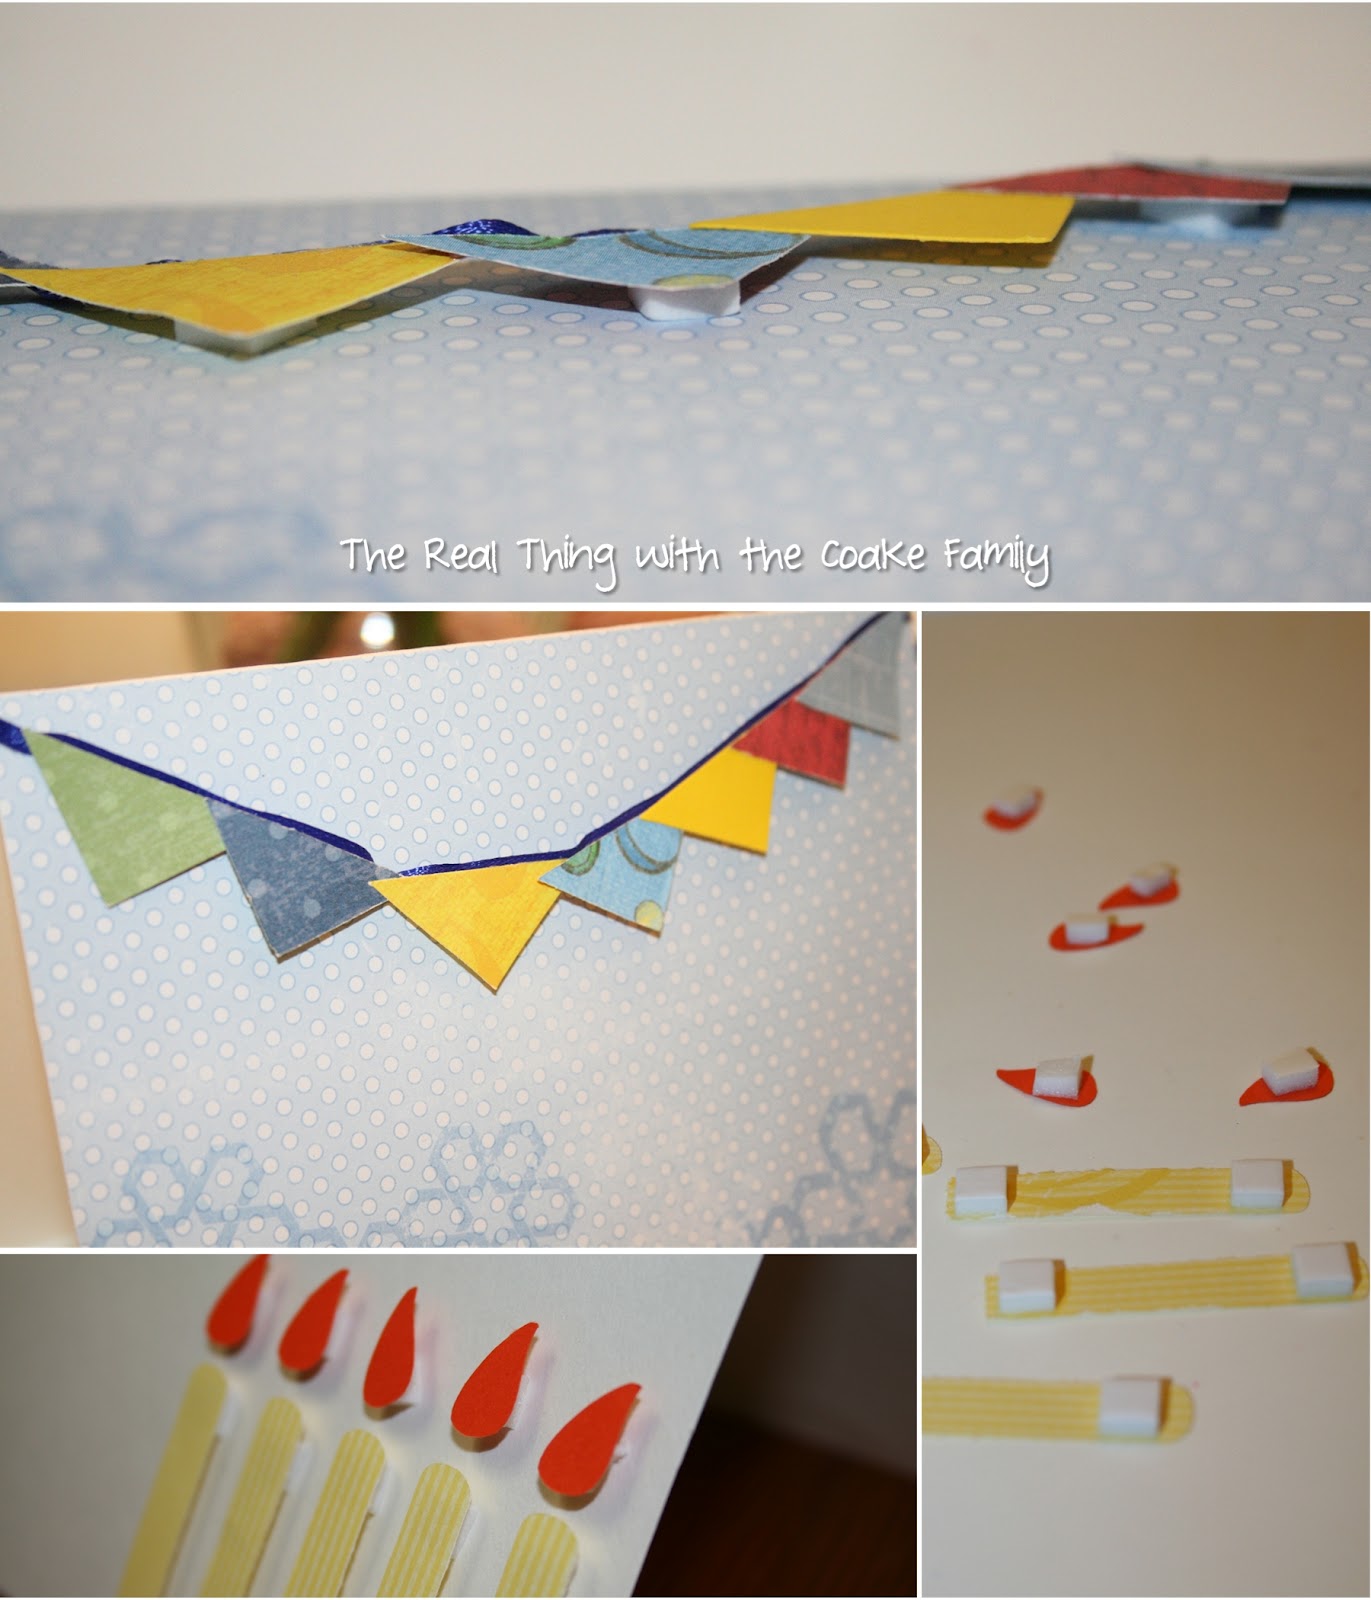
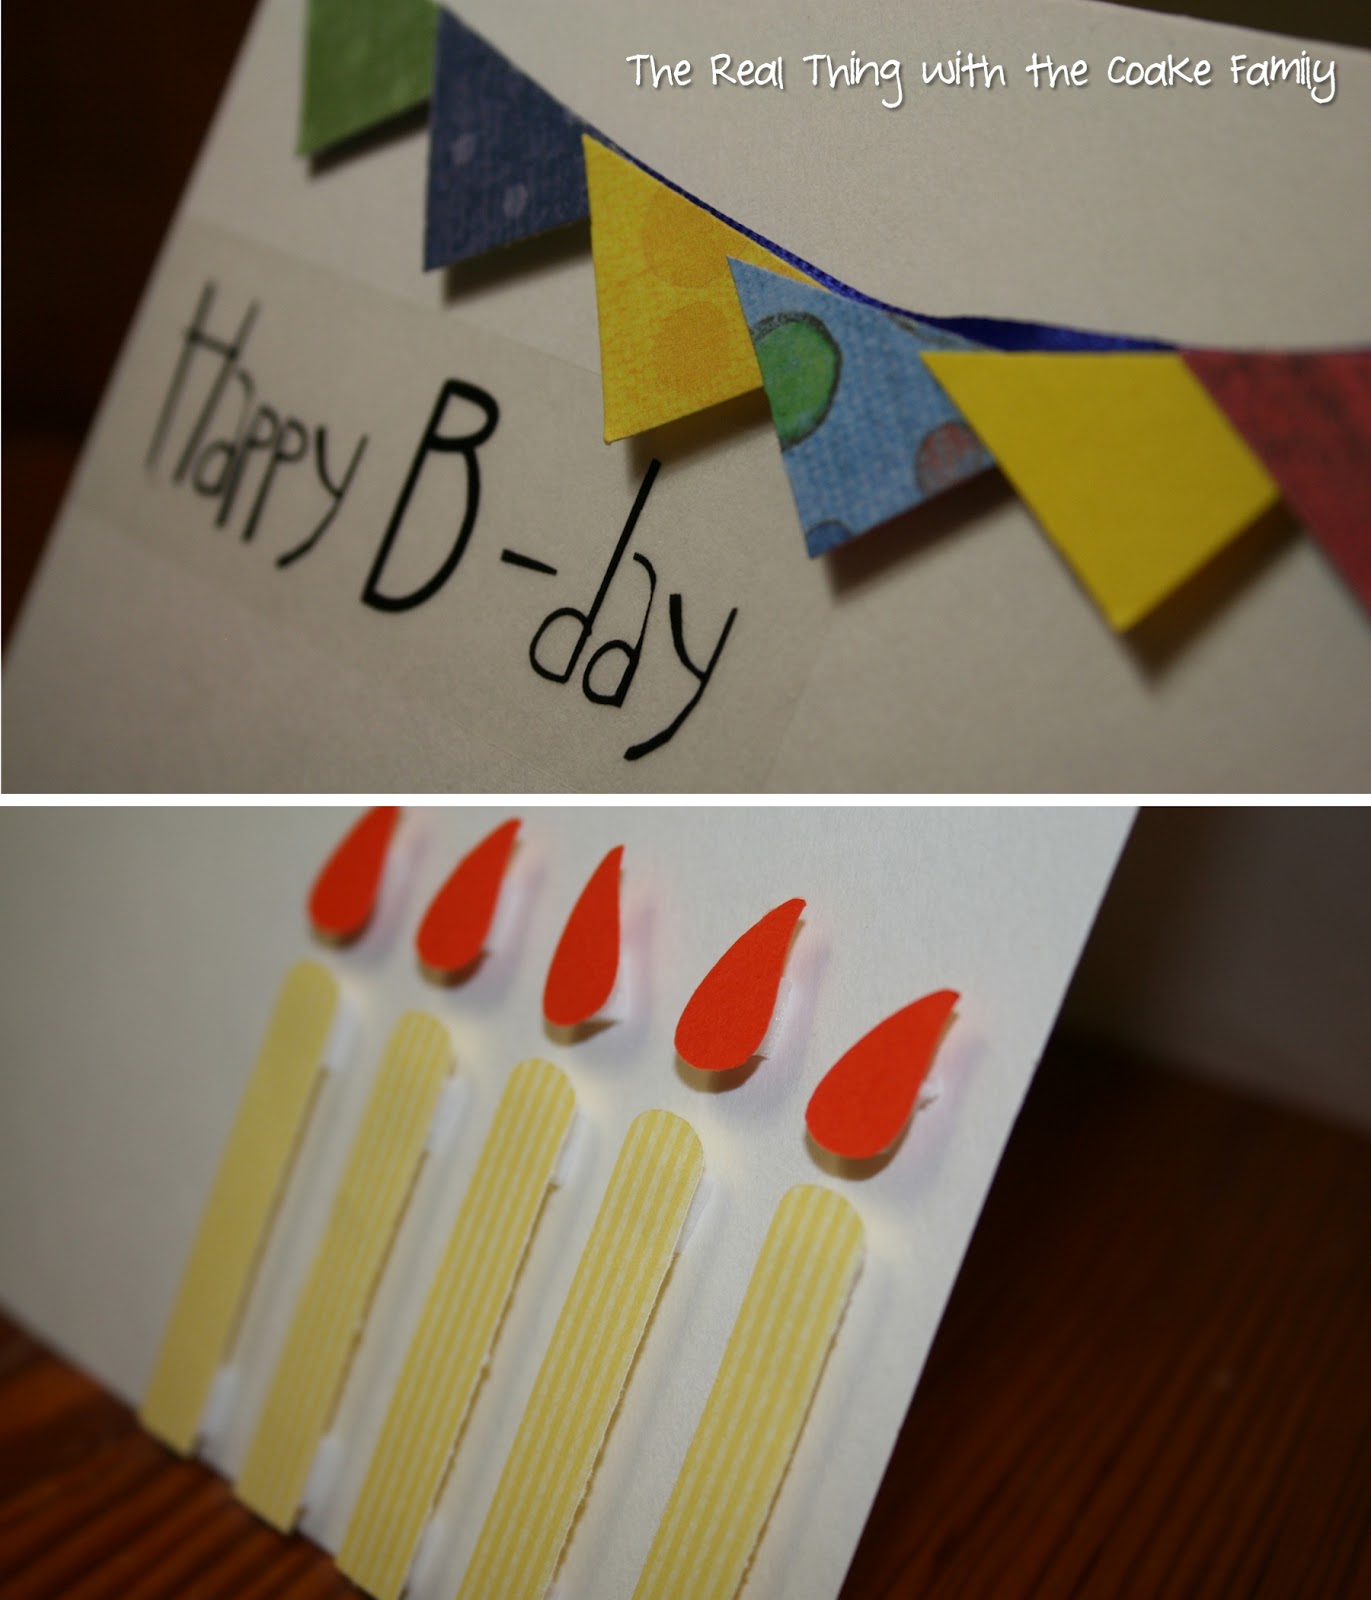
5 candles and flames cut from the Wrap it up Cricut Cartridge(affiliate link)
Happy B-Day Sticker
Adhesive Foam Squares(affiliate link)
Advanced Tape Glider(affiliate link)

I had already made the first of 2 of these cards when I took these pictures, so I already had everything cut out. It took me maybe 20 minutes to put the card together. Easy, Quick and Cute!

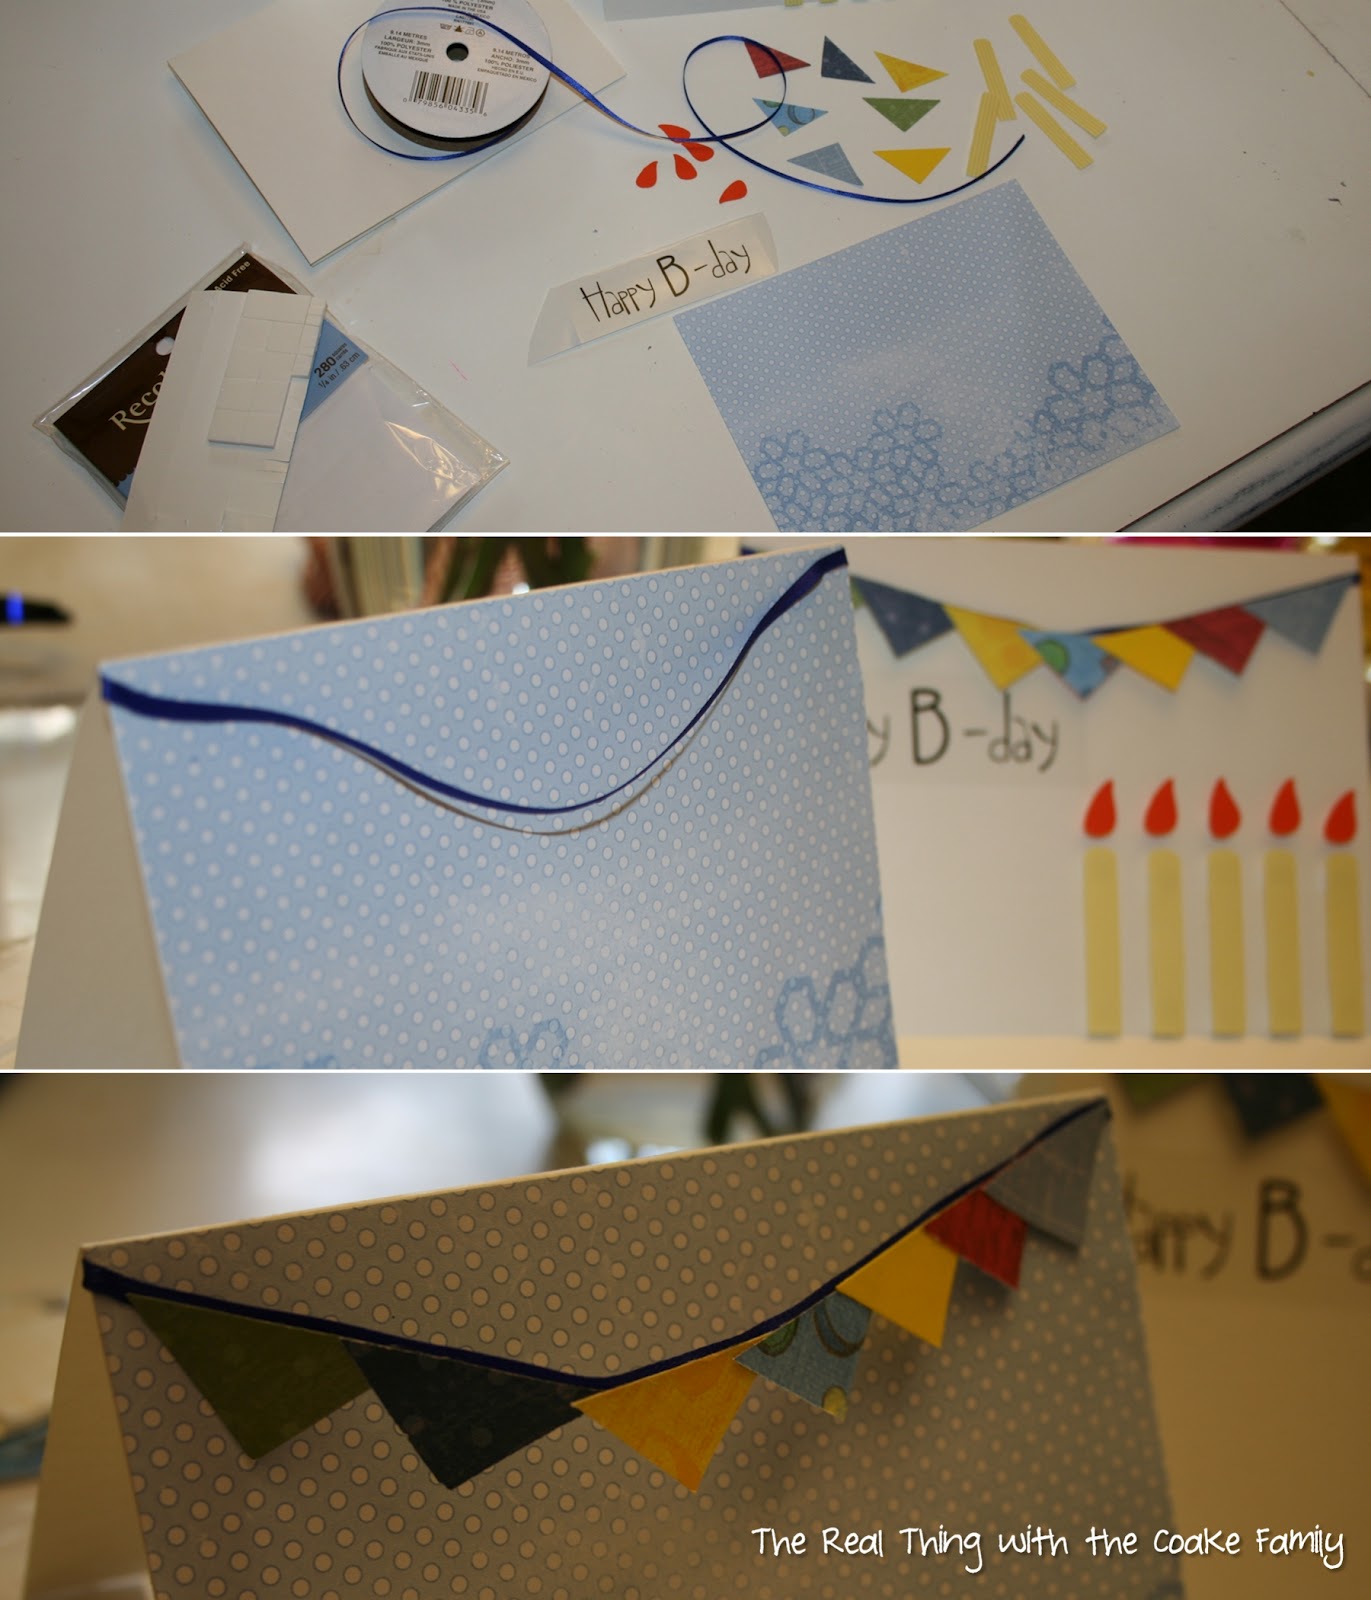
Start by gathering your supplies and cutting everything that needs to be cut.

Next, adhere your background mat to your card base. In the middle picture above, you can see that next I added the ribbon that became my hanging pennant. Then I adhered the triangles to the ribbon. It looks a little wonky and sticks out a bit funny. That is okay as we are going to use foam adhesive squares to make it stay where we want it to and to help flatten it out a bit.

Use as many foam squares as you prefer. I used one about every other pennant as you can see above. This results in a pennant banner that lays better on the card and will stay where you put it.
Adhere your Happy B-Day sticker. Get your candles and flames ready by putting foam squares on the back of each piece. The last thing to do is to place the candles and flames on the card where you want them.
Easy Peasy! One cute card (well two in my case) ready to mail!
The two versions of the same card. Which one do you like better? I like the bottom with the mat, it adds just a little something that was missing.
I always love the details!
For more ideas, check out the cute spring-themed Birthday card I made.

More to Enjoy! 😍

Doll & Horse Show Riding Fun {American Girl Crafts}

My Little Pony Games ~ Perfect for a My Little Pony Birthday Party

Share away! 😍

  • WhatsApp
  • Email
  • Facebook

Hi! I'm KC. I'm a single mom of 2 girls who loves all things creative. Whether it's making something crafty or tackling that DIY project, I'm gonna have some fun and stay organized in the process. 😊 Read More…

Follow Me:

  • Instagram
  • Pinterest
  • YouTube
Previous Post: « Olympics for Kids – A Lesson Plan (Part 1)
Next Post: Olympics for Kids – A Lesson Plan (Part 2) »

Reader Interactions

Comments

  1. Pinkcricut says

    July 18, 2012 at 9:39 pm

    Adorable cards!

    Reply
  2. K Coake says

    July 18, 2012 at 9:39 pm

    Thanks! Thanks for hosting the link party as well.

    Reply
  3. Natasha @ Serenity you says

    July 18, 2012 at 9:40 pm

    these are so cute
    Thanks for linking up to Serenity SaturdayNatasha xx

    Reply
  4. K Coake says

    July 18, 2012 at 9:40 pm

    Thank you!

    Reply
  5. Katie Jasiewicz says

    July 18, 2012 at 9:40 pm

    Love this card of yours! 

    Reply
  6. Camille Beckstrand says

    July 18, 2012 at 9:40 pm

    This birthday card is so very cute!! We are so glad you joined our “Strut Your Stuff Saturday”.  We love to see all of the great recipes and ideas!! Thanks and we hope to see you again next week!  -The Sisters

    Reply
  7. C3moyer says

    July 18, 2012 at 9:40 pm

    Love it!!  Amazing one!!

    Reply
  8. K Coake says

    July 18, 2012 at 9:55 pm

    Thanks Mom!

    Reply

Leave a Reply Cancel reply

Your email address will not be published. Required fields are marked *

Primary Sidebar

Meet KC

Hi! I'm KC, Welcome to my blog!
Click here to Learn More About Me…

Let’s Be Social

  • Instagram
  • Pinterest
  • YouTube

Copyright © 2025 · Sprinkle Pro Theme on Genesis Framework · WordPress · Log in