Recently, I needed some stencils. Have you shopped for stencils? They are expensive. Even though they are expensive I need them because I’m no good with free handing things. I wish I was, but it is not my forte. Therefore, a stencil is a necessity for me. I wanted to figure out a way to make a custom stencil myself so I could make as many as I wanted without it costing me a small fortune. I decided to try two different materials in my quest to make a stencil.
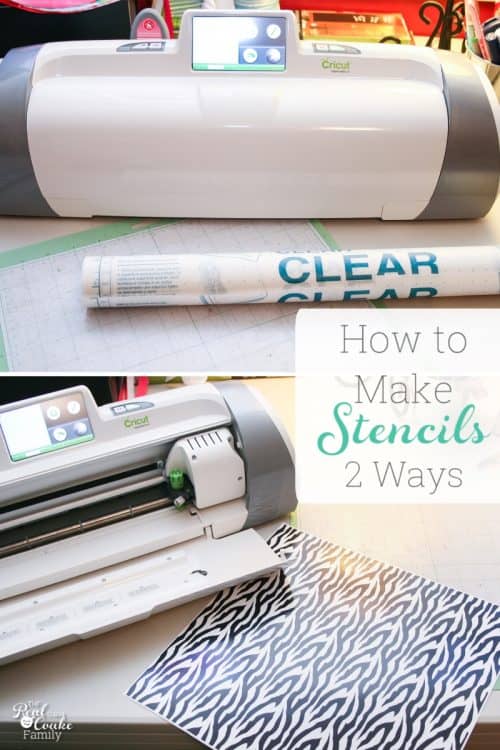
As you can see above, I used my Cricut to make my stencils. I have done something similar in the past with contact paper, a pen and scissors. I don’t have the patience for cutting things out so Mr. T, my husband, cut them out for me. If you don’t have a Cricut or similar machine and you have patience, you can make your own stencil by tracing and cutting. Today, I’m going to show you how to make them the fast way for us less patient people (or those of us who still cut like we are in kindergarten).
I wanted to come up with a lower cost alternative to get a stencil. I realize that vinyl and contact paper are not cheap, but if you look at their cost in terms of how many stencils you can get out of one piece or one roll versus the cost you would pay could you find the exact stencil you want, your cost will be a LOT less. My guess is that your cost is about one fourth or less than the cost of purchasing a stencil.
I wanted to try making a stencil with vinyl![]() (affiliate link) and with contact paper
(affiliate link) and with contact paper![]() (affiliate link), both using my Cricut. I had no idea if it would work. I had a pretty good idea the vinyl would work as I had made a polka dot stencil with a shape maker in order to make a customized doll bed for my daughter’s American Girl Doll. I also had never used my Cricut to cut vinyl before….so off I went on a new adventure.
(affiliate link), both using my Cricut. I had no idea if it would work. I had a pretty good idea the vinyl would work as I had made a polka dot stencil with a shape maker in order to make a customized doll bed for my daughter’s American Girl Doll. I also had never used my Cricut to cut vinyl before….so off I went on a new adventure.
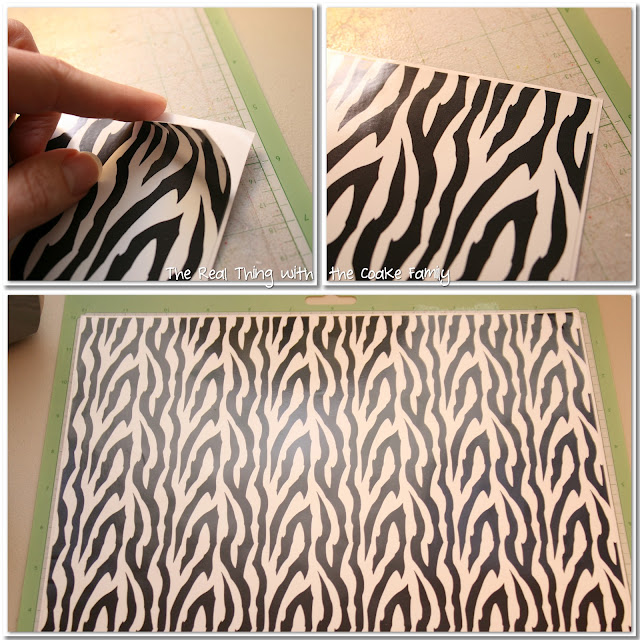
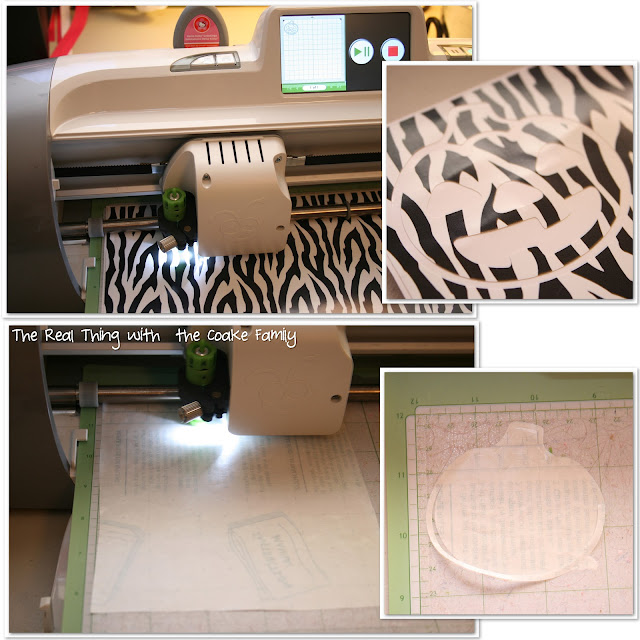
I left my vinyl and my contact paper attached to their backing. With the vinyl, as you can see above, I offset how I laid it on the mat to compensate for the backing paper. That way my cut would be on the vinyl and not on a small portion of the backing paper.
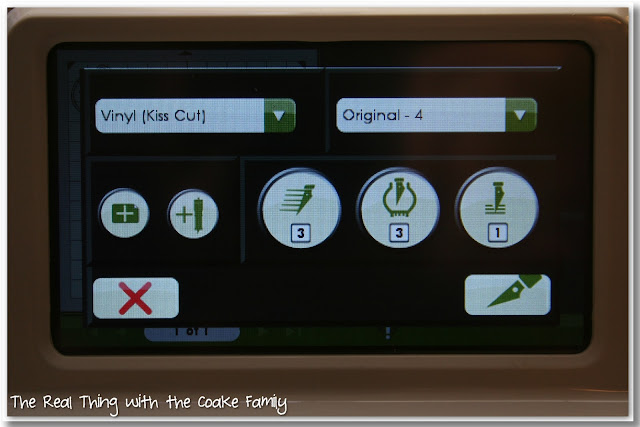
I have a Cricut![]() (<–I have this newer Cricut now that doesn’t need all these settings. It is really nice! – affiliate link). It has a digital screen. I took a picture for you so if you don’t have a digital screen, you can know what setting to use your Cricut on in order to get a great cut on vinyl.
(<–I have this newer Cricut now that doesn’t need all these settings. It is really nice! – affiliate link). It has a digital screen. I took a picture for you so if you don’t have a digital screen, you can know what setting to use your Cricut on in order to get a great cut on vinyl.
The Original – 4 setting at the top right refers to the actual blade. You know how your blade has numbers on it? Turn the blade to 4 for this cut. (I never realized I could or needed to do this until I started paying attention to these preset settings… pretty handy that they did all the work for me!) Looking at the numbers in the circles on the bottom, the first #3 is the blade speed. The second #3 is the blade depth and the final #1 is the number of times it will go over the cut. If you set your machine to these settings, you will get a perfect cut on vinyl.
You can see above, this setting worked perfectly for the vinyl. It only cut through the vinyl and not the backing paper. For the contact paper, this cut went through both layers.
I will make stencils this way many times in the near future for some Christmas presents I have planned. You can follow my blog if you want to see those and some other stencil projects I have planned. If I were to use contact paper, I would change the blade depth to 2 rather than 3 and see if it would cut only the contact paper and not the backing paper.
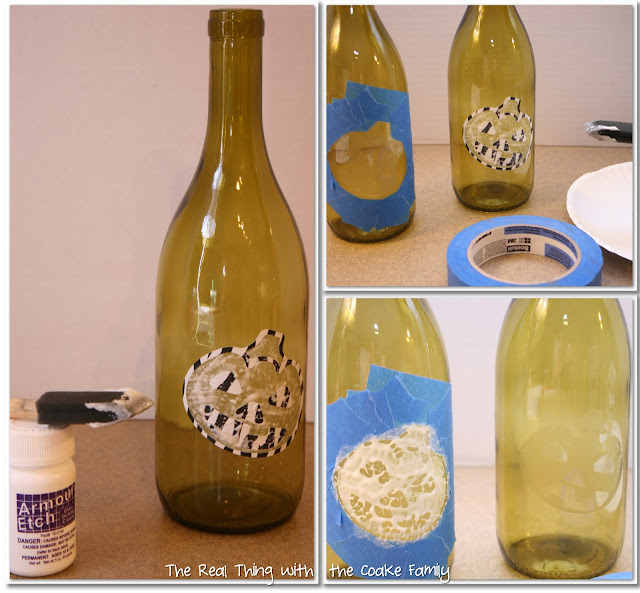
For this trial, I was working on a pumpkin and spider web stencil. I wanted to add these etched glass wine bottles to my Fall/Halloween centerpiece on our table. If you want to try something like this, I learned that it is a great idea to use some tape to tape off the area you don’t want to etch. The stencils I made had a very thin border and it was challenging to keep the etching creme in the correct area.
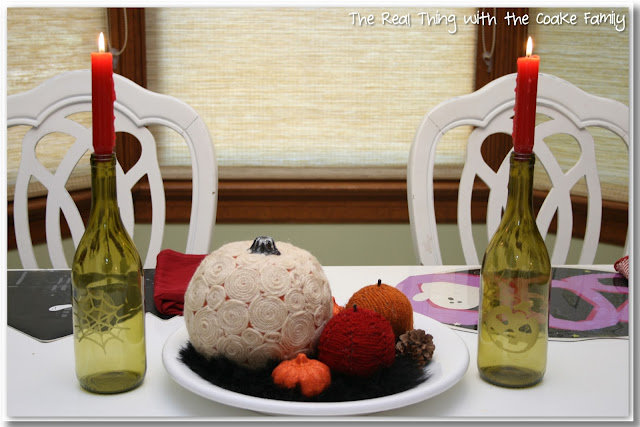
If you are interested, check out my full Fall Centerpiece and you can also see my tutorial on how I made the spiral rosette yarn wrapped pumpkin.
I have also used homemade stencils to make 2 customized doll beds for my daughter’s American Girl Dolls. They would make great and inexpensive Christmas gifts for a little doll lover in your house. You can read about them here: Polka Dot American Girl Doll Bed and An Elegant American Girl Doll Bed.
Love the etched bottles!
Thank you!
Ohh I’m excited, we have just got etching cream here and I ordered some yesterday – stay tuned for a little copying, these are great (send credit of course xo) Stopping by from Transformation Thursday
Thanks! I’m so glad I could help! 🙂 Have fun…I would love to see what you create, please feel free to email me a link or post it here.
These turned out great! 🙂 I can’t wait to see all the vinyl projects you get into now, that you saw how easy it was to cut! 🙂
Thanks. Yes, I have so many ideas….just not enough time. lol!
super job! I love making my own stencils. 🙂
gail
Thank you! I sure have had fun making them since I tried this and figured it out.
Where do you get your vinyl?
I won it a another blog…sorry that isn’t much help.
Take care,
KC
This is great information – thanks for sharing!
You’re welcome!
I have never used a cricut machine…. I make my own stencils using an exacto knife on what I have drawn w/ a Sharpie…. have used different materials… flat cardboard, etc, but the best thing I have found (so far) is old blueprints… they are thin and strong and they last quite well… and one blueprint can make several stencils. I do get really tired of intricate cuts, so the cricut idea sounds good. 🙂
You must have so much patience! I do not have enough patience for the precise cutting of making your own. I think that is spectacular that you are able to make your own stencils. If you decide to get a Cricut, you will feel so spoiled with how fast and simple it is. 🙂
How big of a stencil can the circuit make?
As big as you have vinyl and a cutting mat. I believe that the largest mat is 12″ x 24″. If you needed a larger stencil, you might be able to cut it between multiple mats and use transfer paper and/or tape to connect them together.
I have a Silhouette and have made a few stencils – I love that you can create whatever you want! Thanks for linking up with our Merry Monday party this week.
I love that same thing! It is so great to have the freedom to create any way I want. Love it!
Thanks for your Make Your Own Stencils tutorial, appreciated.
Joy
You’re welcome!
I can see so many possibilities! Thanks for sharing at Over the Moon.
So true!