Who loves a great printable? I know I do, but I don’t always want them printed as a full size printable. I like a smaller planner or notebook and need to print planner pages smaller. It took me a bit to figure out how to do this the best way, but I’ve figured it out, and I’ve got simple step by step directions for you.
I’ve made tons of printables for you over the years, and I know I’ve downloaded my fair share of printables as well. They’re so handy. It makes mom life so much easier to have the work done for you and have something cute to use to plan, keep track, or whatever the printable is for.
The issue I had was that I didn’t want to print at a full 8.5″ x 11 size. For some printables like the Mom To Do List, I want to print smaller.
I looked and looked, and everything I found on how to print to an unusual size piece of paper didn’t work for me. So, with some trial and error, I figured out how to make it work, and I’ve got all the info. for you here in simple step by step directions. And since I recently changed from Windows to a Mac(affiliate link), I can show you for both computers.
How to Print Planner Pages or Printables Any Size
NOTE: When using this method to print, you’ll need to make sure you have the custom size paper to load into your printer. This won’t work if you plan to add 8.5″ x 11 inch paper into the printer and cut it after you print.
To print that way, use the Custom Scale feature you see on the left hand side of the print dialog box below the Page Sizing & Handling heading.
For Windows:
Step 1: Open Print Dialog box
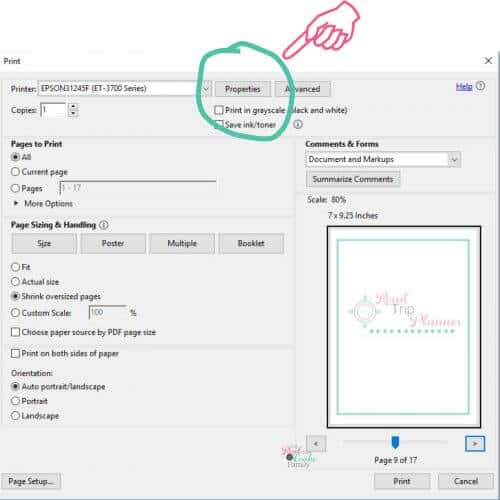
I did this in the Adobe Acrobat program, so these pictures show you how print planner pages from that print dialog box.
First, click on the properties box.
Click on the drop down menu to the right of the document size box.
Look for User-Defined in the list and click on that.
Step 2: Name Your Size
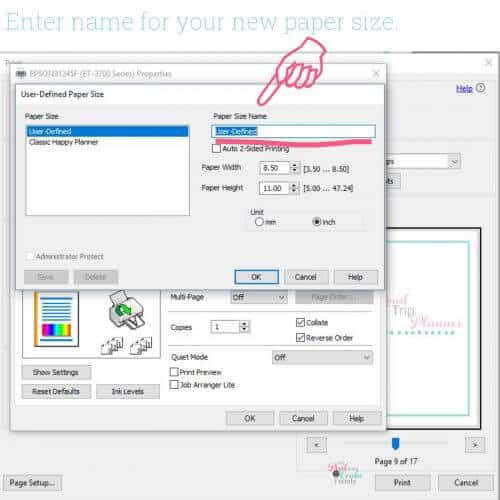
In the window that pops up, add the name for your custom size paper.
Step 3: Add Specifics for Your Paper Size
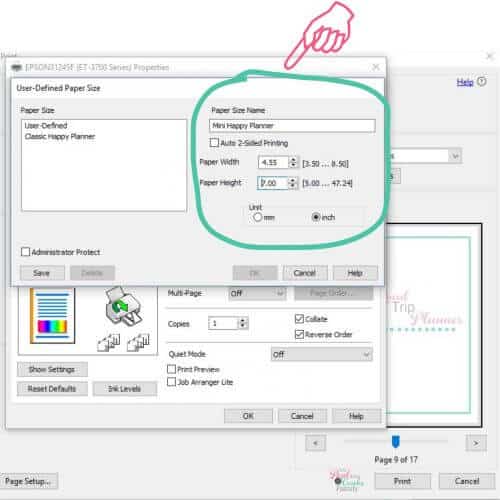
Complete the information for your specific paper size.
Step 4: Save
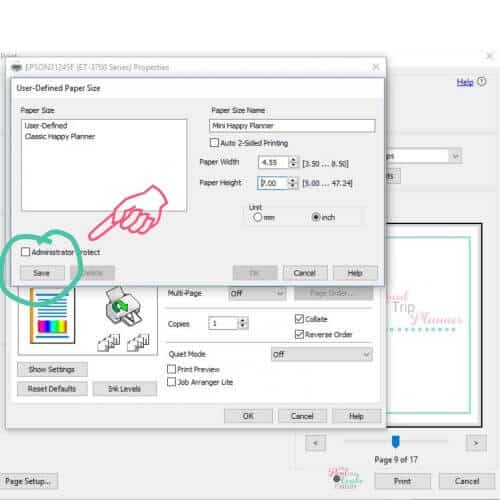
Save your custom paper size.
Step 5: Select Page Setup
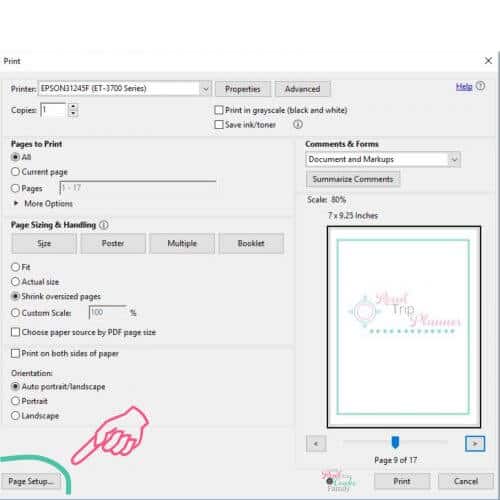
Step 6: Select Your Paper Size
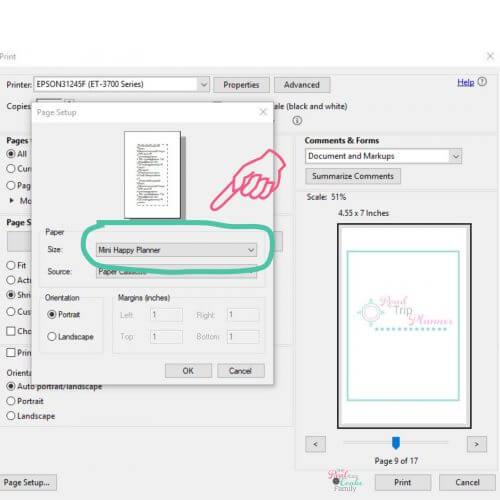
In the new pop up window, click on the drop down menu to the right of the Size option.
Look for the name of the paper size you created in the list and select it and click OK.
Verification
Look on the right side of the print dialog box. Below ‘summarize comments,’ you should see that the adjusted scale and that the paper size matches the values you entered for your custom paper size. If so, click print and you’re good to go.
For Mac:
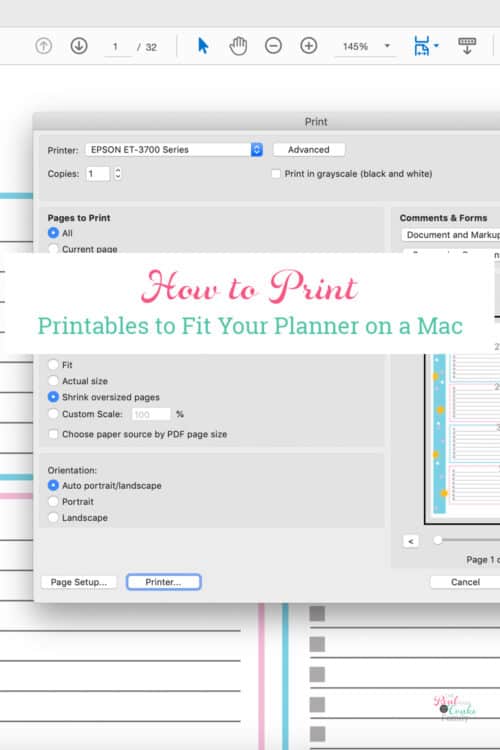
Step 1: Open Print Dialog Box
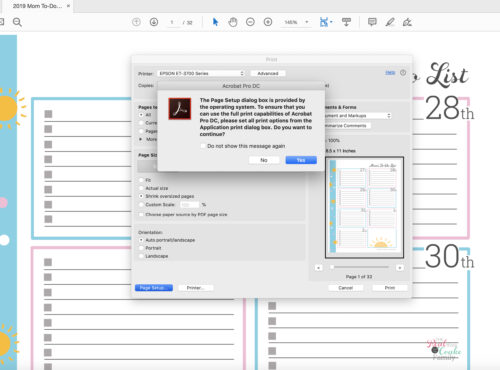
Step 2: Click Page Setup 
A warning box will appear. Click, “Yes.”
The way I read the box, it’s telling you that you won’t have the full Adobe print functionality if you mess with the stuff in the page setup.
I’ve never had any issue with things not working when I print using a custom page size.
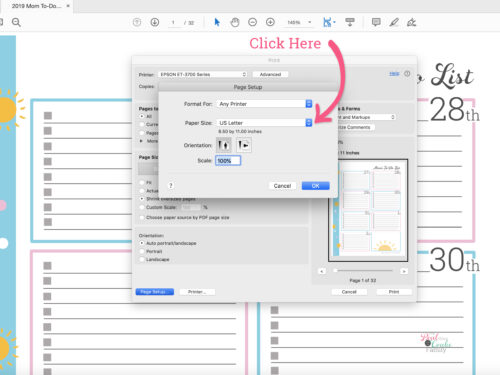
Step 3: Click Paper Size
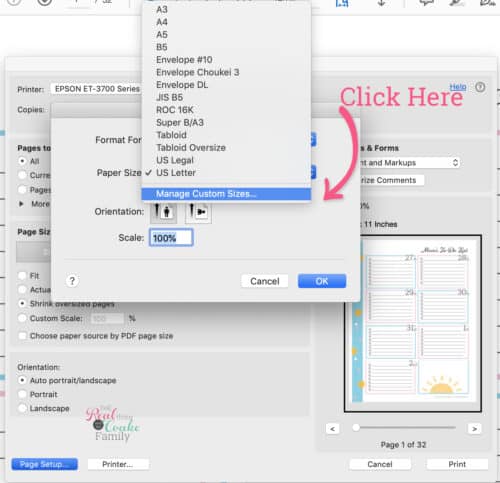
Step 4: Click Manage Custom Sizes
This will open another window.
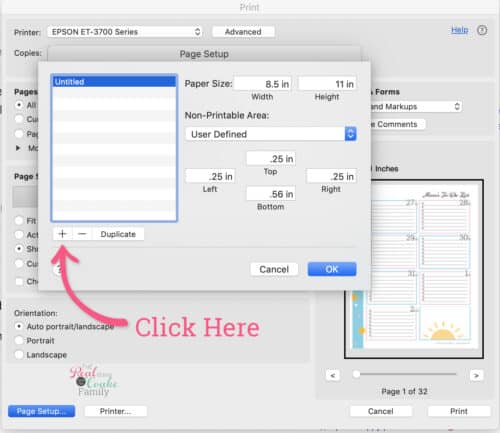
Step 5: Click Add
To add a new paper size, click on the + symbol.
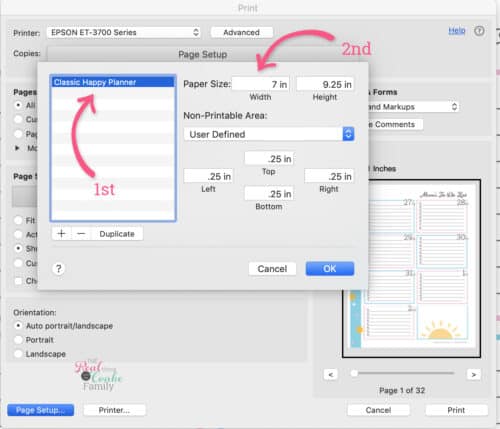
Step 6: Add Specifics for Your Paper Size
First, click to name your paper size in the window above the + and – symbols.
Then add the information for the paper size as well as any adjustments you want to make to the margins.
Click OK.
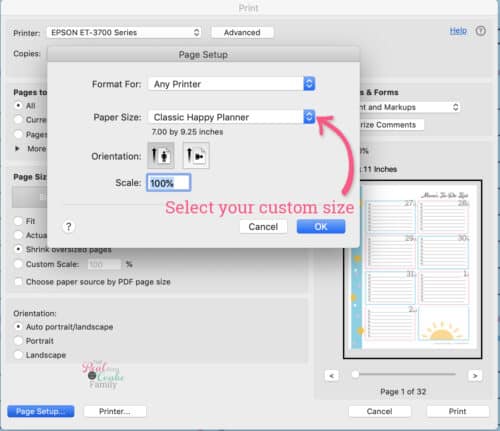
Step 7: Select Paper Size
Click the Paper Size menu and look for the size you just created.
In most cases, it will have it already selected for you.
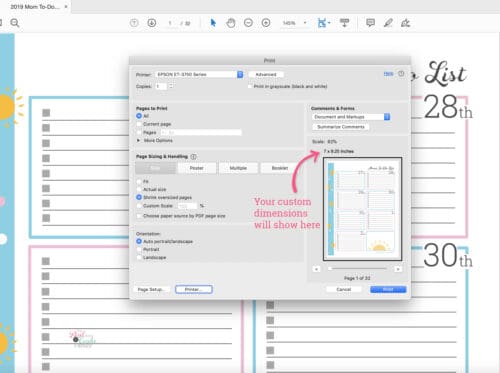
Verification:
You’ll know that you did things right if the print dialog box now has the custom size paper you set up listed right above the picture of the printable you’re printing.
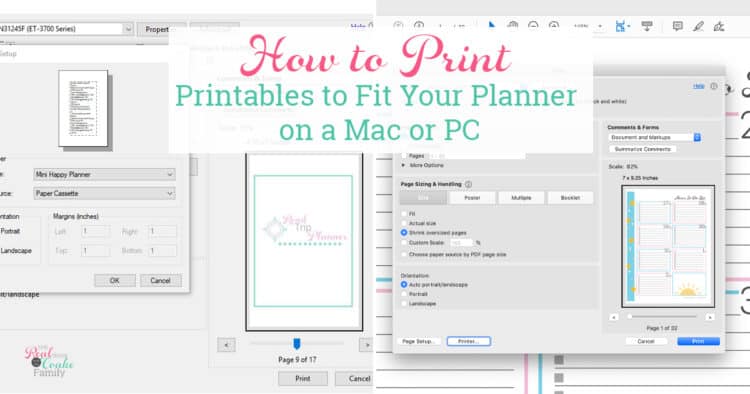
Once you know how to set this up, it is so simple and makes it so easy to print planner pages and other printables any size you want to print them.
Now you can print any printable on the exact size paper you need. Yay! If you want more savings, try the Epson Ecotank printer. I’ve had mine for over a year and never needed to buy ink. It’s a great savings for my wallet and the earth.
Hopefully, this helps you out in your quest to be a little more organized as a mom or at least means that it is tons faster for you to print planner pages than it was for me.
Great information! Pinning. 🙂
Thanks! Glad you found it helpful!