Valentine’s Day is quickly approaching and this year, I wanted to add a little Valentine decor around the house. I had seen a bunch of these cute Christmas tree ideas using pallet wood. I thought it would be really cute to make something like that but for Valentine’s Day. Of course, I found a way to incorporate chalkboard paint as well because it is just so fun!
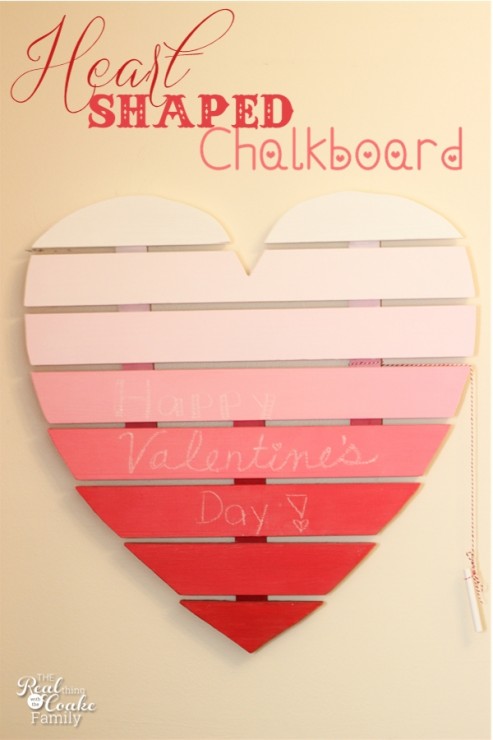
What I had in my mind was to modify the ideas I had see with the Christmas trees for Valentine’s Day. I wanted my Valentine version to be a place we could leave nice notes for each other in the days leading up to Valentine’s Day, not necessarily a place to hang notes or cards like the Christmas trees I had seen. My one concern was being able to find chalkboard paint in Valentine colors. I found the BEST SOLUTION ever! I’m so excited and so excited it worked!
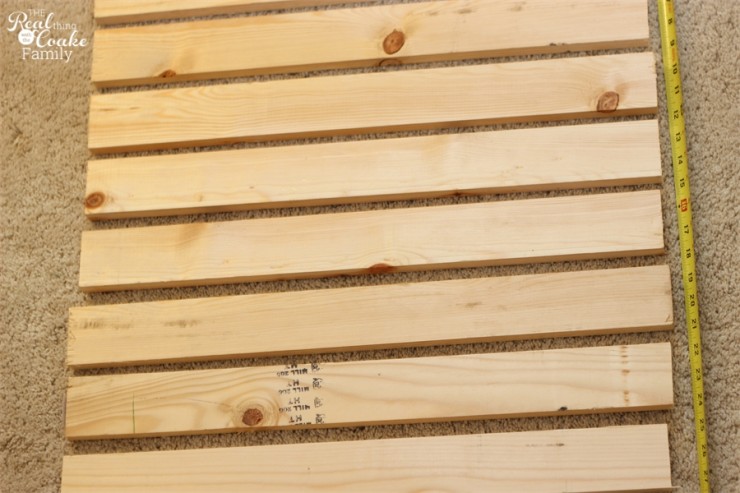
I didn’t want the hassle of dealing with pallet wood, so I just went to Lowe’s and bought 3-1×3 boards that were 6′ long each. Mr. T cut them each roughly into thirds. They were all about the same length. We based all of this on the space in which I wanted to hang the finished heart.
I then place the boards on the floor and began to approximate how far apart we wanted them in the finished product. I was trying to figure out if I needed all of the boards or only some of them. I ended up not using one of the cut boards.
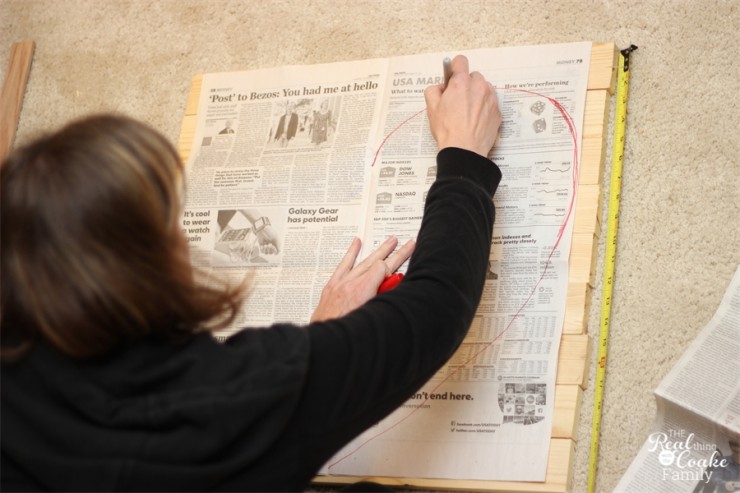
For the heart, use newspaper or other large paper to draw your half heart. Once you have the half the size and shape you like, fold your paper in half and cut out your heart.
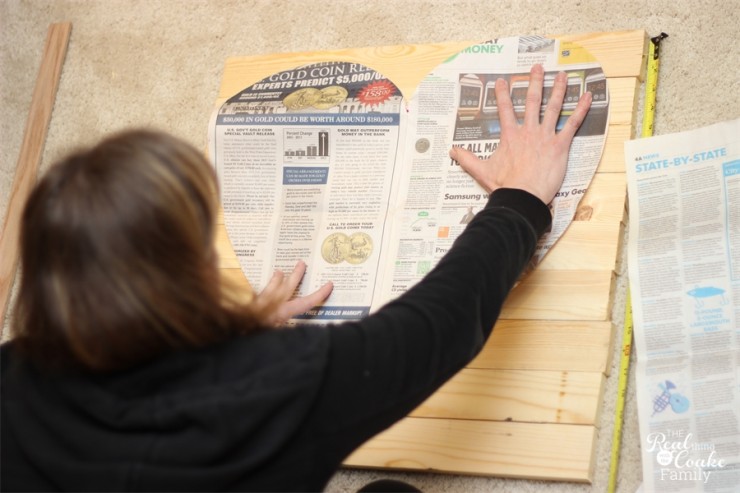
Place your boards all together. Hold or tape your newspaper heart in place and trace it onto the wood pieces.
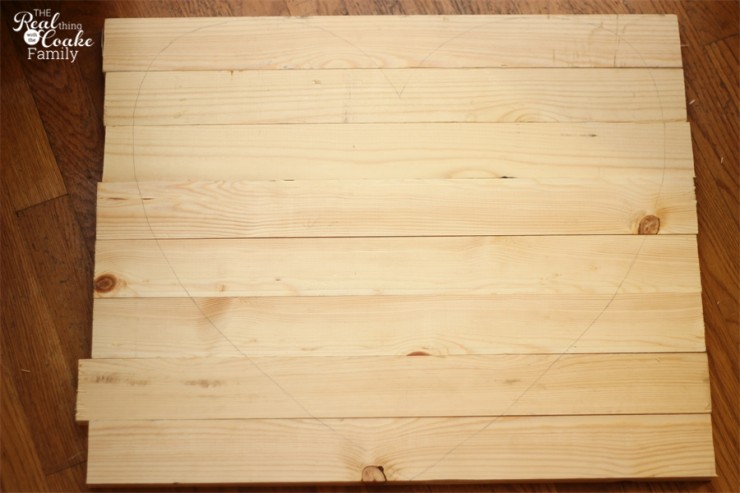
It should look something like this when you are done with these steps. At this point you need to cut your pieces on the lines you have drawn. Mr. T used a scroll saw and cut the heart out for me. He said the top two boards were the most challenging because of the curves and angles.
Now it is time to sand and paint. Prime your boards, unless you want the more rustic look.
Here is where it gets fun to me! I was wondering through Hobby Lobby trying to figure out how to paint this project. I have never seen red or pink chalkboard paint. I thought maybe I would need to paint it black and use colored chalk, but I really wanted red or pink. Then the craft gods looked down upon me and shown their magical light! I found this Americana clear chalkboard coating![]() !
!
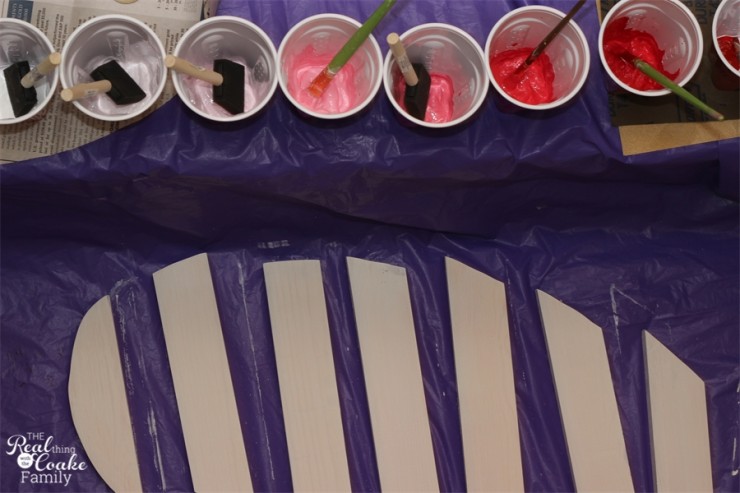
I used three colors of paint; white, red and pink. To make the ombre look I wanted, I mixed up eight shades in the cups as you can see. The boards were painted. The lighter colors only needed two coats of paint. The darker colors needed three or four coats (for the red). Then it was time to attach everything.
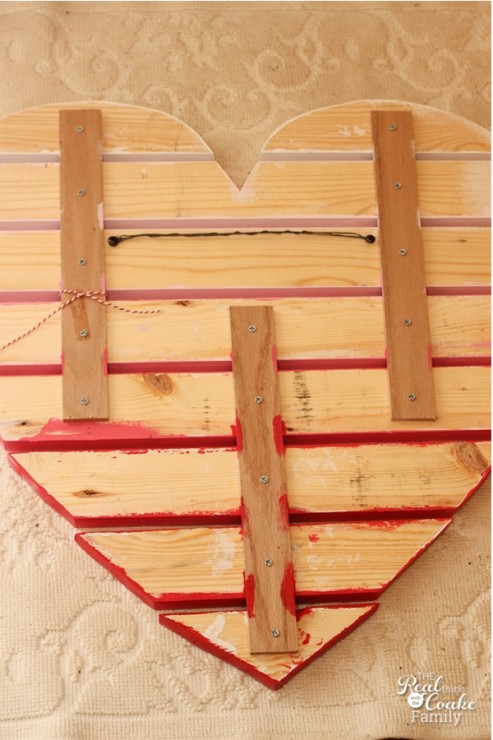
We used 1/4″ x 2 wood that we cut to fit the back. Because of the shape of the heart, you will need three pieces of wood to attach all the pieces together. Use a book ro another piece of wood to keep the same distance between each board. I would recommend that you bring your pieces of wood that are at the top on the right and left down one additional board. That third board up has a tendency to get out of alignment with the other boards.
Mr. T added two screws and some picture hanging wire as our method for hanging up this heart shaped chalkboard.
If you don’t want the wood that you used on the back to show or stick out from the front view, paint one coat of paint to help it blend in more. Next follow the directions on the clear chalkboard coating. It says to paint two coats, one vertical and one horizontal allowing one hour drying time. The hardest part for me was waiting for the 24 hour cure time…tick tock, tick tock.
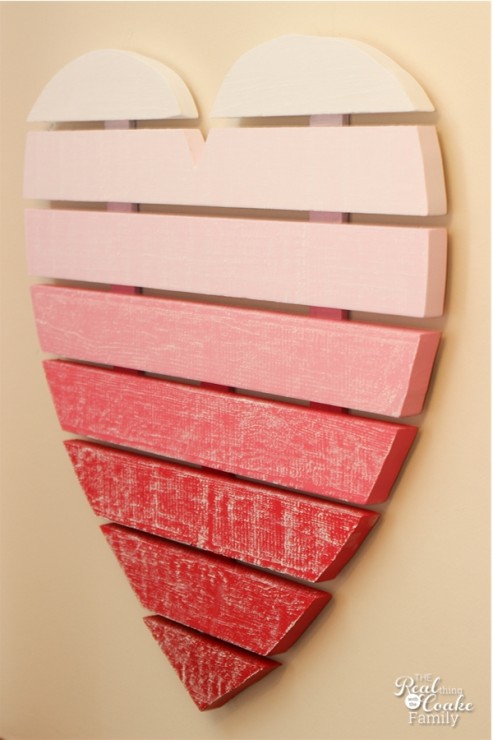
After the 24 hour cure time, make sure you condition your new chalkboard surface by lightly rubbing chalk over the entire surface. Wipe your heart shaped chalkboard clean.
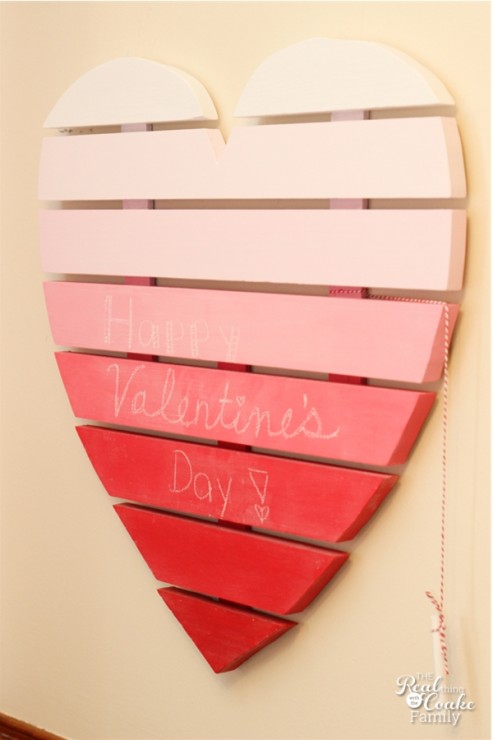
It is ready to use! Doesn’t it look so cute! I’m so happy with how it turned out. The only two cents I can give you for your project, is to start your top board with a darker color pink. The white chalk doesn’t show on the white and light pink boards. I may look for some colored chalk so we can use those boards. You can just learn from me and start with darker/brighter colors.
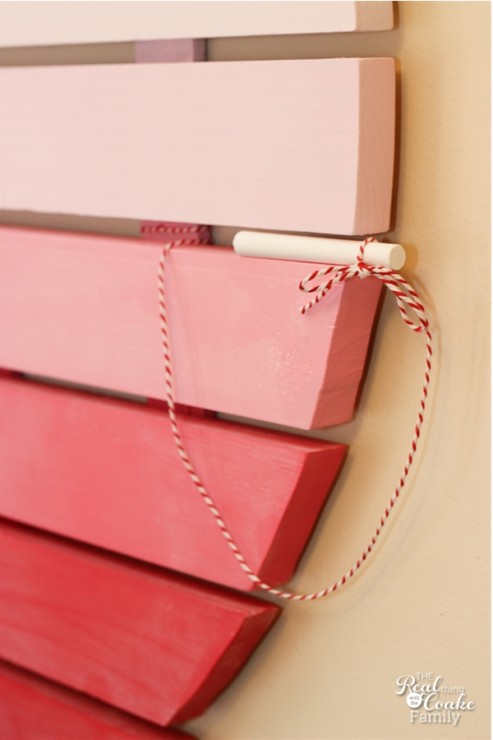
I used my baker’s twine (I got mine from Pick Your Plum. It was an awesome deal!) and attached a piece of chalk.
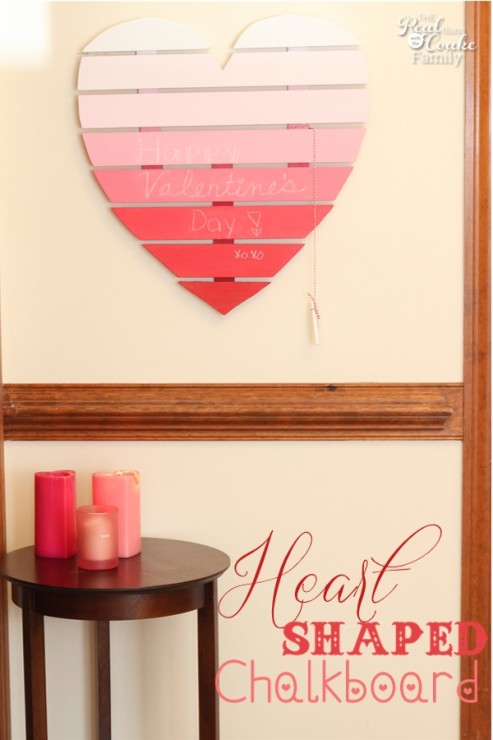
Now we are ready to leave each other sweet notes! In fact, I noticed a new note today. It said, “Happy Snow Day!”
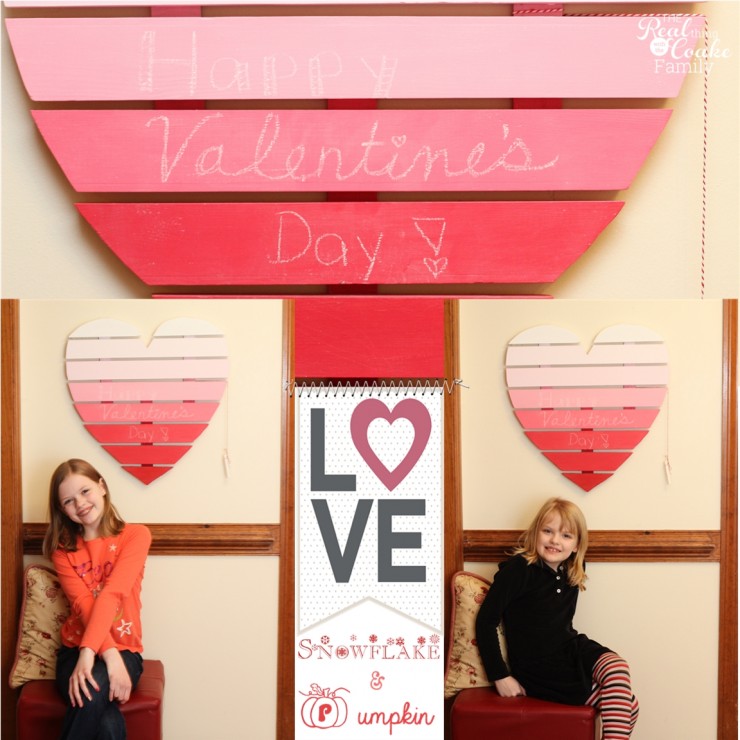
Now for some fun! While I was talking pictures for you all, Snowflake photo bombed my shot. Then Pumpkin decided to follow suit. I thought the pictures were so cute, I turned them into a Happy Valentine’s Day just for you!
Happy Valentine’s Day from our family to you and your family!
More Valentine Fun!

it is so cute!
Love this! Soooo dang cute!
Really cute!
Thanks!
That is beautiful! I WANT ONE! :O)
This is just adorable! I love the ombre effect of the colors. AND the fact that it’s a chalkboard without being black and white. Very cool.
Thank you, Ruth! I love the ombre effect as well. I know don’t you just feel like not having to have a black or white chalkboard opens up a whole new world….or is that just me (she said rather giddily)?
Take care,
KC
I have not heard of this product but I love all things paint so thanks for sharing info on this product. How do you like the finish?
The heard shaped note center is a great idea.
Traci
No way! I was not aware that there was such a product as chalkboard clear coat… Great use for it! I love the Valentine photos you created with your sweet girls… They are so adorable…
Thanks for showing us… 🙂
and have a happy week!!
hugs x, Crystelle
Crystelle Boutique
Yes, I wasn’t aware either until I stumbled upon it! Thank you!
KC
I love this! It’s so cute!
Such a fun project! I love that it’s pink too.. perfect for V-Day!
I’m Coming over from the V-Day SITS linky party 🙂 Have a lovely rest of your day!
Thanks! It has been a fun project! Glad to have you stop by.
Take care,
KC
This is so cute, I’m pinning for future reference! Found you via the SITS linky.
Thanks!
I love this! The ombre coupled with the chalkboard paint is just so much goodness in one project! Pinning!
I love it….So much goodness in one project. Thanks for putting a smile on my face tonight! Glad you enjoyed my project. We are having fun with it.
Take care,
KC
Gorgeous! I absolutely love it! Very clever crafting,
Thank you!
You’re most welcome. I also pinned it to my Pinterest board Heart Crafts.
Thanks!
You are most welcome! A very cute and clever idea!
This is beautiful, love the scale and colors. Great job, happy Valentine’s Day!
Love the heart shape and the ombre paint effect! Great project would look adorable in any home for sure. Pinned it for later!
Thank you, Lani! I had fun creating it and taking it from the picture in my mind to reality!
Love this idea!
Thanks! Me, too. 😉 Have a great day!
How very cute this is! I love the ombre pink with the heart shape. Thanks for sharing and inspiring!
Thank you! We are really enjoying it as well.
What a cute idea! It looks great–Love the picture greeting too!
Thank you, Pam! I love the picture greeting as well…my daughters are some of my favorite people and I loved their photo bombing. 😉
What a neat idea! Stopping by from the SITS link up!
I love this! Great job!
Thanks!
This is gorgeous!
I love the colors of your blog….how neat, you have a pink colored Pinterest button!
Thanks! We love pink around here.
What an absolutely adorable idea! I love that you painted the heart in ombre and made it a chalkboard!
Thank you! It was fun to create and has been great to use!
So very cute!
Thanks!
I really love this idea! It’s absolutely beautiful. I just posted a Valentine chalkboard roundup and included it. I hope you can stop by and check it out. I have attached a link to the post.
Have a great week!
Thank you so much, Courtney! I appreciate your kind comments as well as the feature!
Take care,
KC
Very creative!
I love the colors!
Thanks so much, Jen!
This is such a great idea! I feel like have one 🙂
Thank you for the inspiration.
Thank you! You are welcome…glad I could provide inspiration!
KC
Love this! So pretty. It’s one of my Sunday Funday features! Happy President’s day weekend!
Thank you and thanks so much for the feature! Have a great week.
KC
To mix the different shades did you just use the white and mix a little red or pink into it? thanks
It has been such a long time since I made this I think I mixed some with white as well as some together to come up with the shades. I know the lighter shades were mixed with white and the darkest one is just the red. In between, it was a mixture of adding the red or adding the white to get different shades. HTH
Lovely !
Anna
Thanks!
My kids would love this .Thanks for the idea.
Thanks!
KC Thanks for sharing your awesomel project at Inspire Me Monday at Create With Joy – Congrats – you’re one of our Featured Guests at this week’s party!
Thanks for hosting and for the feature!
So fun! Love the ombre colors! Thanks for sharing at Funtastic Friday!
Thanks!