I’m so excited to show you my new advent calendar today! I got this idea last Christmas and have patiently waited all year so I could make it for our family this year. The time has finally come…yay!
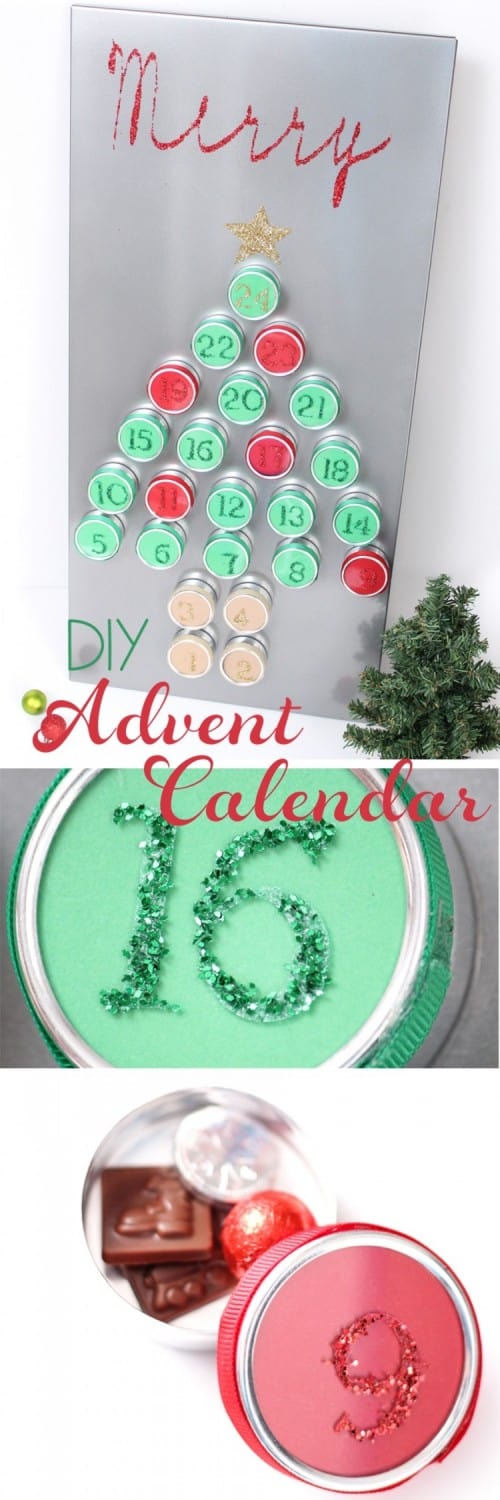
I got the idea for this advent calendar from a similar advent calendar being sold by my favorite coffee shop. I just knew I could make one myself and knew I would have fun making it a DIY. I couldn’t be happier with how it turned out. It turned out totally different from the one they are selling and I love the differences and how this advent calendar will become part of my Christmas decorations and let the kids countdown to Christmas at the same time. I also like that I can fill the tins with anything I want. We don’t have to worry about any allergies and if I want to take the time to find things other than candy, I can. As usual I’ve got a full tutorial for you on how to make your own. You ready? Let’s do this!
Do you remember a few weeks ago when I said I was planning ahead and making a list of craft supplies I would need for Christmas this year. I gave you a handmade Christmas planner printable. I showed you Consumer Crafts website and showed you how I used my planner to order a bunch of supplies at great prices. Well I’ve teamed up with Consumer Crafts again to show you what I made with those craft supplies. They generously offered to sponsor this post as well. It was an easy yes for me since I knew this was something I had been wanting to make and show you for a year now. An added bonus for you guys is that Consumer Crafts is giving away a Cricut Explore to one of you! The entry form is at the bottom of this post. Good luck!
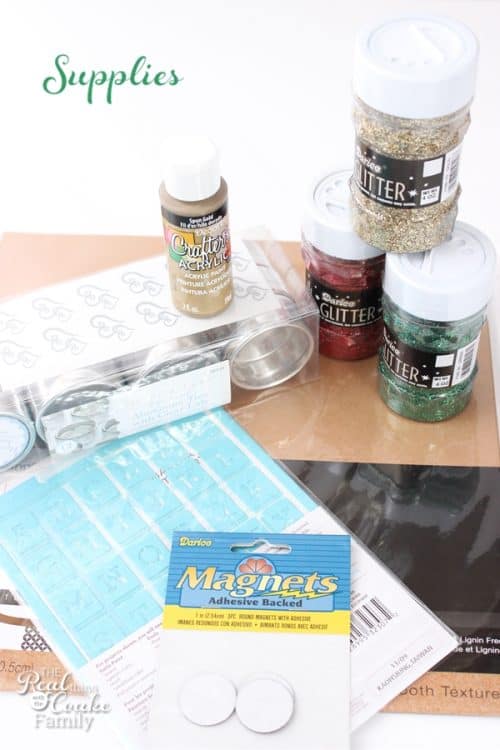
Craft Supplies:
- Round tins
- Brown, red, and green cardstock craft paper
- Mod Podge
- Red, green, and gold glitter
- Red, Green, and Gold metallic paint
- 1″ adhesive magnets
- Red, green, and tan grosgrain ribbon
- Stencils
- Paintbrush
- Hot glue gun
- Hot glue sticks
- Metal (magnetic) board
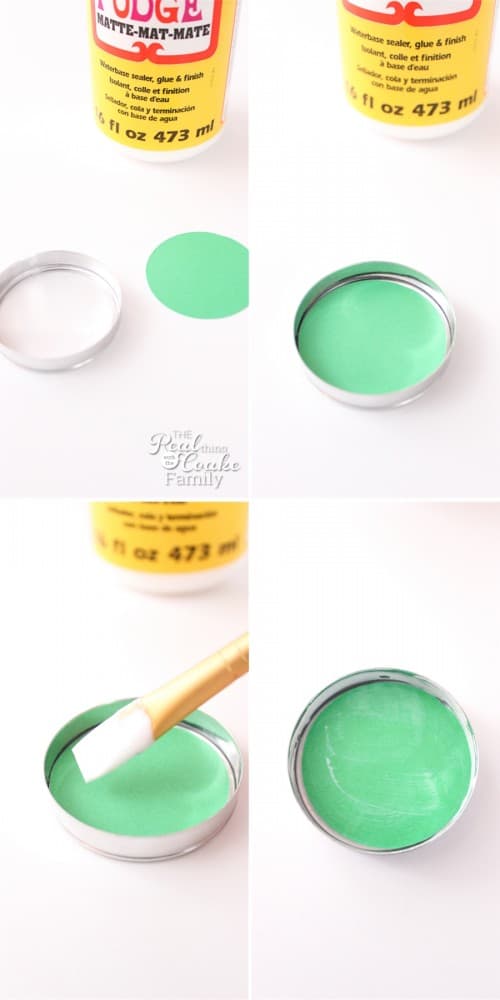
To start making your advent calendar, cut out circles the appropriate size to fit in the top of your tins. Place the paper inside the lid and Mod Podge them in place.
I found this to be easiest and look the best if I put the paper in the lid, then added the Mod Podge on top and up the sides of the inside of the tin. I tried using the Mod Podge on the tin and then placing the paper down, but I didn’t like the look of seeing the brush strokes and Mod Podge. The method I used has worked and held the paper in place.
Wait 15 minutes and repeat with a 2nd coat of Mod Podge.
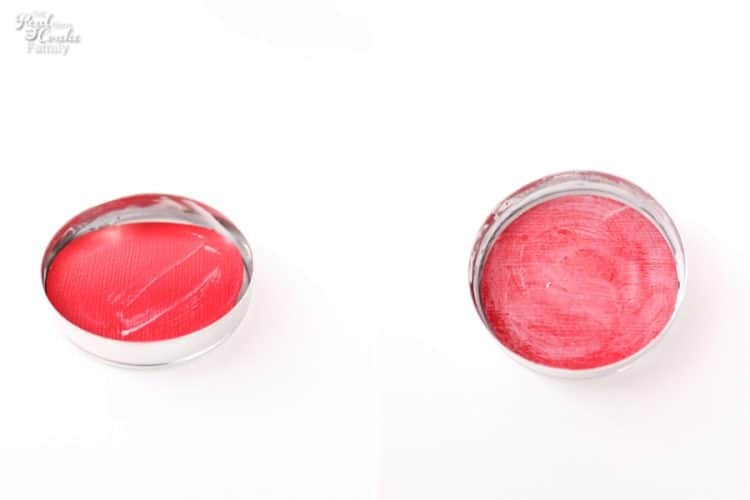
I did have some, on the first coat, that after a minute or two the paper would pop up like you can see above. All I had to do was go over them again with another light coat of Mod Podge immediately. Then the paper would stay in place.
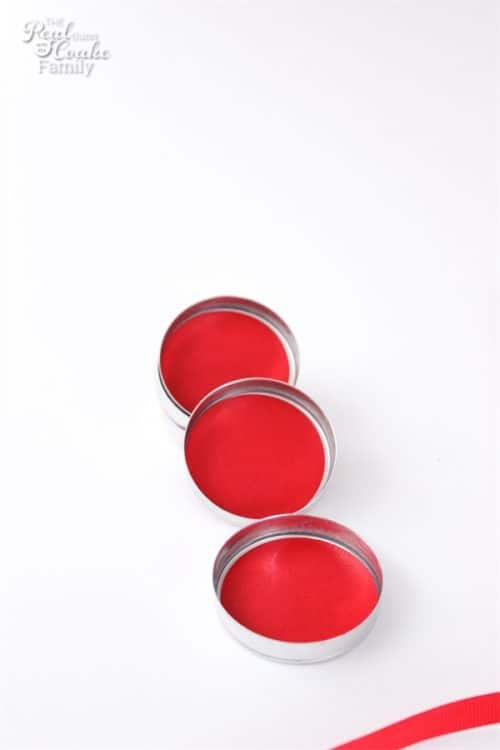
When the lids have dried, the Mod Podge is barely visible. It does add a tiny bit of width to the inside of the tins. So make sure not to use thick coats of Mod Podge or you will run into trouble with the lids sticking when you place them back on the tin base.
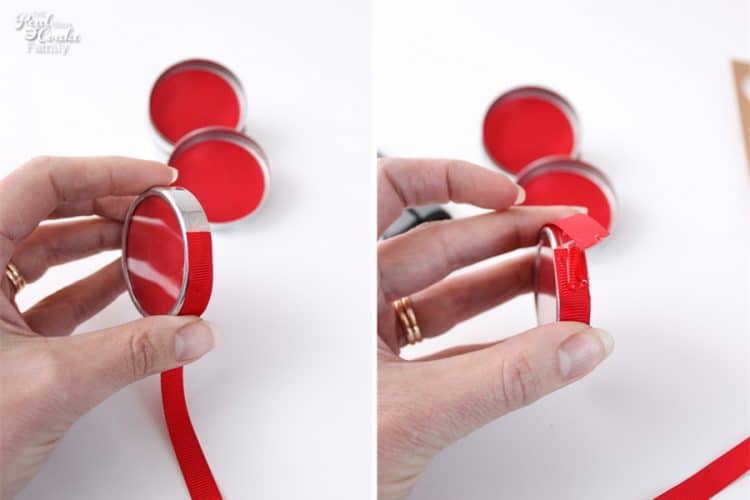
As I was making my advent calendar to look like a tree, I thought it would be a good idea to reinforce the color on the sides of the tins. To do this, just use a grosgrain ribbon that matches the color of your paper. Hot glue it with a thin coat of glue under the start of the ribbon. End it with another thin coat of glue under the end of the ribbon.
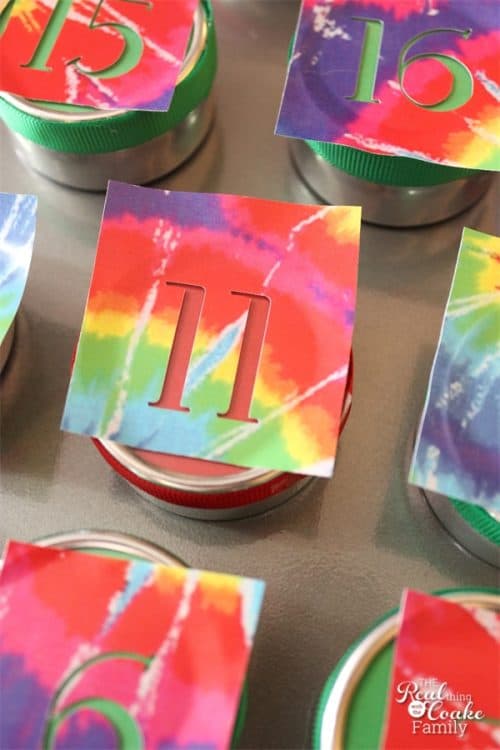
I got some stencils from Consumer Crafts and I really like them, but I realized that they weren’t right for this project. I made my own stencils with my new Cricut Explore…which Consumer Crafts is giving away a new Cricut Explore to one of you! See the entry form at the bottom of the post.
The new Cricut Explore is so easy to work with. I selected a font from my computer that I liked and made the stencils with some adhesive vinyl I had on hand. You can ready my full tutorial on how to make your own stencils if you would like more information.
I highly recommend that you select a font that is sturdy and not delicate in places like the font I selected. I had to go back and hand paint some sections of most of these numbers. Then I had to add more glitter. Not a big deal, but definitely added to the time this project took.
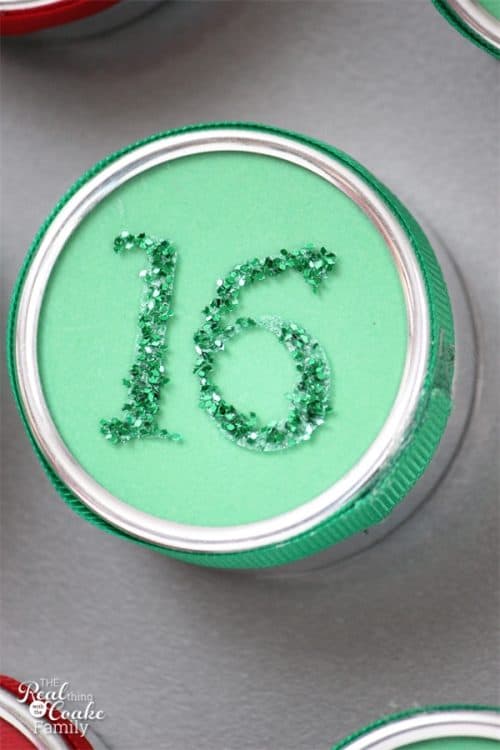
Once you have your stencils on and in place, paint a coat of metallic paint in a coordinating color and let set for about 5 minutes. Sprinkle with the appropriate color of glitter. Remove stencil after gently patting the glitter in place and letting it set for about 5 minutes. The paint should still be a little bit wet. Do any touch ups that are needed and re-sprinkle with glitter in those touch up areas.
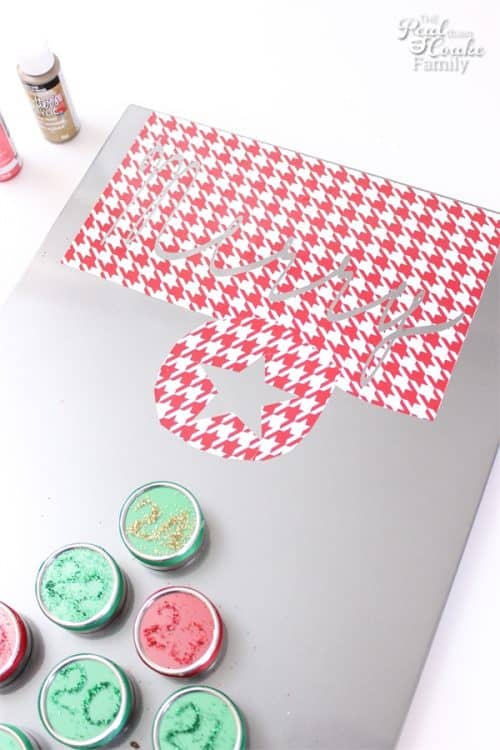
For the top of my magnetic board, I wanted to fill in some blank space. I cut out another stencil (once again not learning the lesson to not select a delicate font) on my Cricut Explore. Adhere to your magnetic board.
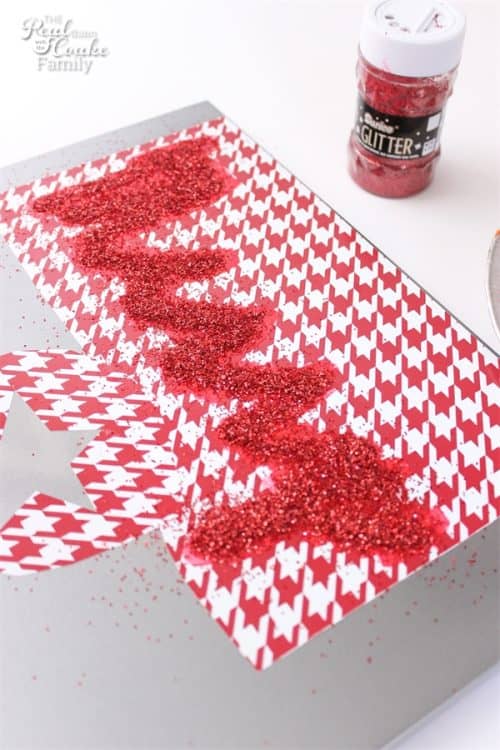
Paint with a metallic paint color that will match your glitter. Let the paint set for a few minutes (up to 5) and sprinkle with glitter. For delicate fonts, gently pat the glitter into place. Wait 10-15 minutes to allow the paint and glitter to set but not dry completely. Remove the stencil and do any touch up and re-glittering as needed.
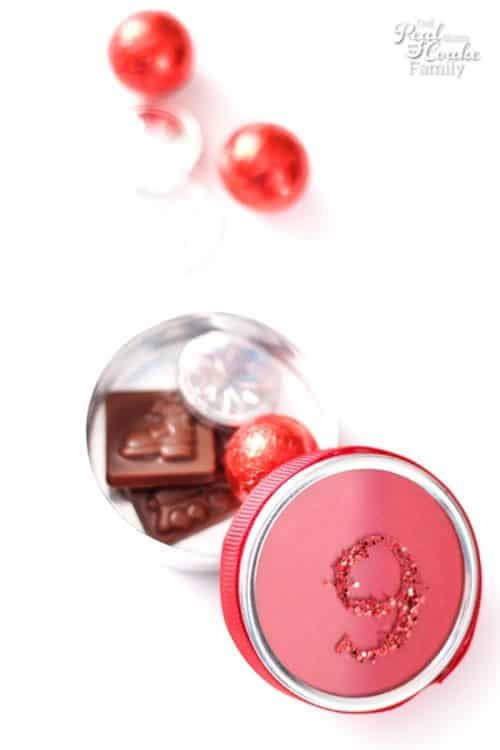
The final step is to fill those cute little tins with whatever you want to fill them with. I added some little chocolates into our tins.
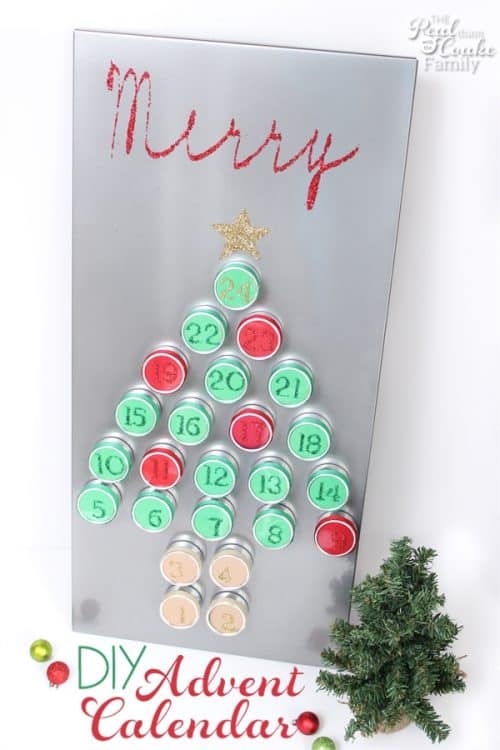
We are ready to countdown now! A few of the tins will need some additional magnets added to the back. They are the tins that I added a larger chocolate. It just added a bit too much weight. Not a problem…just know that if you add something a little more heavy you may need a stronger magnet.
Do you use an advent calendar to count down? Do you buy yours or do you have a reusable calendar that you can use each year?
Don’t forget to enter the Cricut Explore Giveaway sponsored by Consumer Crafts.
a Rafflecopter giveaway
More Christmas fun:

This is such an adorable advent calendar! I LOVE it!
Thank you, Mary!
I love this idea! We always do an Advent Calendar as well! So cute!
Thanks! We are enjoying eating the chocolates each day now. Yummy!
Excited to try this. I’ve been looking for an advent calendar that doesn’t involve Santa!
So glad I could give you an idea!
I would create a happy birthday banner! Simple I know but I need one that I can reuse.
Sounds fun!
I love this! I’ve been dying to get a Cricut, I’d make all kinds of shirts with them
very cute idea, perfect for little chocolates!
Happy thanksgiving.
Thank you Morgane! Hope you had a great Thanksgiving as well!
What a cute advent calendar! So each year I try to find cute ones for the girls. I’ve been ordering them from Germany because they remind me of what I had as a child. But, I totally forgot this yea, so I need to make one. Thank you for the great idea! I want a Cricut so badly. I’m entering!
Wow! How far ahead do you have to plan to order an advent calendar from Germany? That sounds like dedication. Must be delicious or pretty or both. Good luck! I hope you win the Cricut. They are so much fun!
Love these ideas! I have 4 kiddos and been tweaking the Advent Calendar idea with varying degrees of success…. will let you know how this year’s calendar works! 🙂
Thanks so much! Glad to hear that you like it so much. I hope it works out really well for you and the kiddos. 🙂
i would make some cards
I would made my own stencils for this project
Sounds great!