We are making progress in the makeover of my daughter’s room. She had a plethora of decorative pillows that she had made or been given that matched her old room, but we only had one decorative pillow that matched her new room. I had tons of pictures of pillows that I love and want to make, so I took the opportunity to actually make one of those decorative pillows for her.
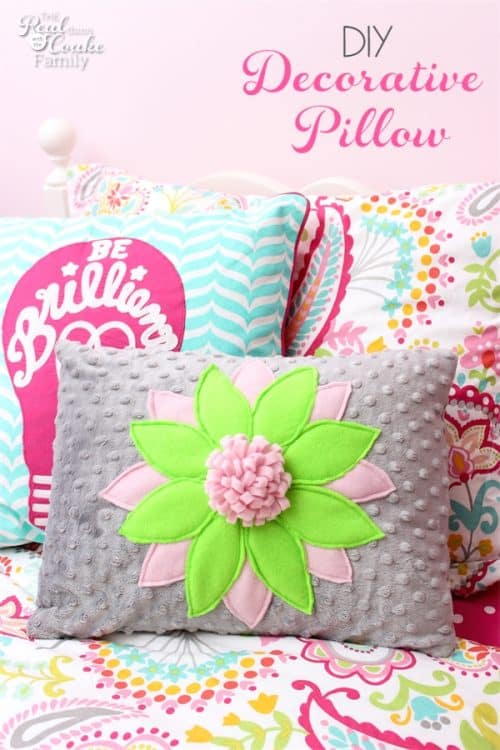
I had seen a pillow similar to this in Make it Yourself![]() (affiliate link), a magazine which I LOVE getting. I had to resize my pillow to use a pillow form I already had and this size pillow looks better on her bed with the other pillows. I let Snowflake pick out the fabrics and colors she wanted. She selected all these super soft fabric for a cozy and cute pillow.
(affiliate link), a magazine which I LOVE getting. I had to resize my pillow to use a pillow form I already had and this size pillow looks better on her bed with the other pillows. I let Snowflake pick out the fabrics and colors she wanted. She selected all these super soft fabric for a cozy and cute pillow.
Both Snowflake and I are super happy with the pillow. She LOVES it in her room and loves the soft minky fabric (which is a total pain to sew with, but it is lovely to cuddle with).
I’ve got the tutorial for you to make your own decorative pillow today as well.
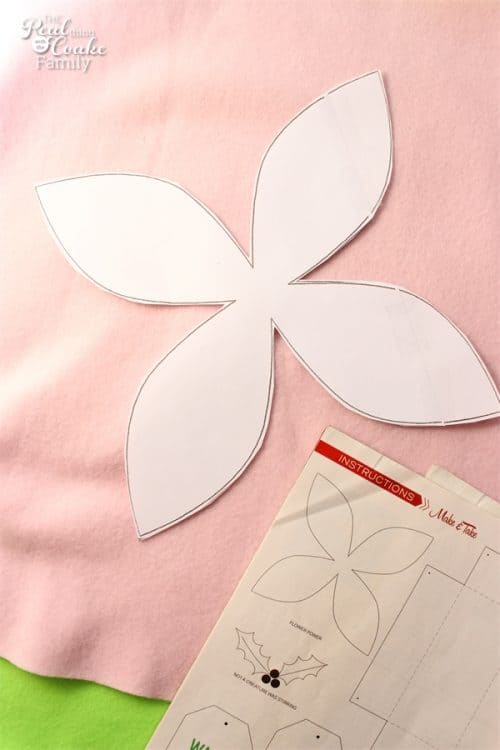
First you will need a petal pattern for making your flower. I’m sure you can find something with a quick Google search.
Blow the pattern up to the correct size for your pillow. You will want the petals to be small enough that you can leave about a 2″ circle open in the middle of the petals of the bottom layer of petals and about a 1″ circle on the second layer of leaves.
We used fleece for our petals. The pillow in the magazine used old sweaters for the whole pillow. I didn’t have old pillows, so we decided on minky and fleece.
When I went to process these pictures for this post, I realized that I used the wrong pattern from the magazine. I couldn’t even figure out what these were for, but both projects were called Flower Power…so anyway, it worked out fine and looks cute, but these are not the correct petals.
Start by cutting out the pieces for your envelope style decorative pillow. (<– That post will show you how to make an envelope style decorative pillow.) Don’t sew them together yet.
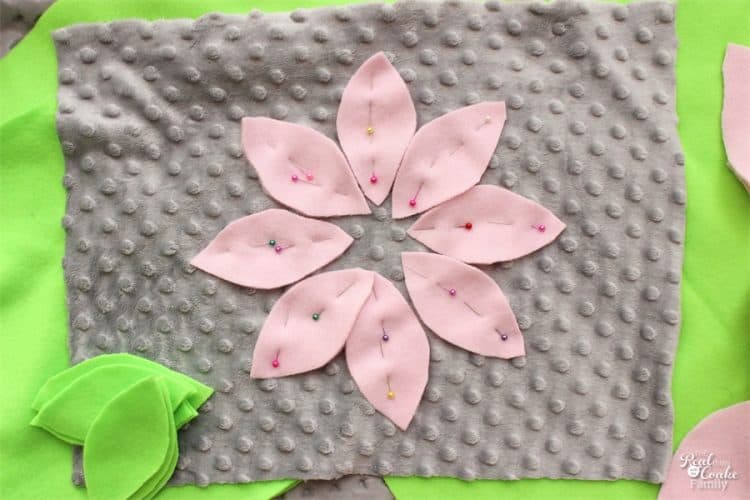
Pin the first layer of your petals to the large fabric panel which will be the front of your pillow. Pin them as much as you can to help the minky fabric (gray) from shifting around as you sew. You will want to leave about a 2″ circle in the center of your petals.
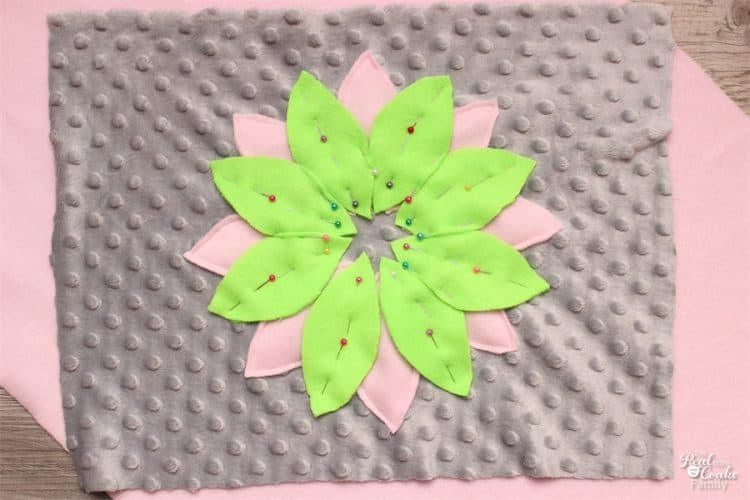
Arrange your second layer of petals, leaving a smaller (about 1″) circle this time. Sew the petals in place trying to layer them on top of each other as you go. You will do this by sewing the petals that are under or on the bottom first, then sewing the top petal. Once again, pin, pin, pin to help things stay in place.
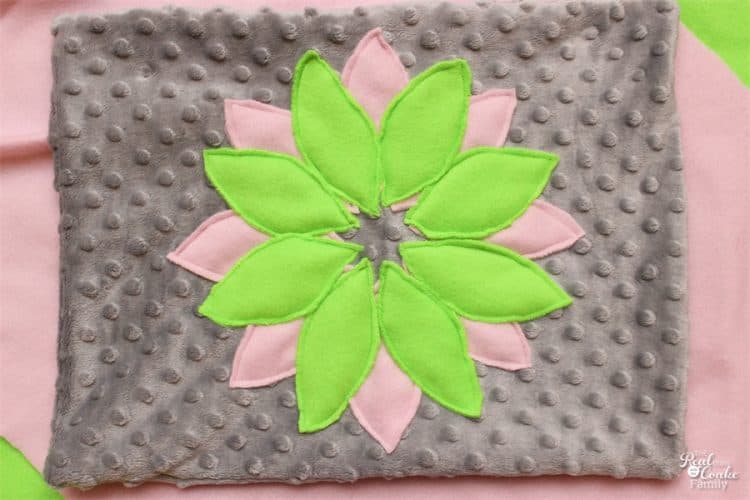
Now it is time to sew the simple envelope decorative pillow. The thing to remember when working with the minky fabric (the gray fabric) is that it will stretch and slip and change size and shape while you sew with it. It is loads of fun to work with…cough. cough. not at all. cough. The trick that I have found that helps when sewing the minky fabric is to pin, pin, pin and pin some more. The more you pin the less opportunity the fabric has to shift around.
Now we need a cute flower for the center of those petals.
Cut out a 3″ x 16″ piece from your fleece fabric. Fold it in half lengthwise and sew a narrow seam. Cut small slits in the open side of the fleece and roll it tightly.
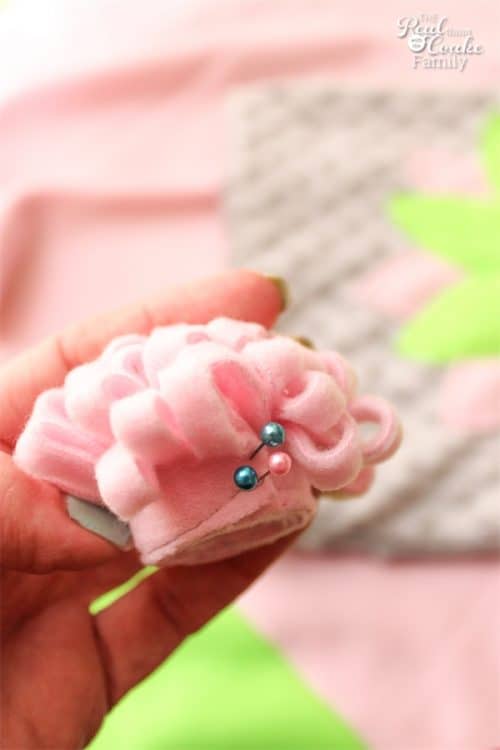
Pin the flower in place to hold it together.
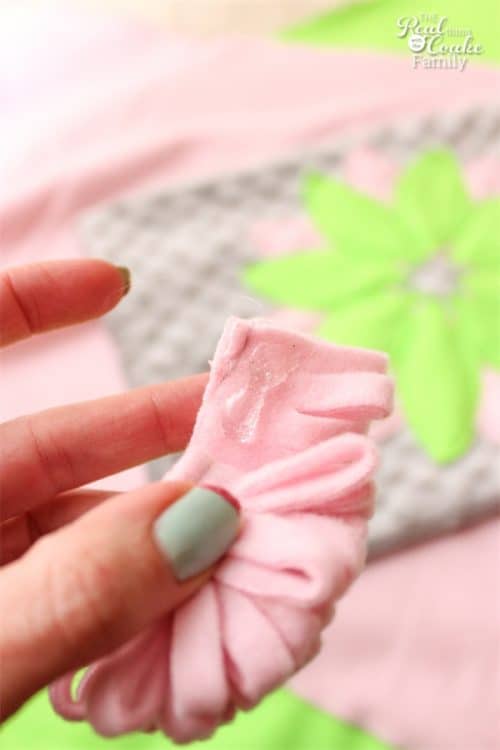
Hot glue the end of the flower in place.
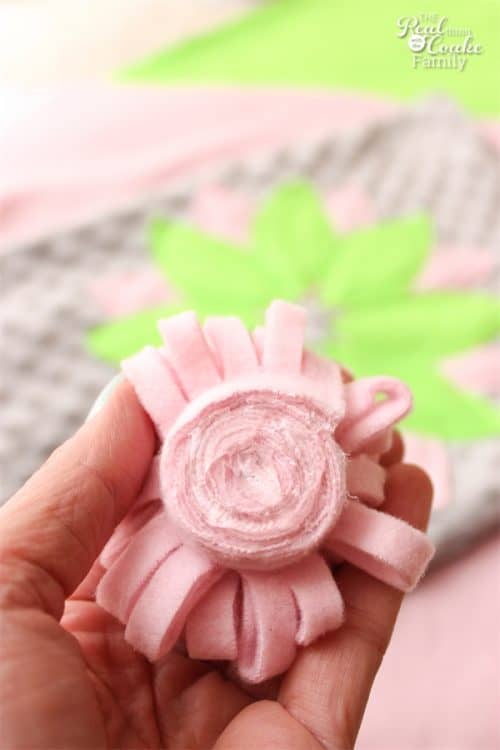
You can use fabric glue or hot glue to adhere your flower to your pillow. I was working late at night and only had hot glue, so I went with that. Someone had left the top open on my fabric glue…boo!
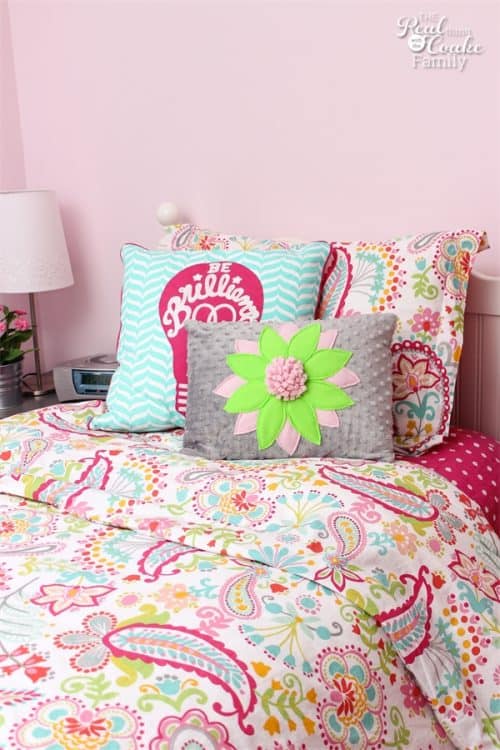
Now we have more decorative pillows on her cute new bed. The Be Brilliant pillow is a cover from PBTeen that I got on sale.
I think this pillow is a nice mix for my daughter showing her growing up and being more mature, but still loving soft cuddly things. The duvet cover has all of the colors in it that she selected for the pillow, so it looks cute with the full look of the room.
We still have a bit to go in her room. We need some wall art, to put together a bookcase and do some organizing. I think at some point I need to hem her curtains (blech) and then once I have done all of that, it will be a matter of figuring out if we are done and everything looks good or if we need a little something else. At least at this point, I can check something off the to-do list!
Next up will be the PBTeen knock off wall art. I’ll be making that this weekend and should have that to show you in the next week or two. I may take a sneak peek pic and put it on Instagram, if you follow me there, you will get to see that. It is going to be so cute!
More Fun Posts for You:

FAB decorative pillow created for your teen’s bed! Love the pale pink & lime large felt flower. Thanks for sharing! Sarah in Minneapolis
Thanks so much, Sarah! She is really loving it as well. Yay!
This morning I forwarded your fleece flower pillow tutorial to my sister who has 3 granddaughters. She loved this idea and hopes to create/sew one in different colors for each girl, ages 12 1/2, 8 & 6 1/2. THANKS again for the FAB photo shoot with directions!
Awww…that is so fun to hear! I’m so glad you guys are loving the idea. I’d love to see pics when she has them done. You or she could email them to me or put them on my facebook page. 🙂
Very cute! I’d love to make some fun pillows for my tweens’ bedrooms!
So, so cute!!
Thanks!
Your pillow turned out really cute, teenagers are hard to please!
I wanted to let you know that your blog post never showed in my feed, just the tittle, no actual words or pictures, I do not know if I am the only one it happens, but your blog is the only one that way on my bloglovin’ feed. So I do not see your work as often as I used to.
Thanks Morgane! I’m sorry to hear bout Blog Lovin’. I have no idea why it would be that way. Bummer!