You ready to think about Thanksgiving yet? Yeah, I know Halloween hasn’t even happened yet, but I’m ready to show you some Thanksgiving crafts. I thought I could show them to you a little early this year to give you some time to pin and actually make them instead of just pinning. 🙂 Today, I’m going to show you the beginnings of a what I think I’m going to do for my Thanksgiving table.
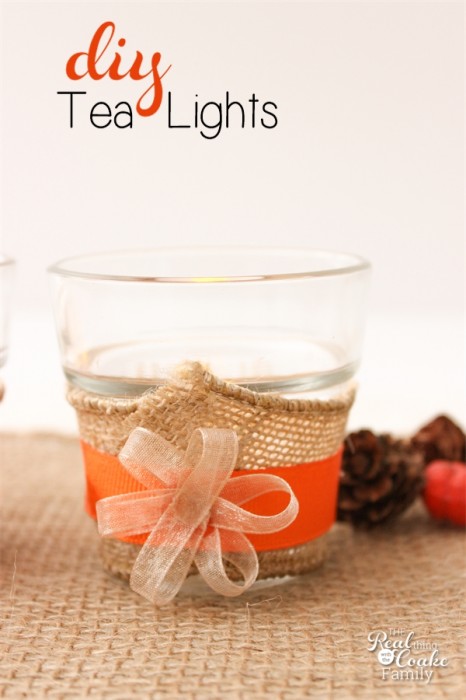
Aren’t the little tea lights I made so stinking cute!? They are going to be the perfect addition down the center of my Thanksgiving table. I have a few other things I think I’m going to make to go with these, which of course I will share with you. You know I will be keeping it simple (like this simple fall centerpiece I did last year), but simple doesn’t have to me boring or ugly. No way!
As you probably noticed, if you have been reading my blog for a little bit, I did quite a few Halloween crafts this year. I get bored easily. I’m ready for something else now. So, when Offray offered to send me some ribbon and pay me to create a Thanksgiving ribbon craft, I was more than happy to move on to the next thing! They have gorgeous ribbons and I have used them many, many times in my projects. I was excited to see what they sent me and get to work coming up with ideas. In addition to their gorgeous ribbon they also have a gorgeous new site! You should check Offray out. Their new site has ideas, inspiration, and the best part is that you can order ribbon directly from them. Perfect! No more ribbon emergencies anymore if I can’t find what I need locally! 🙂 I also have a coupon for you at the end of the post…oh happy day!
So, to the Thanksgiving craft at had… you ready to make some cute diy tea lights for your Thanksgiving table (or to change-up the colors and use it for any time of the year)? Let’s do it!
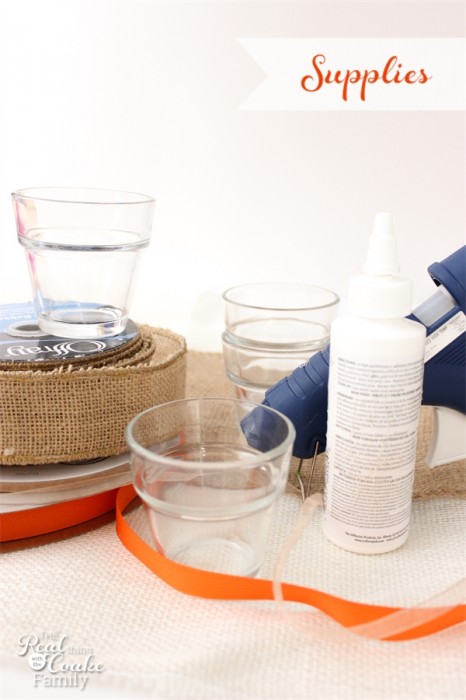
Craft Supplies:
- Tea light holders
- Glue appropriate for ribbon
- Glue gun and glue
- 1.5″ Wired Burlap Ribbon in Natural
- 5/8″ Grosgrain Ribbon in Torrid Orange
- 1/4″ Simply Sheer Asiana Ribbon in Champagne
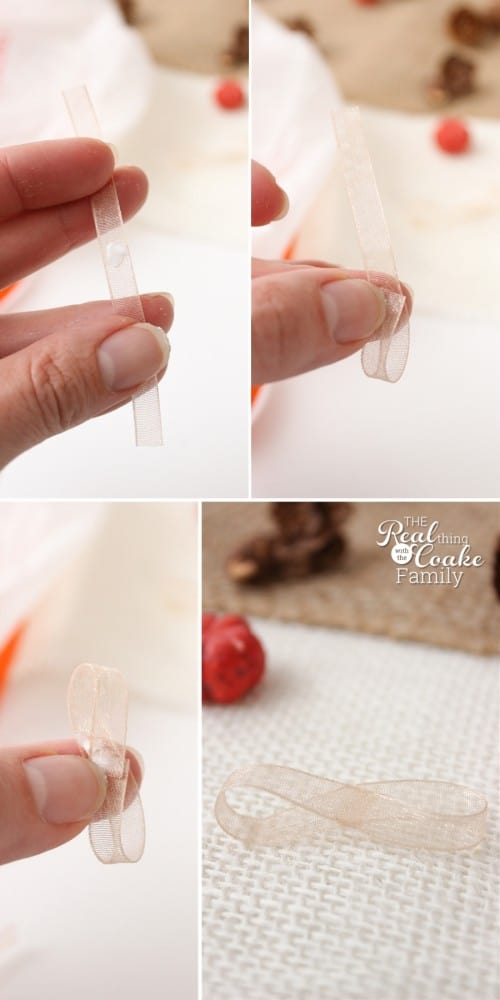
You will start by making the little ‘flower’ with the sheer ribbon. For my tea lights I cut my champagne ribbon at about 3.75″ long. Put a dab of glue (not hot glue) in the center of that 3.75″ long ribbon. You will be making a figure 8 with your ribbon. Do that by folding one edge up to the middle. It should be at an angle at the midline as pictured above. Fold the other edge to the midline making the edges match up and complete the figure 8. Allow the glue to set but not dry completely.
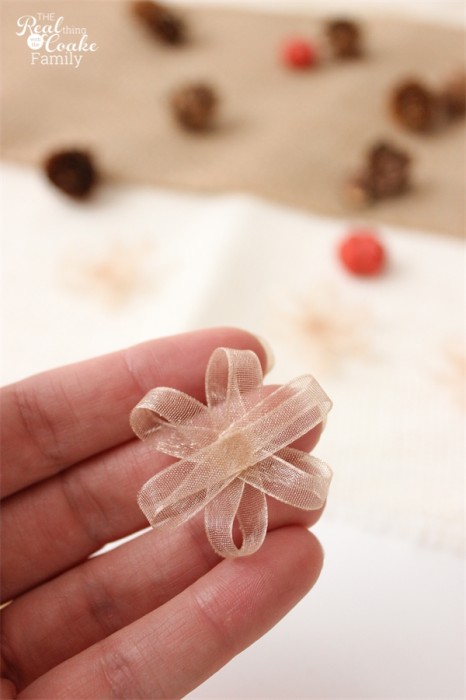
Make three figure 8’s for each flower you want to create. Once you have given the glue a little bit of time to set but not dry completely, place three of the figure 8’s on top of each other, staggered as to create the flower. If the glue is not fully dry, you will be able to squish them together without needing to add more glue. Otherwise just add another dab of glue.
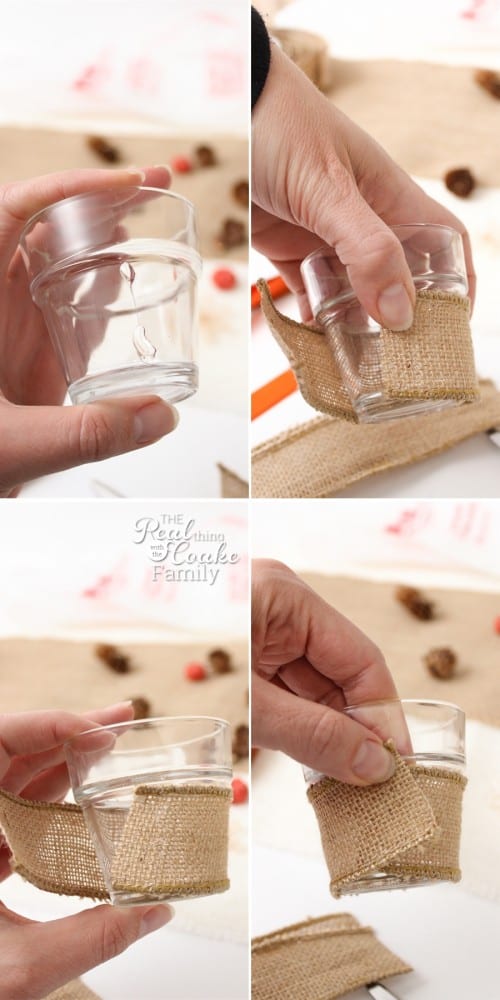
Cut a piece of the burlap ribbon that will fit around your tea light. Mine was 7.75″. Use hot glue for this portion of the craft. Place a line of hot glue on the back side of the tea light holder. Place the middle of the ribbon in that hot glue. Pull the ribbon tightly around to the front of the tea light. It will may need a little bit of working. The round tea light holder and the straight ribbon can tend to fight a little bit. Once you have the ribbon how you like it, hot glue it into place. Pull the other half of the ribbon around to the front and get it how you like it. I went for an offset look because I liked it and it helped with the round container, straight ribbon fight as well.
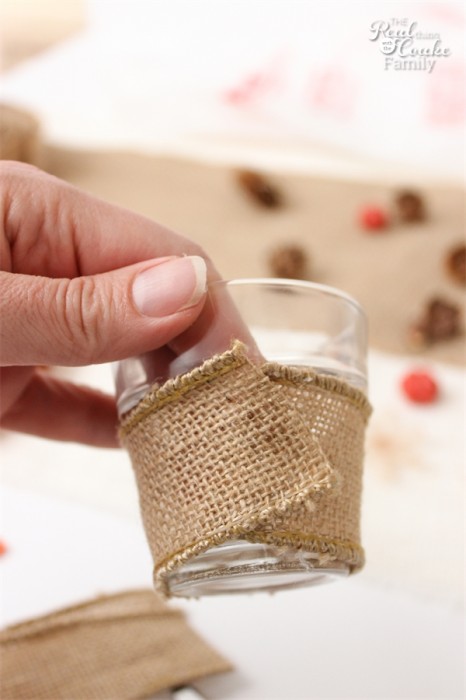
Try your best not to use too much hot glue so that it doesn’t seep through the burlap ribbon. If it does, we will be place ribbon over it, so you should be able to cover it up.
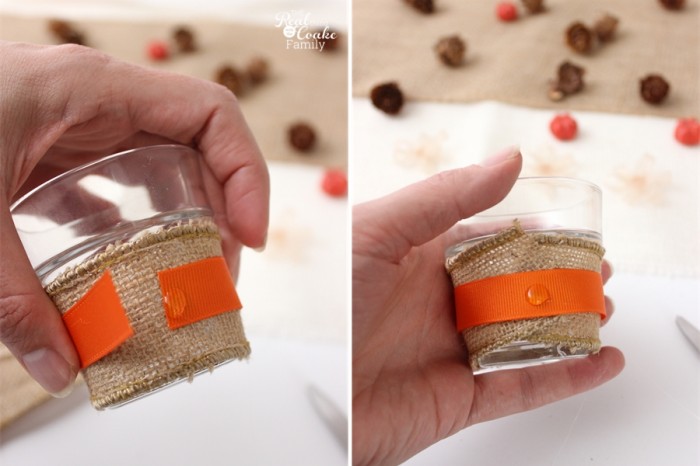
Place your torrid orange ribbon around the middle of the burlap ribbon. My grosgrain ribbon was also 7.75″. I glued mine with the seam in the back of the votive. After securing the ribbon together in the back, place a small dab of hot glue on the front in the middle of the ribbon.
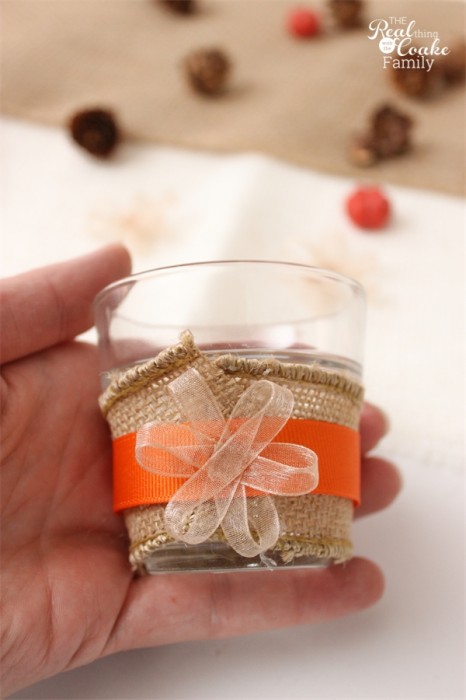
Place the cute little ribbon flower you made earlier in that dab of glue. All done! You could add a gem or something in the center of the flower if you wanted to add another little touch, but I liked mine just like this.
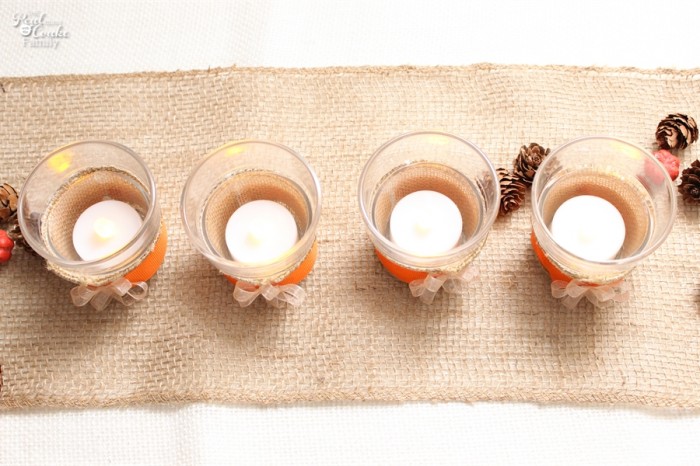
See how pretty they are going to be on my Thanksgiving table? I love it! I’m loving the brown and orange look as well as the rough, natural feel of the burlap. It just seems so perfect for fall and for Thanksgiving.
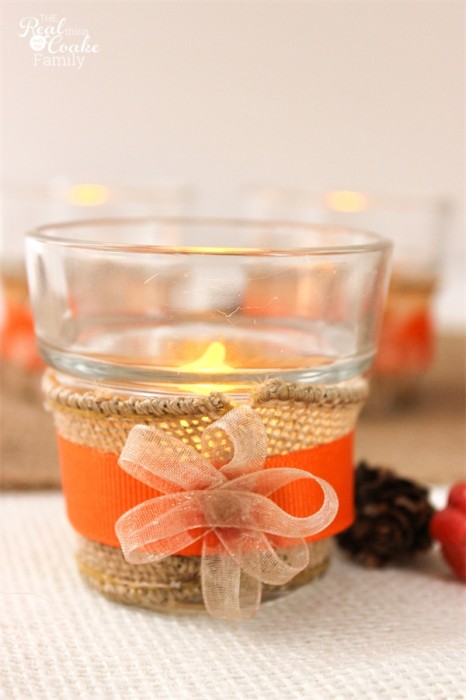
I’m pretty sure there will be more burlap involved in the Thanksgiving crafts for my table. Can’t wait to find a little time and get some more craftys done! Fun! Fun! Fun!
If you want to learn more about Offray, you can learn more on their new site. You can also follow Offray on Pinterest for lots of fun ribbon inspiration!
Now, guess what? You can get 15% off one order placed with Offray! Yippee! Just use the coupon code REALCOAKE15.
Use REALCOAKE15 during checkout on Offray.com to receive 15% off one order. Offer expires 11:59 PM eastern time on Sunday, November 30, 2014. Discount excludes applicable tax and shipping costs. Cannot be combined with any other offer. Discount cannot be applied to previous purchases. Subject to change or cancellation without notice. Other restrictions may apply.So what do you have planned to pretty up your table for Thanksgiving?
More Thanksgiving fun for you:

Love these! Thanks for the idea!!
Super cute, KC! Love these!
So cute! Love anything with burlap!
What great ideas.
Very pretty and simple to make. Thanks.
These are really cute! I love the burlap!
Thank you! Burlap is always fun!
These are just adorable and so perfect for a Thanksgiving tablescape – they aren’t too big to get in the way!
Exactly! I love cuteness that doesn’t obstruct seeing those with whom we are sharing our holiday. 🙂
These are so delicate and pretty ~ perfect for the Thanksgiving table and your tutorial is wonderful.
Thank you so much!
I love how these turned out – and so simple too! Pinned!
Thanks so much! I love simple it usually = quick and easy. ♥ How about you?
Thank you. they are so cute, I can’t keep real candles any more because I have one cat that just has to see how everything works. GOD bless
Thank you. they are so cute, I can’t keep real candles any more because I have one cat that just has to see how everything works. GOD bless
Gorgeous ribbon and project!
This would be cute for christmas, Halloween, Valentine’s day, easter, 4th of July….