Did you remember that Mother’s Day is just around the corner? I’m actually planning ahead this year…so amazing for me! I made a Mother’s Day gift for my Mom and my Mother-in-law. Of course, I took pictures and have a tutorial for you…just in case you need a gift idea.
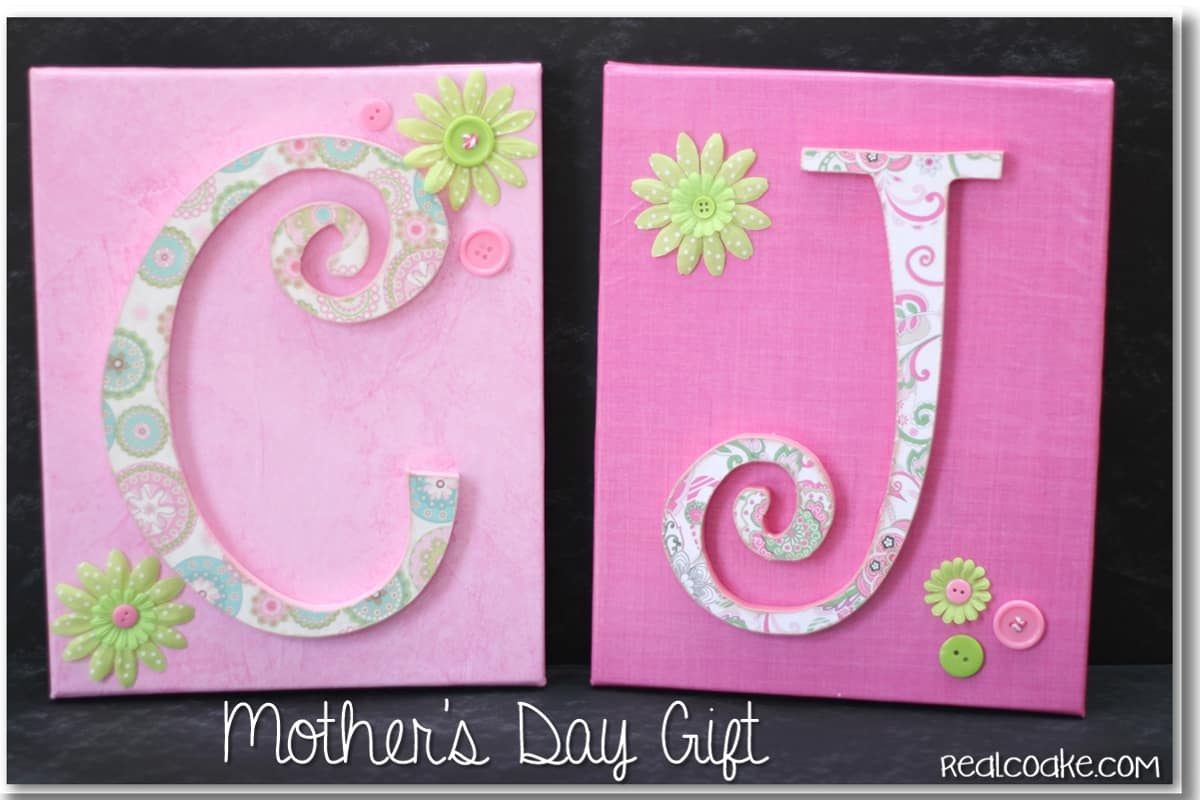
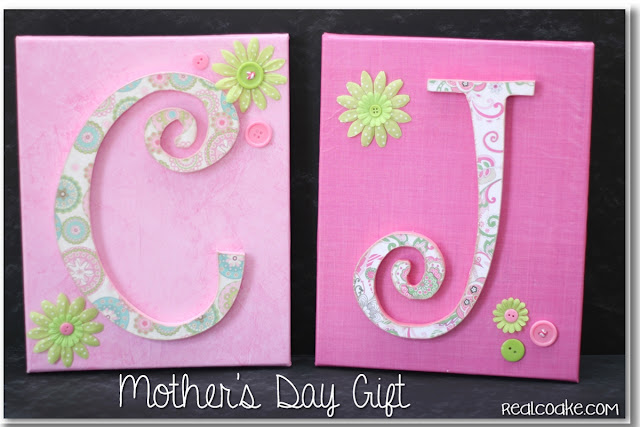
I knew I wanted to make something using an artist canvas, scrapbook paper and Mod Podge. I wandered around Hobby Lobby and let inspiration come to me. This is what I came up with. It was my first time working with Mod Podge and paper, so I have some tips and such for you as well. 
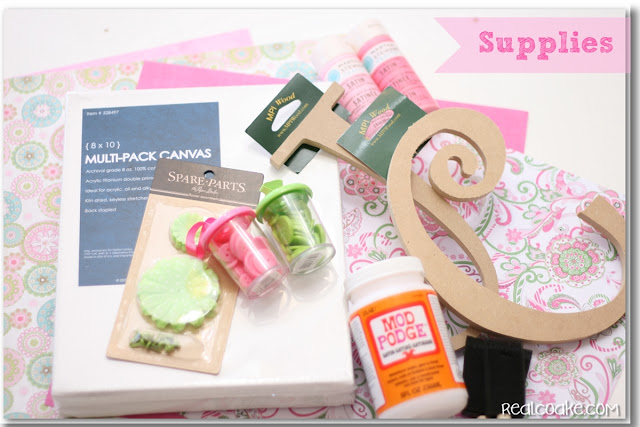
First let’s start with the supplies you will need.
- 8 x 10 artist canvas
- 2 sheets scrapbook paper (I used 4 because I was making 2)
- Craft paint
- Monogram letters
- Mod Podge

- Brushes
- Embellishments
- Sandpaper
- Utility knife
- E6000 glue or hot glue
Optional, but would have been really helpful
- Spray bottle with water
- Mod Podge brayer

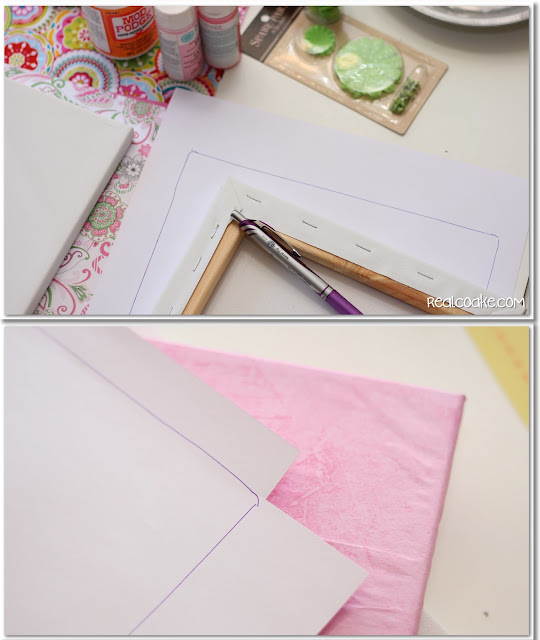
I started by roughly tracing the canvas shape on the back of the scrapbook paper. Then I used those marks to notch out the corners. This allowed me to fold the paper over the sides, top and bottom. You can see in the bottom picture that I had already used Mod Podge to adhere the first paper to the canvas. You can also see the wrinkles that I got.
After applying a coat of Mod Podge to the canvas, adhere your paper, trying to work it smooth. I have since learned from Mod Podge Rocks blog that it may be helpful to use a brayer to smooth the paper out and that lightly spraying the paper with water first might have helped me not get the wrinkles.
After allowing that to dry. I applied 2 coats of Mod Podge on top of the paper to act as a sealer. When I did this, most of my wrinkles disappeared. They seemed to get worse at first, but as the Mod Podge dried, the wrinkles were less or much less severe. Yay!
While waiting for coats of Mod Podge to dry, I painted the sides of my monogram letters. I did give them a light sanding before painting them because some of their edges were pretty rough. I knew the sides of the letters would show and I didn’t want them to be bare wood. I decided to adhere the paper to the letter using Mod Podge. I wanted to minimize the paper waste as well as the bulk to deal with for this process, so I just did a quick cut of the paper around the letter. Then used Mod Podge to adhere the paper. This time I got no wrinkles! Yay!
Use a utility knife to cut around your letter and remove the excess paper. I found this easiest to do on the back side of the letter. It was a bit tricky around the curvy parts of my letters.
As you can see, I was left with pretty rough cuts and bit of paper. Not the look I was going for.
I used fine grit (320) sandpaper to gently sand away the rough bits and extra paper.
I decided to ‘distress’ the edges of the letters to slightly camouflage where I sanded. It was easy to do on the straight parts of the letters. For the curved parts of the letters, I used a Q-tip and applied my distressing ink to the edges.
Just like with the paper on the canvas, I added 2 coats of Mod Podge to the letters once I was done with the distressing. This just acts as a sealer to finish everything off. I like the Satin finish.
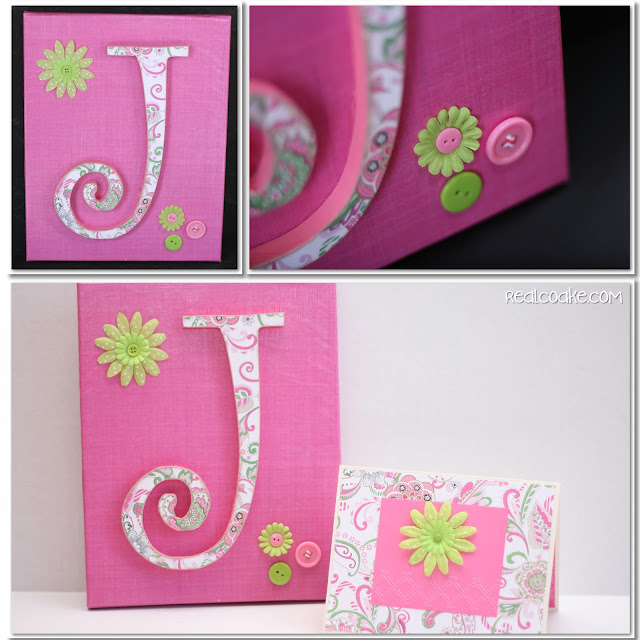
After this step, it was time to adhere the letter to the canvas. I used E600 glue because I really don’t like hot glue. Use whichever one you prefer. I think either will work. Then I decided on the embellishments to add and glued them on as well. Presto…done! Cute Mother’s Day gift for the two Moms in my life.
This is the one for my Mother-in-Law along with the matching card I made for her. I showed you the tutorial for that: Mother’s Day card.
This one is for my Mom. She was in town just after I made these, so I got to give it to her in person. I made a matching card for her as well. As her birthday is coming up, we celebrated her birthday while she was in town. I made her card a birthday card. I’ll have a tutorial for you on it another day.
There you have it. An idea (with a tutorial) for a Mother’s Day gift. I super happy with how they turned out and I hope both my Mom and my Mother-in-law really enjoy them.
What kinds of gifts do you do for Mother’s Day? We always keep things pretty simple. If I lived near my Mom, she would be super happy with a picnic! Sounds nice to me, too.
Disclosure: I am an Amazon affiliate. I am paid a small referral fee if you click through my link and purchase something.



This is so cute!
Thank you!
Cute idea – I’ve done similar projects in the past and they are a lot of fun. Right now I am trying to think of something for my Mother-In-Law, and this might fit the bill.
Dana @ Project Day
Thank you! This was my first project like this. You are right, they are fun.
KC
Adorable cards KC! Thanks for this great tutorial!!
Krista
Thanks, Krista.
KC
Lovely!
Thanks!
Love it! Nicely done 😉
Thanks!
These turned out so cute! I love the idea and you could use this for so many great gifts. Thanks for sharing it KC – love to see your fun projects each week!
Thank you! Yes, you are right, it would be a great gift idea for various uses. Thanks so much for tweeting about this post!
KC
thanks for all the work of love to make the card and “C”. They are so lovely. C3
Glad you liked it mom!
KC
So cute! I LOVE monogram anything! Thanks for sharing at Pinworthy Projects.
Thanks, Carrie! Thanks for hosting as well.
KC
I grew up with everything monogramed so now I’m obsessed with it and love that it’s back in style. You make this look a lot easier than what I suspect it really is.
FYI: I’m visiting from the blog hop. 🙂
I grew up with everything monogrammed as well…didn’t even think about that until I saw your comment. They are fun! This project was easy…it just took some figuring as I went.
Take care,
KC
These turned out so beautiful!
Thank you!
Very cute! My stepkids and I made similar initials for their rooms last summer. I love that it’s a kid-friendly project.
Thanks! I bet these look really cute in the kids rooms. My girls would probably love if I made them for their room.
Take care,
KC
Great tutorial and wonderful gifts. Lucky Moms who receive them. Just might have to try that for friends that are Moms.
Thanks! I think this could be a great gift for other occasions, too. Not just for Mom’s either.
Take care,
KC
This project turned out great. I love the cheerful colors and patterns!
Thank you!
These are so pretty! Would be a great way to personalize anyone’s space…especially little girls. 😉
Kelly
Thank you! You are right, they would be great to personalize a space. I bet my little girls would like them and I’m sure many others would as well.
Take care,
KC
So pretty, I love modge podging paper onto wood. These letters are especially so cute!
Thanks! Yes, it is fun. I will, no doubt, do more. 😉
KC