• Home
  • Contact
  • Privacy Policy & Disclosures
  • Nav Social Menu

    • Email
    • Instagram
    • Pinterest
    • YouTube

Real Creative Real Organized

Creativity and Organization for Mom Life

  • Crafts
  • DIY
  • Organization
  • Travel
  • Mom Life
  • Holidays & Special Days
    • New Year’s
    • Valentine’s Day
    • Mother’s Day
    • Easter
    • Father’s Day
    • Fourth of July
    • Halloween
    • Thanksgiving
    • Christmas
    • Seasons
      • Spring
      • Summer
      • Fall
      • Winter
    • Olympics
    • Birthdays
  • Shop
Home » Holidays & Special Days » American Girl Doll 4th of July Top {Free Doll Clothes Pattern}

American Girl Doll 4th of July Top {Free Doll Clothes Pattern}

June 14, 2013 by KC Coake 44 Comments

Share away! 😍

18.3K shares
  • WhatsApp
  • Email
  • Facebook
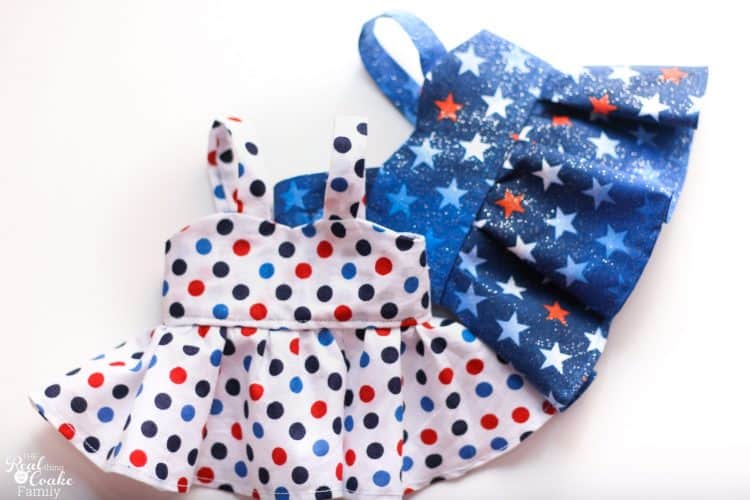
It feels like it has been a while since I have given you an American Girl Doll post…does it seem that way to you? Today, I’ve got another free doll clothes pattern for you along with a lot of tips for making the pattern. We used this pattern to make 4th of July tops for our dolls.Adorable free doll clothes pattern for sewing an American Girl Top along with tips for completing the pattern.
So let me start this post by telling you that this pattern, while free…which I really appreciate, was a bit of a fail in terms of what it was supposed to make and working with it. However, you have me in your corner, so I have all kinds of tips and help for you so you can make this cute top for your dolls, too.
The pattern was supposed to make a summer dress for the dolls. It is officially designed for for 18″ dolls such as Carpatina or Magic Attic dolls. It also says they give direction on how to modify the dress to fit American Girl dolls. Off I went to make this cute dress.
 
To get your copy of this free doll clothes pattern, just visit Carpatina Doll Free Dress Pattern. You will want to download both the pattern and the sewing directions. It is two separate files.
First, let me tell you that modifying the pattern for the AG doll was not as easy as I thought it would be. It says to increase the width of the skirt part of the pattern by 3 inches in order to fit AG dolls and to make the dress long add 4 to 6 inches to the length. I didn’t think I wanted the dress long, though after making it I would suggest that if you want a dress, you must add a good 3″ to the pattern so the poor little dolls tush will be covered. Using the pattern as is, will result in a top or one VERY short dress.
I thought this whole thing sounded simple enough. Just add 3″ to the width of the pattern. About 1 hour later, I had given it the old college try and hoped that what I had done to the pattern was the correct way to add 3″ to the width. You see, the skirt pattern is a curve and adding 3″ could mean that I should continue that same curvature but then that caused problems with where to cut the 3 additional inches…should it be the top of the curve or the bottom or both…but then that was weird looking and at weird angles. Now perhaps I totally overthought the whole thing, but to me adding 3 inches to the width of a curved object was not an easy thing to do.
I have a printable for you, near the end of this post, of the pieces I added to the pattern to make it fit our AG dolls. They work (other than that if you want a dress you have to add to the length of the skirt pattern), so whether I overthought it or not, it came out in the end and you benefit from my use of the compass, protractor, ruler, and about 6 sheets of paper! 🙂 Lol!
Next up, the pattern is written with very little information and while I really appreciate free patterns, it would be nice to have full directions. It could just be me, but I wanted and needed more information at a lot of points with this pattern.
Steps 1-3 of the pattern relate to printing and cutting of the pattern.
Adorable free doll clothes pattern for sewing an American Girl Top along with tips for completing the pattern.
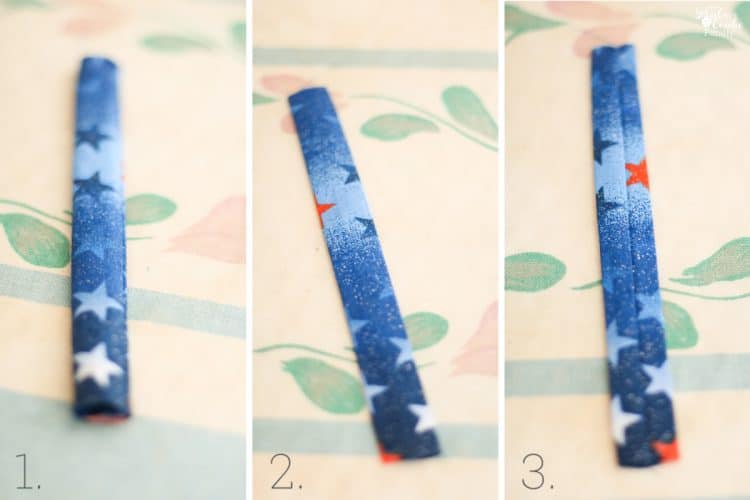
 In step 4 the pattern talks about sewing the straps. Here is one tip for you so that your finished product will look really nice. You can see in #1 above, sew the straps and turn them, lightly iron the strap on the seam. #2 Press the seam allowance to one side in the center of the strap. You can see in #3 what the back of the strap now looks like. The seam allowance is neatly pressed to one side in the center. This will allow your strap to have no visible seam when you are finished with the dress, I mean top. 😉 Just make sure to use the no seam side for the front when you put them together with the bodice.
Adorable free doll clothes pattern for sewing an American Girl Top along with tips for completing the pattern.
Step #5 in the pattern, suggests that you serge the edges of the skirt and hemline and they wait until the final step to hem the skirt. I’ve never hemmed a skirt the last thing in a pattern and it just felt wrong to me. I also don’t own a serger. I opted to go ahead and press my 1/4″ seam allowance in the bottom of the skirt and hem it now. It just felt right to me. Then I proceeded with gathering the skirt. If you follow the pattern the way that I did, leave the end pieces unfinished for now, we will finish them at the end.
Adorable free doll clothes pattern for sewing an American Girl Top along with tips for completing the pattern.
Next up is step #6. Pretty straightforward. The only slightly tricky thing is lining the straps up at the correct angle. If you look closely at the pictures of my finished product, they aren’t perfect. I lined them up what I thought was the correct angle, but somehow either within the pinning or sewing, they still got off a little bit. It only bothers me when I look at the pictures. I think they look fine.

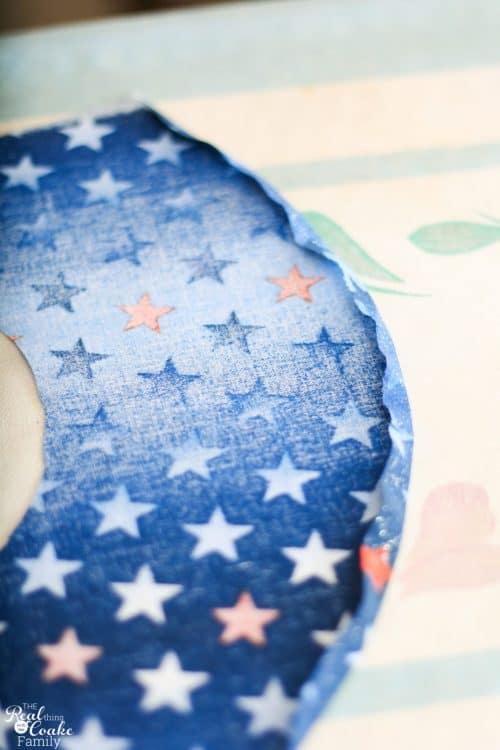
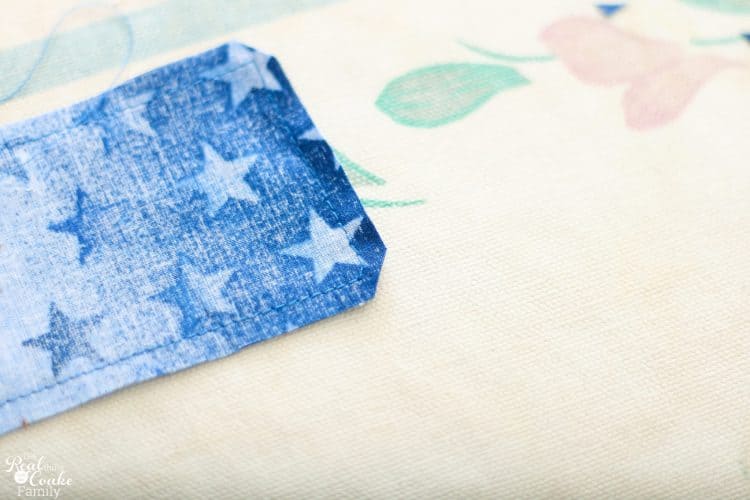
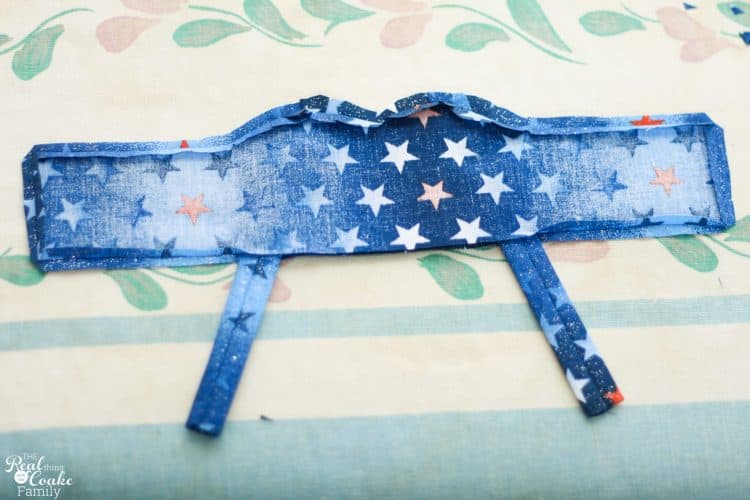
Don’t forget to clip the corners before you turn the bodice. It will help to reduce the bulk at the corners and make it look a bit better.
Adorable free doll clothes pattern for sewing an American Girl Top along with tips for completing the pattern.

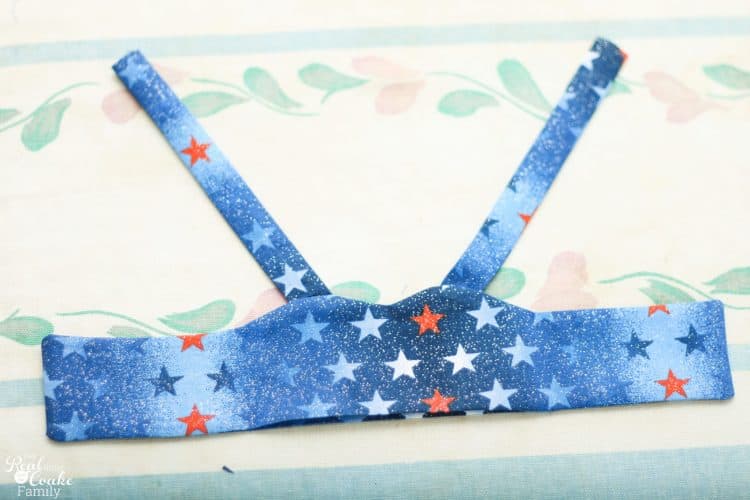
While you are clipping, I highly recommend that you clip the curves on the bodice and press the whole thing before you turn it. It will make it so much easier to press it and get a polished, finished look once you turn the bodice. Having a good pair of sewing scissors really helps with small snipping like this. I love my Fiskars scissors (affiliate link) that are spring loaded. Makes the job super easy.
Adorable free doll clothes pattern for sewing an American Girl Top along with tips for completing the pattern.

 
The clipping and pressing  (affiliate link) really helps the curve of the top to show off really well.
Adorable free doll clothes pattern for sewing an American Girl Top along with tips for completing the pattern.
 
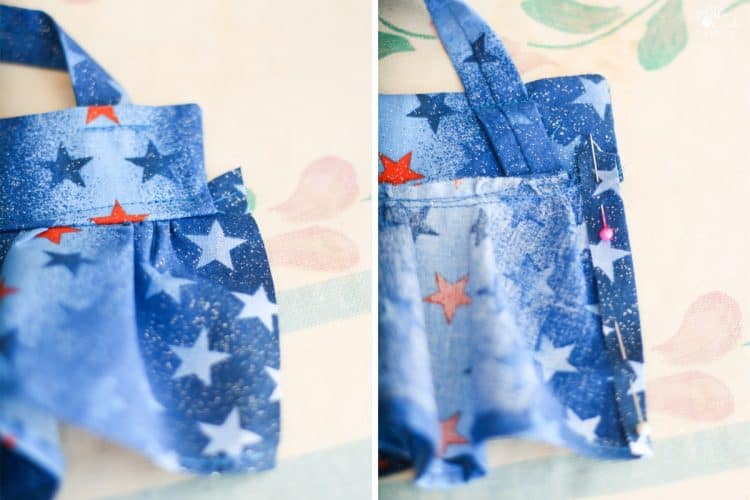
For step #8, when you line up your ruffle skirt portion, leave about 1/4″ hanging off the end of both sides. You can either turn this under in step #10 for a polished look(as you can see I did above) or if you have actually made a dress, you can use this area to fold under and attach your velcro closure.
Before you get to step #10 though, in step #9 the pattern calls for topstiching the waistline. I’m not really sure this is necessary. They say it is to close the bodice completely. Now maybe I attached the bodice incorrectly, but when I sewed the bodice to the skirt, I closed the bodice. I still did topstitch as you can see above because it helps keep the bulk down and keeps things a bit more smooth. If you topstitch, press the seam up toward the bodice and topstitch the ruffle and the bodice together.
The pattern calls for sewing the two sides of the ruffled ‘skirt’ together and adding two snaps at the top. This will not work on the AG dolls. I tried it. The bodice is not wide enough to go over the dolls tush.
I recommend if you are making the top, just add two small pieces of velcro to the bodice, I sewed one at the top of the bodice and one piece at the seam for the bodice and ruffle. I left the ruffle part of the top open in the back. If that bothers you, you could add more velcro to close the ruffle portion. For the dress, sew one long piece of velcro to the ruffle portion of the dress and one or two pieces to the bodice.
Adorable free doll clothes pattern for sewing an American Girl Top along with tips for completing the pattern.
 

Whew! We did it! We got through that pattern and despite the fact that we got a top and not a dress and that it was a bit confusing and I had to rip seams to get the top on the dolls (because I sewed the ruffle together the first time as the pattern says to do)…we love this top! It is so stinking cute!

Now that I know how to make them, I’m pretty sure I will make them again and not find them hard at all(and yet I never have, I like the easy stuff, like this simple reversible wrap skirt).
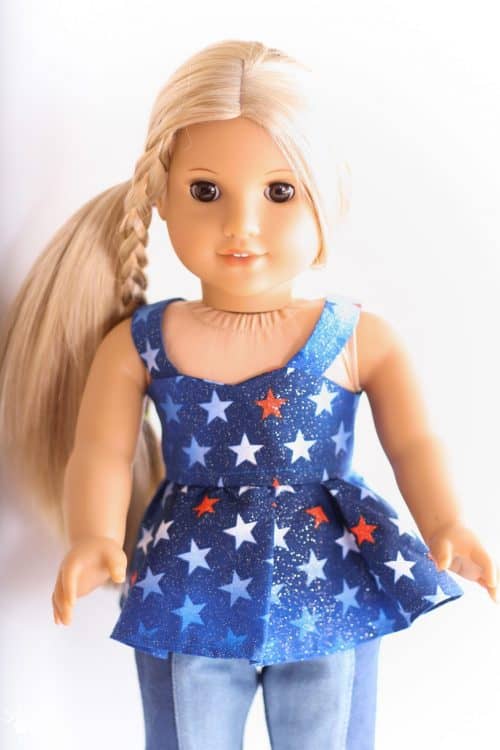
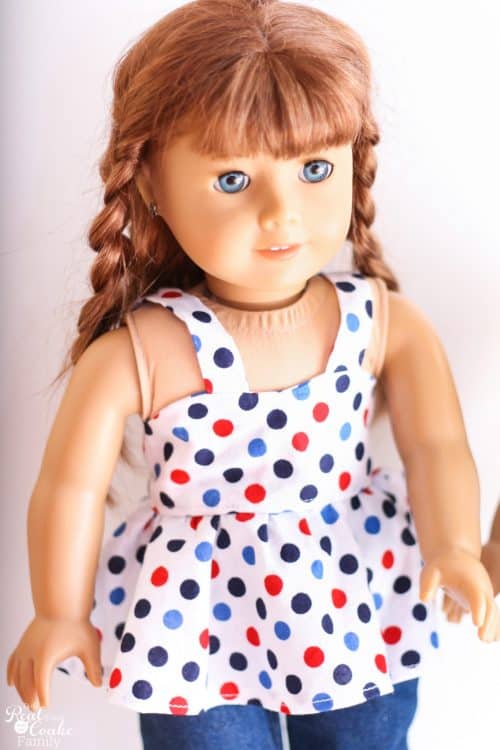
 Adorable free doll clothes pattern for sewing an American Girl Top along with tips for completing the pattern.
 
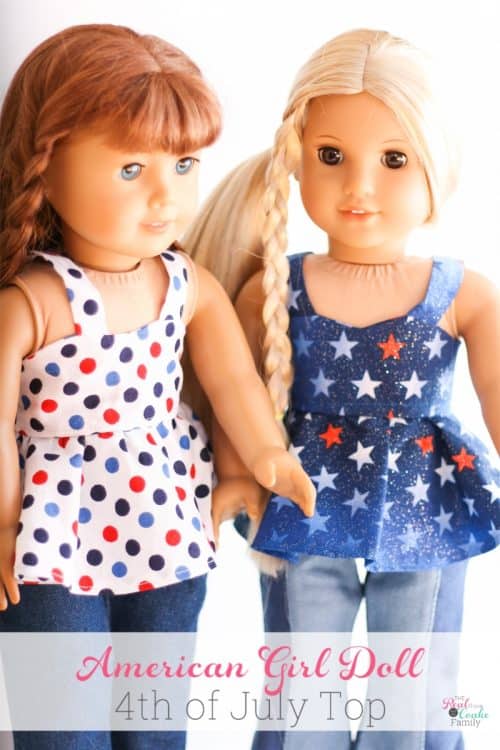
Julie is all ready for the 4th of July and loves her cute star spangled top.
Adorable free doll clothes pattern for sewing an American Girl Top along with tips for completing the pattern.
 
Felicity loves her polka dots and feels quite ready for the 4th as well.
Below, you will find the pattern pieces I used to modify this pattern to fit the American Girl Doll. Just remember this will be for a top not a dress. If you want a dress, you will still need to add at least 3 inches to the length of the skirt pattern piece.

Get your pattern pieces by signing in below. Remember this is NOT the pattern, it is just my additional pieces to help the pattern work for AG Dolls.

Adorable free doll clothes pattern for sewing an American Girl Top along with tips for completing the pattern.
 
The girls were together wondering where the fireworks were. I told them they had to wait a little while…they weren’t too happy about that. They also said they were getting pretty hot in their jeans since it is summer and hot and humid. So now, because this turned out to be a top and not a dress…I’m off to make them some shorts. I’ll be back next week with another pattern for you to make shorts for your dolls! They are super cute, too. Can’t wait to show you!

Hey, do you follow me on Facebook, Instagram, or Pinterest? If not, why not? You are totally missing out on more fun ideas and cuteness.

More to Enjoy! 😍

Easy and Beautiful Epsom Salt Candle Holders
How to Make a Glitter Candle {DIY Home Decor}

Share away! 😍

18.3K shares
  • WhatsApp
  • Email
  • Facebook

Hi! I'm KC. I'm a single mom of 2 girls who loves all things creative. Whether it's making something crafty or tackling that DIY project, I'm gonna have some fun and stay organized in the process. 😊 Read More…

Follow Me:

  • Email
  • Instagram
  • Pinterest
  • YouTube
Previous Post: « Real Family Fun #18
Next Post: Patriotic Glitter Stars {4th of July Crafts} »

Reader Interactions

Comments

  1. Janie Carroll Designs says

    June 14, 2013 at 4:02 pm

    You did a great job with this alteration of the free pattern. I also undertook this pattern last year and had the same frustrations you shared. I think because the curvature of the skirt and the fullness of the gathers are somewhat forgiving, it works. I chose to cut my own full circle skirt the next time. I also thought the strap placement was a little awkward. Since I make doll clothes for my little business, I do find many patterns frustrating, and end up correcting or even re-drafting them altogether.

    Reply
    • KC Coake says

      June 22, 2013 at 6:01 pm

      Thanks, Janie! I’m so glad to know that it wasn’t just me that had a hard time with this pattern. I though of using the skirt patter that I have used tons of times to make a reversible skirt. I bet it would work just fine next time. I bet you have tons of experience with your business making patters work…bet there are some awesome patters you know of and some totally stinkers, too.
      Have a great weekend.
      KC

      Reply
  2. Char (DollDiaries) says

    June 14, 2013 at 4:53 pm

    So, you are not the only one who has tried this pattern and become totally frustrated!! I made the 18″ slim body version for our Carpatina Erin doll and I got so stressed out that I ended up not even connecting the top to the skirt. You can see my finished product here: https://dolldiaries.com/a-new-outfit-for-our-carpatina-doll/

    I love them in the Patriotic fabric!

    Reply
    • KC Coake says

      June 24, 2013 at 3:04 am

      I love what you created from your pattern. It was a while ago, but I think I tried to comment on it and it wouldn’t let me anymore. It sure was nice to know I was not the only one who struggled with this pattern. (Not that I’m glad that others have been frustrated.) Hopefully my suggestions can help other because I think the top turned our really cute. Wait until you see the shorts I made…cute, too!
      KC

      Reply
    • Virginia Kennedy says

      July 7, 2020 at 12:06 pm

      I am very frustrated because I cannot find the “free” pattern.

      Reply
      • KC Coake says

        July 20, 2020 at 5:31 pm

        Sorry for your frustrations. Are you looking for the Carpatina pattern or the additional pieces I have that make the pattern work for an AG doll? Let me know and I can see what I can do to help.

        Reply
  3. Wendy says

    June 17, 2013 at 6:10 pm

    Wow! You did a great job! The dolls look so cute. 🙂

    Reply
    • KC Coake says

      June 25, 2013 at 2:15 am

      Thanks so much!
      KC

      Reply
  4. Beansieleigh says

    June 17, 2013 at 6:24 pm

    Oh my gosh… Just LOVE this!! Thanks so much for sharing how to make these sweet clothes for our daughters, granddaughters, and I must confess even for myself! (I’m a collector.. I never did outgrow my dolls!) ~tina

    Reply
    • KC Coake says

      June 25, 2013 at 2:16 am

      Thanks! I hope the pattern (with my modifications) works out really well for you, your daughters and granddaughters. I think I may not outgrow them…they are so fun. I think I will be sad when my daughters outgrow them.
      Take care,
      KC

      Reply
  5. Morgane @ Bear,Dolly and Moi says

    June 17, 2013 at 11:04 pm

    It is good you won that fight with the pattern, the outfits turned out really cute!
    I think it is sometimes harder to sew for dolls than kids, except the dolls will have wear what we make them!

    Reply
    • KC Coake says

      June 25, 2013 at 2:26 am

      Thanks! I love how they turned out. I’ve never sewed for my girls…it intimidates me, but I keep hearing it is easier than the doll stuff. I really should give it a try before they get too old and would be embarrassed to have something Mom made.
      Take care,
      KC

      Reply
  6. JOY @ https://joysjotsshots.blogspot.com/ says

    June 18, 2013 at 2:18 am

    Thanks for sharing a pattern I can add to my Pinterest Doll Pattern page. I only post free patterns. Appreciate the honesty and warning about adapting the pattern. Despite that fact, you did a beautiful job and created a beautiful post that I really enJOYed!

    Reply
    • KC Coake says

      June 26, 2013 at 1:05 am

      So glad I could help add to your free pattern collection. Thank you! My girls and I love how the top turned out…so cute.
      Take care,
      KC

      Reply
  7. Lindsay(PACountryCrafts) says

    June 19, 2013 at 11:55 am

    Aw! Sorry you had trouble with the pattern, but they turned out really cute! I need to make some shirts for my girls’ dolls to wear with the skirts I made them. I bet that I can alter this pattern to work… Thanks for the inspiration!

    Reply
    • KC Coake says

      June 26, 2013 at 1:17 am

      Well, I can handle the pattern being frustrating when it turns out so cute! I hope the tops work out well for you if you give them a try.
      Take care,
      KC

      Reply
  8. Sosewsuzi says

    June 19, 2013 at 9:58 pm

    Thank you….for posting this. I’ve had the Carpatina free pattern for a while but had not gotten around to making it. What a time saver for me to find your post. I just finished printing and pasting the pieces together. Now I’m off to select some fabric from my stash. Then will read your entire post again. Will check back to see your shorts.

    Reply
    • KC Coake says

      June 26, 2013 at 1:25 am

      I hope your sewing went well and that my post helped you out. The tops are so cute, it was worth the fuss. I’ll be posting the shorts tomorrow…yay!
      KC

      Reply
  9. Krista @ Goodwill Glam says

    June 20, 2013 at 7:10 pm

    So cute! I have to try this for my little girl! Do you think it would fit a Bitty Baby if I made a few adjustments?

    Reply
    • KC Coake says

      June 26, 2013 at 1:35 am

      Thanks! I really don’t know if it would work for the bitty baby. Can you measure around the waist of the Bitty Baby and send me the measurement. I could compare it to our dolls and see.
      KC

      Reply
  10. Jerri says

    June 30, 2013 at 1:35 pm

    Thank you! I have tried so many times to make this dress for our girls! We have both Carpatina and American Girl dolls here, and this dress never sews up well and never fits either of them well with the adjustments I’ve tried. Your additions look great! I am eager to try them out this week.

    Reply
    • KC Coake says

      July 1, 2013 at 1:50 am

      I’m so glad I could help! I really hope my modifications work and you are able to make this dress/top for your dolls. It is so cute when you are finished. Good luck!
      KC

      Reply
  11. Pam @Threading My Way says

    July 6, 2013 at 11:17 am

    Fabulous job making the pattern modifications, KC. The outfits look great!!!

    Reply
    • Pam @Threading My Way says

      July 6, 2013 at 1:10 pm

      I’ve featured your doll dresses today…
      https://www.threadingmyway.com/2013/07/threading-your-way-features.html

      Reply
    • KC Coake says

      July 8, 2013 at 1:39 am

      Thanks so much! Thanks for the feature as well!
      Take care,
      KC

      Reply
  12. Catholic Bibliophagist says

    April 23, 2015 at 2:45 am

    I made that pattern for a Magic Attic doll (same size as the Carpatina dolls). Even though I was not trying to enlarge the pattern, I ran into as many difficulties as you did with the poorly written instructions and poorly designed patterns. My dress ended up as a top also. And I don’t think I will ever make another one.

    Reply
    • KC Coake says

      April 28, 2015 at 1:09 pm

      Oh – I’m sorry you had so much trouble as well. I wrote this post a while ago and I haven’t attempted this pattern again either…but then again, I rarely do the same thing more than once. Thankfully, I fixed this pattern (at least if you want a top) so maybe others can find it and not have as many issues.

      Reply
  13. Heather says

    June 13, 2015 at 3:06 am

    I too made this free pattern for my nieces’ Our Generation dolls (like American Girl). The instructions are hard to follow and I found this post after I made the dress. There is also a video version, but they don’t even lay out the pattern in the correct direction. I was able to get the sizing correct, but scrapped the first skirt for a longer version. When cutting the pieces, I added not only what they recommended, but also another inch to be sure. In the end, I cut off the extra fabric that I added on top of what was recommended as I did not need it. When sewing the back, your want to sew partly up the skirt and then leave the seam open the rest of the way. Roll over the edge and stitch. I used Velcro along the top of the bodice. And when you sew the straps to the bodice, you can sew both ends in the sem at the same time, if you are good with measuring. The dress turned out cute, but not really thrilled about sewing another. I really do appreciate the free patterns that I am finding on the web!

    Reply
    • KC Coake says

      June 14, 2015 at 8:51 pm

      Yep, our shirts turned out cute as well and I did many of the things you mention. Despite the issues with the pattern, in the end my girls love their shirts. Thanks for all your additional tips.

      Reply
  14. monica says

    July 5, 2015 at 8:02 am

    gracias. me gusto muchos tus bestidos de muñeca.saque un patron,muchas gracias. Monica

    Reply
    • KC Coake says

      July 5, 2015 at 8:37 pm

      So glad you liked it. Enjoy!

      Reply
  15. Sandy Becker says

    December 18, 2017 at 8:38 pm

    Would it be possible to get info on the shorts you were going to make to go with the Forth of July top you altered. I know this is way after the fact…but I just found your blog. Thanks, Sandy

    Reply
    • KC Coake says

      December 19, 2017 at 4:34 pm

      Sure thing! I did another post about the shorts, which you can find here: https://realcreativerealorganized.com/patterns-for-doll-clothes/ . Hope that helps!

      Reply
  16. Mary Reigel says

    February 11, 2018 at 4:57 am

    Hi KC!

    Just wanted to let you know that the link for the Carpatina pattern is not working and I cannot find anything on their website that matches this. Can you please help me? I would love to make a couple of these for my granddaughters 🙂

    Thank you in advance for any help you can provide,
    Mary

    Reply
    • KC Coake says

      February 12, 2018 at 4:12 pm

      Thanks for the heads up. I just searched their site and found what I’m pretty sure is the pattern. It is at this URL: https://www.carpatina.com/dolls/proddetail.php?prod=PATD-FREE01 . I’m editing the post not to correct the links. Thanks again and good luck with making them!

      Reply
      • Kathy Norton says

        February 13, 2018 at 10:45 pm

        Hello,

        Like you I had the pattern but found it almost impossible to follow the directions. All it says about attaching the skirt is to “Pin the skirt waist to the bodice outer part and stitch”. I took that to mean to only sew it to the back side of the bodice, since later they tell you to top stitch the waistline and completely close the bodice. The only way to do that is to place wrong side of the skirt to the right side of the bodice back. Then when you turn it down to get the front side of the bodice attached to the waist it is faced in the correct direction (skirt right side out). I had seen you say (in your tutorial) you must have done it wrong. Did you just attach the skirt to both sides of the bodice by stuffing in inside and only doing one top stitch to enclose it? It is a cute pattern, and I had made tons of just the bodice itself from small 12 x 12 pieces of fabric no good for anything else. They turned out great. It also told you to increase the size of the bodice, straps and skirt by so much to fit AG dolls. I did get one top finished, but there has to be a better way. If anyone could clarify the details of the construction for me that would be great. Thanks for showing us your tops too. They look great!

        Thanks,
        Kathy

        Reply
        • KC Coake says

          February 14, 2018 at 3:44 pm

          Kathy – I SO wish I could help you! Unfortunately, it has been too long since I made this top and I have a horrible memory….so I don’t remember at all how I fixed it. Sorry, I wish I had better news for you.

          Reply
      • Mary Reigel says

        February 14, 2018 at 1:57 am

        Thank you so much KC!!! 🙂

        Reply
  17. Elizabeth Stine says

    February 15, 2018 at 11:52 am

    I would love the pattern for the 4 th of July top tia

    Reply
    • KC Coake says

      February 19, 2018 at 3:39 pm

      There is a link in the post that will take you to the main pattern on the Carpatina site (it is not my pattern and I can’t give it away). I offer a pattern that will help you modify their pattern to work for an 18″ doll. To get that, sign in to the box near the bottom of the post that says that the pattern is a subscriber bonus. Wait for a moment and that graphic will disappear and another graphic will appear. That graphic will say, “Click here for your free printable or pattern.” Click on that graphic and the pattern will open up in another window. It is a pdf that you can download to your computer/phone and print from there.
      Hope that helps!

      Reply
  18. Francine Rossi says

    June 30, 2019 at 11:42 am

    I cannot seem to find where I get the first pattern for the 4th July top. I did sign up and got the pattern to fit the American Girl Doll. Please help my granddaughter is anxious to make it.

    Reply
    • KC Coake says

      July 3, 2019 at 5:11 pm

      The link to the Carpatina pattern is near the beginning of the post. Here it is again. https://www.carpatina.com/dolls/proddetail.php?prod=PATD-FREE01
      Hope that helps!

      Reply
  19. Mary Williams says

    June 29, 2020 at 3:17 pm

    I do NOT have a problem with your pattern BUT I wish you had one for the BOY KEN . Do you??????

    Reply
    • KC Coake says

      July 1, 2020 at 6:57 pm

      I don’t have one for him. Though he is the same size as the other dolls so any of the AG patterns would fit him. I just don’t have any patterns that are gender-neutral, I’m pretty sure everything is pretty girl skewed.

      Reply

Leave a Reply Cancel reply

Your email address will not be published. Required fields are marked *

Primary Sidebar

Popular Posts

  • IKEA built in hack with storage and desk Great IKEA built in hack for simple shelving and desk
  • collage showing how to paint a stairwell The Inexpensive Way to Paint a Stairwell

Meet KC

Hi! I'm KC, Welcome to my blog!
Click here to Learn More About Me…

Free Member Program:

Let’s Be Social

  • Email
  • Instagram
  • Pinterest
  • YouTube

Copyright © 2023 · Sprinkle Pro Theme on Genesis Framework · WordPress · Log in