Hello, hello! I’m back with another cute flower made from ribbon. This time I’ve got a double layer flower for you. They are so pretty and when you make a double layer flower you get to add more color to your flower because you use three different ribbons. More color=more fun!
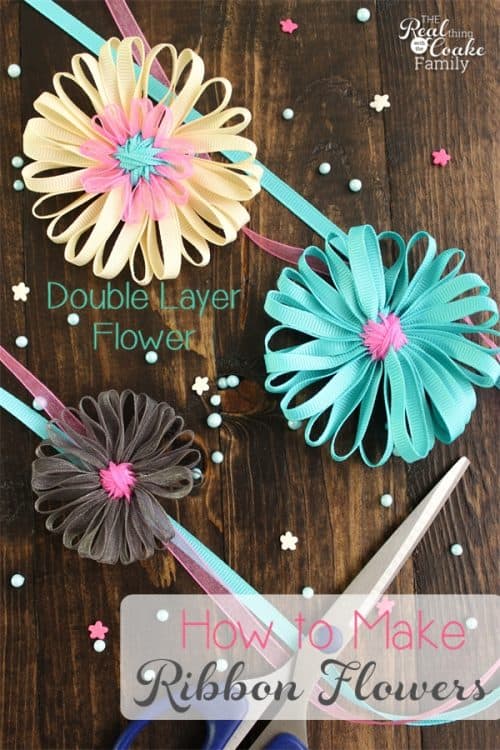
The double layer flowers are my favorite. I think they look really pretty and I love all the color combinations that can be made with them as well. Just like the single layer flowers, they can be used so many ways from wreaths, garlands, to pretty toppers on a present, and plenty of other ideas. I think the possibilities might be endless. 🙂
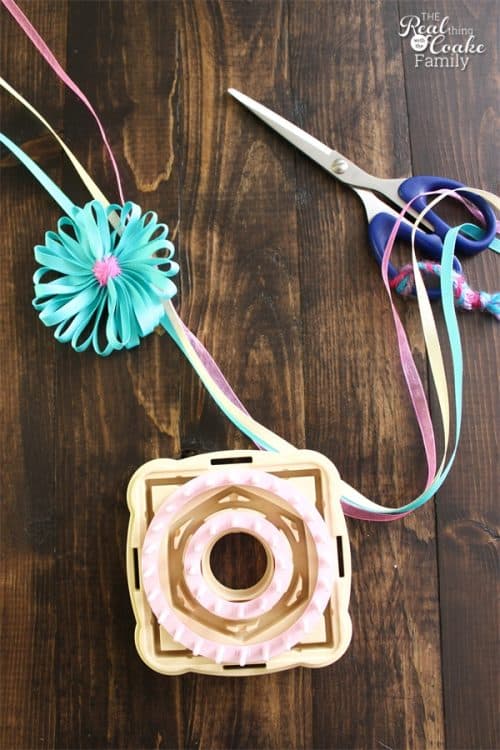
You will want to set up your flower loom![]() (affiliate link) like the one in the picture above. You will want two different sizes of the circles.
(affiliate link) like the one in the picture above. You will want two different sizes of the circles.
I selected the largest and the smallest.
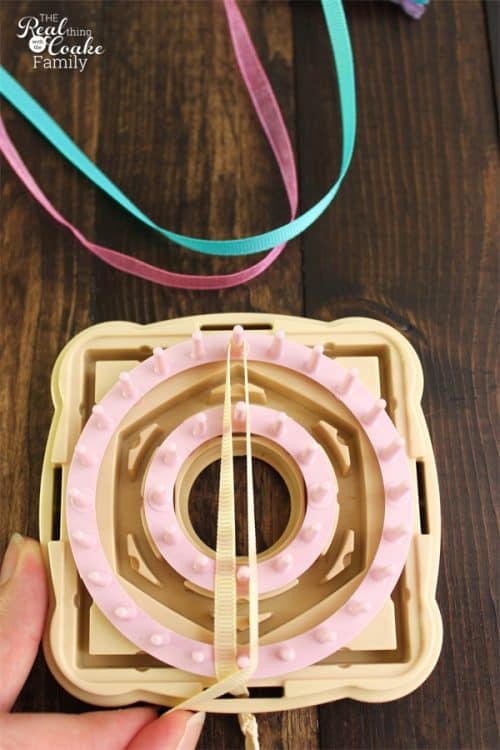
Just like you did with the single layer flower, start by threading your ribbon through the slot on the side and tying a knot to secure it in place. Then you will wind your ribbon around the spindles. You are winding around the outside spindles for this first time. You will notice that the ribbon is also going around the smaller form spindles as well.
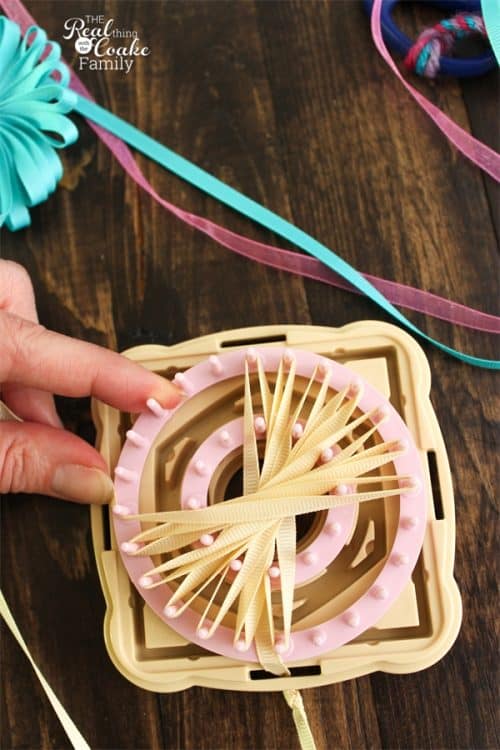
This is what it will look like as you go.
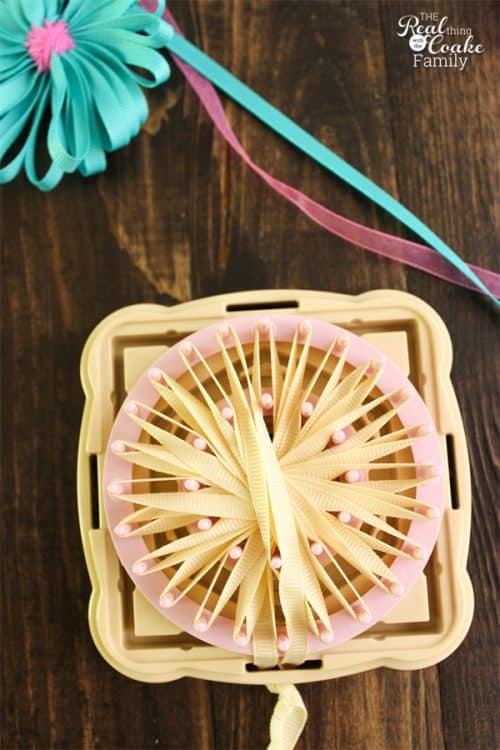
All done with this layer. You can see that I wound all the way around the entire loom. I made sure none of my ribbon covered up the center spindles, but rather went around them.
Finish this layer by threading your ribbon back through the slot and tying the two ends together. Secure it into the slit that is on the side of the loom.
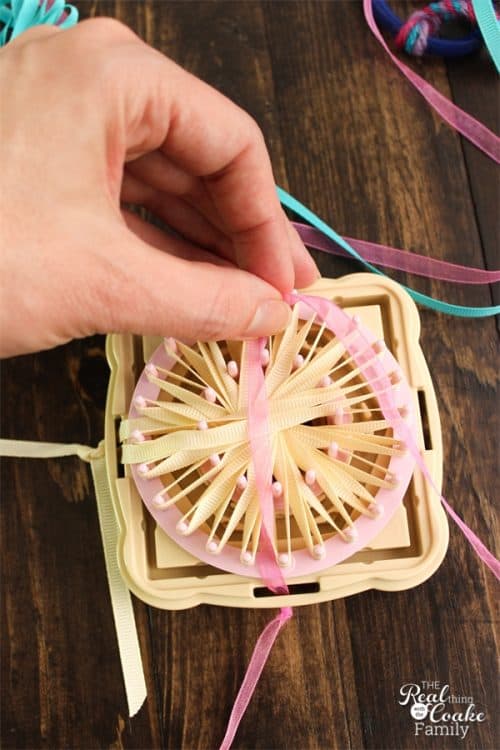
The way I read the directions that came with the loom, it tells you to use the same slot to place your next ribbon through and secure the ribbon in the same slit in the side of the loom. With this shear ribbon I might be able to do that, but with any thicker ribbons, there was no way I could get that to work. I suggest that you just pick another slot and thread your next ribbon through it, tie a knot and secure it in the slit.
Now you will start winding the ribbon around the spindles. You are winding this ribbon only around the inner spindles this time.
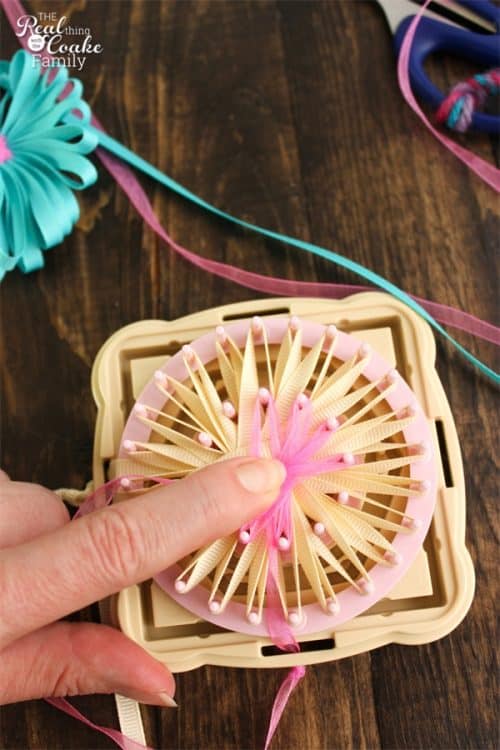
With the shear ribbon, you will want to keep your finger on what you have wound around the spindles as you go. Trust me. Do it! If you don’t the ribbon will pop off the spindles just about when you are done and it is so frustrating. This doesn’t seem to be as much of an issue with grosgrain ribbons.
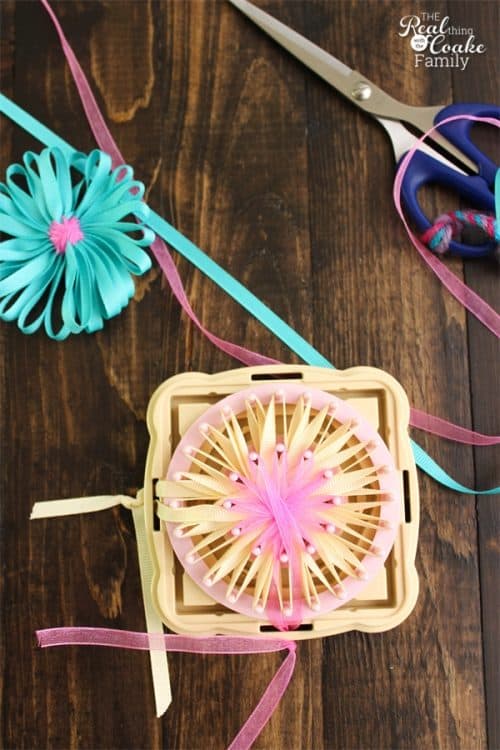
Wind all the way around until you get back to the beginning. Tie your two ends of ribbon together and secure them in the slit on the side of the loom. Once again, use your finger in the center of what you have wound onto the loom. It will be super awkward to hold it while you tie a knot in the two ends of ribbon, but once again, if you don’t, you will be crying. Trust me. 🙂 (Or is it just me that gets frustrated when all the work you just did pops right into oblivion?)
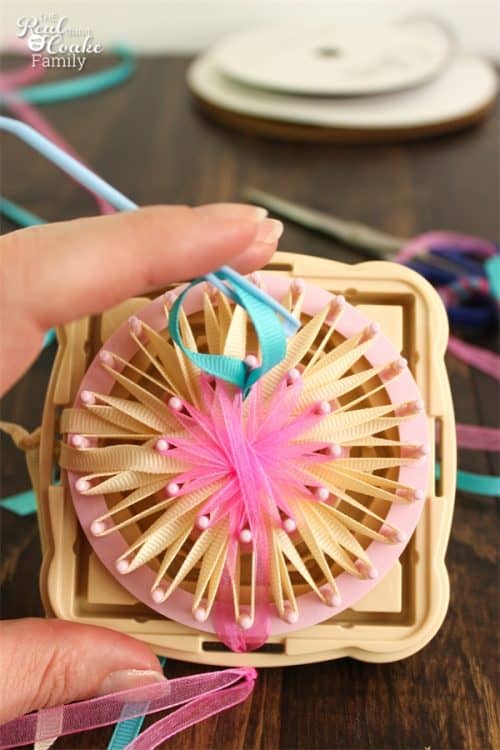
Now you get to sew your flower together. Do this by placing a length of another color of ribbon on the needle provided with your loom. Bring it up between ribbon that is wound around the same spindle on the INSIDE spindles. You will only be sewing the inner flower. Hold the tail of the ribbon that you are sewing with while you do all of the sewing so you can find it to knot and secure it when you have finished sewing.
Go in between each ribbon on the inner portion making your way all the way around the loom. When you do this you will usually be pulling the sewing ribbon in between the ribbon from the bottom layer as well. Sometimes the needles is a little tough to get through, but just look for the openings between the ribbons.
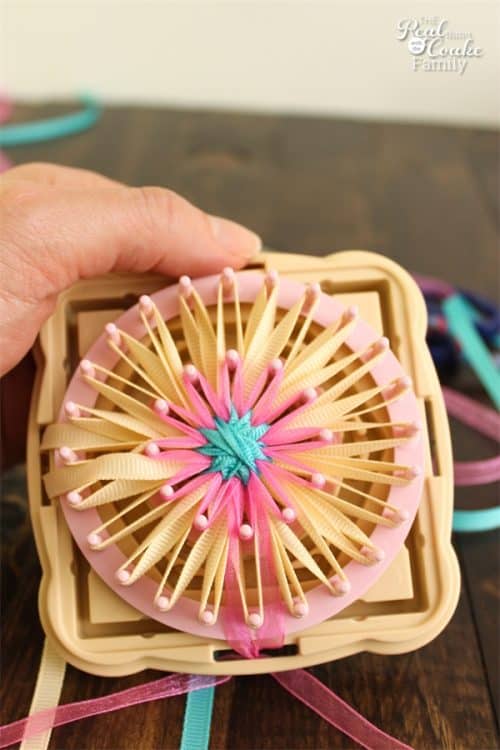
When you are done, you will have created the center of your flower.
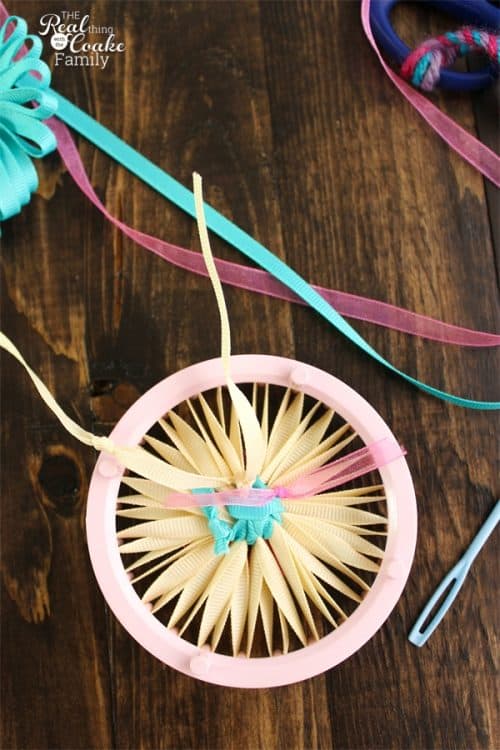
Tie knots on the back side of your flower to secure all of the ribbons. I find it best to tie off the ribbon with which you just sewed the center first. Do this before you remove anything from the loom. Then you can remove the loom from the base and flip things over to tie the additional two knots. It seems easiest to me to remove the smaller or center loom for this part.
Remove your flower from the loom.
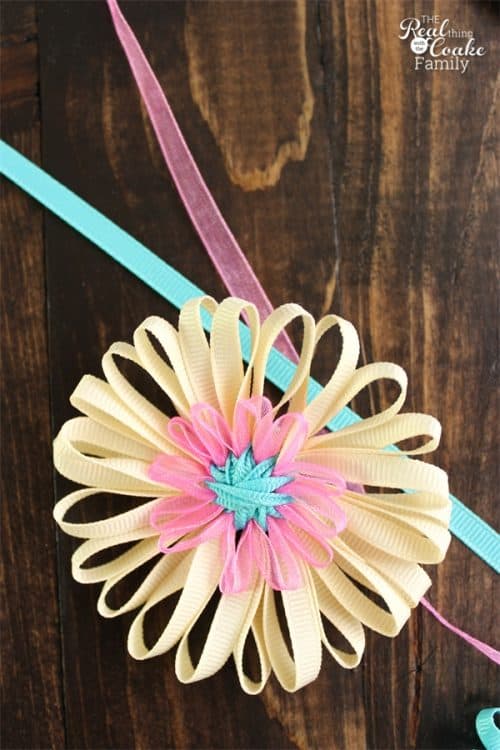
You have just created a double flower from ribbon! Isn’t it so pretty?
Once again, these use a fair amount of ribbon. On the spools of ribbon typically available at a craft store, which are usually between 8 and 15 yards, you can make between 3 and 5 flowers (depending on the size…this would be the larger size). I get a lot of my ribbon in large quantities from Offray, since they have been sponsoring one post per month. Most of their ribbon comes between 25 to 100 yards on a spool. So, if you plan to make a whole bunch of these, I would highly recommend getting your ribbon from them (and they are not sponsoring this post, I’m just giving you my opinion on how to save money if you want to make a bunch of these).
What do you think would be a great use for a flower made from ribbon?
Don’t forget, sign up to get instant access to every new post!
More Fun for You:

I’ve seen those looms and wondered if I’d ever use them for anything. After seeing your flowers, I think I’m sold. The flowers would look great on presents!!!
Oh, so glad you liked seeing them Pam! They are fun and possibly addictive. 😉 I think the flowers would look great on a present.