Do you guys remember how I’ve been making all kinds of decorative pillows this year? I’m back with some more pillows today and I couldn’t be more happy with what I created!
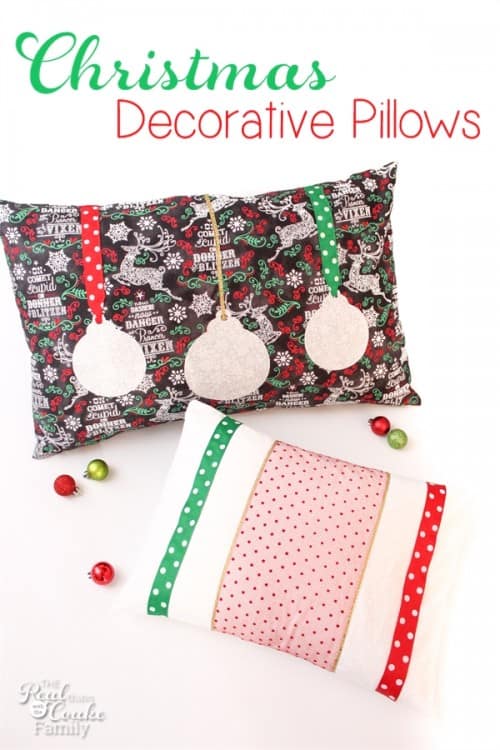
Earlier this year I made spring decorative pillows, summer decorative pillows, and, most recently, fall decorative pillows. I enjoyed them so much and I’ve always coveted Christmas pillows in the stores, but our Christmas budget for extras like pillows is usually already spent on other things. I decided this year I was having Christmas pillows no matter what.
When Offray started giving me supplies of ribbons and compensating me for making things with their beautiful ribbons, I knew that it would be perfect to finally get my Christmas pillows and make them myself with some adorable ribbons! Yippee! Oh and don’t forget…I have a coupon for you to buy your own ribbons from Offray, it is at the bottom of this post.
Of course a lot of crafty fun has a trial or two along the way…or at least it does for me. How about you?
I knew I wanted to make two different pillows because I have a tan couch and burgundy/red colored club chairs. What looks good on one will not necessarily look good on the other.
I had THE HARDEST time finding fabric for these pillows. Apparently if you didn’t by Christmas fabric back in September, you are out of luck. 🙁 I am not good at planning that far in advance. Anyway, after about the 4th store, my daughter Pumpkin found the adorable black print fabric. It went perfectly with the ribbons I had selected from Offray. I had already found the white snowflake fabric and went with it even though I knew the snowflakes would be hard to photograph…had to go with what I liked and hope I could get a decent pic or two for you guys as well.
Got home with my fabric and set to work. My girls had used my Cricut for some crafts a while back and it hadn’t worked quite right the next time Pumpkin and I used it. This time…it was dead…no go. Uugh! I needed it to cut out the ornaments for the larger pillow. I ordered a new Cricut and waited (impatiently) for it to arrive. So love the new Cricut! So fun! After that everything was smooth sailing with these pillows and they were totally worth the effort!
Let me show you how to make your own adorable Christmas decorative pillows featuring this fab Offray ribbon.
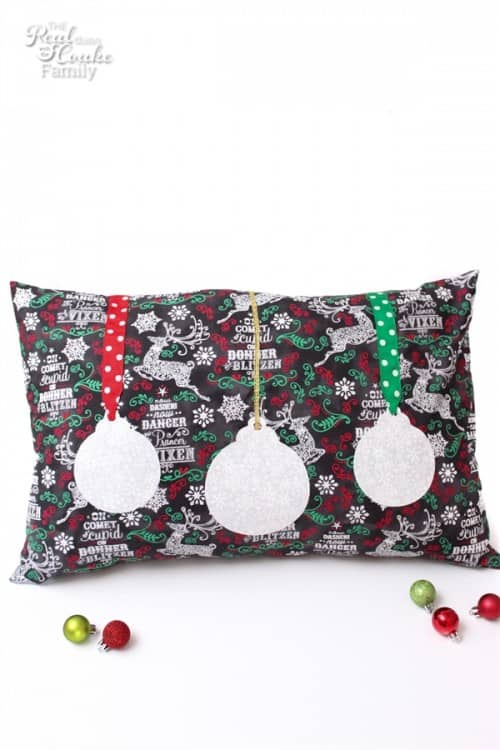
Let’s start with the ornament pillow. Isn’t it so cute?! You will want to cut out your ornaments. I use my Cricut to do that. I’ve got a full tutorial on cutting fabric with Cricut machines for you. One thing I did different this time was to use the Light Heat n’ Bond rather than the Ultrahold. It is supposed to better for sewing applique, but the Ultrahold is supposed to be better for cutting with the Cricut. The light worked perfectly. Also, while I’m thinking of it, if you happen to have the new Cricut, you just turn the dial to the fabric setting and you are good to go. You no longer have to worry about what settings to set the machine to get a great cut. Easy peasy!
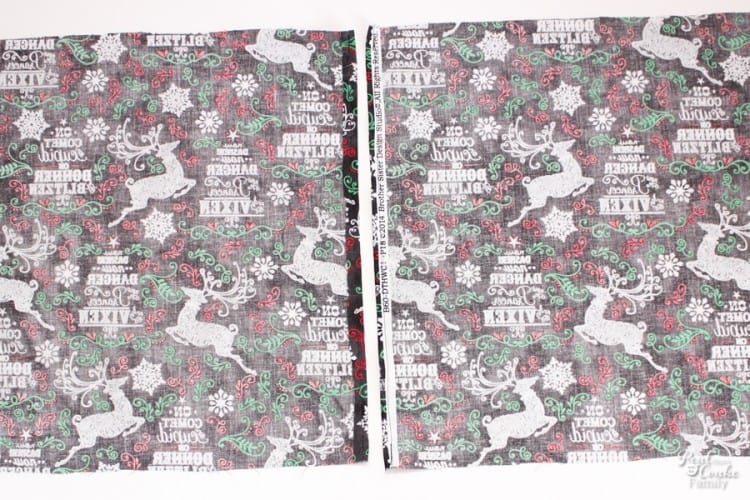
You will want to measure the pillow you want to create a cover for. You will need three cuts from your fabric in order to make these simple envelope style pillow covers. For the largest piece or front of your pillow, cut your fabric 1″ larger than your measurements. For the two smaller pieces or the back panels of your pillow, cut the full width + 1″ and 1/2 of the length + 3″.
I have the full step by step tutorial for you in my post about how to make decorative pillows.
Once you have cut your fabric, start by sewing a 1/2″ hem into one side of each of your back panels(pictured above). The fabric I was working with had a distinct pattern, so I had to be careful to plan which side to hem so that back of the pillow would have the proper pattern, not a funky messed up pattern.
For this pillow you will need the following Offray ribbons: Grosgrain Polka Dots Red 7/8″, Grosgrain Polka Dots Emerald 7/8“, Quasar Gold 1/8″.
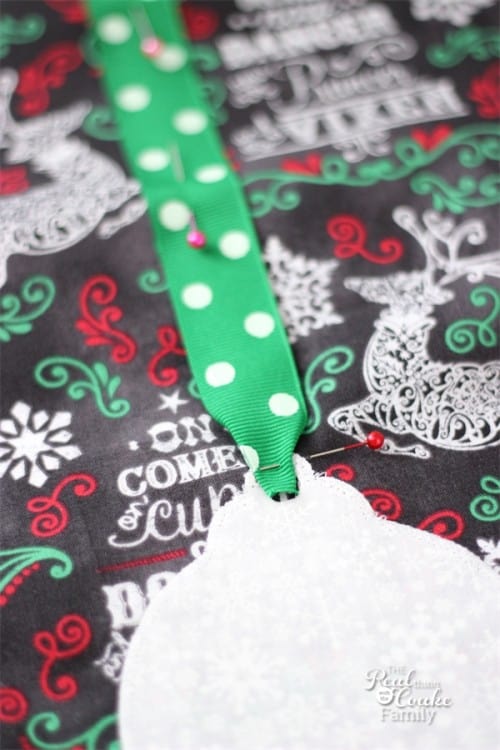
Next up, take your larger piece of fabric that will be the front panel of your pillow. Place your ornament cut outs on the front evenly spaced. Iron those on and then sew around them with a zig zag stitch.
Pin your polka dot ribbon to look like the hanger for the ribbon. You will want to tuck the bottom portion of the ribbon in as you can see pictured above. Just pin it in place like you see above so that it makes it look like the ribbon goes through the opening of the ornament.
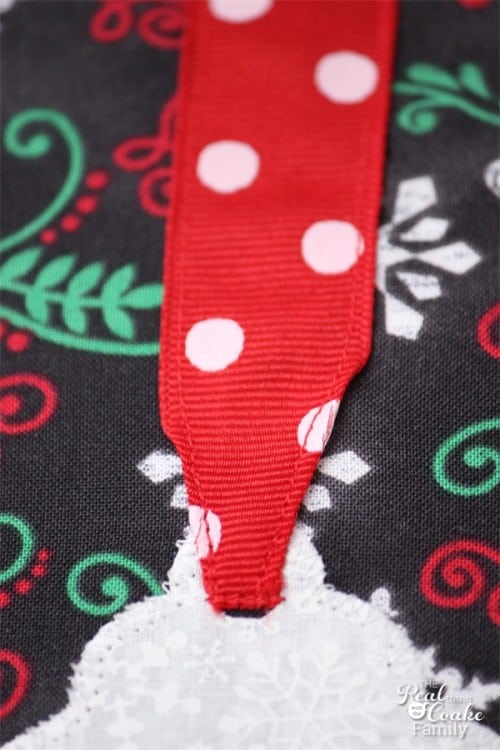
Sew down one side of the ribbon and up the other side to hold it in place. You can see in the picture above how I stitched the narrower part of the ribbon to make sure it stayed put. I also reinforced the bottom most narrow place by back stitching. Since I have kids and they are hard on things, I thought that might help it hold up better.
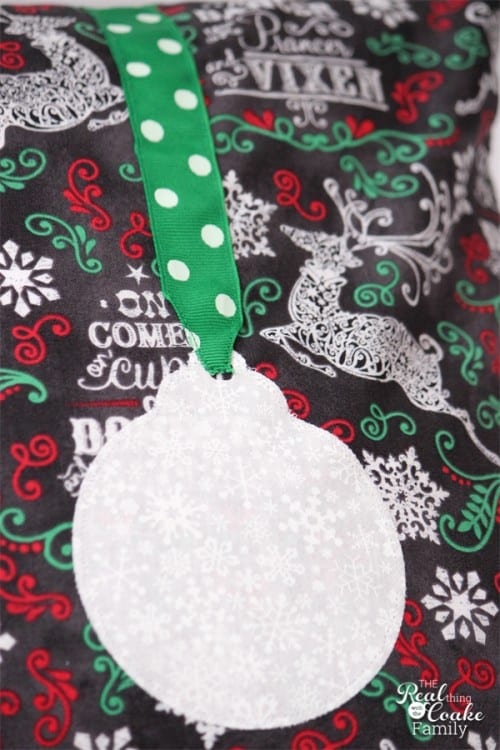
The completed ornament. I love how they turned out…so stinking cute!
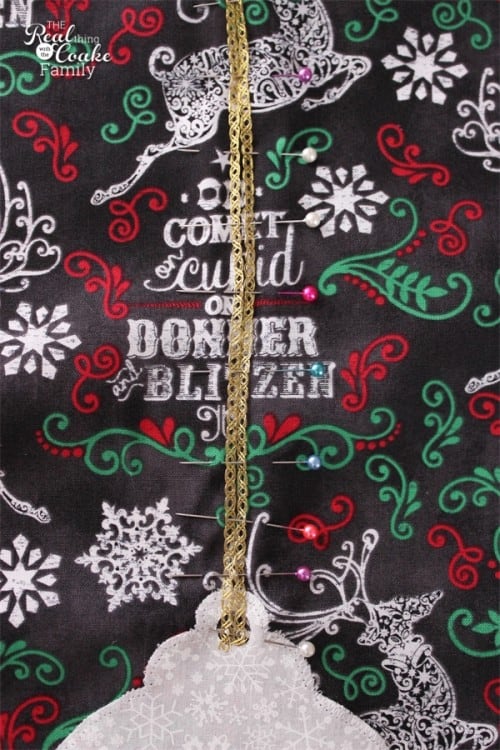
Next up, I wanted to use this amazing Quasar ribbon. It is so pretty! It is also only 1/8″ thick. I thought it might be easier to sew it on if I made it double wide and used a zig zag stitch. It worked great! I just wanted to show you how to pin this ribbon because that was the hardest part…not the sewing, which totally surprised me.
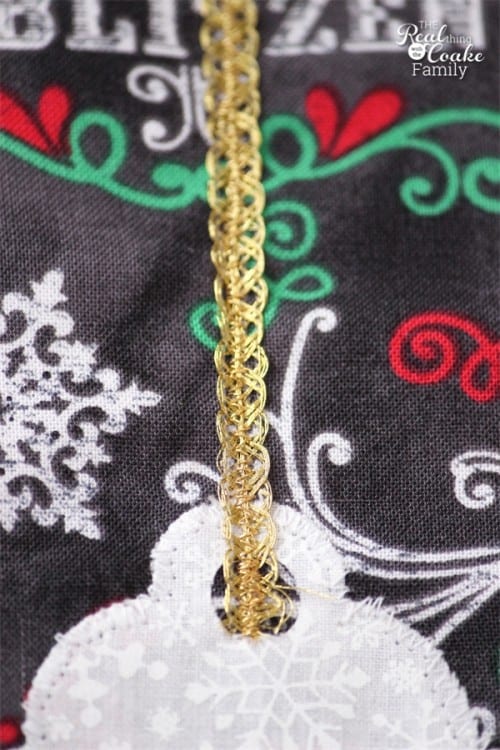
Isn’t it so pretty! I used the zig zag stitch right up the middle of the two ribbons. I also back stitched at the end to help keep this delicate ribbon from fraying.
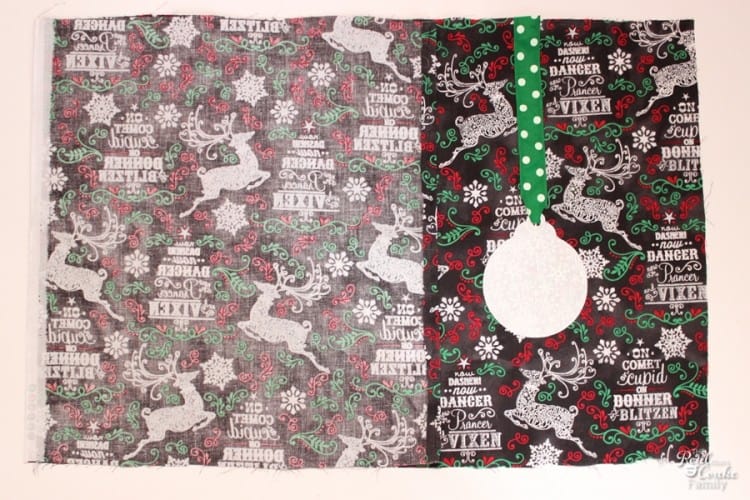
Now that you have the front of this pillow all done and pretty, you are ready to finish the pillow. Place your back panels to the front panel right sides together. Place one of the smaller panels that you sewed a 1/2″ hem in earlier to the left and the other to the right. They should overlap with the hemmed edges in the center. This will create the envelope back in which you will place your pillow form.
Pin in place and sew the pillow all the way around using a 1/2″ seam.
Clip the corners and turn the pillow. Iron. Make sure when you iron that you either use a cool iron or stay away from the ribbons. No need to melt any ribbons after you have done all this work. Insert your pillow form and do a happy dance for the cute pillow you just made!
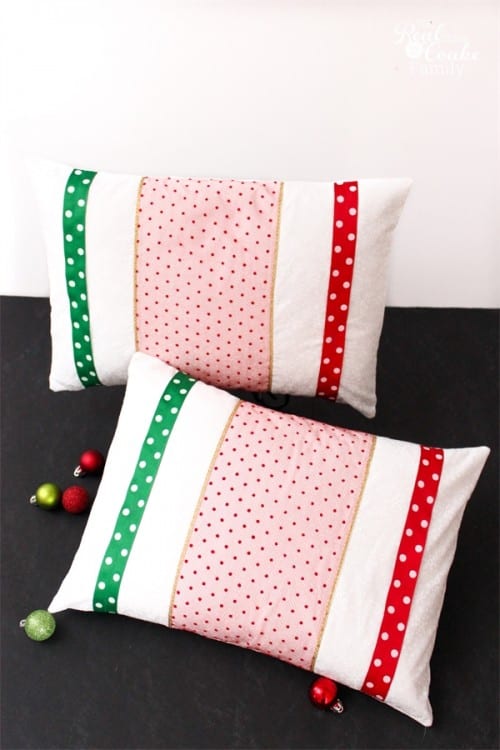
For my burgundy/red chairs, I thought it would look better to have a more solid pillow cover. The chairs already have a pattern, so no need to add another busy pattern to compete. I selected the Grosgrain polka dots ribbon in Emerald (7/8″) and Red (7/8″) along with the Red Dotted Tulle (6″) and the Gold Quasar ribbon (1/8″).
You will want to follow the same pattern for cutting your three panels of fabric for each pillow. Also start by sewing the 1/2″ hem into each of the smaller back panels.
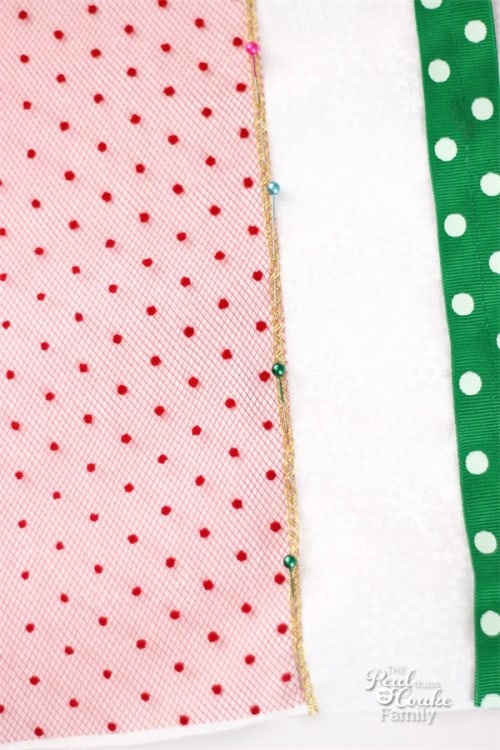
For the front of this pillow, lay out the ribbon in the pattern that you like. Pin in place and sew. I used the polka dot ribbons on either side with the red dotted tulle down the center. I trimmed the edge of the red dotted tulle with the gold quasar ribbon. This time I decided to be adventurous and sew the 1/8″ wide quasar ribbon directly on rather than double wide…meaning I had to sew that straight down the front of the pillow. You can see above how I pinned the ribbon in place.
I was totally impressed with myself…I did it! I sewed that 1/8″ wide ribbon and didn’t miss a stitch on the ribbon. I had no idea that I could sew that straight for this long. So glad I gave it a try, it wasn’t nearly as hard as I thought it would be and I LOVE the end result. All of the ribbon was great to work with and sew with.
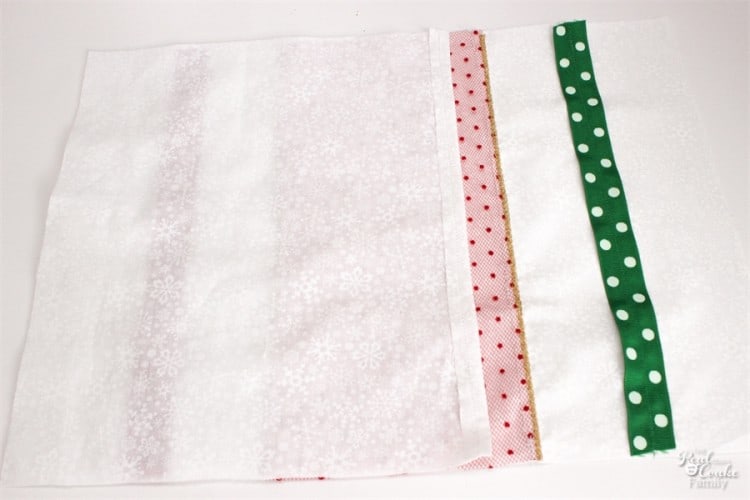
Once again, when you are done with the front panel, you will place the front and back panel right sides together. Place the hemmed sides of the back panels in the middle with one panel lined up to the left and one to the right. They should overlap in the center with your hemmed sides in the middle. Pin in place. Sew around the entire pillow using a 1/2″ seam.
Clip the corners and turn the pillow. Iron being careful to iron on the back of the pillow with a cool iron. You don’t want to melt the ribbon and ruin all that work you just did.
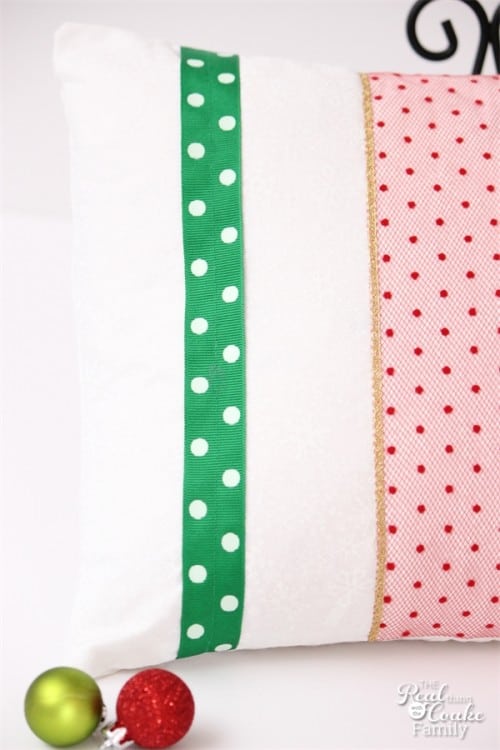
I love the polka dots! The addition of the gold ribbon adds such a pretty detail.
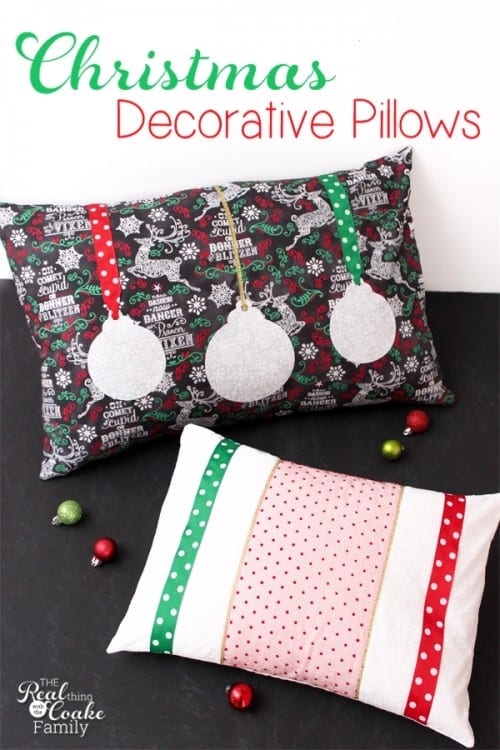
There you have it…two different ideas for decorative Christmas pillows. Which one do you like better? This wasn’t one of my quick and simple projects, but sometimes it is just worth it to invest time to make something you really love. Now I have Christmas pillows, which I have always wanted! I think I need to make more for our bedroom though. 😉 Maybe next year…actually I would love to make a Christmas duvet cover and pillows for our room. That would be so fun!
Now, guess what? You can get 15% off one order placed with Offray! Yippee! Just use the coupon code REALCOAKE15.
Use REALCOAKE15 during checkout on Offray.com to receive 15% off one order. Offer expires 11:59 PMeastern time on Wednesday, December 31, 2014. Discount excludes applicable tax and shipping costs. Cannot be combined with any other offer. Discount cannot be applied to previous purchases. Subject to change or cancellation without notice. Other restrictions may apply.
What Christmas decorations and/or crafts have you made so far this year?
More Christmas fun:

I think they are beautiful. Thank you and GOD bless.
Thank you!
Super cute pillows!!!
Super cute!!! I love how you used the ribbon to “hang” the ornaments. 🙂
Thank you!
This is such a sweet Christmas pillow! I cannot wait to see the rest of your house all decked-out for the holidays. I need ribbons for a project. Checking out Offray now!
Thank you Jessa! You should see my house right now! It looks like a blogger got halfway through a lot of projects and walked off the job…lol! Eventually it will get finished. 🙂 The Offray ribbons were great to work with…highly recommend them.