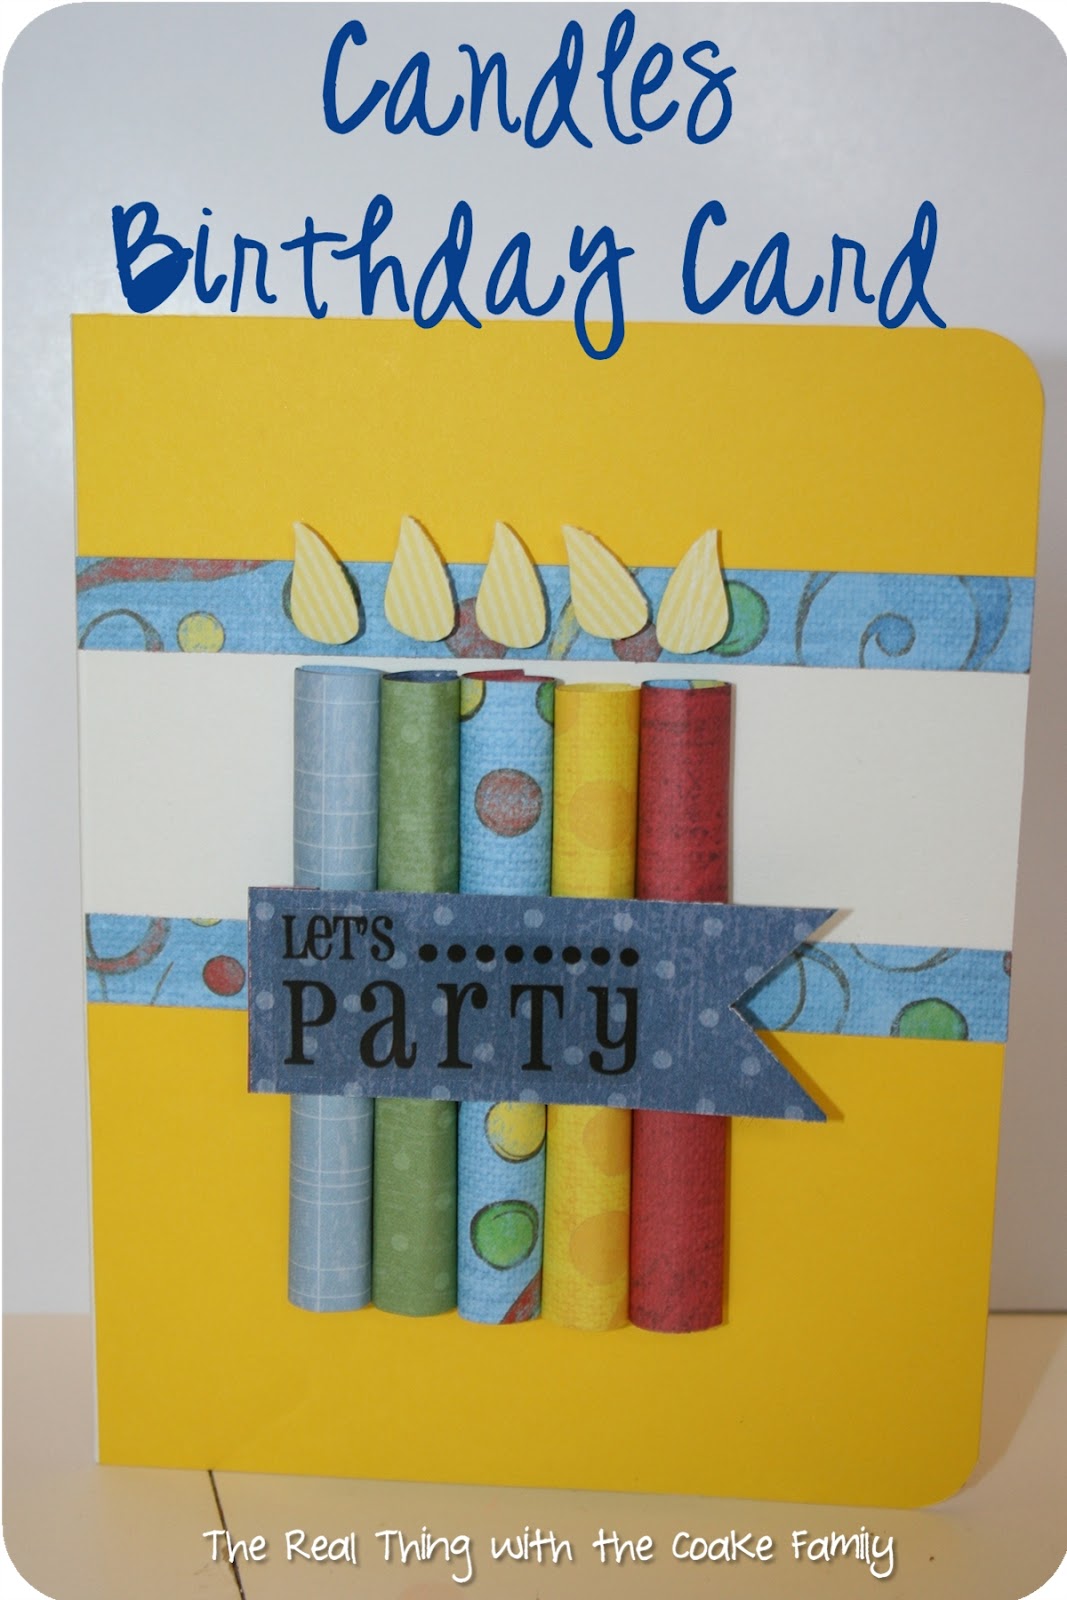
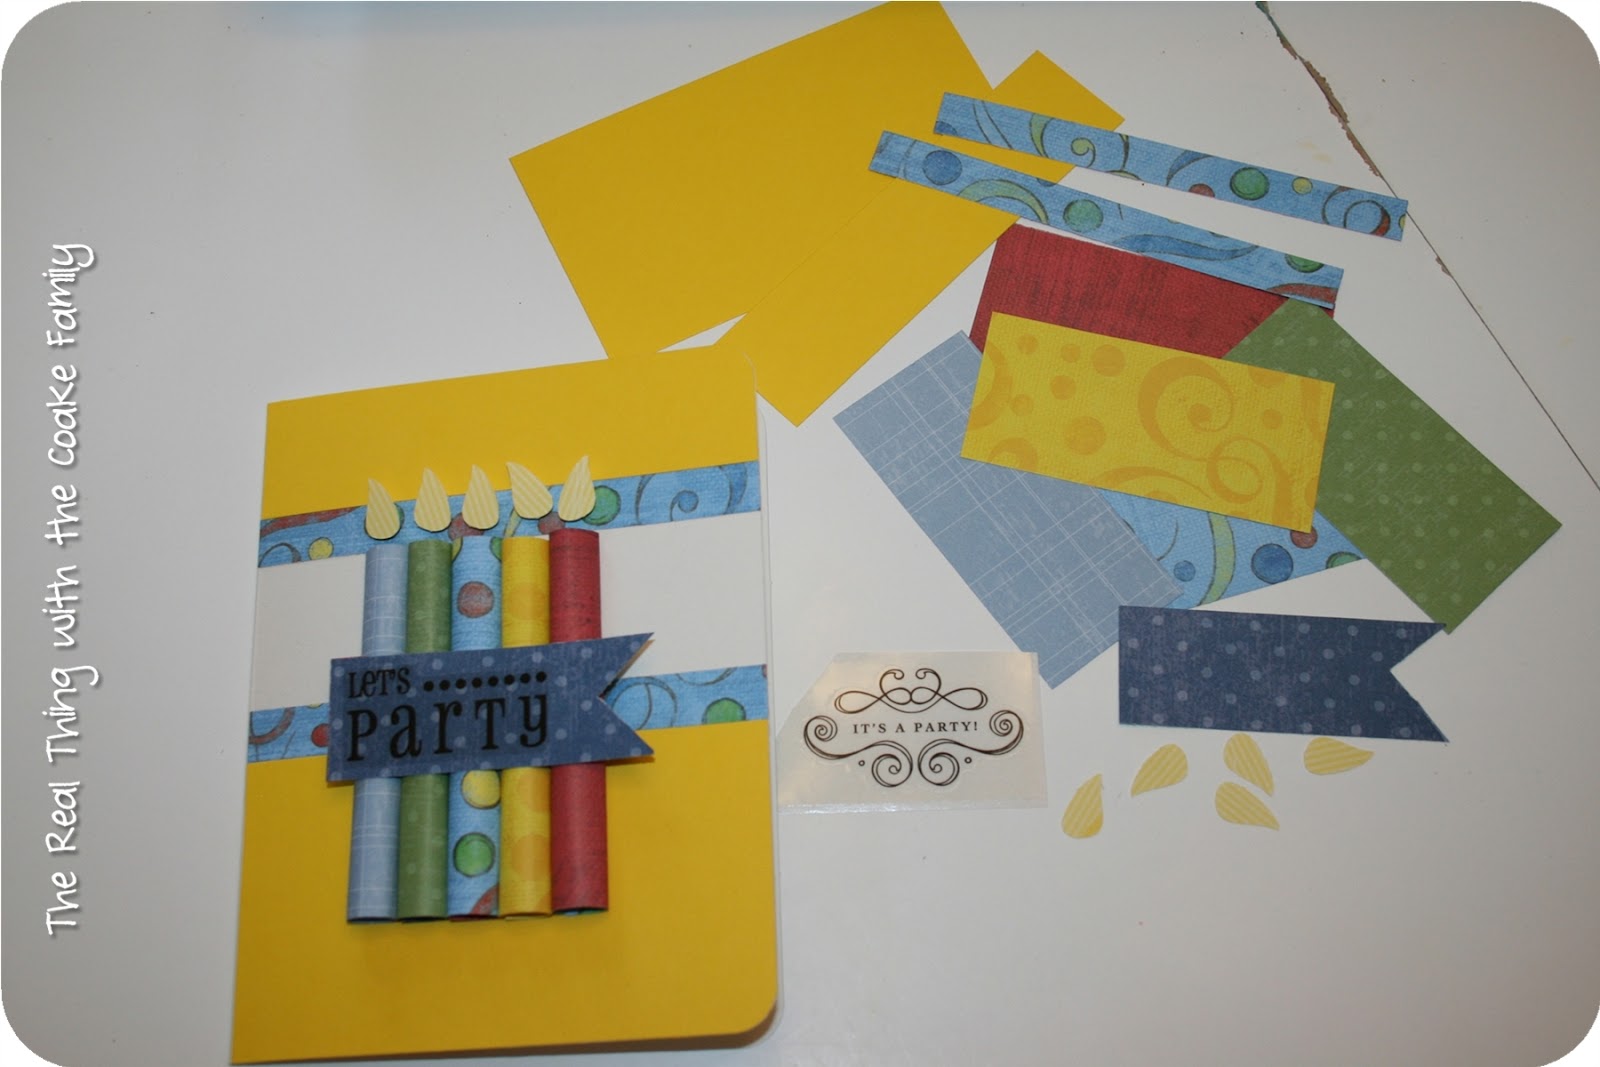
Supplies:
Blank card
1 – 2.75″ x 5″ yellow rectangle
1 – 1.25″ x 5″ yellow rectangle
2 – 1/2″ x 5″ blue rectangles
5 – 1 5/8″ x 3.5″ rectangles of various colors and patterns
1 – 1.25″ x 3.25″ rectangle with the ends cut to make a banner
Flames cut from the Wrap it up Cricut Cartridge![]() (affiliate link)
(affiliate link)
Birthday or Party sticker
Corner Rounder
Adhesive Foam Squares![]() (affiliate link)
(affiliate link)
Advanced Tape Glider![]() (affiliate link)
(affiliate link)
Happy Birthday Stamp
Ink
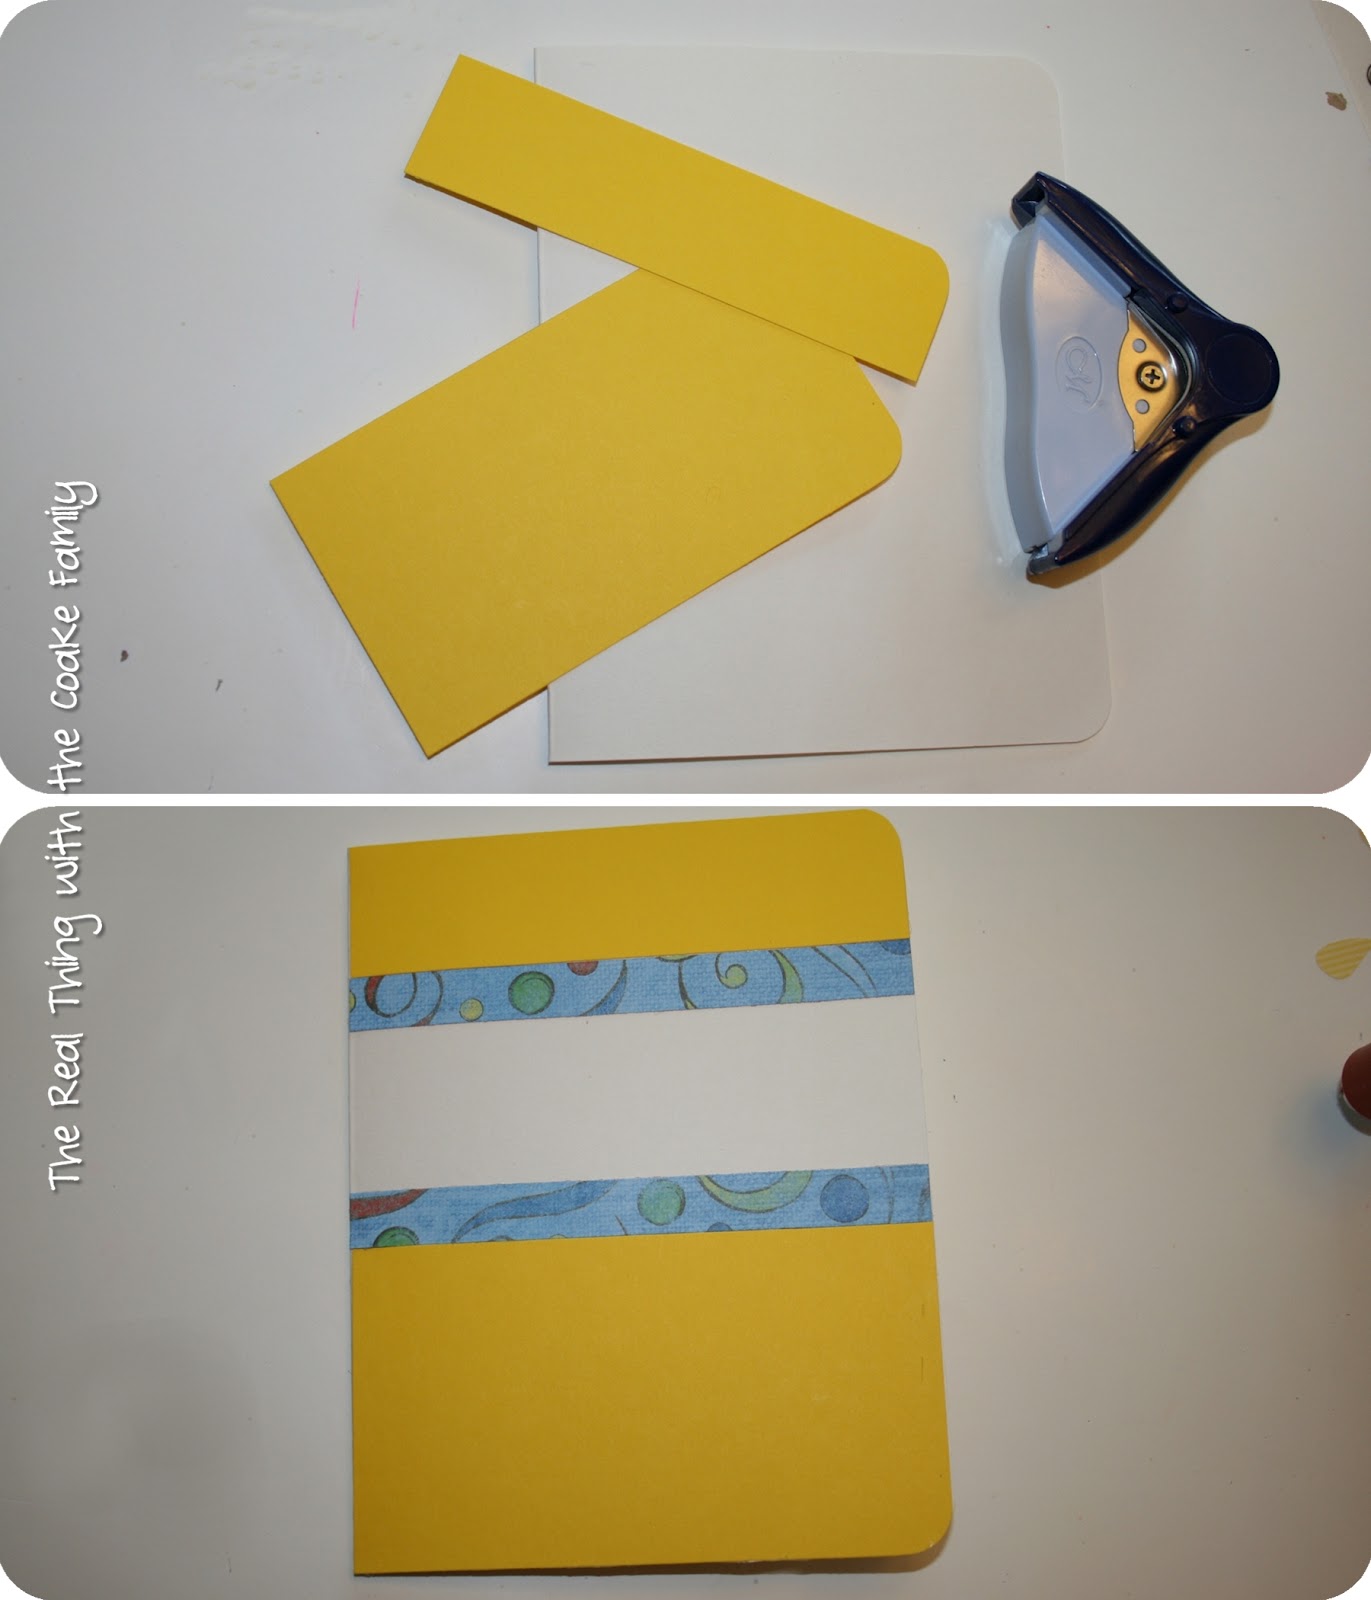
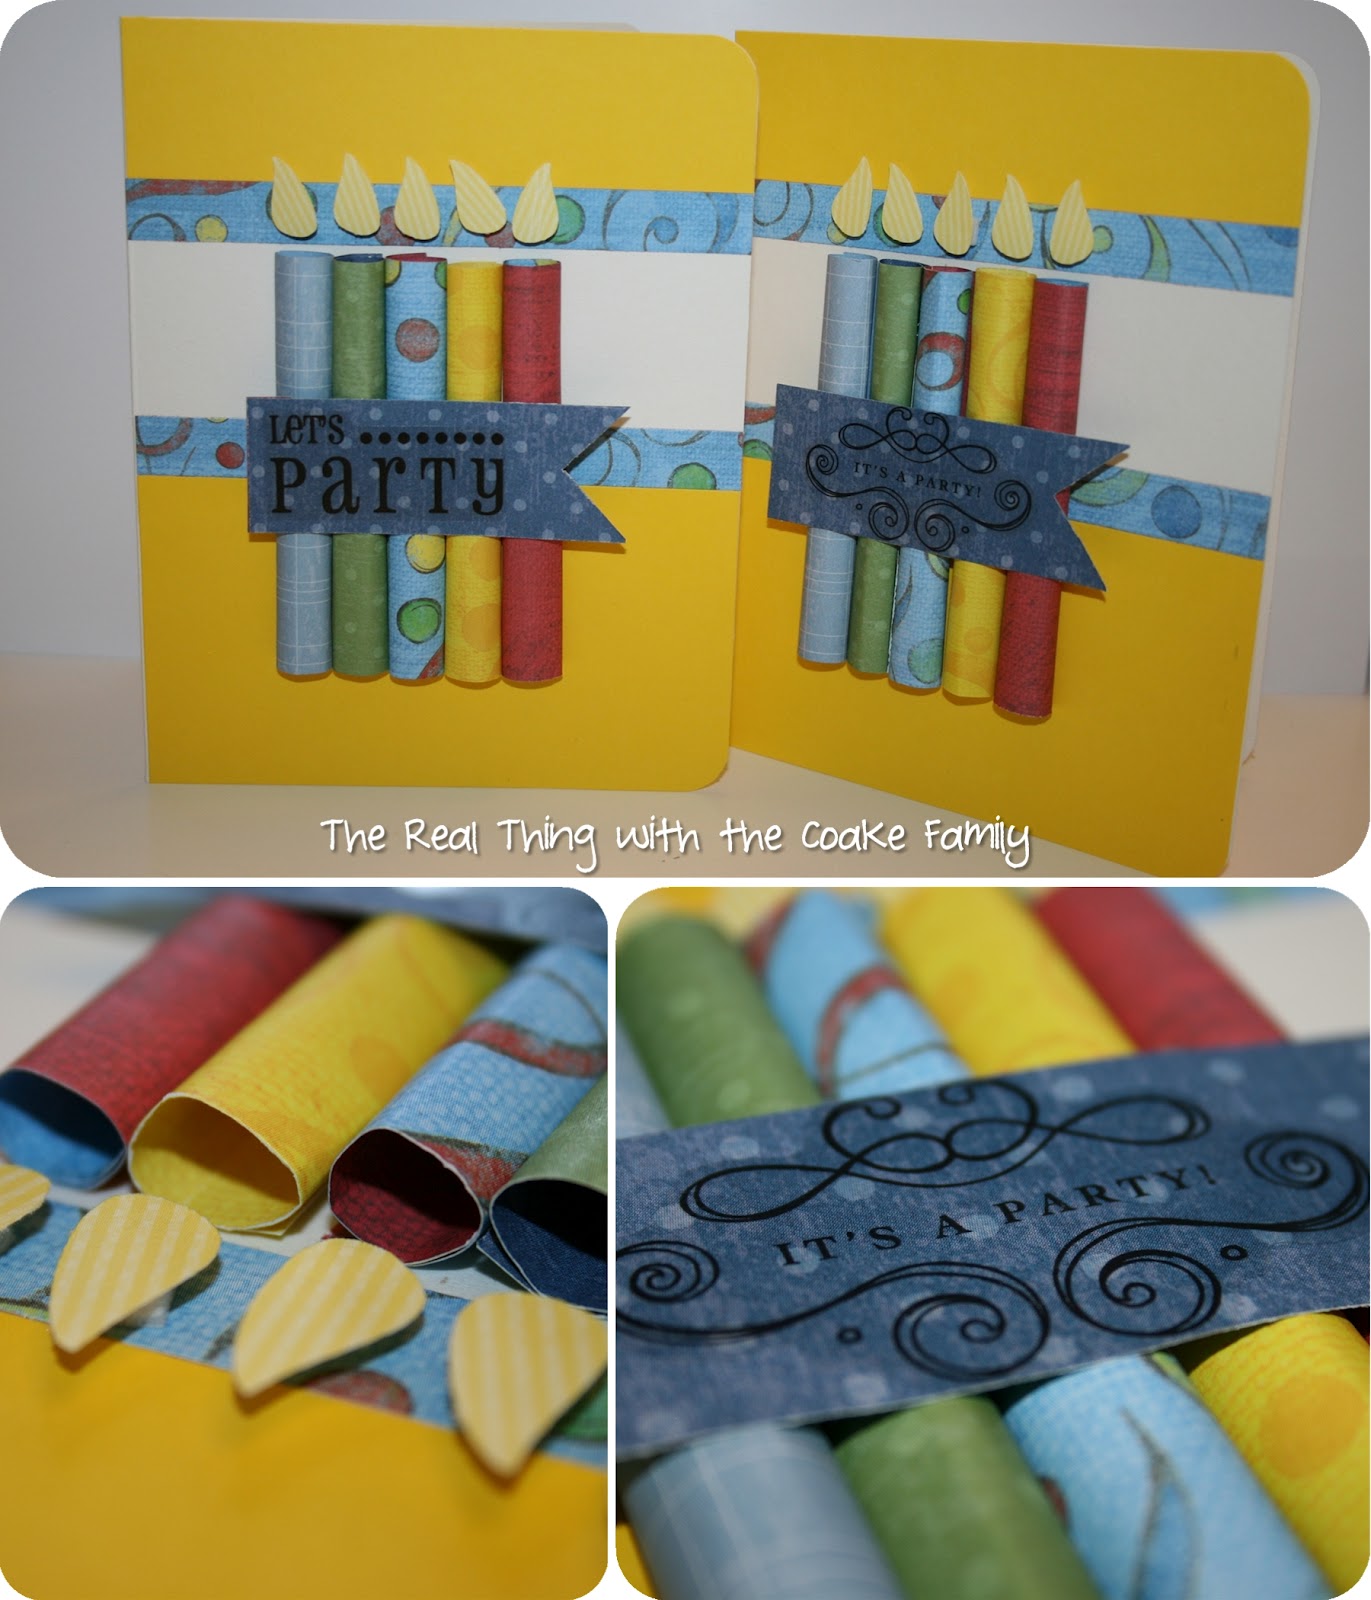
Use your corner rounder on the edge of the card as well as on 1 corner of the 2 yellow rectangles. Adhere the yellow rectangles to the card base, matching up the corners of the yellow rectangle that are corner rounded. Adhere the 2 1/2″ x 5″ blue rectangles just below and above the yellow rectangles, respectively.
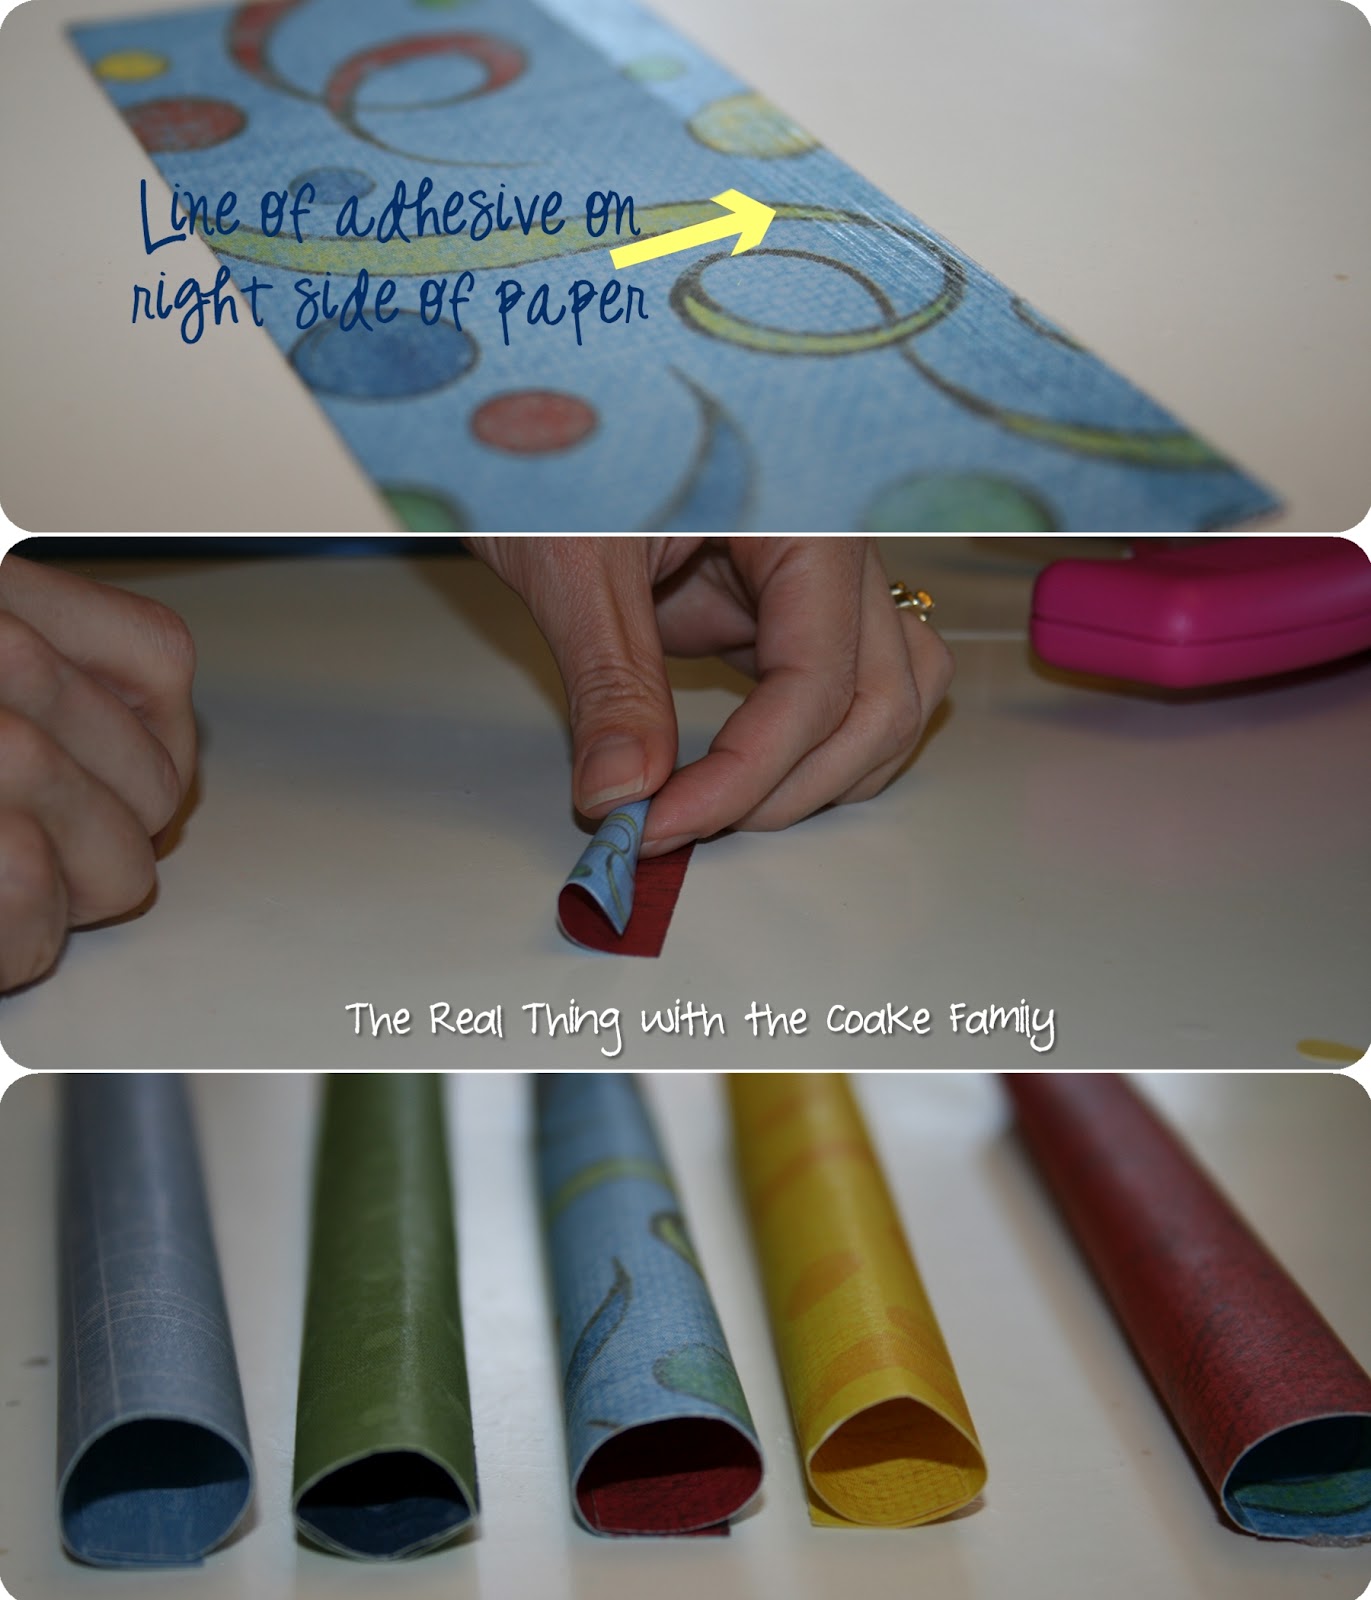
To make the candles, put adhesive on one edge of the right side(the side, if your paper is double-sided like mine, you want to be showing when you are done) of the paper. Roll your rectangle up into a circle, keeping the right side out. Start with the side with adhesive and roll toward the non-adhesive side. Press lightly so as to not distort the shape too much from a circle.
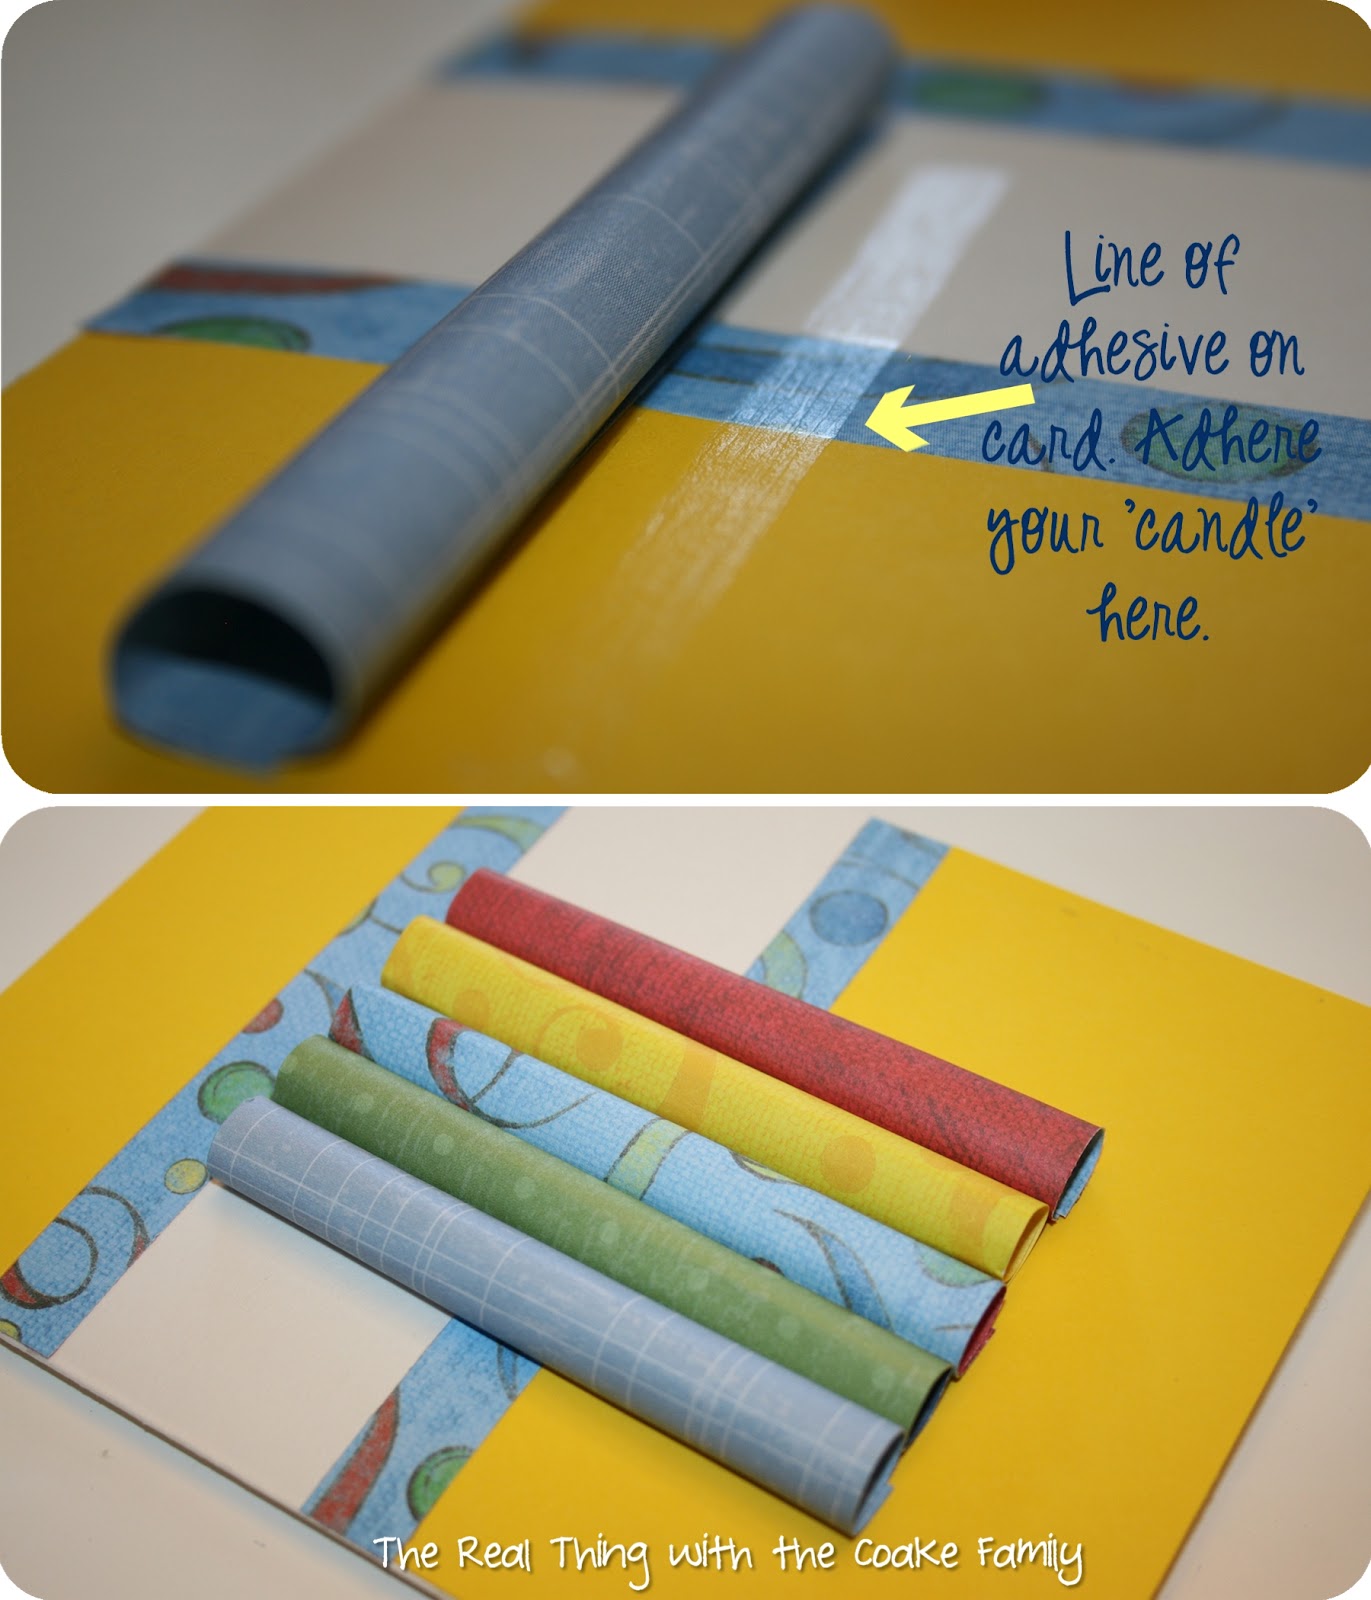
Adhere the candles to the card by putting adhesive on the card and attaching the candle to it.
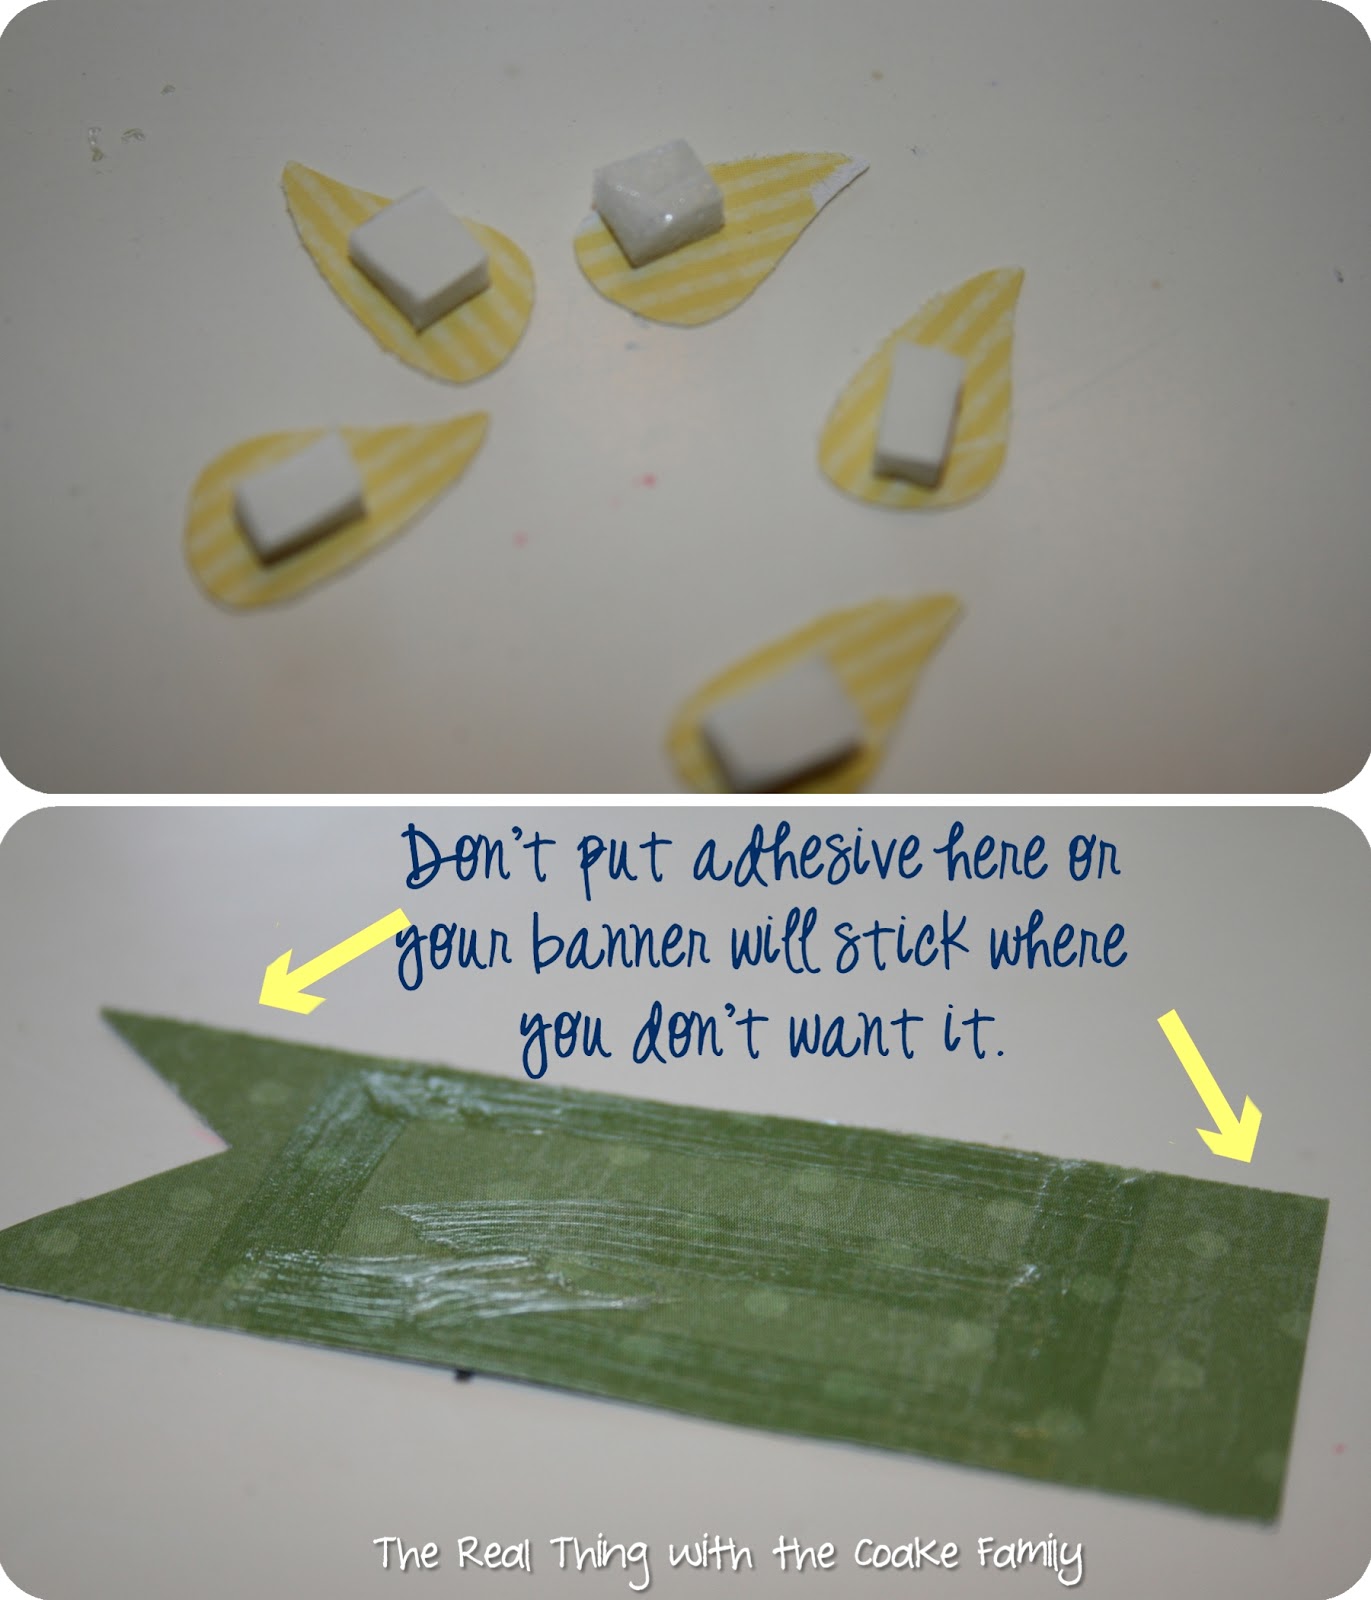
Put foam squares on the flames and add them to the card above the candles. Add the sticker to the banner and the banner on top of the candles. Put the adhesive on the back of the banner but not on the whole back as the whole thing won’t be glued down. If you do the whole thing you will have extra adhesive that will make the banner stick where you don’t want it to.
Enjoy choosing to whom you will give your beautiful card!
Thanks so much!
Very cute and great tutorial! Thanks for sharing on Saturday Show & Tell at Cheerios and Lattes last weekend! We love having you join us and hope to see you again this weekend! See you soon!
Mackenzie 🙂
@Sarah Hamer Thanks so much! Thanks for hosting your fun link party!
What a great idea and great tutorial! Thanks for linking up and showing us what you were up to!!
@Brittany @C rafty Mischief Thanks!
castebner
So glad I could give you an idea! I know I am always looking for ideas as well. Happy card making!
Thanks so much!
How fun! I love it!
That is such a cute card. I make cards for our entire family (including 6 grandchildren), too, so I am always looking for new ideas. Thanks for sharing!
Cute! What a great idea for a card.
<3 Christina at I Gotta Create!
Wildly Original Round Up party is open!
@Erin Thanks so much!
@Liz Detter Thanks so much! Yes it would use up scrapbook paper and it was fun and easy to make. Thanks for stopping by!
Your card is absolutely adorable!!! Excellent job!!!
I enjoy making cards too. This idea is so cute. I have so much scrapbooking paper, this would be a great way to make use of some of it. Thanks for coming by Quirky Vistas to comment on my map project. Stop by again sometime!
Liz
@HIgh Heeled Life Thank you so much for the sweet comments! I hope that if you get your supplies out, you enjoy your time creating. This is one of my favorite cards I have ever made. It was so easy and yet looks so impressive (at least to me..haha).
I am so intrigued by the Speech-Language Pathologist’s idea that you start blogging. I spent most of my career working with children, so I am not nearly as knowledgeable about adult rehab, but it seems like such a fun suggestion to give a client and I am sure it is effective.
Thanks so much for stopping by my blog. I am really looking forward to keeping up with you. (Hope I don’t sound like a crazy stalker…I am just inspired and intrigued with your story.)
Have a great day!
Oh I’m so glad you stopped by my little corner of BlogLand, as I now have discovered your fabulous blog and am following it. This was a great post it has inspired me to get out my boxes of scrapbooking and card making supplies.
My adventure into blogging was a suggestion by my Speech Therapist …I cannot praise her enough. She has been with me since I went home from hospital … in the beginning it was twice a week and our sessions are now more monthly (or bi-monthly) but each time she brings new and wonderful suggestions to make thinking and remembering easier.
Wishing you a wonderful and blessed week..xo HHL
This card is adorable. I would love if you
linked them up to Show Off Monday @ Kampenlane.com on Monday.
Thanks!
Taylor-Ann
kampenlane.com