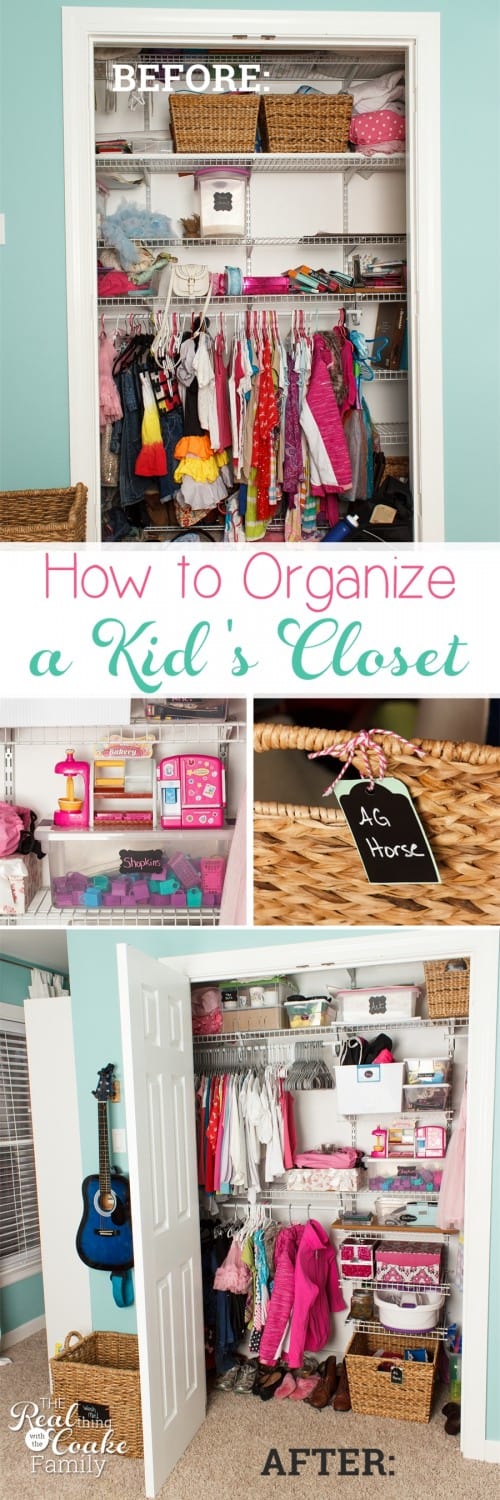
Have you ever had a DIY project that totally didn’t go the way you envisioned in your head? I’m willing to bet that if you have done more than 1 DIY project you have had many that didn’t go the way you wanted. It seems to be the way with DIY. You have great plans, but things just don’t usually go quite like they are supposed to. That is the way this kid’s closet worked out for me. I totally had planned that this was going to be done by Thanksgiving…yep just finished it last week. Let me tell you the tale of the doors and I’ve got some great ideas on how to organized a kid’s closet.
When we bought this house and moved in everything was pretty much a DIY screw up. The people that lived here thought they knew what they were doing and thought they knew how to paint(or maybe they liked the paint everywhere it doesn’t belong look), but they most certainly did not. I had Pumpkin 12 days after we moved into this house and in the following year, we painted almost every surface in the house. We also changed out every light fixture, light switch, switch plate, electrical outlet and cover in the house as well as changed all of our appliances and got a new counters and sinks throughout the house. One of the other projects we did was to makeover of almost all of the closets with Closetmaid organizing systems (affilaite link). I’m telling you, they are a do-able project and they make such a difference in the amount of storage you can get out of a closet. Our house has a closet in each room and a very small pantry, very small coat closet and very small linen closet…maximizing storage space from closets is critical. I still have the linen closet, coat closet, and pantry that need makeovers. The pantry is up next.
Anyway, when we first moved into this house, this room was Snowflake’s. She had the original closet doors on the closet, but they were always banging into the door for the room and just a pain. So, when we moved the girls into a room together and turned this room into a playroom, we took down the closet doors and used a tension rod and curtains. It worked well, but now that this is Pumpkin’s room, we needed closet doors back up. I looked into getting sliding closet doors for this space, but the only ones that would fit were pretty cheap quality. I would have had to custom order wood doors and that was going to be over $300, which is more than I wanted to spend right now. Not to mention that I have no idea how to install sliding doors and I thought dealing with the existing doors would be easier. Sigh.
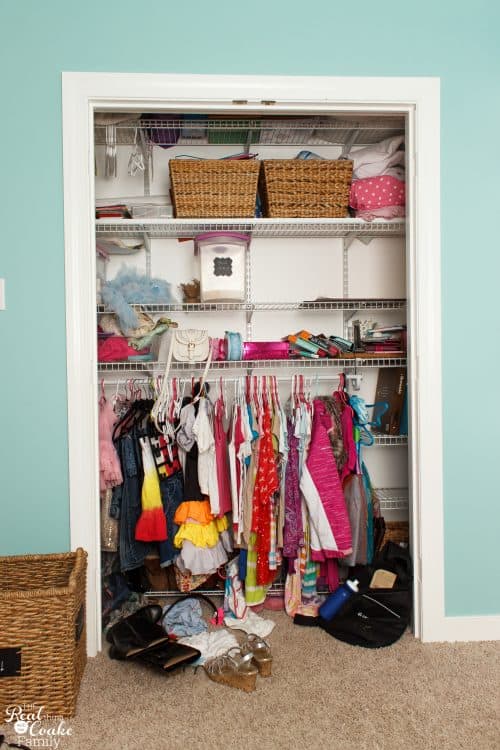
So, before I tell you the saga of the doors, let me show you where Pumpkin’s closet started. When I made over the closets in the bedrooms, this was a playroom. I designed it for playroom use. More toy storage and, at the time, a much shorter clothing rod to just hold the dress up clothes. When we separated the girls into their own rooms, I was able to easily modify the Closetmaid system (affiliate link) to make the bar longer to hold more clothes, but I knew that long term, I would need to re-design the closet back into a ‘real’ closet. That became part of Pumpkin’s room makeover.
First up, we had to remove everything from the closet. That is the first step with any organization project I take on.
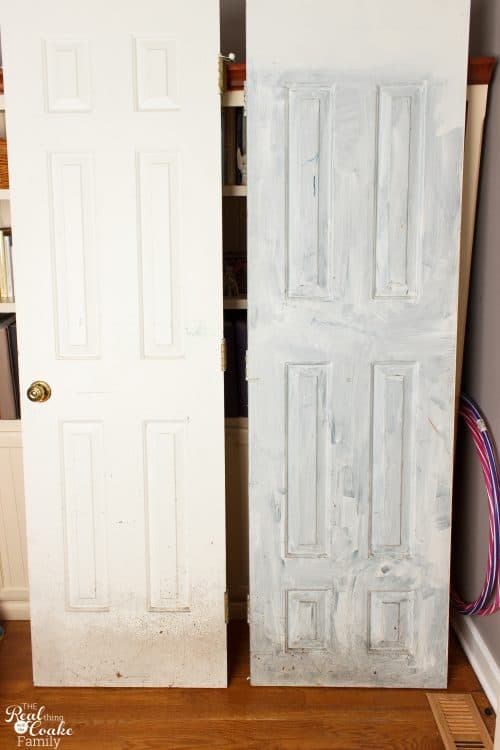
We had the original doors in our storage shed. This is what I mean by the former owners thought they knew how to paint, but really had no idea what they were doing. This is how most everything looked in our house when we moved in…minus the mold at the bottom of the doors in the picture.
When we retrieved the doors from our storage shed, we found that they had mold on them. I worked to clean the mold off of them and was able to get most of it. Though, I had concerns about putting doors that had mold in the past back in our house. As I worked on the doors, I was more and more uncomfortable about putting them back in the house especially since they were really messed up. There were so many scuff marks, scratches, scrapes, and huge paint drips. I decided it would be easier and better to just buy new doors.
The thing about that decision is that I had not done new doors in about 8 years. We had done a few new doors in our house because some of them were really bad and not worth saving. 8 years for my DIY brain is a bit like pregnancy and childbirth, I totally forgot what a pain in the ass (sorry for swearing….but really that is me in real life and this project deserves a few swear words…though I usually try to keep it clean and very family friendly here) the project would be.
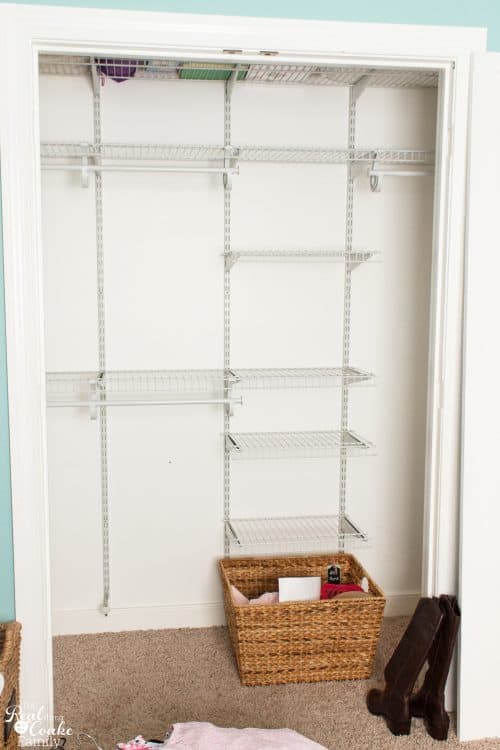
The easy part of the project was modifying Pumpkin’s closet. She and I sat down and came up with a plan. Because I had so many shelves in the closet for storage before, I only had to buy a few things to change the closet over. I had to buy another hanging rod and end caps for it as well as end caps for the shelves. The shelves just had to be taken back to Home Depot where they cut them to the new size for me. That is what I love about this hanging track system You can easily change it anytime you need to and the installation really isn’t bad.
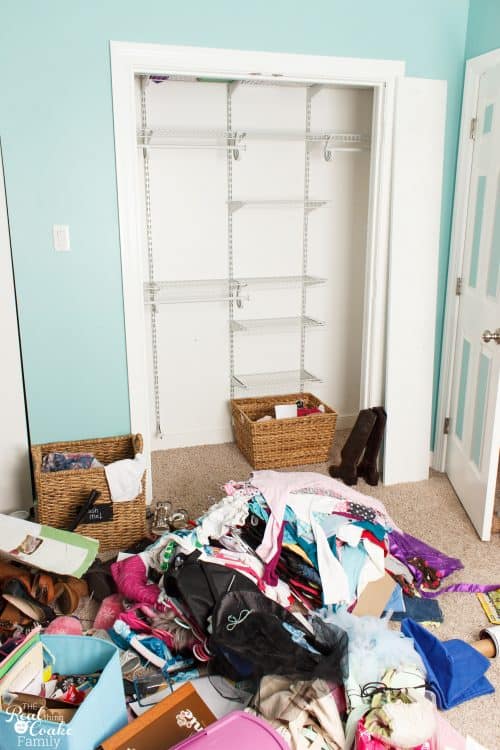
With that easy part of the project done, it was time to address all the stuff! Doesn’t her room look lovely here? This was the day before I remembered she was having a friend over to play. Hello, motivation! Got that done in time so she could actually play with her friend.
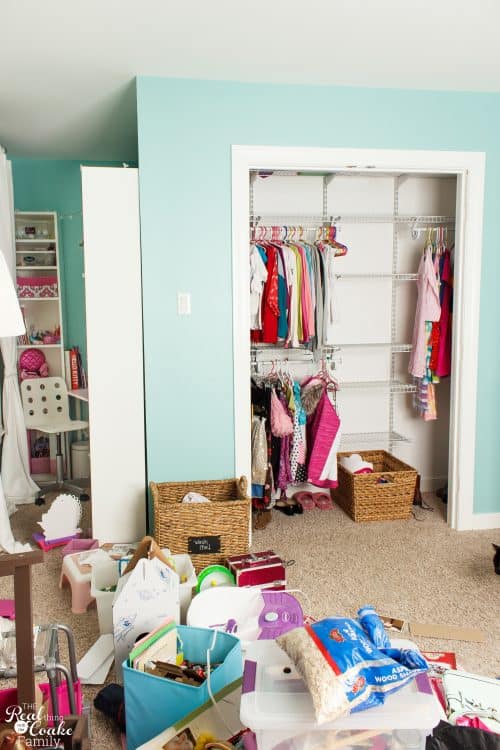
First up, I rehung all of her clothes in the closet going through them and donating those that were too small or she didn’t like anymore. That was the easy part for sure! She had kid-sized clothing hangers that we eventually changed to the adult-sized hangers that are all the same color. Fun!
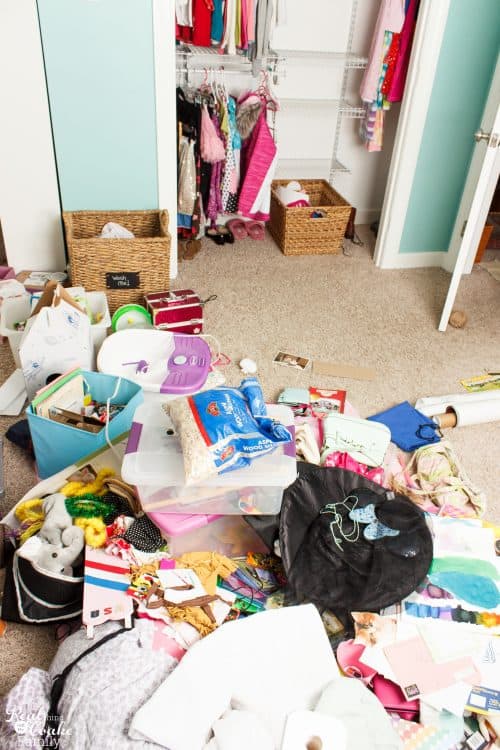
After getting the clothing out of the way, it was time to tackle where all of this stuff was going to fit in her new room. It felt a bit overwhelming. Ever feel that way when organizing? Me, too! I usually start by sorting things into groups so I can see what we have and what needs to be kept together. That usually helps me get going and makes it feel a bit less overwhelming.
I must admit, I didn’t think all of this was going to fit in her room. Yet, we managed to make it work.
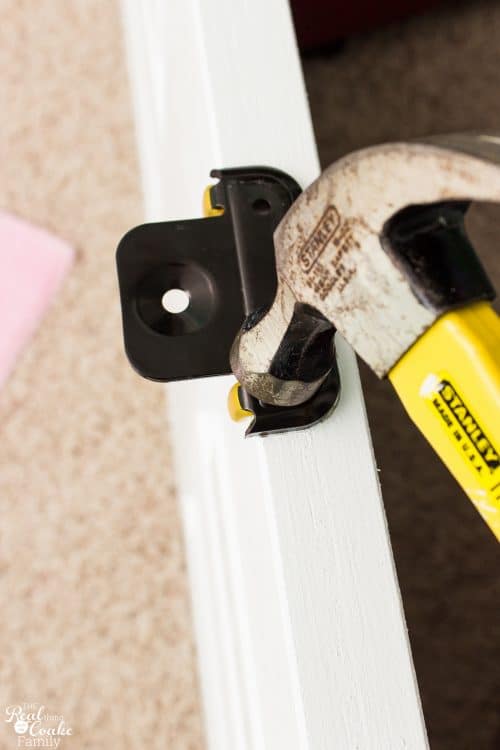
I’ll show you the organized closet in a minute, but first back to the doors. After I primed and painted the doors, it was time to add the hinges and ball stop at the top of the door. I was really hoping that the home improvement store would tell me a new power tool would be worth it for this project, but they didn’t. Boo!
Instead, they recommended that I get a Butt Marker (affiliate link)…yep, that is the name of the tool. You mark off where the hinges are supposed to go and use the Butt Marker to make a mark or impression in the door.
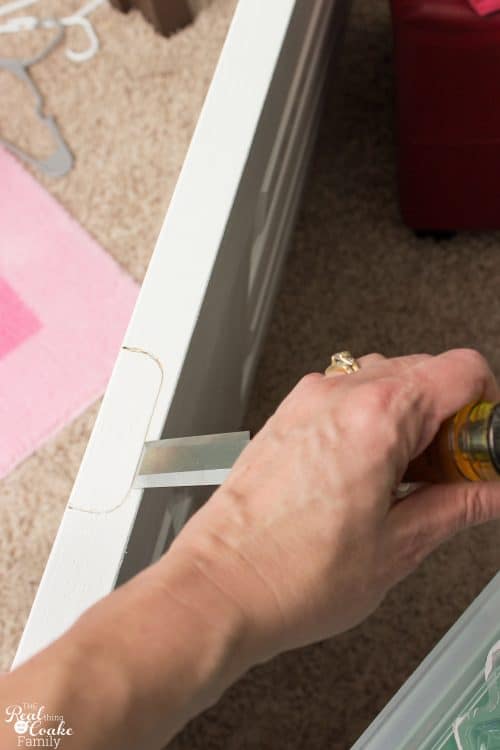
Then you get to have fun with a chisel and hammer. It takes a bit of time and patience. Not two things I usually have at the same time. Lol!
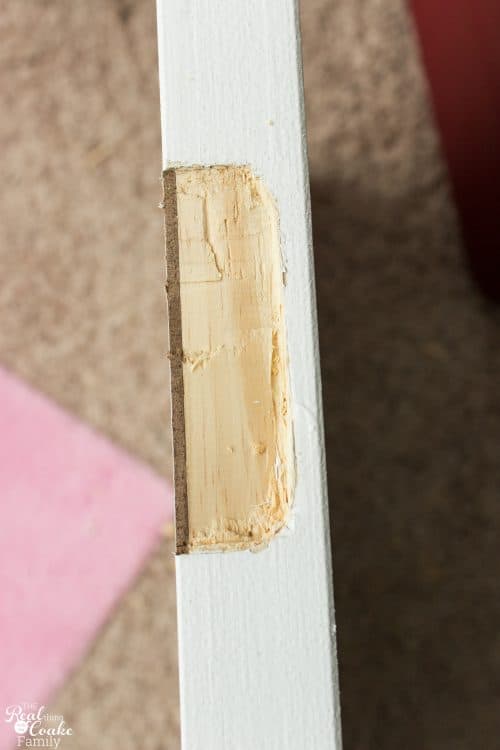
It doesn’t really matter if the chiseling that you do is perfect. Though I did learn that you can score the front of the door wood with a utility knife as well. That will help you get a straight cut on the front of the door. It will show slightly when the hinge is installed and will look better.
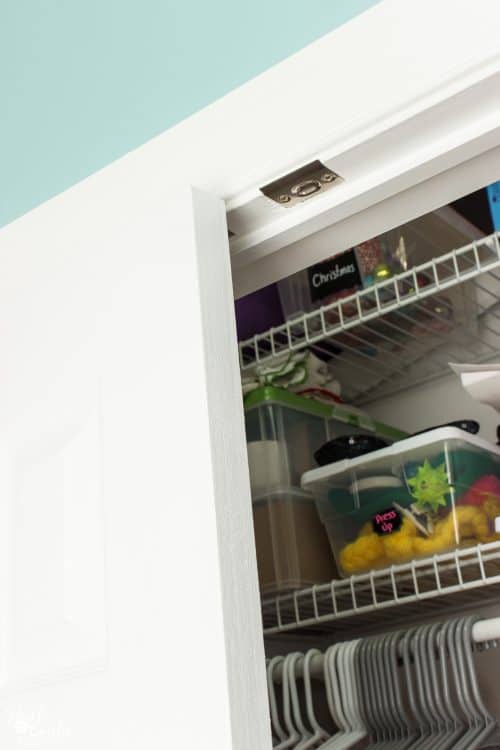
And after all that work, I hung the door and it wasn’t even close to closing. This is when I remembered what a pain in the butt hanging doors is. There is always something that needs tweaking or doesn’t work quite right…always!
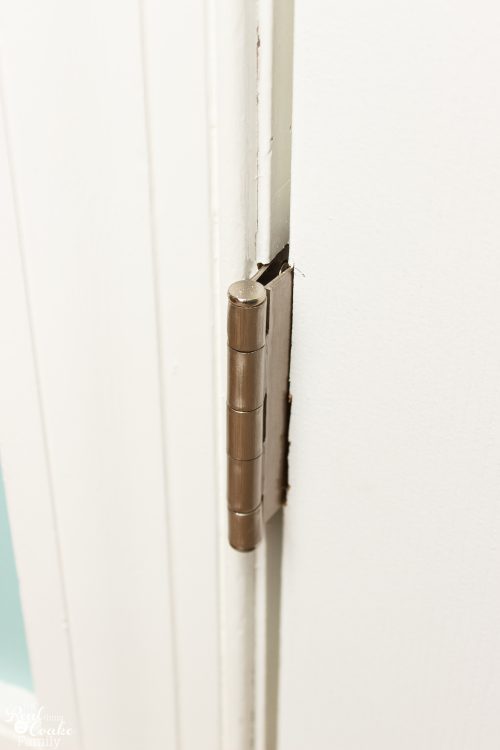
Normally, you can just adjust the screws some and it will help bring the doors to align. However, I was having some kind of issue where my hinges wouldn’t even close quite right. They were even pulling on the trim and causing the possibility of some cracking there. Not good.
Which of course means another trip to the home improvement store to get some help and figure out the issue…however it also required a good long break for me. Do you ever get that way with a project? I just needed a break and to not think about the doors. It was also Christmas season. I had full intentions of bringing you this post the week before my girls were off for Christmas break. There was too much going on to take the time to figure this out.
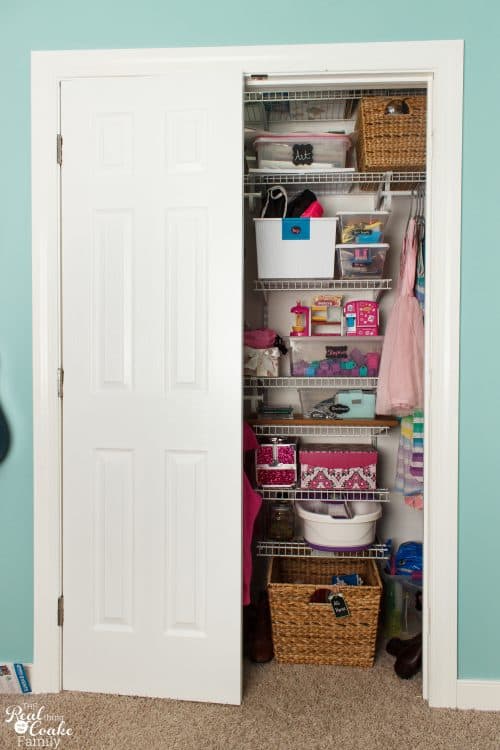
So, my daughter lived with a closet with one door….that didn’t work. Yeah…I’ve got mom guilt about how long it took me to finish this. At least her closet was organized because we did get that done…thanks to that playdate! 🙂 Who knew inviting friends over would be so helpful to getting her room done and in alleviating some mommy guilt. Lol!
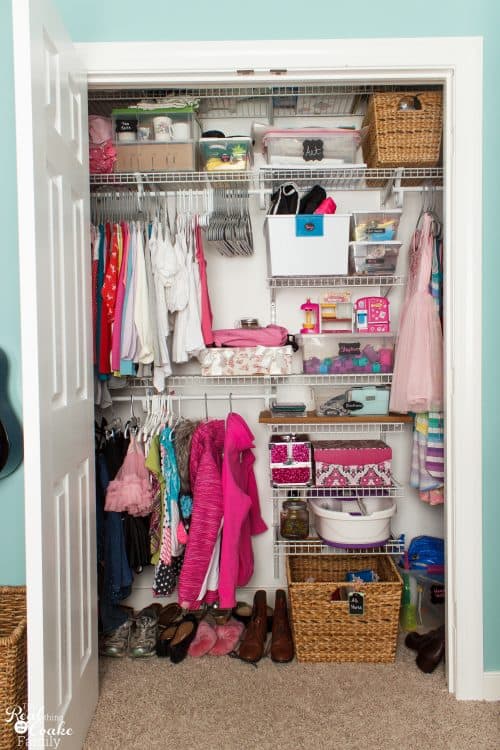
This is how things ended up in the closet. I created one side for shirts on top and bottoms and jackets on the bottom. The other side has space for all of her dresses. In the middle (but off centered) she has plenty of room for storing things. Now it is toys, but some day it could be for sweaters or other things.
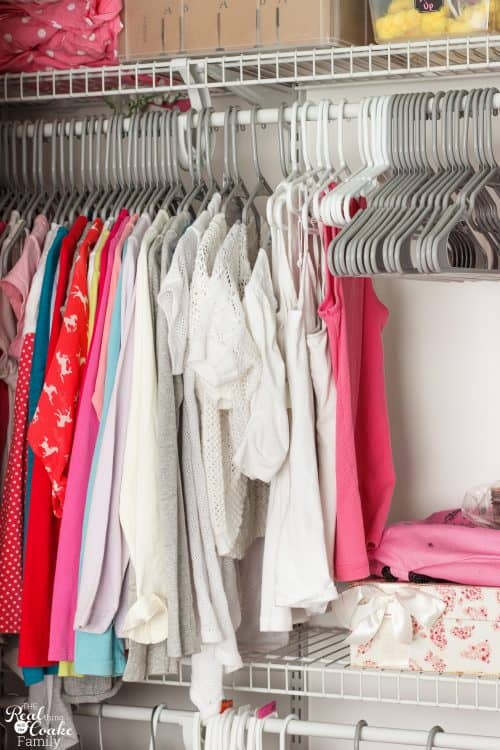
Since it is winter as we organized this, we put all of the long sleeve shirts together in the front of her closet with all of her tank tops and camisoles right up front since she wears those frequently under sweaters or shirts. Her summer shirts are in the back of this portion of the closet.
I love the look of having all matching hangers! She is the only person in our house who has all matching hangers. Everyone else has gotten a pack of hangers here and another a few months later and, therefore, colors are not all the same. We did keep a few of the child-sized hangers for her tank tops and camisoles since those seem to hang better from them.
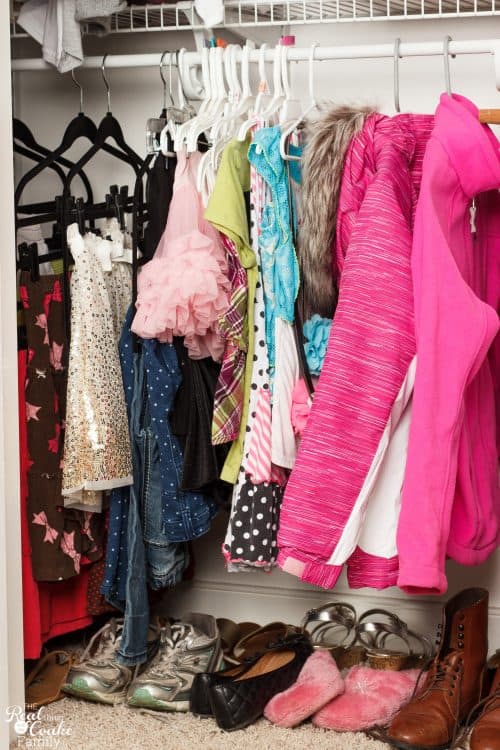
The bottom rack has places for all of her skirts, jeans, shorts, jackets and the few dress up items she still has. We have enough space we could go away from the multi-hangers, but since we have them, we are continuing to use them.
The shoes are just on the floor. In the closet system before this re-organization, I had a shoe rack. She seemed to have a hard time keeping her shoes somewhat neat on the rack, so we thought we would just give the floor a try. If we want to, we can always go back and add the shoe rack back in.
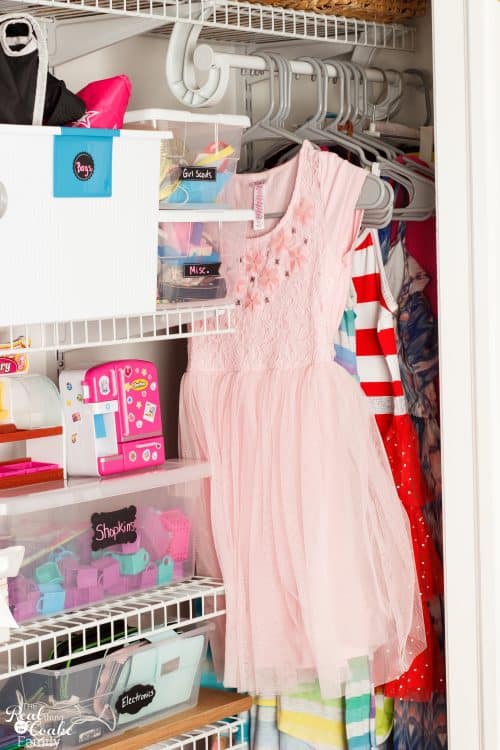
The other side of the closet has space for her dresses. Right up front is the pretty dress she got from our winter fashion shopping trip.
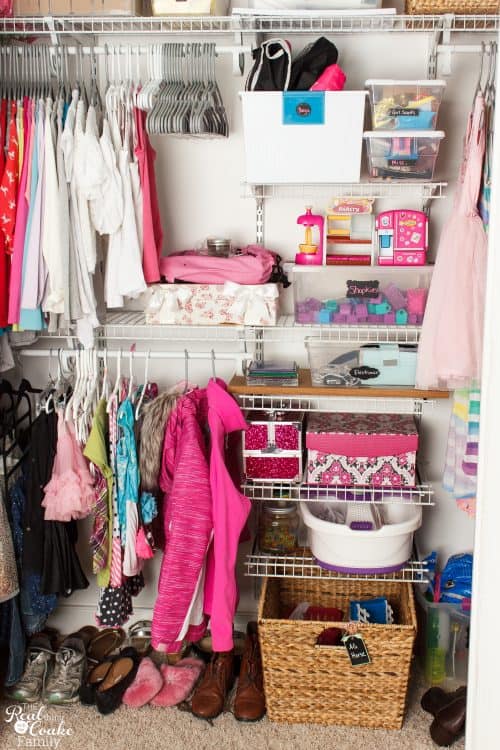
This is the main portion of her closet. What I love about this closet system is the flexibility. As I was figuring out where things would go, I could easily change the placement of the shelves. So easy!
If you notice, looking at the center section, I place the lighter things toward the top and the bulky or harder to get in and out things lower in the shelving. That will make it easier for her to not only get things out but to put them away as well.
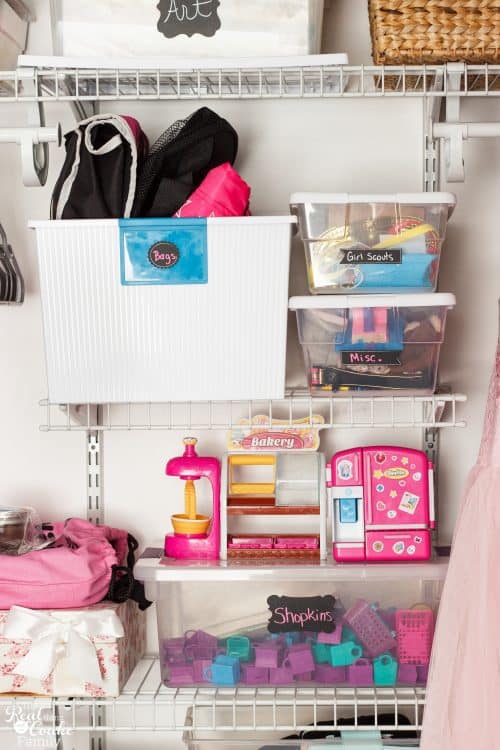
On the top portion of the center area, we have a box for her bags. She tends to like purses and bags, so we put them all in one box to corral them a bit. Next to that we have a box for her Girl Scout memorabilia as well as some misc. small things that didn’t really go with anything else.
Below that, we moved the Shopkins from her DIY corner shelving unit into the closet and moved some of the things that I thought would go in the closet over to that shelving unit because it just fit better that way.

One of the things that I find really helps my kids, my husband and myself when we organize is to label everything! It makes it so much more easy to clean up. Everyone knows what goes where. It is easy to find chalkboard labels these days. I prefer the chalkboard pens (affiliate link) for these kinds of projects because they generally don’t wipe off as easily as traditional chalk.
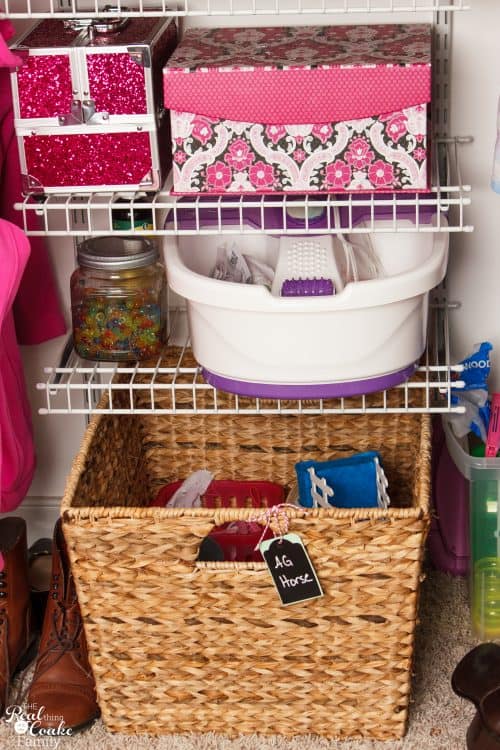
In the lower section, we organized all of her spa things (which are the top two shelves) and her bulky American Girl horse things are in the big basket on the floor. 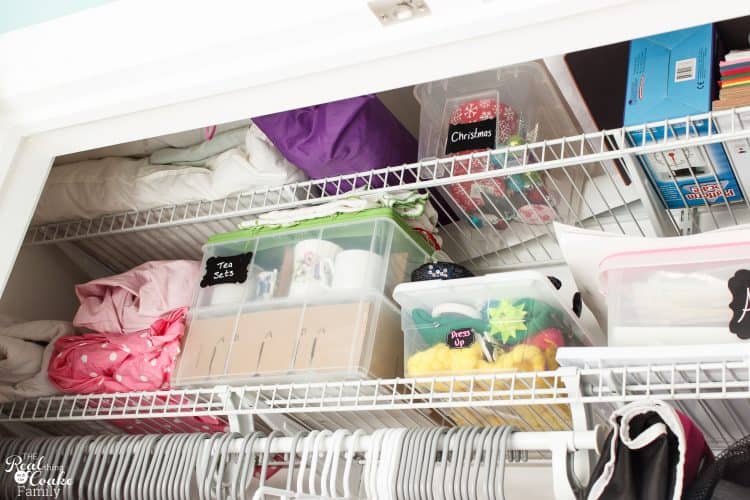
Above her clothing is some additional storage of things that she doesn’t use as much or are just things that need to be stored in her closet.
On this side of the closet are her extra mattress pad and sheets along with her tea sets and dress up items. On the top shelf are the extra pillows that we use when we have guests as well as a kid-sized indoor tent and Pumpkin’s own Christmas decorating supplies that she purchased with her own money.
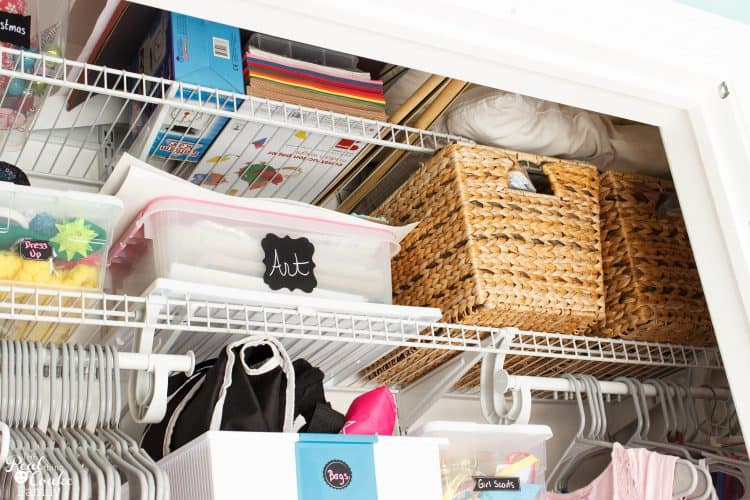
On this side of the closet, I still needed some storage space for some of our extra homeschool supplies. Those are on the top shelf along with pillows as well as in the two baskets. Then we have a box in which Pumpkin can store her artwork. Once the box is full, like it is in the picture, it is her choice as to what artwork she keeps and what she gets rid of.
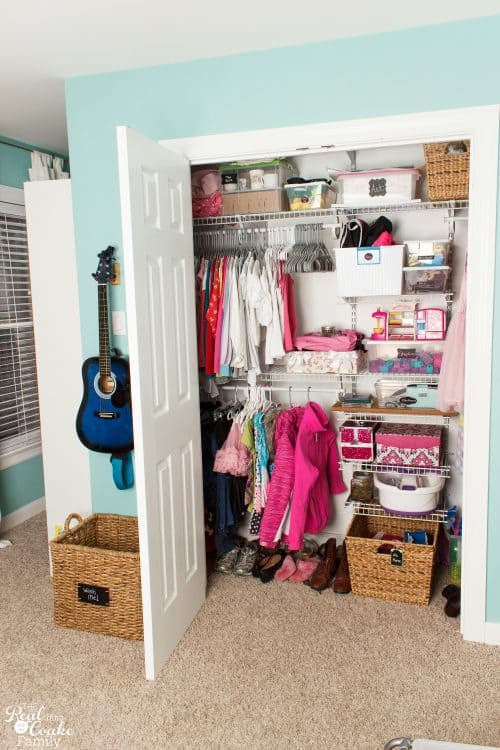
And there you have it…one organized closet with one non-functioning door. Like I said, Mommy guilt…yet, at least, she had an organized closet versus the mess all over the floor, so there is that. Oh, and see how we got an ugly guitar hanger? I love having a safe place for her to hang her guitar rather than it seeming to lay about on the floor.
So last week, I got over my funk about the doors and decided it was getting done. Mr. T, who was originally totally unwilling to help me with the project, helped me get the hinges on the 2nd door as well as fix them on the first door. I had gone to the home improvement store and talked with the person who worked in the doors department. He had said that it sounded like for some reason, the butt marker wasn’t working quite right for me and that I just needed to chisel the groove for the hinges a little further back. It worked and thank goodness Mr. T finally decided to help a little bit.
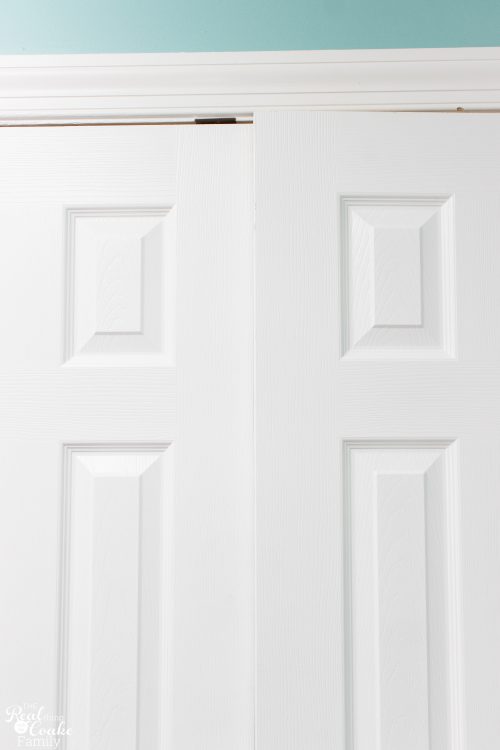
Now that both doors were hung, it was time to tackle the last issue. The doors overlapped slightly. Not because they were hung incorrectly, but because they were slightly too large. It is just something that can happen when you hang doors especially in an older house that has had time to settle.
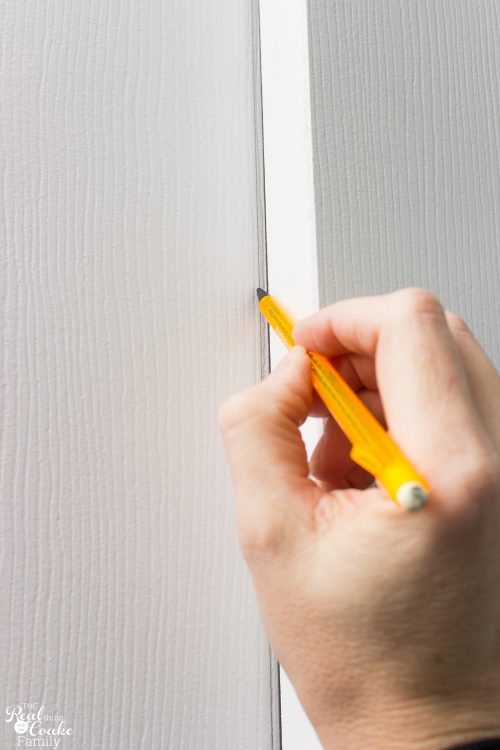
The way to solve this is to mark one door and plane off the extra wood. I did that by closing one door and marking it with a pencil on the door I was planing down.
I have a crappy wood plane. If you are tackling this project this is the wood plane (affiliate link) I want to get and would have gone to get after my first hour of planing, yes 1st hour of planing, but no one locally had it. Boo!
It took me 3 hours of planing, sanding, carrying the door upstairs, trying it, marking it again, planing some more, sanding some more, trying again. Yes…put on your patient panties the day you go for this project, or hope your doors are off by less than mine were. They were probably off by 1/8″ to 1/4″. Doesn’t sound like that much, but it is when you are shaving wood and doing it alone, it is a lot.
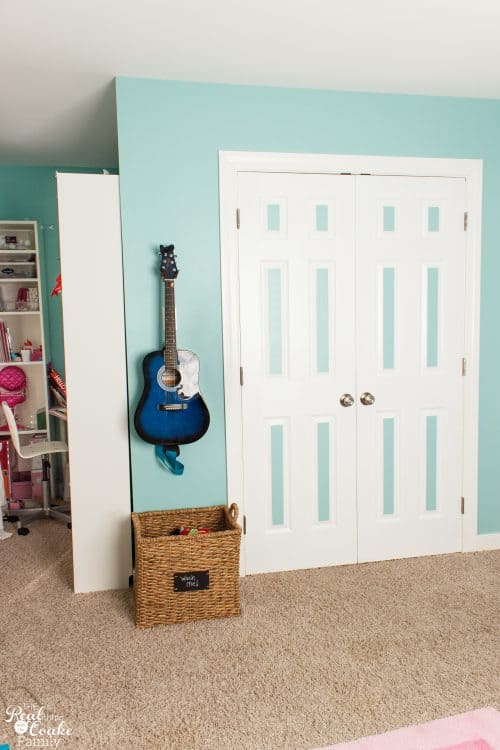
After all of that, I finally got the doors to work and I totally did a happy dance! Then I had to prime the section that had been shaved and paint that section white. The fronts of the doors got the blue paint and I also added the ball stop at the top of the doors (super easy when you buy the right drill bit size, which is enormous). Mr. T added the handles before he left to go out of town again.
The following morning, when the paint had dried, I tried the doors again. I tried closing the left door then the right door first. It worked perfectly! I did a big time happy dance. I was a little nervous that I hadn’t shaved quite enough wood off to make room for the paint.
Then I tried closing the right door then the left door…dun dun dun…it didn’t work! OMG! The left door is the one that planed/shaved. It works one way but not the other and I’m pretty sure that when I planed the doors the top little section wasn’t totally level, so the back side of the side panel of that door has a little more wood than the front of that side. Does that make sense? At some point, I will go back and shave a little more off the back of that side panel. It is just a small section at the top of the door. For now, I’m calling the doors done and we just have to remember to close the left door first. Uugh! DIY! So rewarding and so frustrating all at once.
For now, how about if we admire the pretty doors! That are closed! And now that I have written this post, I will either remember how much I hate hanging doors next time I think it will be a simple and inexpensive project and I will hire someone to do it for me or buy a big pair of patient panties for myself to get through the project. LOL!
What are your tips for an organized kids’ closet? How about tips for hanging doors?
Do you follow me on Instagram? You totally should! I post a few more behind the scenes pics and family fun over there. I’d love to have you join me. 🙂
More great posts you are going to love:

Love your gray hangers! Do you mind if I ask where you got them? Thanks