• Home
  • Contact
  • Privacy Policy & Disclosures
  • Nav Social Menu

    • Email
    • Instagram
    • Pinterest
    • YouTube

Real Creative Real Organized

Creativity and Organization for Mom Life

  • Crafts
  • DIY
  • Organization
  • Travel
  • Mom Life
  • Holidays & Special Days
    • New Year’s
    • Valentine’s Day
    • Mother’s Day
    • Easter
    • Father’s Day
    • Fourth of July
    • Halloween
    • Thanksgiving
    • Christmas
    • Seasons
      • Spring
      • Summer
      • Fall
      • Winter
    • Olympics
    • Birthdays
  • Shop
Home » Crafts » American Girl Doll Bedding Pattern {Free}

American Girl Doll Bedding Pattern {Free}

October 17, 2012 by KC Coake 40 Comments

Share away! 😍

19.2K shares
  • WhatsApp
  • Email
  • Facebook

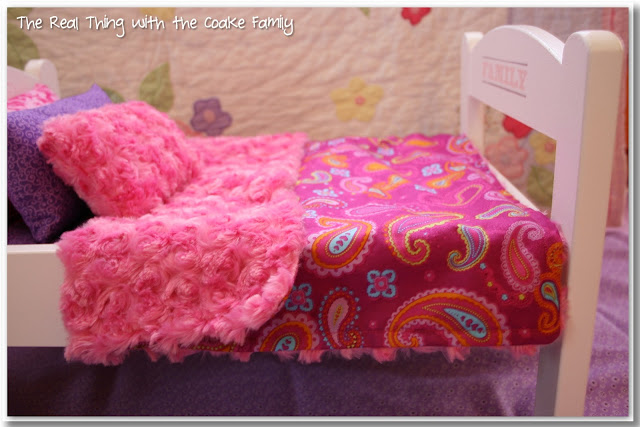
Today, I’m excited to show you a recent sewing project I took on while my Mom was in town. We spent a rainy fall afternoon sewing bedding for both of my daughter’s American Girl Doll beds. You can see how I customized these $20 IKEA doll beds here: Polka Dot Bed and Stenciled Bed. We made our own pattern rather than buying a pattern. In this post, I’m going to show you my free American Girl Doll Pattern to make bedding so you can make your own bedding and save money by not buying a pattern.

Free American Girl Doll bedding pattern. Sewing pattern very simple and will easily re-size for any doll bed. 
Isn’t the bedding cute? We went to a craft store and I let each of my girl’s pick out 4 fabrics that went together. When my girls chose their fabric, they had looked at some pictures of bedding on my American Girl Doll Ideas and Sewing Pinterest boards. They both liked the idea of having a fluffy, fuzzy fabric, so we made sure to include some in their selections.
 
 
Initially, I was planning to purchase a pattern with which to make this bedding. After talking with my Mom and thinking about it, I realized that I really didn’t need a pattern. All I needed to do was measure and pick the sizes I wanted the finished products to be. I’m going to show you what I did as well as give you a few of my tips and tricks if you want to sew your own bedding.
 
By the way, this was a pretty easy project. To me the only hard parts were the parts my Mom did….all the hand work, the sewing the buttons on the mattresses and the closing of the mattresses and pillows.
 
Free American Girl Doll bedding pattern. Sewing pattern very simple and will easily re-size for any doll bed. 
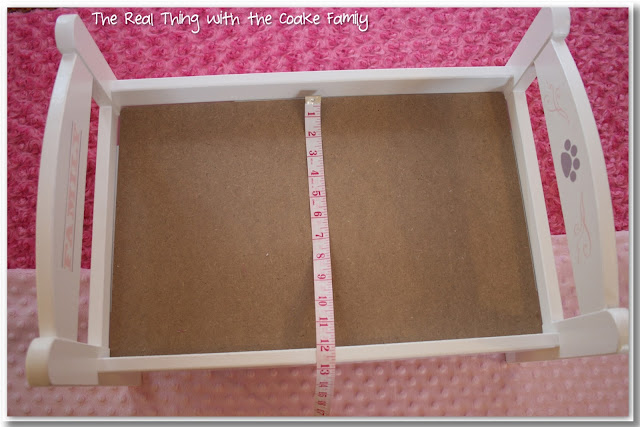
The first thing you need to do is to measure the bed for which you are making this bedding. My bed measured 12″ wide by 19″ long and 1.25″ deep.
 
I started sewing the mattress. I had pinned this tutorial (18″ Doll Mattress Sewing Tutorial) on making a mattress for a doll bed quite some time ago. I used it as a basis from which to figure out how to make a mattress. Of course, I change some things to suit my needs and preferences.
 
Free American Girl Doll bedding pattern. Sewing pattern very simple and will easily re-size for any doll bed. 
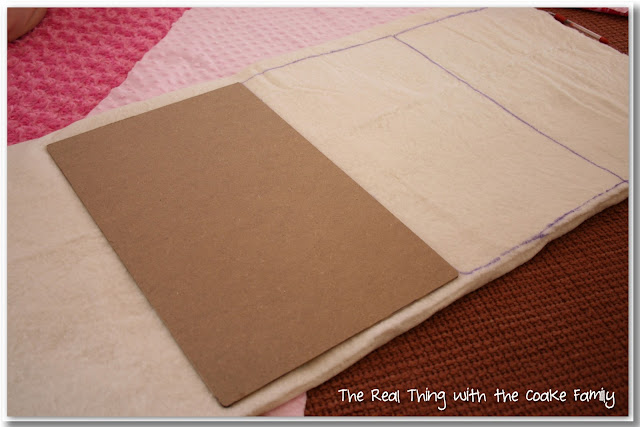
I didn’t want to use the typical fluff that is used for stuffing pillows and/or mattresses. I bought the batting you can see above. I think it is quilt batting(affiliate link). It is flat and I thought it would be easier to deal with for the mattresses. As you can see above, I just traced around the board for the bottom of the bed to get the right size for the mattress. I wanted my mattress to be about .5 to 1 inch thick. I used all of the batting and just divided it between the two mattresses I was making.
 

Since my bed measured 19″x12″x1.25″, I cut my fabric 20″ x 13″. That left me a half inch seam on each side. Once I had the fabric cut, I put the right sides together and sewed them leaving an opening at the top. Easy!

Free American Girl Doll bedding pattern. Sewing pattern very simple and will easily re-size for any doll bed. 
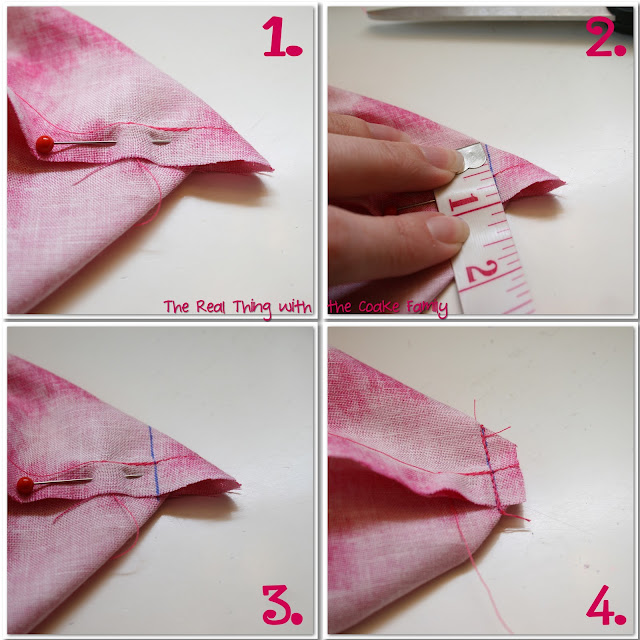
For me, the most helpful part of the tutorial I linked to on Ana White’s site, was the part of how to make the box corners and make them super simple. You can click over here to see that. She says you take the corner where you sewed the right sides together and open the corners up so the seams match up, as you can see in #1. Then you mark down from the point. Now, in her tutorial, she is making a 2″ thick mattress. I wanted my mattress to only be a half an inch thick. She said to mark a 2′ clip off the corner. I figured out that for my thinner mattress I needed to do less. I probably should have done a half inch, but is seemed too small, so I marked mine at 1″ as you can see in #2 & 3. Finally you sew where you made that mark and clip the extra fabric, #4.
Free American Girl Doll bedding pattern. Sewing pattern very simple and will easily re-size for any doll bed. 
As I was using the flat batting, I laid the batting on top of the wrong side of my mattress fabric. I put my hand into the mattress and held onto both the mattress fabric and the flat batting and turned it right side out. It worked great! You can see above that I left the opening quite large on this first mattress to accommodate for my flipping the fabric with the batting. It really wasn’t necessary to have that large of an opening. On the second mattress, I made the opening much smaller (my Mom really appreciated that when it came time to sew it closed by hand).
 
Free American Girl Doll bedding pattern. Sewing pattern very simple and will easily re-size for any doll bed. 
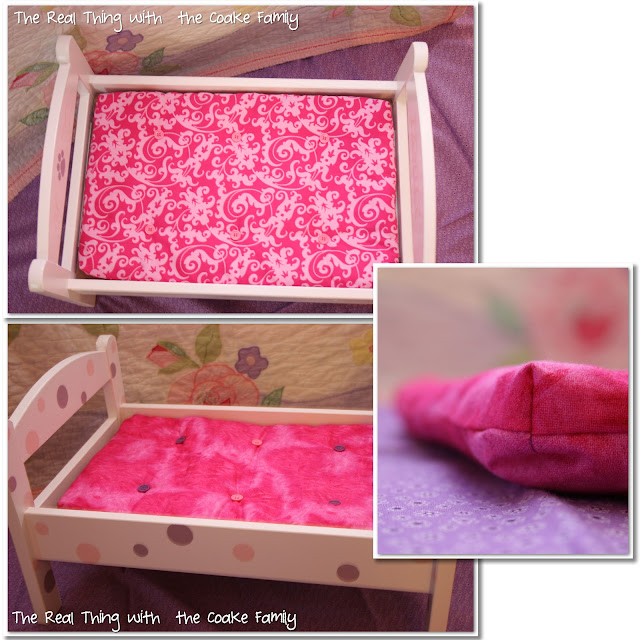
You can see the pretty box corner that we got using the simple technique. My Mom added the buttons onto the mattresses just to make sure the batting wouldn’t move around and to add a fun touch.
 
Free American Girl Doll bedding pattern. Sewing pattern very simple and will easily re-size for any doll bed. 
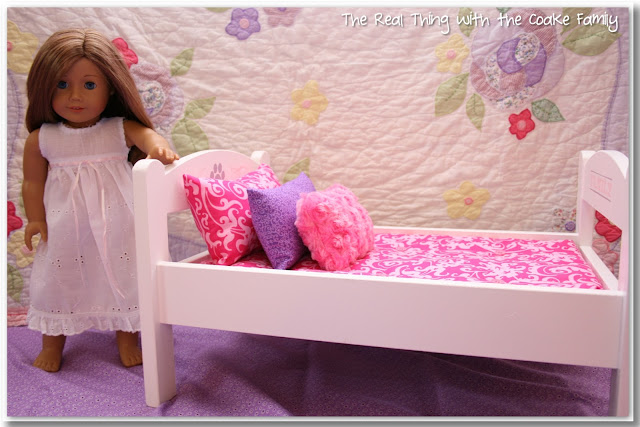
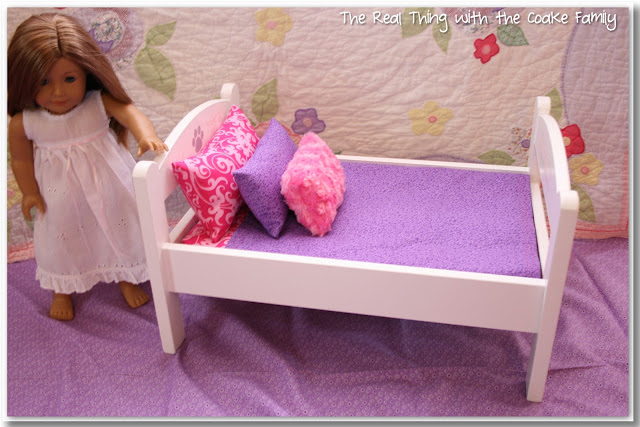
This is Samantha with her new mattress and her Elegant American Girl Doll Bed. She is Snowflake’s doll. Snowflake made the pillow that matches her mattress completely by herself, including the hand work to close the pillow! Very impressive. She and I worked out the sizing of her pillows. My mom cut them all to have a 1″ seam allowance. Her pillows are: 11″ x 6.5″ for the largest, 9″ x 6″ for the medium, and 7″ x 5.5″ for the smallest.
 
Free American Girl Doll bedding pattern. Sewing pattern very simple and will easily re-size for any doll bed. 
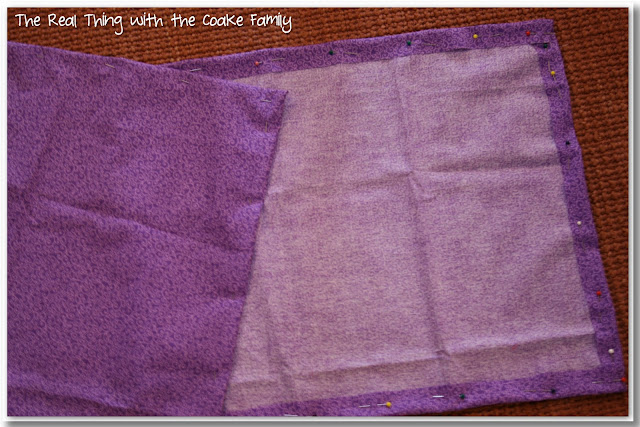
For the sheet for both beds, I determined I didn’t want the sheet to go all the way to the top of the bed. That way, you can still see the mattress and the sheet won’t cover the dolls head when she is in the bed. I made the sheet  20″ wide by 17″ long, leaving a half inch seam allowance. I didn’t buy enough fabric to double the fabric so that sheet would be reversible. It is my only regret. The sheet looks fine, but I think it would look just a touch nicer if it was the right side showing on both sides.

Free American Girl Doll bedding pattern. Sewing pattern very simple and will easily re-size for any doll bed. 
Samantha with her sheet tucked into her bed.
Free American Girl Doll bedding pattern. Sewing pattern very simple and will easily re-size for any doll bed. 
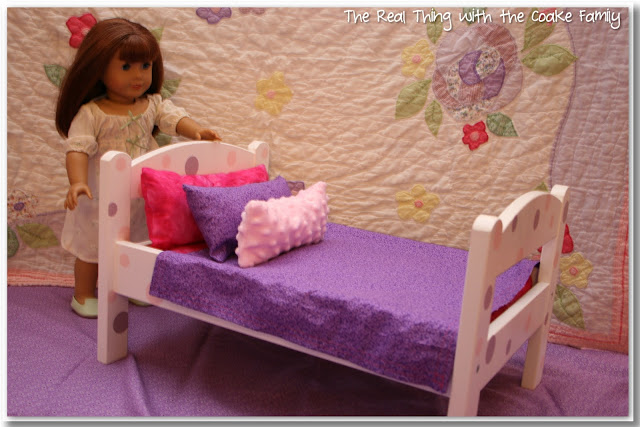
Felicity with her sheet and pillows on her polka dot American Girl doll bed. You can see that the sheet can either be tucked under the mattress as it is show with Samantha or as you can see above hanging out with Felicity.
 
Pumpkin made the pillow that matches the mattress all by herself (of course since she is 5, my mom did the closing of the pillow once it was stuffed). I sewed the other two pillows on the machine. My Mom came up with the sizes for these pillows. Pumpkin’s pillows measured, leaving a 1 inch seam allowance, 13″ x 6″ for the largest, 11″ x 5.5″ for the medium, and 9″ x 5″ for the smallest.
 
Free American Girl Doll bedding pattern. Sewing pattern very simple and will easily re-size for any doll bed. 
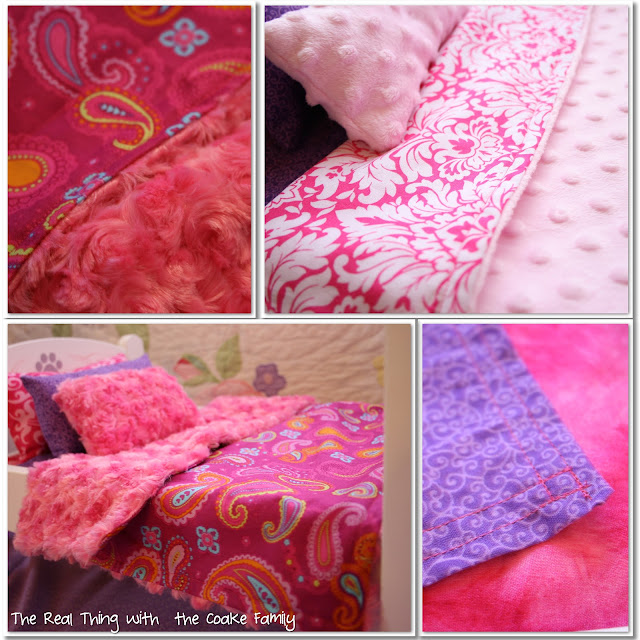
Next up was making the quilt/comforter. I wanted to make these reversible to add to the fun. The girls each picked out a fluffy fabric that would be one side and a cotton fabric for the other side. I had planned on them being a little bit larger than the sheet, but I hadn’t bought quite enough fabric. So, they are the same size, 20″ x 17″ with a half inch seam allowance. The size worked out fine.
Free American Girl Doll bedding pattern. Sewing pattern very simple and will easily re-size for any doll bed. 
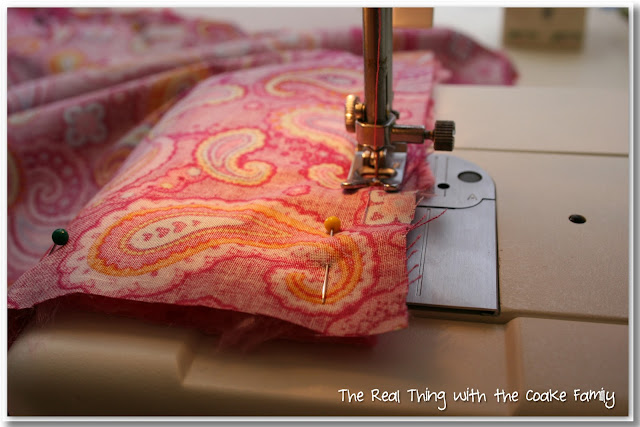
My biggest tip in working with the fluffy fabric is to PIN, PIN, PIN! It was hard to work with and I didn’t figure out pinning it until I worked on the pillows (which were last). It slipped around a lot and was hard to get things sewn how I wanted them. Pinning lots in the center would have helped that. It made a huge difference in sewing the pillows.
 
Free American Girl Doll bedding pattern. Sewing pattern very simple and will easily re-size for any doll bed. 
After I sewed the right sides together, I turned the comforter/quilt right side out. Rather than hand sew these closed, which I hate doing, I decided to top stitch around the entire edge of the quilt/comforter. I thought it would be easier than hand closing it and that it would help keep the quilt/comforter from slipping around. It seems to have worked well.
 
Free American Girl Doll bedding pattern. Sewing pattern very simple and will easily re-size for any doll bed. 
As you can see, Samantha really enjoys her cozy bed and likes her reversible quilt/comforter.
Free American Girl Doll bedding pattern. Sewing pattern very simple and will easily re-size for any doll bed. 
Felicity is quite happy as well. They are both cozy and warm in their beds as the cooler fall temperatures have now hit.
 
Free American Girl Doll bedding pattern. Sewing pattern very simple and will easily re-size for any doll bed.
I love all the details and textures! In the bottom, right corner, you can see the sheet that I made. You can see that I decided to double stitch the sheet. I thought it gave it a little more weight and made it look just a touch nicer.
 
Free American Girl Doll bedding pattern. Sewing pattern very simple and will easily re-size for any doll bed.
There you have our cute new bedding for our American Girl Dolls. It cost us about $30 for both beds and mattresses with some coupons and sales. We think it looks great and both my girls are very happy with their beds. We did it all without a pattern. Thanks, Mom for spending a fall day sewing with me. It was fun. Maybe next time you come the weather will cooperate so we can actually go on the hike we wanted to do or maybe we will have to find another project!
 

I’ve got a fantastic American Girl Doll Pinterest board with even more great patterns and ideas. Follow the fun here…
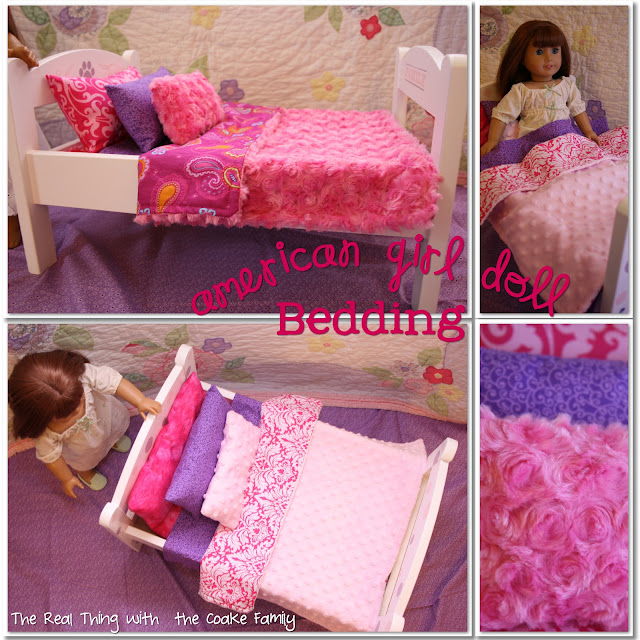
Follow The Real Thing with the Coake Family’s board American Girl Doll Ideas on Pinterest.

More to Enjoy! 😍

Fall Decorative Pillows
Digital Delights: Strawberry Shortcake Birthday Party - Part 2

Share away! 😍

19.2K shares
  • WhatsApp
  • Email
  • Facebook

Hi! I'm KC. I'm a single mom of 2 girls who loves all things creative. Whether it's making something crafty or tackling that DIY project, I'm gonna have some fun and stay organized in the process. 😊 Read More…

Follow Me:

  • Email
  • Instagram
  • Pinterest
  • YouTube
Previous Post: « Training Tuesday: Half Marathon Training Week 14 & 15
Next Post: Toy Storage: Kid’s Playroom Reorganization »

Reader Interactions

Comments

  1. Shana says

    October 17, 2012 at 1:19 pm

    Oh my goodness! I love this. My daughter will be so excited when I surprise her with them. Thanks for the idea!!!

    Reply
    • K Coake says

      October 18, 2012 at 3:03 pm

      Thank you! I’m sure she will love the bedding. My daughters are super happy with theirs. Have fun making them!

      Reply
  2. Kath says

    October 17, 2012 at 6:16 pm

    Great tut

    Reply
    • K Coake says

      October 18, 2012 at 3:07 pm

      Thanks!

      Reply
  3. Diana - FreeStyleMama says

    October 18, 2012 at 3:42 am

    Very cute! I love how they turned out. I’m going to try something different for our mattresses.

    BTW~ I clicked on your Pin It at the bottom of your post and it didn’t work, so I just used the bookmark I have on my toolbar.

    Diana
    Diana Rambles
    Bento Blog Network
    Link Rink

    Reply
    • K Coake says

      October 18, 2012 at 3:08 pm

      Thank you! Thanks for letting me know about the Pin It button. It is one of those things I know I need to fix and haven’t gotten to.

      Reply
  4. Pam says

    October 24, 2012 at 10:45 pm

    What little girl wouldn’t LOVE this set!!! Simply adorable!!! And thanks to your easy to follow tutorial, they could easily be adapted to fit a different sized bed.

    Reply
    • K Coake says

      October 24, 2012 at 11:47 pm

      Thank you so much, Pam! Yes I was hoping that anyone could adapt it, glad to know I was clear enough…sometimes I’m not sure if it comes across well. I will add it to the other link party you asked me to a little later tonight.

      Reply
  5. Mariel says

    October 27, 2012 at 4:39 am

    So cute! I love it with that cozy minky material. Thanks for sharing with us at ‘Or so she says…’! The newest party starts tomorrow (every Saturday). I would love to have you back. 🙂 http://www.oneshetwoshe.com

    Reply
    • K Coake says

      October 29, 2012 at 1:04 am

      Thank you…I love that material as well. So cozy and fun! Thanks so much for hosting the link party.

      Reply
  6. gypsykate says

    October 30, 2012 at 7:32 pm

    adorable! love the lush fabrics. my daughter loves them so much she asked me to make some bedding for her Barbies in the same fabric. thanks for sharing

    Reply
    • K Coake says

      October 31, 2012 at 3:02 am

      Thank you! What a compliment that your daughter liked it that much! I hope she loves it if you make it for her.

      Reply
  7. Anonymous says

    November 2, 2012 at 12:45 am

    I’m a beginner so do you know about how much of each fabric you had to buy? I hate to buy way too much! If it’s too much trouble don’t worry about it. Thanks for a great tutorial!!!!!

    Reply
    • K Coake says

      November 2, 2012 at 1:44 am

      No trouble at all! I bought 1/2 a yard of each fabric. I thought 1/2 a yard was fine for the sheet. I did wish I had bought 3/4 of a yard of the fabrics I used for the quilt/blanket. I could have made it a little bit larger if I had just a little more fabric. I think I bough 3/4 of a yard of the fabric for the mattress as well and that amount worked fine. I hope that helps. Thank so much for stopping by!

      Reply
    • Anonymous says

      November 2, 2012 at 3:53 pm

      Thanks so much!!!

      Reply
    • K Coake says

      November 3, 2012 at 1:39 am

      Your welcome!

      Reply
  8. Anonymous says

    November 15, 2012 at 1:06 pm

    I am so happy to have found your site…just bought some “fuzzy” fabric that I have never used before…Needless to say I will be pinning up a storm! Thanks again

    Cindy

    Reply
    • K Coake says

      November 16, 2012 at 2:48 am

      So glad I could help. I hope the pinning up a storm works great for you!
      Enjoy,
      KC

      Reply
    • Anonymous says

      January 28, 2013 at 3:19 pm

      Hello,

      I think that the Ikea doll beds are good value because one can customize them with paint or stain. Anyone who sews can make quilts with scraps or special bedding without spending a lot of money. One ends up making a one of a kind items not massed produced. There are even great applicques that you can buy and add to pillow tops. This is a good tutorial and thanks for the information.
      Joylo from Ontario, Canada

      Reply
    • K Coake says

      January 29, 2013 at 4:00 am

      Thanks so much! You are right, it is fairly easy to do without a lot of money.
      Take care,
      KC

      Reply
  9. Kat's Almost Purrfect World says

    March 1, 2013 at 8:57 am

    This is so cute! My daughter is 15 but of course we still have her Kirsten doll. My mom is from Sweden and got both my daughter and my neice the dolls when they were 7 or 8. I got the Bitty Baby for myself, so I could play with her. I got my on ebay and the head was scuffed up so it wasn’t toooo expensive. I wish she was still young cause I didn’t want to stop playing dolls with her. lol

    Reply
    • KC Coake says

      March 9, 2013 at 3:53 pm

      Thanks! Ah, Kirsten is my favorite! I wish she hadn’t been archived. Yeah, I hear you, I’m going to be sad when my girls are out of this phase.
      Take care,
      KC

      Reply
  10. adriene says

    March 5, 2013 at 12:02 am

    Hi,
    This is too cute, I am totaly clueless when it comes to sewing. I was wondering if anyone on this site has done or will be doing a youtube step by step video on how to mke the matress and comforter? If there is one, please link it. thanks so much

    Reply
    • KC Coake says

      March 10, 2013 at 3:07 am

      Thank you! I haven’t done a youtube video and at the moment I don’t have plans to. I’m sorry, I can’t be of more help to you.
      KC

      Reply
  11. Lori K says

    October 29, 2013 at 12:53 am

    Quick question: are the measurements you gave for the sheet, comforter and pillows finished measurements or cut measurements? Thanks – my girls have been waiting so long for me to get started on this!

    Reply
    • KC Coake says

      October 29, 2013 at 1:03 am

      Hey Lori! They are the cut measurements with the seam allowances listed. I hope the girls love them when you get them done. Did you guys get the IKEA beds as well? I would love to see them when you get finished.
      Take care,
      KC

      Reply
    • Lori K says

      November 15, 2013 at 12:21 am

      We have had the IKEA beds for a while but finally painted them last spring. I will share once we get the bedding sewn 🙂

      Reply
    • KC Coake says

      November 15, 2013 at 2:46 am

      Sound great, Lori! I’m looking forward to seeing everything!

      Reply
  12. Patty Powers Rhodes says

    January 12, 2014 at 4:18 am

    love it my 7 year old will love this.

    Reply
    • KC says

      January 12, 2014 at 8:07 pm

      Patty, so glad you like it and that your 7 year old will really enjoy it!
      KC

      Reply
  13. Norma Grandone says

    October 18, 2014 at 7:47 am

    Love the bedding, and I suggest you can buy used sheets at the thrift stores so you will have enough fabric to make it double as you wished to do. My friend gave me her old chenille bedspread to use, so I may line it with a contrasting fabric.

    Reply
  14. Cindie Oliver says

    July 16, 2015 at 8:51 am

    I love the doll bedding pattern, unfortunately there is no way of printing this pattern, what a shame…..is this no longer available?? ?

    Reply
    • KC Coake says

      July 16, 2015 at 9:42 pm

      The pattern is there, you just have to read the text and get the pattern from within the text. I never made a printable for this pattern. You don’t really need a pattern. It is just the measurements along with the seam allowance. Hope that helps. 🙂

      Reply
  15. Wendy says

    October 30, 2015 at 10:40 am

    Hi, cute bedding. Do you remember how much fabric you bought?

    Reply
    • KC Coake says

      November 1, 2015 at 3:49 pm

      Thanks! I’m so bad at remembering to figure out how much fabric I use because I often buy the fabric and then wait months to actually make things. I have some newer posts about making a mattress, reversible sheets and comforter. I will link them below. I list the fabric used in most of those posts, but I believe you will need about 1/4 yard of each fabric for each thing(sheets, comforter) you plan to make (mattress is more). I hope that helps.
      https://realcreativerealorganized.com/2015/06/doll-bedding-pattern.html
      https://realcreativerealorganized.com/2015/06/sewing-reversible-sheets-doll-bedding.html
      https://realcreativerealorganized.com/2015/10/sewing-american-girl-doll-comforter.html

      Reply
  16. Becky Jorgensen says

    January 21, 2016 at 5:26 am

    Super love your doll beddding! My favorite is the reversible quilt/comforter!

    Reply
    • KC Coake says

      January 28, 2016 at 1:31 pm

      Thanks so much!

      Reply
  17. Angela Smith says

    March 14, 2016 at 3:59 pm

    I will be using your beautiful tutorial for my 4th grade sewing club. Thank you.

    Reply
  18. Jackie S. Gibson says

    December 16, 2016 at 1:20 am

    Enjoyed your ideas, but I would like to cross stitch a comforter top for my granddaughter. Have you ever seen a cross stitch pattern that would work for a 20″ by 17″ comforter? Thank you for any ideas to help me.
    Jackie

    Reply
    • KC Coake says

      December 16, 2016 at 11:14 am

      Thanks so much! I haven’t seen a pattern like that. Sorry, I couldn’t be of any help. I hope you find something.

      Reply

Leave a Reply Cancel reply

Your email address will not be published. Required fields are marked *

Primary Sidebar

Popular Posts

  • IKEA built in hack with storage and desk Great IKEA built in hack for simple shelving and desk
  • collage showing how to paint a stairwell The Inexpensive Way to Paint a Stairwell

Meet KC

Hi! I'm KC, Welcome to my blog!
Click here to Learn More About Me…

Free Member Program:

Let’s Be Social

  • Email
  • Instagram
  • Pinterest
  • YouTube

Copyright © 2023 · Sprinkle Pro Theme on Genesis Framework · WordPress · Log in